Keeping your kitchen faucet head clean is not just about appearances—it’s also key to better water flow and hygiene. Over time, mineral deposits, limescale, and grease can clog the tiny holes in your faucet head, making water spray uneven or even block some streams completely. Many people reach for vinegar to solve this, but what if you don’t like the smell, have allergies, or just ran out? The good news: there are other effective methods for cleaning your kitchen faucet head without vinegar.
This article will guide you through practical, safe, and simple alternatives using household items you likely already have. You’ll learn step-by-step cleaning methods, how to remove stubborn buildup, and tips to keep your faucet head sparkling. We’ll also cover mistakes to avoid, product comparisons, and answers to common questions—so you’ll never be stuck with a dirty faucet again.
Why Clean Your Kitchen Faucet Head Regularly?
Many people overlook the faucet head when cleaning their kitchen. But this small part of your sink can hide bacteria, mold, and hard water deposits. Over time, these build up and can:
- Slow water flow
- Cause uneven spray
- Affect taste and odor of water
- Harbor germs that spread onto dishes or hands
According to the Environmental Protection Agency, kitchen faucets are among the most touched surfaces in a home, making them a hotspot for germs. Regular cleaning keeps your water pure and your kitchen healthy.
What many people don’t realize is that even if your water looks clear, the inside of your faucet head can collect invisible biofilm—a slimy layer where bacteria love to grow. When you use the faucet, droplets can splash this bacteria onto your food, hands, or dishes.
In households with small children, elderly people, or anyone with a weakened immune system, this can be a bigger risk.
Also, hard water deposits slowly narrow the water holes, so you might not notice the problem until your water flow is reduced by half. By the time you see visible crust, your faucet head is often already filled with buildup inside.
That’s why regular cleaning is not just a cosmetic step; it’s a preventative measure for your family’s health and your faucet’s performance.
Common Types Of Faucet Buildup
Understanding what’s causing the blockage or discoloration helps you choose the best cleaning method.
- Limescale: White, chalky deposits from hard water minerals.
- Soap scum: A filmy residue from soap and detergent.
- Grease: Fatty deposits from cooking splashes.
- Mold and mildew: Black or pink spots in humid environments.
- Rust: Reddish-brown stains from iron in water or old pipes.
Each type may need a slightly different cleaning approach.
For example, limescale is very stubborn and forms especially fast in homes with hard water. Soap scum often appears as a dull film, and it can trap bacteria underneath. Grease is sticky and can attract more dirt, making the faucet look grimy.
Mold and mildew thrive in moist places, so they’re common if your faucet leaks or splashes often. Rust is less common but can show up in older homes or where pipes are corroded. Knowing what you see helps you pick the best cleaning tool and avoid wasting time with the wrong method.
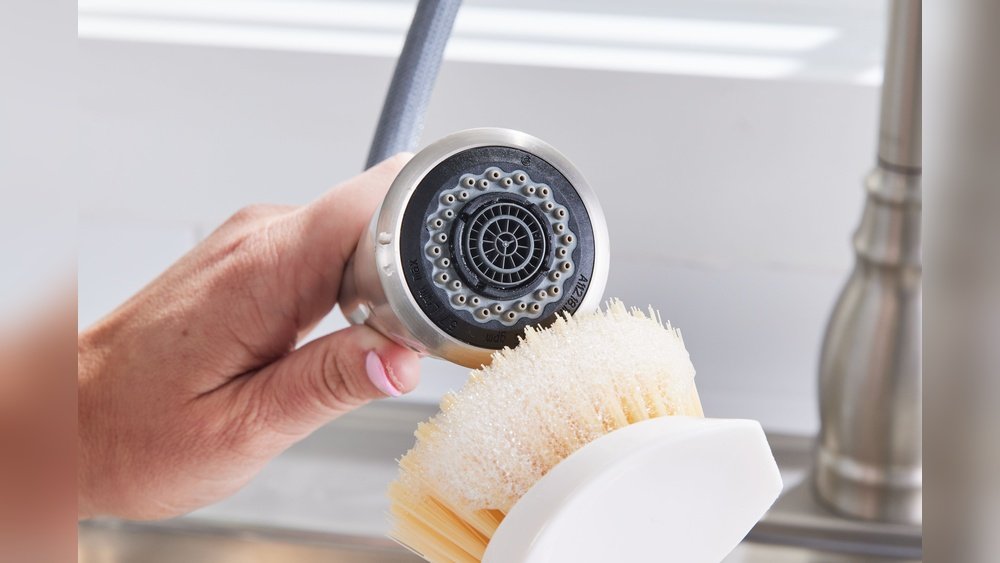
Credit: www.ruvati.com
Essential Supplies For Cleaning Without Vinegar
You don’t need fancy products. Most of what you need is probably already in your home:
- Baking soda (sodium bicarbonate)
- Lemon juice (optional, for natural acid)
- Dish soap (degreaser)
- Hydrogen peroxide (for deep cleaning)
- Toothbrush (soft-bristled, old is fine)
- Rubber gloves
- Zip-top plastic bag (for soaking)
- Elastic band or twist tie
- Paper clips or toothpicks
- Microfiber cloth
- Hot water
Choosing the right combination depends on the problem you’re facing.
For instance, baking soda is great for scrubbing without scratching. Lemon juice works well for mild mineral spots, but not on every finish. Dish soap is gentle and cuts through grease quickly. Hydrogen peroxide comes in handy if you notice black spots (mold) or pinkish stains (bacteria).
Toothpicks or paper clips help poke out clogged spray holes. Using a zip-top bag for soaking is especially useful if you can’t remove the faucet head easily.
Safety First: Precautions Before Cleaning
Before you start, keep these safety tips in mind:
- Turn off the water supply if you plan to remove the faucet head.
- Wear rubber gloves to protect your skin from cleaning agents and grime.
- Test any cleaner on a small, hidden area to avoid damaging finishes.
- Do not mix hydrogen peroxide with bleach or other strong chemicals.
If your faucet head is fragile or antique, consult the manufacturer’s guide for advice.
Some faucet heads have delicate finishes that can be ruined by harsh chemicals or rough scrubbing. If you’re not sure, gently test your cleaning method on a small, hidden spot—like the back or underside. For families with allergies, check the labels on commercial products or stick to basic ingredients like dish soap and baking soda.
And if you need to use pliers or tools to remove parts, always wrap them in a cloth to avoid scratching the surface.
Step-by-step: How To Clean A Kitchen Faucet Head Without Vinegar
Let’s get practical. Here’s a detailed process for getting your faucet head spotless—without a drop of vinegar.
1. Surface Cleaning For Everyday Dirt
This method is best for regular maintenance and light buildup.
Steps:
- Mix a few drops of dish soap in a bowl of warm water.
- Dip a microfiber cloth or sponge in the soapy water.
- Wipe the entire faucet head, focusing on crevices and the nozzle.
- Use a soft toothbrush to scrub around the holes and seams.
- Rinse with clean water and dry with a towel.
This routine removes grease and surface grime.
For best results, pay special attention to the underside of the faucet head and around the spray holes. These areas collect the most residue, especially if you cook often. If you see stubborn spots, let the soapy water sit on them for a few minutes before scrubbing.
Don’t forget to wipe the handle and the base of the faucet—they can also collect splashes and grime.
2. Baking Soda Paste For Limescale And Stubborn Spots
Baking soda is a gentle abrasive that tackles hard water stains and limescale.
Steps:
- Mix 2 tablespoons of baking soda with a few drops of water to form a paste.
- Spread the paste over the faucet head, especially around mineral deposits.
- Let it sit for 15–20 minutes.
- Scrub with a toothbrush, using circular motions.
- Rinse thoroughly with warm water and wipe dry.
For extra power, add a few drops of lemon juice to the paste.
If you have a lot of buildup, you may need to repeat this process. The fizz from lemon juice and baking soda can help loosen stubborn deposits. If the paste starts to dry before you scrub, just wet your toothbrush and continue.
For tight spots, use a toothpick or cotton swab dipped in the paste.
3. Deep Cleaning With Hydrogen Peroxide
For tough stains, bacteria, or mold, hydrogen peroxide is effective and safe for most surfaces.
Steps:
- Mix equal parts hydrogen peroxide (3%) and water in a small bowl.
- Dip a cloth or toothbrush in the solution.
- Scrub the faucet head, focusing on black or pink spots.
- Let the solution sit for 10 minutes before rinsing.
- Wipe dry.
Hydrogen peroxide breaks down bacteria and organic stains without harsh fumes.
If you’re dealing with visible mold or mildew, let the solution sit a little longer—up to 20 minutes for deep cleaning. This method is also good for families who want to avoid strong chemical smells. Just remember to rinse well, as leftover peroxide can react with other cleaners.
4. Soaking The Faucet Head (no Vinegar Needed)
If mineral deposits are blocking the spray holes, soaking is the best solution—even without vinegar.
Steps:
- Fill a zip-top plastic bag with hot water and a tablespoon of baking soda.
- Slip the bag over the faucet head, making sure the nozzle is fully submerged.
- Secure the bag with an elastic band or twist tie.
- Let it soak for 30–60 minutes.
- Remove the bag, scrub with a toothbrush, and rinse.
This method loosens deposits so you can easily wipe them away.
If the buildup is thick, gently wiggle the bag every 15 minutes to help the solution reach all corners. After soaking, use your toothbrush to scrub around each spray hole. This soaking method is gentle on all finishes and avoids the strong smell of vinegar, making it perfect for open kitchens.
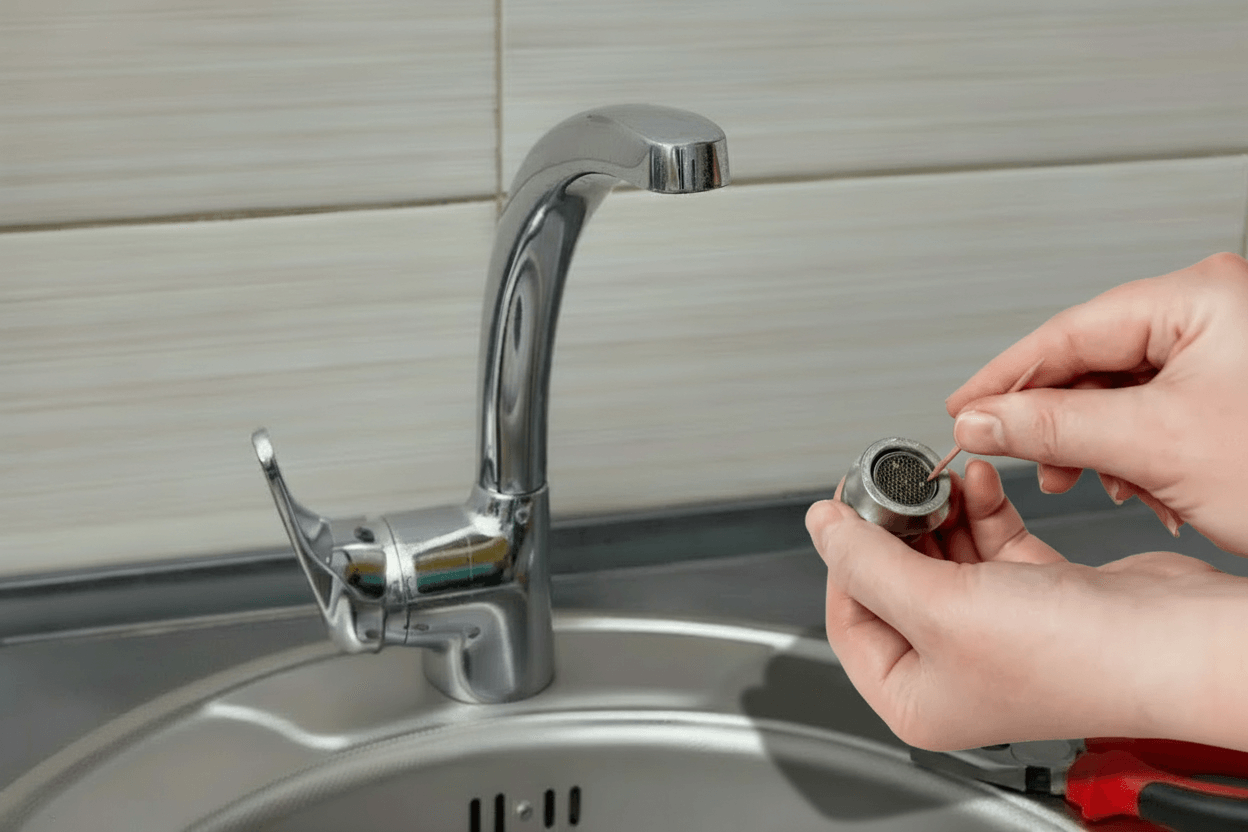
5. Removing And Cleaning The Aerator
Most kitchen faucets have an aerator (a small screen) inside the nozzle that traps debris. Cleaning it is essential for strong water flow.
Steps:
- Unscrew the aerator by hand or with pliers (wrap with cloth to protect finish).
- Separate the parts (screens, washers) and soak them in warm, soapy water.
- Scrub with a toothbrush or toothpick to remove buildup.
- Rinse thoroughly and reassemble.
- Screw the aerator back onto the faucet.
Don’t force it if the aerator is stuck—soak the tip in hot water first.
If the aerator has fine mesh, use a toothpick or a soft brush to push out any trapped debris. After cleaning, run water for a few seconds to flush out any loosened particles before replacing the aerator. This step is often missed, but it makes a huge difference in water flow.
Comparison: Cleaning Agents For Faucet Heads
Here’s how common non-vinegar cleaning agents compare:
| Cleaning Agent | Best For | Safety | Odor |
|---|---|---|---|
| Baking soda | Limescale, stains | Very safe | Odorless |
| Lemon juice | Mild deposits | Safe | Citrus scent |
| Hydrogen peroxide | Mold, bacteria | Safe at 3% | Very mild |
| Dish soap | Grease, daily cleaning | Very safe | Mild, soapy |
Baking soda offers the best balance of safety and cleaning power for tough deposits.
Unlike vinegar, these options don’t leave behind strong odors or risk damaging softer finishes. Baking soda and dish soap are safe for almost every kitchen faucet, while lemon juice and hydrogen peroxide are good for specific problems like mild stains or bacterial growth.
Remember, always rinse thoroughly after using any cleaner to avoid residue.
Advanced Cleaning: Clearing Clogged Spray Holes
Sometimes, even after soaking, water sprays unevenly. Here’s how to clear every hole:
- Straighten a paper clip or use a toothpick.
- Gently insert it into each spray hole to loosen debris.
- Run water to flush out particles.
- Repeat until all holes are clear.
Be gentle—don’t force the tool, or you might damage the holes.
If a hole remains blocked after poking, try running hot water again or repeat the soaking step. For faucets with rubber spray nozzles, you can gently massage the nozzle with your fingers to dislodge hidden debris. This detailed attention keeps your faucet working as if it were new.
How Often Should You Clean Your Faucet Head?
The ideal cleaning schedule depends on your water quality and kitchen habits:
- Weekly: Wipe with soapy water to prevent buildup.
- Monthly: Deep clean with baking soda paste or soak.
- Every 3–6 months: Remove and clean the aerator.
Homes with hard water may need more frequent cleaning to prevent limescale.
If you notice water spots forming quickly or your spray pattern changes, adjust your cleaning routine. For busy households, set a reminder on your phone or keep a checklist in your cleaning cabinet. Consistency is key—regular care means less deep cleaning and fewer plumbing problems down the road.
Mistakes To Avoid When Cleaning Kitchen Faucet Heads
Even with the right products, some common errors can cause damage:
- Scratching the finish: Avoid steel wool, harsh brushes, or abrasive powders.
- Using boiling water: Extremely hot water can damage seals or plastic parts.
- Forgetting to rinse: Cleaning agents left behind can corrode or stain metal.
- Mixing chemicals: Never mix hydrogen peroxide with bleach or ammonia.
- Over-tightening the aerator: This can damage threads or cause leaks.
Checking your manufacturer’s care guide can prevent costly mistakes.
Also, never use sharp metal objects (like knives) to poke clogged holes. If you’re unsure about a cleaning product, search for your faucet brand online for specific recommendations. Taking a photo before disassembling the aerator can help you reassemble it correctly.
How To Keep Faucet Heads Cleaner For Longer
Prevention saves time and effort. Here’s what helps:
- Dry the faucet after each use to prevent water spots.
- Use a water filter to reduce minerals if you have hard water.
- Clean up splashes and soap residue quickly.
- Install a faucet aerator with a self-cleaning feature.
- Schedule regular cleaning sessions.
A little routine care means less scrubbing and fewer deep cleanings.
Other helpful tips: Train everyone in your household to wipe down the faucet after heavy use. If you have a pull-out or pull-down faucet, check the hose and spray head for buildup too. For families with pets or small children, be mindful of dirty hands or food that can transfer grime to the faucet.

Credit: www.youtube.com
Product Guide: Commercial Faucet Cleaners (vinegar-free)
If you prefer ready-made cleaners, many are safe for faucet heads without vinegar. Here’s a look at popular options:
| Brand | Main Ingredient | Safe for Most Finishes? | Special Features |
|---|---|---|---|
| Bar Keepers Friend | Oxalic acid | Yes (test first) | Removes rust, limescale |
| CLR Calcium, Lime & Rust Remover | Lactic acid | Yes (rinse well) | Targets mineral deposits |
| Seventh Generation Cleaner | Plant-based surfactants | Yes | Eco-friendly, gentle |
Always check the label for compatibility with your faucet’s finish.
Some commercial cleaners have stronger ingredients that work quickly, but they may not be suitable for every surface. If you’re unsure, test the product on a small spot first. For best results, follow the instructions carefully and rinse well after cleaning.
Eco-friendly brands are a good choice for households with kids, pets, or sensitive skin.
Real-world Example: Cleaning A Clogged Faucet Head
Let’s see these steps in action. Imagine you notice your kitchen faucet sprays sideways and feels weak. Here’s what to do:
- Wipe the head with soapy water. Notice white, crusty buildup.
- Make a baking soda paste and coat the affected area.
- Wait 20 minutes, then scrub with a toothbrush.
- Water pressure is still low, so fill a zip-top bag with hot water and baking soda, secure over the faucet, and soak for 45 minutes.
- Remove the bag, scrub again, and poke each hole with a toothpick.
- Unscrew the aerator, soak, scrub, and replace.
- Turn on the water—now the spray is even and strong.
This process restored full water flow without any vinegar or harsh smells.
A few more details: If you find the aerator is filled with grit or sand, that’s a sure sign your water carries debris. After cleaning, take a moment to run the water without the aerator attached to flush out anything left in the lines. This prevents re-clogging and keeps your faucet clear for longer.
Special Tips For Different Faucet Finishes
Not all faucet heads are made the same. Here’s what to watch for:
- Chrome: Use non-abrasive cleaners to avoid scratches. Baking soda is safe.
- Stainless Steel: Avoid bleach, which can cause rust spots. Rinse well.
- Brushed Nickel: Skip acidic cleaners (even lemon juice). Stick to dish soap and baking soda.
- Bronze or Gold: Use only mild soap and water. Test any cleaner on a hidden area first.
If in doubt, less is more—use gentle methods and soft cloths.
For faucets with colored or matte finishes, avoid anything gritty, as it can leave permanent marks. Some high-end faucets have protective coatings—using the wrong cleaner can void your warranty, so always check your manual first. For extra shine on chrome or stainless steel, finish with a dry microfiber cloth.
When To Call A Professional
Home cleaning solves most faucet issues, but sometimes you need expert help:
- The faucet head is still clogged after multiple cleanings.
- Leaks or drips start after reassembly.
- The finish is peeling or corroded.
- You see mold inside the faucet body.
Plumbers have special tools for deep cleaning and repairs. It’s better to ask for help than risk damage.
If you notice water leaking from the base or hear strange noises after cleaning, stop and call a professional. Sometimes buildup can hide bigger problems, like worn-out seals or failing parts. Fixing these early prevents more expensive repairs later.
Environmental Impact: Why Avoid Vinegar?
You might wonder, “Why skip vinegar? ” While it’s natural, vinegar is acidic and can damage some faucet finishes over time. It also leaves a strong smell and may react with certain metals, causing corrosion. Many people also prefer to avoid the scent or have allergies.
Using baking soda, hydrogen peroxide, and dish soap offers a milder, equally effective way to clean—better for sensitive noses and many modern faucet finishes.
Also, when vinegar enters the water system, it can be harmful to some plants and bacteria in septic tanks. For homes with sensitive plumbing or those aiming for a “greener” clean, these alternatives are safer for both people and the environment.
Key Insights Beginners Miss
Many first-time cleaners overlook these important details:
- Cleaning the aerator is just as important as cleaning the outside. This tiny part traps most debris.
- Soaking with baking soda and hot water works nearly as well as vinegar, but without smell or risk to finishes.
- Polishing with a dry microfiber cloth after each cleaning prevents water spots and keeps the faucet looking new.
Knowing these tricks saves time and extends the life of your faucet.
Another tip: If you have a pull-out spray faucet, clean the inside of the hose every few months to prevent mold and bacteria from building up. And always store your cleaning supplies together in one place so you don’t waste time searching.
Expert Recommendations
Most plumbers and home experts agree: cleaning your kitchen faucet head without vinegar is safe and effective, as long as you use gentle methods. For stubborn limescale, try soaking and brushing before using commercial products. If your water is very hard, consider installing a filter to reduce future buildup.
If you’re unsure about which method to use, start with the mildest option first. Over time, you’ll find the routine that works best for your kitchen and water quality. For more expert advice on kitchen cleaning, visit Family Handyman.
Frequently Asked Questions
How Do I Know If My Faucet Head Needs Cleaning?
If your water flow is uneven, pressure is low, or you see white or greenish buildup, it’s time to clean. A slight spray to the side or slow fill times are also signs of clogging.
Can I Use Lemon Juice Instead Of Vinegar?
Yes, lemon juice is a natural acid that helps dissolve mild mineral deposits. It’s safe for most finishes but should be avoided on brushed nickel or gold faucets.
What If The Aerator Is Stuck And Won’t Unscrew?
Try soaking the faucet tip in hot water for 10–15 minutes, then gently twist with a cloth-wrapped plier. Don’t force it—if stuck, call a plumber to avoid damage.
Is Baking Soda Safe For All Faucet Finishes?
Baking soda is generally safe for chrome, stainless steel, and plastic. For delicate finishes like bronze or gold, always test on a small area first.
How Can I Prevent Hard Water Deposits In The Future?
Install a water softener or use a faucet-mounted water filter to reduce minerals. Wipe the faucet head dry after each use, and schedule regular cleanings to prevent buildup.
Keeping your kitchen faucet head clean without vinegar is simple, safe, and effective. With a little effort and the right methods, you’ll enjoy better water flow, a healthier kitchen, and a sparkling sink—no harsh smells or chemicals required.

Credit: www.homeaglow.com