If you own a mini egg cooker, you already have a small, powerful tool in your kitchen. But many people only use it for boiling eggs, missing out on other possibilities. If you are new to using a mini egg cooker, or you want to get more out of yours, this guide is for you. Here, you will learn not only how to make perfect boiled eggs but also how to cook soft, medium, and hard eggs, poach, steam, and even prepare omelets. You will find practical advice, tips for cleaning and safety, and solutions to common mistakes. By the end, you will know how to use your mini egg cooker like a pro and enjoy delicious eggs every time.
Understanding Your Mini Egg Cooker
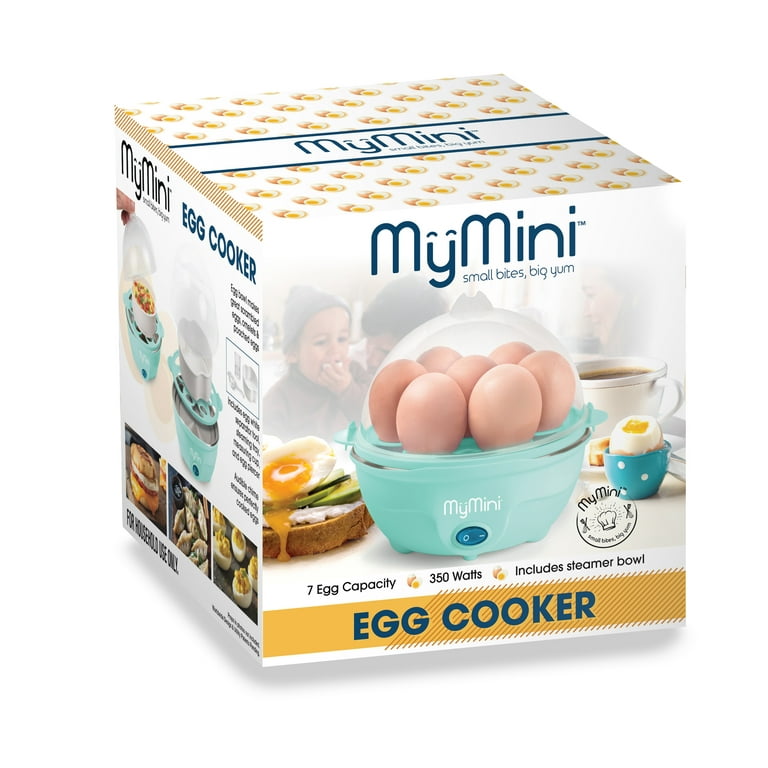
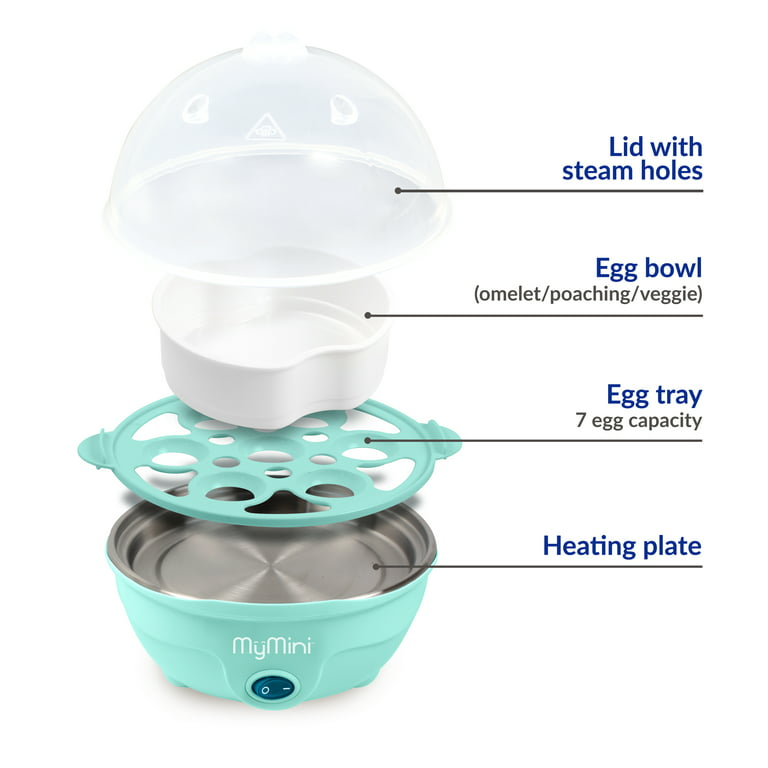
Before you start, it helps to know what a mini egg cooker is and how it works. A mini egg cooker is a small electric appliance designed to cook eggs quickly and easily. It usually holds 6–7 eggs at a time, but some models are smaller or larger. The main parts are:
- Base unit: Heats the water and holds the egg tray.
- Egg tray: Holds eggs upright for boiling.
- Measuring cup: Shows how much water to use for soft, medium, or hard eggs.
- Lid: Covers the eggs and keeps steam inside.
- Poaching tray or omelet tray: Some models include trays for poaching or making omelets.
Most mini egg cookers work by heating a small amount of water. The steam cooks the eggs. When all the water has turned to steam, the cooker usually makes a beep or turns off automatically. This method makes egg cooking almost foolproof.
Getting Ready To Use Your Mini Egg Cooker
Before you cook anything, set up your egg cooker correctly. Here’s how:
- Read the instructions: Always check your egg cooker’s manual. Models can be different.
- Wash all parts: Clean the egg tray, lid, and measuring cup with warm soapy water before first use.
- Find a stable surface: Place your cooker on a flat, heatproof counter.
- Check the power cord: Make sure it is dry and not damaged.
Non-obvious tip: Some users forget to dry the heating plate after washing. Always wipe it dry, or water spots can cause food odors or uneven heating.
Credit: www.walmart.com
How To Boil Eggs In A Mini Egg Cooker
Boiling eggs is the most common use for a mini egg cooker. Here is a step-by-step guide for perfect results every time.
Step 1: Choose Your Eggs
Use fresh eggs for boiling. Old eggs are easier to peel, but they may not taste as fresh. If you want easy-to-peel eggs for deviled eggs or salads, use eggs that are 7–10 days old.
Step 2: Decide Soft, Medium, Or Hard
Your mini egg cooker can make soft, medium, or hard-boiled eggs. Decide what you want before you start.
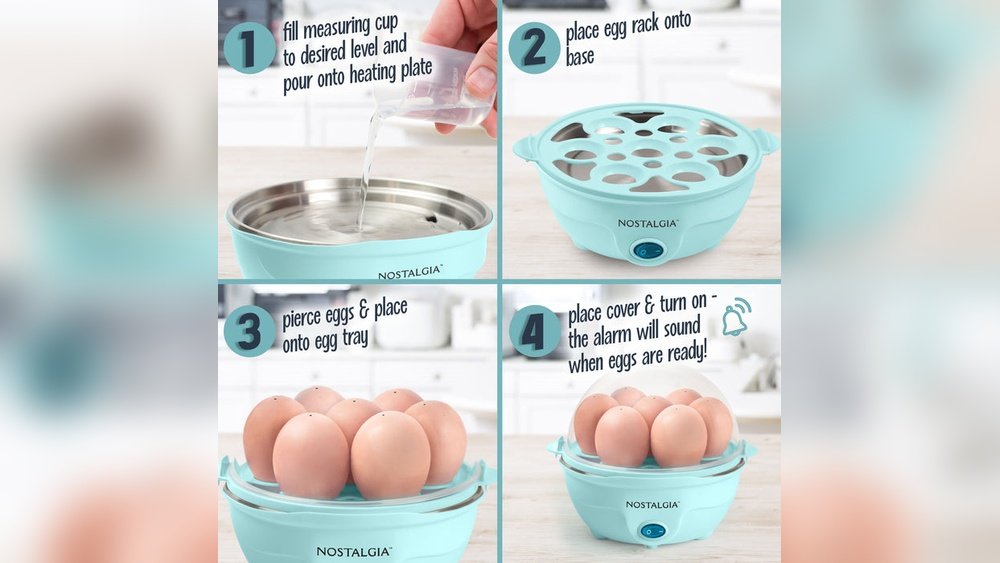
Step 3: Measure Water
Use the measuring cup that comes with your cooker. Fill it to the line for soft, medium, or hard eggs. Pour the water onto the heating plate at the bottom of the cooker.
Extra insight: The amount of water is what controls the cooking time. More water means harder eggs because it takes longer to evaporate.
Step 4: Poke Eggs (if Needed)
Many egg cookers include a small pin under the measuring cup. Use this to poke a tiny hole in the wide end of each egg. This helps prevent eggs from cracking.
Beginner mistake: Some people poke too deep or crack the shell. Gently press, just enough to pierce the shell.
Step 5: Place Eggs In Tray
Put the eggs, large end up, into the egg tray. Place the tray in the cooker.
Step 6: Cover And Start
Put the lid on. Plug in the cooker and press the power button. Some models start automatically when plugged in.
Step 7: Wait For The Signal
Your cooker will beep or turn off when done. This can take 6–13 minutes, depending on how many eggs and the desired doneness.
Step 8: Cool Eggs Fast
Right after cooking, use tongs to move eggs into a bowl of ice water. This stops them from cooking further and makes peeling easier.
Step 9: Peel And Enjoy
Let eggs cool for at least 5 minutes. Crack them gently on the counter and peel under running water for best results.
How To Make Poached Eggs
Poaching eggs is easy with a mini egg cooker that has a poaching tray. Here’s what to do:
- Spray the poaching tray: Use a little cooking spray or oil to prevent sticking.
- Add water: Use the measuring cup’s poached setting (usually less water than boiling).
- Crack eggs: Crack one egg into each section of the tray.
- Place in cooker: Put the tray on top of the egg tray.
- Cover and cook: Place the lid on and start the cooker.
- Check doneness: Poached eggs are usually ready in 4–6 minutes. For firmer yolks, add a little more water.
Non-obvious tip: For prettier poached eggs, gently break the egg into a small bowl first, then slide it into the tray.
Making Omelets In A Mini Egg Cooker
Many mini egg cookers include an omelet tray. You can make a quick omelet with little cleanup.
Ingredients
- 2 eggs
- Salt and pepper
- Chopped vegetables (optional)
- Grated cheese (optional)
- Cooked ham or bacon bits (optional)
Instructions
- Spray the tray: Use nonstick spray or a little oil.
- Beat eggs: In a bowl, beat the eggs with salt and pepper.
- Add extras: Stir in any vegetables, cheese, or meats.
- Pour into tray: Fill the omelet tray, but do not overfill.
- Add water: Use the measuring cup for the omelet setting (or the same as for poached eggs).
- Cook: Place the tray in the cooker, cover, and start. Omelets are usually ready in 8–10 minutes.
Extra advice: Cut vegetables small so they cook through. Do not add too much cheese or the omelet may not set well.
Steaming Vegetables And More
A mini egg cooker is not just for eggs. You can steam vegetables and even small pieces of fish. This is great for a quick, healthy side dish.
How To Steam Vegetables
- Cut vegetables: Make small, even pieces (for example, broccoli florets, carrot slices).
- Add water: Use the amount for medium or hard eggs.
- Place in tray: Some cookers let you put veggies in the egg tray or an extra steaming bowl.
- Cover and cook: Start the cooker. Most vegetables steam in 5–10 minutes.
Example: Steam a handful of green beans or a few baby carrots for a snack.
Note: Do not overfill. The steam needs room to move.

Credit: www.youtube.com
Cleaning And Maintenance
Keeping your mini egg cooker clean will help it last longer and cook better.
After Each Use
- Unplug and cool: Wait until the cooker is cool.
- Wash trays and lid: Use warm soapy water. Most trays are dishwasher safe.
- Wipe heating plate: Use a damp cloth. Do not use harsh scouring pads.
- Dry everything: Prevents stains and rust.
Deep Cleaning
Mineral deposits (white spots) may build up on the heating plate. To clean:
- Mix 1 tablespoon vinegar with 1 tablespoon water.
- Pour onto the heating plate.
- Let sit for 5–10 minutes.
- Wipe clean with a soft cloth.
Tip: Regular deep cleaning (every 2–4 weeks) keeps your cooker working well.
Common Mistakes And How To Fix Them
Even with a mini egg cooker, things can go wrong. Here are common problems and solutions.
1. Eggs Crack During Cooking
- Cause: Not poking the eggs, or using very cold eggs.
- Solution: Let eggs come to room temperature, and always poke the wide end.
2. Eggs Are Undercooked Or Overcooked
- Cause: Wrong amount of water.
- Solution: Measure water carefully. Each cooker is slightly different; adjust if needed.
3. Green Ring Around Yolk
- Cause: Cooking too long or not cooling eggs fast enough.
- Solution: Move eggs to ice water as soon as cooking ends.
4. Sticking Or Hard-to-peel Eggs
- Cause: Very fresh eggs or skipping the ice bath.
- Solution: Use slightly older eggs, and always cool eggs quickly.
5. Cooker Smells Or Has Buildup
- Cause: Not cleaning regularly.
- Solution: Wipe after every use and do a vinegar clean monthly.
Cooking Times And Water Amounts Compared
Different brands and sizes of mini egg cookers may need different water amounts. Here is a typical comparison for boiling eggs:
| Egg Doneness | Water (ml) | Cooking Time (minutes) |
|---|---|---|
| Soft | 25–30 | 6–7 |
| Medium | 35–40 | 8–9 |
| Hard | 45–50 | 12–13 |
Tip: Always check your cooker’s instructions, as the numbers can change by model.
Comparing Mini Egg Cookers: Features That Matter
Not all mini egg cookers are the same. If you are buying or upgrading, look for these features:
| Feature | Why It Matters | Best For |
|---|---|---|
| Automatic shut-off | Prevents overcooking | Busy users, beginners |
| Poaching/omelet tray | Makes more than just boiled eggs | Variety seekers |
| Egg capacity | Cook more eggs at once | Families, meal preppers |
| Clear lid | See cooking progress | Visual cooks |
| Nonstick coating | Easy cleaning | Everyone |
Beginner mistake: Choosing a cooker without auto shut-off can lead to overcooked eggs if you forget to watch the time.
Creative Ways To Use Your Mini Egg Cooker
Most people only make basic boiled eggs. Try these ideas to get more from your mini egg cooker:
- Meal prep: Make a batch of hard-boiled eggs for salads or snacks.
- Breakfast sandwiches: Poach eggs for a quick sandwich.
- Egg muffins: Mix eggs, cheese, and veggies in the omelet tray for a grab-and-go snack.
- Steamed fish: Cook a small fillet of white fish for a light meal.
- Single-serve desserts: Some users make small custards or puddings in the poaching tray.
- Warm tortillas: Place a tortilla on the lid to soften while eggs cook.
Extra insight: The steam created is gentle and helps cook many foods evenly. Just remember not to block the steam holes.
Safety Tips You Should Know
Mini egg cookers are safe if used correctly, but always follow these rules:
- Never touch the hot plate until it cools.
- Keep the cooker dry except for the water needed for cooking.
- Use only as much water as recommended.
- Do not open the lid during cooking; steam can burn.
- Unplug when done to save energy and prevent accidents.
- Keep out of reach of children while in use.
Non-obvious advice: If your cooker uses a metal pin for poking eggs, store it safely—these are easy to lose and can be sharp.
Credit: www.walmart.com
Troubleshooting: What To Do When Things Go Wrong
If your mini egg cooker is not working as expected, try these solutions.
The Cooker Does Not Turn On
- Check the outlet: Try another device to see if the plug works.
- Inspect the cord: Look for breaks or fraying.
- Contact support: If the light does not come on, the unit may be faulty.
Eggs Are Not Cooked Through
- Add more water next time. Each cooker is different, so adjust by 5–10 ml.
Eggs Are Rubbery
- Reduce water for softer eggs. Overcooking makes eggs tough.
Water Leaks Out
- Too much water can overflow. Use the measuring cup and do not fill above the line.
Pro tip: Keep a small notebook. Write down your perfect settings for your favorite style of eggs.
Benefits Of Using A Mini Egg Cooker
Why use a mini egg cooker instead of boiling eggs on the stove? Here are the biggest advantages:
- Time-saving: No need to watch the pot or wait for water to boil.
- Consistent results: Eggs cook evenly every time.
- Easy to clean: Fewer pots and less mess.
- Energy efficient: Uses less power than boiling water on the stove.
- Safe for kids and beginners: No open flames or hot pans.
Real-life example: Students in dorms or small apartments use mini egg cookers because they work with just an outlet and take little space.
How To Store Eggs After Cooking
You have cooked a batch of eggs—now what? Here is how to keep them fresh:
- Cool completely: Eggs must be cold before storing.
- Keep shells on: Shells protect the eggs from drying out and absorbing odors.
- Use airtight containers: Store eggs in a sealed box in the fridge.
- Label with date: Cooked eggs last about 1 week in the refrigerator.
Tip: If you peel eggs ahead of time, cover them with damp paper towels in the container to keep them moist.
Mini Egg Cooker Vs Traditional Boiling
Is there a real difference? Here is a simple comparison.
| Method | Time Needed | Difficulty | Cleanup | Consistency |
|---|---|---|---|---|
| Mini Egg Cooker | 6–13 min | Very Easy | Simple | High |
| Stovetop Boiling | 10–20 min | Medium | Multiple items | Varies |
Insight: The cooker is faster and less likely to overcook eggs, especially for beginners.
When To Replace Your Mini Egg Cooker
Like any appliance, mini egg cookers do not last forever. Here are signs you may need a new one:
- Heating plate is rusted or pitted.
- Unit does not heat or shuts off randomly.
- Broken or melted plastic parts.
- Lid does not fit properly.
Most mini egg cookers last 2–5 years with proper care.
Storing Your Mini Egg Cooker
When not using your cooker:
- Dry all parts well.
- Store in a cool, dry place.
- Keep all accessories together (trays, measuring cup, pin).
Pro tip: Keep the instruction manual in the box or with your cooker for easy reference.
Frequently Asked Questions
How Do I Make Sure My Eggs Are Easy To Peel?
The best way is to use eggs that are 7–10 days old and cool them quickly in ice water after cooking. Poking a small hole in the shell before cooking can also help.
Can I Cook Other Foods In My Mini Egg Cooker?
Yes! Many models let you steam small amounts of vegetables, fish, or even dumplings. Just do not overfill, and always clean well after cooking non-egg foods.
My Eggs Come Out With A Green Ring Around The Yolk. What Am I Doing Wrong?
This usually means the eggs cooked too long or were not cooled quickly enough. Try using less water or moving eggs to ice water immediately after cooking.
How Do I Remove Mineral Deposits From The Heating Plate?
Mix equal parts vinegar and water, pour onto the plate, and let sit for 5–10 minutes. Wipe clean with a soft cloth. Repeat monthly to keep your cooker working well.
Where Can I Find More Recipes For My Mini Egg Cooker?
You can find a variety of creative egg cooker recipes on cooking blogs, YouTube, and the Wikipedia page about egg cookers for more ideas.
With these steps and tips, you can use your mini egg cooker for much more than just basic boiled eggs. Experiment, keep your cooker clean, and enjoy easy, healthy meals any time.