Marble is often chosen for its stunning, natural beauty and its cool, smooth surface. In homes, hotels, and public spaces, marble countertops, tables, and floors add elegance and luxury. However, marble is sensitive. Its surface can easily suffer from etching—those dull, light marks that appear when acidic liquids, like lemon juice or vinegar, touch the stone. This can be frustrating, especially after investing in such a beautiful material. The good news is that most marble etching can be fixed with the right approach, tools, and a bit of patience.
Let’s explore everything you need to know to restore the shine to your marble. You’ll learn why etching happens, how to identify it, which methods work for different levels of damage, and how to protect your surfaces from future harm.
Along the way, you’ll discover practical tips, honest advice, and a few insights that only experienced restorers know.
Understanding Marble Etching
Before you start fixing marble etching, it’s important to understand what’s happening to your stone. Marble etching is a chemical reaction between acid and the calcium carbonate in marble. When acid touches marble, it eats away a tiny bit of the surface, leaving a dull, often lighter spot. This isn’t a stain or a scratch—it’s a physical change in the stone’s surface.
Common causes of etching include:
- Lemon juice, vinegar, wine, or soda spills
- Using acidic cleaners (many bathroom and kitchen cleaners are not safe for marble)
- Even mild acids from fingerprints or some foods
Etching looks different from stains. Stains are usually darker and caused by something soaking into the stone. Etching is lighter and feels different to the touch—often rougher or less smooth than the surrounding area.
Non-obvious insight: Many people confuse etching with water spots or stains. If you try to remove etching with a cleaner, it won’t help, because the problem is a physical change, not a surface deposit.
How To Identify Etching On Marble
Recognizing marble etching is the first step in fixing it. Here’s how to tell:
- Visual clues: Etched spots look dull and lighter than the rest of the marble. They may be round, splash-shaped, or streaky.
- Touch test: Run your fingers over the spot. Etched areas feel less smooth and sometimes slightly rough compared to the polished surface.
- Light test: In good light, look at the marble from an angle. The etched spot will not reflect light like the surrounding area.
- Timing: If you know something acidic touched the marble (like a lemon wedge left overnight), and a mark appeared soon after, it’s probably etching.
Non-obvious insight: Sometimes, etching can reveal faint patterns or “ghost” outlines of the object that caused it, like a wine glass ring or a drip line.
Tools And Materials You’ll Need
Fixing marble etching doesn’t require professional equipment for light damage, but you should gather the right materials:
- Soft cloths (cotton or microfiber)
- PH-neutral cleaner (never acidic or abrasive cleaners)
- Marble polishing powder (look for products specifically for marble, not granite)
- Spray bottle with water
- Rubber gloves
- Masking tape (to protect nearby areas)
- Plastic spatula (optional, for applying paste)
- Variable-speed orbital sander (for deep etching, usually for professionals)
- Fine-grade steel wool (#0000) (sometimes used for gentle buffing)
- Marble sealer (for protection after repair)
If you don’t have marble polishing powder, many hardware stores or stone suppliers carry it. Avoid DIY recipes with baking soda or toothpaste; these can cause more damage.
Assessing The Severity Of Etching
Not all etching is the same. The method you use depends on how deep the damage is.
Light Etching
This is the most common type. The surface looks dull but is still smooth and not deeply pitted.
Example: A faint ring left by a lemon wedge or a glass of soda.
Moderate Etching
The spot is dull and feels slightly rough, but you can’t feel a deep groove.
Example: A splash of vinegar left for several hours.
Deep Etching
The spot is dull, rough, and you can feel a definite dip or pit. The finish is gone, and the surface may look white or powdery.
Example: Battery acid spill or repeated acid exposure.
Each type of etching requires a different approach. Addressing the wrong level with the wrong method can make the damage worse.
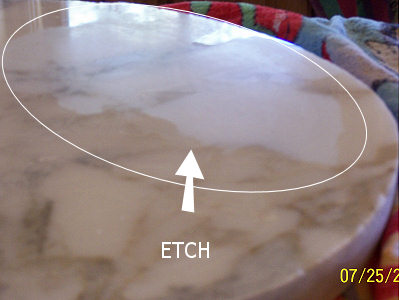
Credit: www.mygranitecare.com
Fixing Light Marble Etching
For most homeowners, light etching is the problem. Here’s how to fix it safely and effectively.
Step 1: Clean The Area
Use a pH-neutral cleaner and a soft cloth to remove any dirt or residue. This ensures you’re working on the etch, not on top of old spills.
Step 2: Apply Marble Polishing Powder
- Dampen the area with a spray bottle.
- Sprinkle a small amount of marble polishing powder over the etched spot.
- Using a soft, damp cloth, gently rub the powder in a circular motion. Apply light pressure.
- Continue rubbing for 30–60 seconds, keeping the area moist.
Step 3: Buff And Check
Wipe away the powder with a clean, damp cloth. Dry the area. Check the spot from different angles to see if the shine is restored. If the etch is still visible, repeat the process.
Step 4: Final Clean
Once the etch is gone, clean the area again with a pH-neutral cleaner. Buff with a dry microfiber cloth to bring back the shine.
Tip: If the spot reappears after a few days, it may be a stain, not an etch. Try a poultice for stains.
Practical example: A faint etch from a glass of orange juice on a bathroom vanity can often be removed completely with two rounds of marble polishing powder.
Fixing Moderate Marble Etching
Moderate etching needs a bit more effort. You may need to repeat the polishing process several times or use a mild abrasive.
Step 1: Protect Surrounding Area
Use masking tape to shield grout lines and nearby surfaces. This prevents accidental damage.
Step 2: Use Marble Polishing Powder
Apply as you would for light etching, but use a bit more pressure. Work in small circles, and keep the area damp.
Step 3: Optional—use Fine Steel Wool
If the etch is still visible after several attempts, use #0000 steel wool (very fine) and gently buff the spot. Always move in a circular motion and avoid pressing hard. Only use steel wool on polished marble, never on honed or matte finishes.
Step 4: Polish Again
After steel wool, repeat the marble polishing powder step to restore the gloss.
Warning: Do not use regular sandpaper or coarse abrasives. These can scratch marble and make the problem worse.
Fixing Deep Marble Etching
Deep etching is more challenging and may require professional help, but you can try some advanced methods if you’re comfortable.
Step 1: Assess The Depth
If the etch is very deep (you can feel a pit or the stone looks damaged), consider calling a stone restoration professional. Deep repairs often need resurfacing with specialized equipment.
Step 2: Try A Diy Polishing Kit
There are marble polishing kits that come with special pads and compounds. Follow the instructions carefully, and test on a small area first.
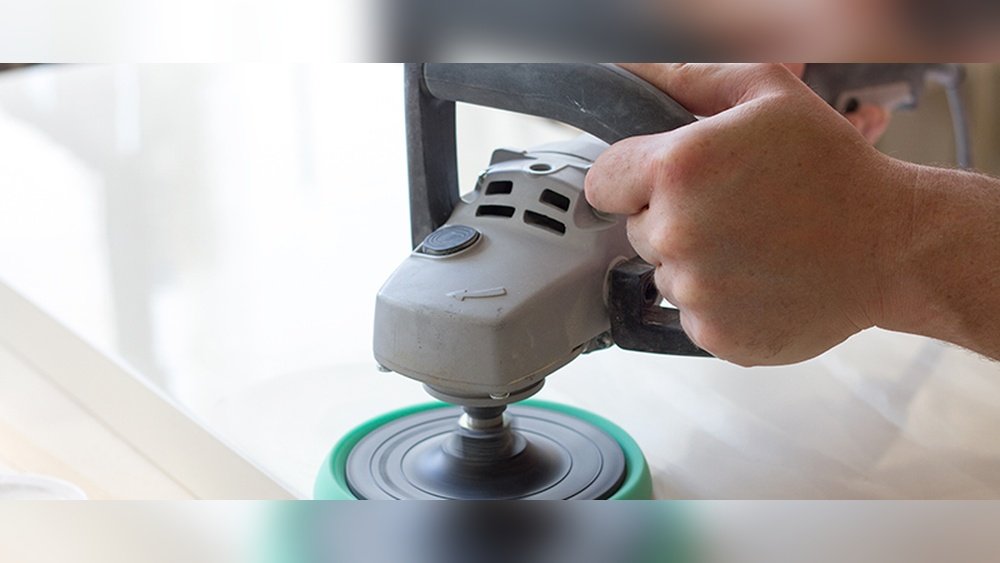
Step 3: Use A Variable-speed Orbital Sander
If you are experienced with tools, you can use a variable-speed orbital sander with a marble polishing pad. Work slowly, use the correct grit (usually starting at 800, then 1500, then 3000), and keep the area wet to avoid overheating.
Step 4: Finish With Marble Polishing Powder
After sanding, use marble polishing powder to bring back the shine.
Step 5: Seal The Surface
Once the etch is repaired, apply a marble sealer according to the manufacturer’s instructions. This helps protect against future etching.
Professional tip: Deep etching is best handled by experts. DIY attempts can lead to uneven surfaces or a “cloudy” finish if done incorrectly.
Comparing Methods For Fixing Marble Etching
The best method depends on the depth of the damage. The table below summarizes the typical approaches:
| Type of Etching | Repair Method | Success Rate (DIY) | When to Call a Pro |
|---|---|---|---|
| Light | Polishing powder, soft cloth | 90% | Rarely needed |
| Moderate | Polishing powder, fine steel wool | 70–80% | If repeated attempts fail |
| Deep | Polishing kit, orbital sander | 30–40% | Usually needed |
Non-obvious insight: Sometimes, a spot that looks deep is actually a combination of light etching and a stain. Test for stains before sanding.
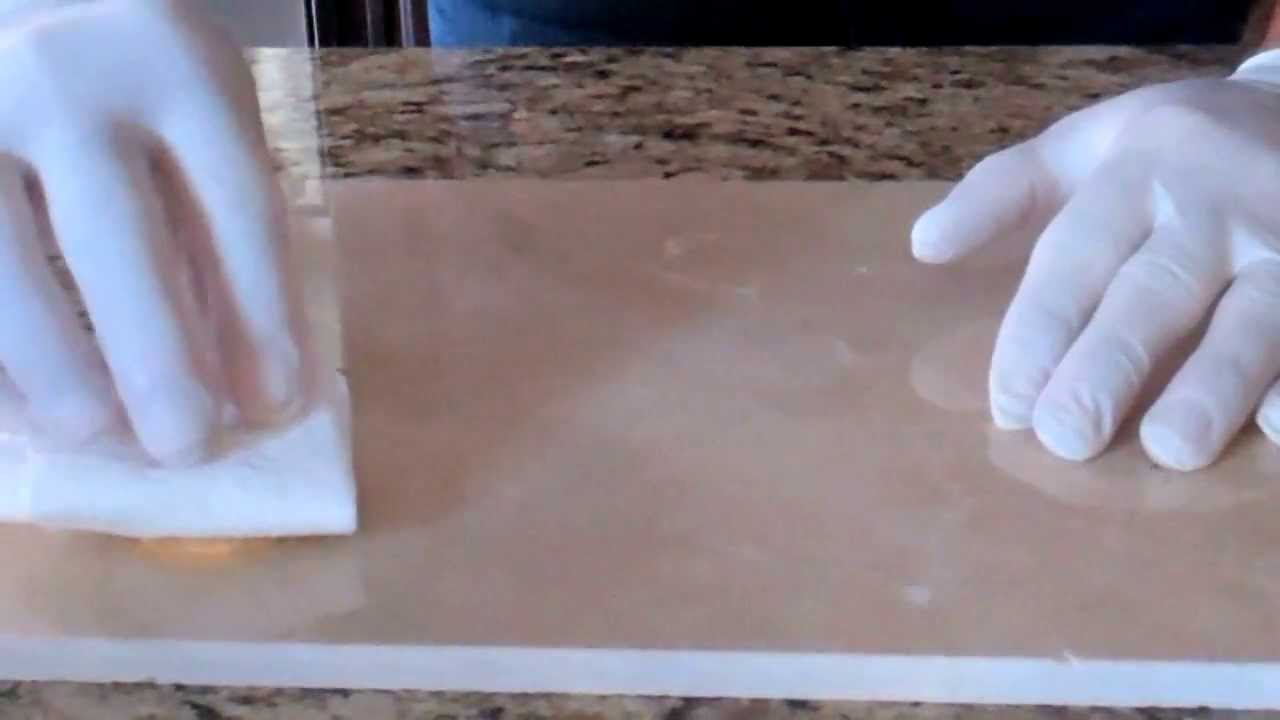
Credit: www.youtube.com
How To Prevent Future Marble Etching
Fixing etching is helpful, but prevention is better. Here are proven steps to protect your marble:
- Seal marble regularly: A good marble sealer creates a barrier that slows down acid penetration. Most sealers need reapplication every 6–12 months.
- Use coasters and trays: Especially for drinks, citrus, wine, and toiletries.
- Clean up spills fast: Wipe any acidic liquid immediately, before it can react.
- Use pH-neutral cleaners: Avoid vinegar, lemon, or any bathroom/kitchen cleaner that’s not labeled safe for marble.
- Place mats in kitchens and bathrooms: Areas near sinks and stoves are most at risk.
- Educate family and staff: Many etches happen by accident. A quick word about marble’s sensitivity can save a lot of trouble.
Practical tip: Some “natural stone” cleaners are not safe for marble—always check the label for “safe for marble” or “pH-neutral.”
Common Mistakes When Fixing Marble Etching
Even with the best intentions, people often make mistakes that can make etching worse. Here’s what to avoid:
- Using acidic cleaners: Even a small amount of vinegar or lemon-based cleaner will create new etching.
- Scrubbing with rough pads: Never use green scrubbing pads, sandpaper, or anything abrasive.
- DIY remedies with baking soda or toothpaste: These can scratch or dull marble further.
- Skipping the test patch: Always test products in a hidden corner before using them on visible marble.
- Ignoring deep etching: For very deep marks, home methods can make the area uneven or cloudy.
Non-obvious insight: Some glass cleaners contain ammonia, which can also etch marble. Stick to marble-specific products.
When To Call A Professional
While many cases of marble etching are easy to fix at home, there are times when a pro is needed:
- The etched area is very large, deep, or covers a main countertop.
- Your attempts to polish do not restore the shine.
- The marble has a honed or matte finish (these require special techniques).
- You are unsure about the type of stone—sometimes, what looks like marble is a different, softer material.
Professionals have special machines, diamond pads, and years of experience. They can restore even badly etched marble to a like-new finish. The cost can range from $200 to $800 depending on the size and depth of damage.
Cost comparison example:
| DIY Method | Supplies Cost | Time Required | Result |
|---|---|---|---|
| Polishing powder | $10–$30 | 15–60 minutes | Good for light etching |
| Professional service | $200–$800 | 2–4 hours | Excellent for all etching |
Special Cases: Honed And Matte Marble
Not all marble is shiny. Honed marble has a matte, satin finish. Fixing etching on honed marble is different:
- Use a honing powder (not polishing powder).
- Rub in a circular motion with a damp cloth.
- For deep etching, professionals use special diamond pads to match the finish.
Tip: Never use polishing powder on honed marble—it will create shiny spots and ruin the uniform look.
Caring For Marble After Fixing Etching
After you fix etching, a few habits can keep your marble beautiful:
- Reapply sealer as recommended.
- Place mats under soap, bottles, and fruit bowls.
- Wipe up spills right away.
- Use a microfiber cloth for regular cleaning.
- Avoid putting hot pans directly on marble, as heat can sometimes amplify etching.
Non-obvious insight: Even hard water can etch marble over time. If you live in an area with mineral-rich water, dry marble surfaces after each use.
The Science Behind Marble Etching
Understanding the science can help prevent future damage. Marble is made mostly of calcite, a form of calcium carbonate. Acids react with calcite, dissolving a tiny bit of the surface. This is why even weak acids (like tomato juice or cola) can cause etching.
Fun fact: Vinegar (acetic acid) is often used in geology to test for calcite—if a drop fizzes, the stone will etch easily.
Restoring Large Areas And Floors
For large marble floors or countertops with widespread etching, DIY methods are risky and time-consuming. Professionals use:
- Diamond polishing pads attached to rotary machines
- Special polishing compounds
- Multiple steps to restore the entire area evenly
Trying to fix a large area yourself may create uneven spots or streaks. For more on professional marble care, see the Marble entry on Wikipedia.
Comparing Marble To Other Stones
It’s helpful to know how marble compares to other common stones in terms of etching.
| Stone Type | Etching Risk | Typical Uses | Care Needed |
|---|---|---|---|
| Marble | High | Countertops, floors | Frequent sealing, gentle cleaning |
| Granite | Low | Countertops, floors | Occasional sealing |
| Quartzite | Medium | Countertops | Sealing as needed |
| Engineered Quartz | Very low | Countertops | Wipe clean, no sealing |
Practical tip: If you want the look of marble without the maintenance, consider quartz or granite for kitchens.

Credit: stone-repairs.com
Frequently Asked Questions
What Is The Difference Between Etching And Staining On Marble?
Etching is a dull, light spot caused by acids reacting with the marble’s surface. Staining is a dark spot from something soaking into the stone, like oil or wine. Etching changes the surface texture, while staining only changes the color.
Can I Use Baking Soda To Fix Marble Etching?
No, baking soda is alkaline and abrasive. It can scratch marble and make the surface duller. Always use products made specifically for marble.
How Often Should I Seal My Marble To Prevent Etching?
Most experts recommend sealing marble every 6 to 12 months. High-use areas may need more frequent sealing. Always follow the sealer manufacturer’s instructions.
Is It Safe To Use Vinegar Or Lemon To Clean Marble?
No. Both are acidic and will cause etching. Use only pH-neutral cleaners labeled safe for marble.
Will Polishing Fix All Types Of Marble Etching?
Polishing works well for light and some moderate etching. Deep etching, or large damaged areas, usually need professional resurfacing.
Marble’s beauty is worth the extra care it requires. With a careful approach and the right products, you can fix most etching problems at home and enjoy your marble for years to come. If you’re ever unsure, don’t hesitate to consult a stone care professional—they can restore your marble and give advice on keeping it looking its best.