When you think about the perfect pizza, you might picture a crispy crust, melted cheese, and that smoky flavor you only find in a real wood pizza oven. These ovens are more than just a tool—they’re an experience. Whether you’re a pizza lover, a home cook, or someone who enjoys outdoor cooking, learning how to use a wood pizza oven can completely change the way you make pizza and other foods. But if you’re new to these ovens, the process can feel overwhelming. There’s more to it than just lighting a fire and putting in a pizza. Timing, wood choice, temperature, and technique all matter. In this guide, you’ll find everything you need to know—from lighting the first flame to sliding out a bubbling hot pizza—so your next meal from the oven is a success.
Understanding Your Wood Pizza Oven
Before you start cooking, it’s important to know your oven’s design and how it works. Most wood pizza ovens are made from brick, clay, or stone. They have a dome shape that helps heat circulate evenly. The oven floor is where you’ll cook your pizza, and the fire usually sits at the back or side. The chimney lets smoke escape, but it also helps control the airflow and temperature.
Heat retention is what makes these ovens special. The walls absorb heat from the fire, then radiate it back into the oven. This means your pizza cooks fast—usually in 90 seconds to 3 minutes—at temperatures between 700°F and 900°F (370°C–480°C). Regular home ovens can’t get this hot, so you won’t get the same flavor and texture.
Types Of Wood Pizza Ovens
There are a few main types you’ll find:
- Traditional brick ovens: Heavy, built-in, and excellent at holding heat.
- Portable ovens: Smaller, lighter, and often made from steel or ceramic.
- Hybrid ovens: Can use both wood and gas for more flexibility.
Each type works the same way but may heat up at different speeds or hold heat differently. Beginners often forget that preheating time varies, so plan for 1–2 hours for a traditional oven and about 30–45 minutes for a portable one.
Choosing The Right Wood
The wood you use will shape the flavor of your pizza and how hot your oven gets. Not all wood is the same, and using the wrong type can cause problems.
Best Woods For Pizza Ovens
Hardwoods are the top choice because they burn hot and clean. Examples include:
- Oak: Burns long and gives a mild smoky flavor.
- Maple: Slightly sweet smoke, steady burn.
- Ash: Lights easily, burns hot.
- Beech: Clean-burning, low smoke.
- Hickory: Strong flavor, use in small amounts.
Avoid softwoods like pine or spruce. They burn fast, create soot, and can leave a bad taste on your pizza.
Wood Size And Moisture
Use seasoned wood—dry wood with less than 20% moisture. Wet wood creates smoke and takes longer to burn. Cut logs to fit your oven, usually 12–16 inches long and split to 2–4 inches thick.
A common mistake is using wood that is too large or too moist. This can stall your fire and make it hard to reach high temperatures. Always store your wood in a dry place.

Credit: www.love-logs.com
Prepping The Oven
Getting your oven ready is as important as the cooking itself. Here’s how to do it right.
Cleaning Before Use
Ash and leftover soot from old fires can affect flavor and block airflow. Use a brush or shovel to remove debris from the oven floor and fire area. Never use water to clean the inside—it can damage the oven.
Building The Fire
- Start with kindling: Place a small stack of dry twigs or wood shavings in the center or back.
- Add small logs: Lay 2–3 small pieces of hardwood on top.
- Light the fire: Use a long match or fire starter. Do not use chemicals or lighter fluid.
- Let it catch: Once the fire burns steadily, add a few more logs.
Spread the fire to one side or the back as it grows. This gives you a hot area for cooking and an open space for your pizza.
Preheating
Let the fire burn for at least 60–90 minutes (for a large oven). You want the oven walls and floor to turn white or light gray—this means they are hot enough. The floor should reach at least 700°F (use an infrared thermometer for accuracy).
Beginner tip: Many people rush this step. If the oven is not hot enough, your pizza will be soggy, not crisp.
Managing Oven Temperature
Controlling temperature is key for great pizza. Too hot and you’ll burn the crust; too cool and the pizza will be undercooked.
Measuring Temperature
Use an infrared thermometer to check the oven floor and dome. Point it at different spots for an accurate reading. The floor should be 700–900°F; the dome a bit hotter.
Adding Wood
Keep a small fire burning at the side or back. Add logs as needed to maintain the heat. Use a metal peel to move coals and ash. If the oven gets too hot, let the fire die down, or move some embers away.
Airflow And The Door
Opening the oven door lets in more air, which makes the fire burn hotter. Closing it slows the fire down. Adjust the door and chimney vent to fine-tune the temperature.
Non-obvious insight: Even small changes in wood placement or door position can quickly change the heat. Practice helps you learn your oven’s personality.
Tools You Need
Having the right tools makes using a wood pizza oven much easier and safer. Here are some essentials:
- Pizza peel: A flat paddle for sliding pizza in and out. Use wood for launching and metal for turning.
- Oven brush: For cleaning ash and debris.
- Infrared thermometer: To check temperature.
- Fire poker or rake: For moving logs and coals.
- Ash shovel: To remove old ash safely.
- Heat-resistant gloves: Protect your hands from high temperatures.
- Dough boxes or trays: For proofing and organizing dough balls.
Beginner mistake: Using a home kitchen spatula or oven mitts. These aren’t made for the high heat and can be dangerous.
Making The Perfect Pizza Dough
The dough is the heart of your pizza. For wood-fired ovens, dough should be soft but sturdy to handle the high heat.
Simple Pizza Dough Recipe
- Flour: 1,000 grams (about 7 cups, bread or 00 flour)
- Water: 650 grams (about 2 3/4 cups, room temperature)
- Salt: 20 grams (about 1 tablespoon)
- Fresh yeast: 2 grams (or 1 gram dry yeast)
- Mix water and yeast in a bowl.
- Add flour and salt; mix until combined.
- Knead by hand or mixer for 10–15 minutes until smooth.
- Let dough rise in a covered container for 1–2 hours.
- Divide into balls (250 grams each for 12-inch pizzas).
- Rest for another 4–6 hours at room temperature.
Tip: Use less yeast and allow a longer rise for better flavor and texture.
Shaping And Topping Your Pizza
Once the dough has rested, it’s time to shape and add toppings.
Shaping Dough
- Dust your work surface with flour.
- Gently press the dough ball into a disc, starting from the center.
- Stretch the dough by hand, turning and pressing outwards.
- Leave a thicker edge (the crust) for a classic look.
Never use a rolling pin; it pushes out air and makes the crust flat.
Adding Toppings
Use simple, high-quality ingredients for best results:
- Tomato sauce: Crushed San Marzano tomatoes, salt, and a little olive oil.
- Mozzarella cheese: Fresh or low-moisture.
- Fresh basil: Adds aroma and color.
- Olive oil: Drizzle for flavor.
Don’t overload with toppings. Too much can make the pizza soggy in a wood oven.
Launching And Baking Pizza
This is where the magic happens. The process is quick but requires attention.
Launching The Pizza
- Sprinkle flour or semolina on the peel to prevent sticking.
- Place the shaped and topped pizza on the peel.
- Give a quick back-and-forth shake to make sure it slides.
- Open the oven door and, with a swift motion, slide the pizza onto the hot oven floor.
Baking
- Bake for 90 seconds to 3 minutes, depending on oven heat.
- Use a metal peel to turn the pizza every 20–30 seconds for even cooking.
- Watch for bubbling cheese and a golden-brown crust.
If the pizza cooks too fast on top but not on the bottom, let the fire die down a bit or move the pizza further from the fire.
Removing And Serving
Use the peel to take the pizza out. Let it rest for a minute before slicing. This helps the cheese set and makes slicing easier.
Cooking Other Foods
A wood pizza oven isn’t just for pizza. You can cook bread, roast vegetables, bake meats, or even desserts.
Bread
After pizza, the oven will still be hot but cooling down. This is the perfect time for baking bread. Shape your dough, let it proof, and bake directly on the oven floor for a crispy crust.
Roasting Meats And Vegetables
Place meats (like chicken or beef) in a cast iron pan. Add root vegetables around them, and cook in the oven after the fire has died down a bit (400–500°F). Turn occasionally for even browning.
Desserts
Bake fruit crisps, pies, or even cookies. The gentle, even heat after pizza time is ideal for these treats.
Non-obvious insight: The oven’s cooling stages can be used for different foods—pizza at peak heat, bread as it cools, then roasting and desserts.
Cleaning And Maintaining Your Oven
Proper care will extend the life of your oven and keep flavors pure.
After Each Use
- Let the oven cool completely before removing ash.
- Use a metal shovel to take out ash and leftover wood.
- Brush the oven floor to remove crumbs and debris.
Deep Cleaning
Once every few uses, scrape the oven floor and walls to remove built-up soot. Never use water or soap inside; dry brushing is best.
Protecting Your Oven
If your oven is outdoors, cover it when not in use. This protects it from rain and temperature changes that can cause cracks.
Beginner mistake: Ignoring cracks. Small cracks are normal but seal large ones with oven-safe mortar to prevent damage.
Troubleshooting Common Problems
Even experienced cooks run into issues. Here’s how to solve the most frequent problems:
Pizza Sticking To The Peel
- Use enough flour or semolina under the dough.
- Work quickly—don’t let pizza sit too long on the peel.
- Avoid wet toppings that soak the dough.
Uneven Cooking
- Rotate the pizza regularly.
- Make sure the fire is burning evenly.
- Check that the oven floor is clean and hot.
Soggy Crust
- Oven floor not hot enough.
- Too many toppings or too much sauce.
- Dough too thick.
Burnt Crust
- Oven is too hot or pizza too close to the fire.
- Crust too thin.
Too Much Smoke
- Wood is too moist or too large.
- Airflow is poor (open the door or chimney).
- Use only dry, hardwood logs.
Wood Pizza Oven Vs. Other Ovens
To show the difference, here’s a quick comparison of wood pizza ovens with other common types:
| Oven Type | Max Temp (°F) | Cooking Time | Flavor | Best For |
|---|---|---|---|---|
| Wood Pizza Oven | 900 | 90s–3min | Smoky, authentic | Neapolitan pizza, bread |
| Gas Oven | 550 | 6–8min | Clean, mild | American-style pizza |
| Electric Oven | 500 | 8–12min | Neutral | Everyday cooking |
Credit: www.thursdaynightpizza.com
Safety Tips For Wood Pizza Ovens
Wood ovens reach very high temperatures, so safety is important.
- Always use heat-resistant gloves when handling tools.
- Keep children and pets away from the oven while it’s hot.
- Never use water to put out the fire—let it burn out naturally.
- Store wood away from the oven to prevent accidental fires.
- Use a long-handled brush and peel to keep hands safe.
Non-obvious insight: The outside of the oven can stay hot for hours, even after the fire looks out. Always check before touching.
Hosting A Pizza Party
A wood pizza oven is perfect for gatherings. Here’s how to make your pizza party a hit:
- Prep dough and toppings ahead of time.
- Set up a topping station so guests can build their own pizzas.
- Assign someone to manage the fire and another to bake.
- Offer drinks and side dishes that pair well with pizza—like salads or grilled vegetables.
- Keep things moving; pizzas cook fast, so have the next one ready to go.
Pro tip: Invite guests to shape their own dough. It’s interactive and fun.
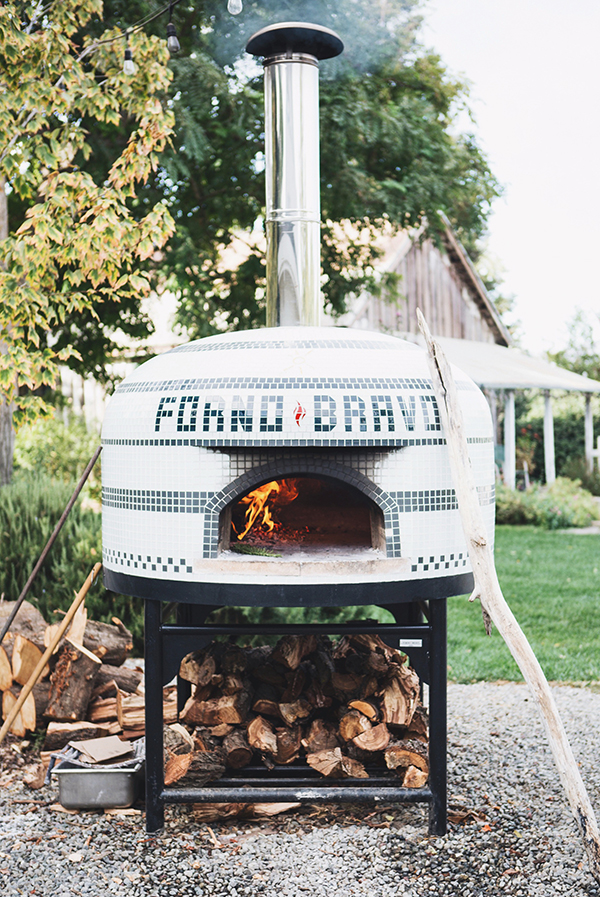
Credit: www.fornobravo.com
Table: Wood Types And Their Characteristics
To help you choose wood for your oven, here’s a summary:
| Wood Type | Burn Temperature | Flavor Profile | Availability |
|---|---|---|---|
| Oak | High | Mild, classic | Common |
| Maple | High | Slightly sweet | Moderate |
| Ash | Very high | Neutral | Common |
| Beech | High | Clean, light | Less common |
| Hickory | Very high | Strong, smoky | Moderate |
Table: Typical Cooking Times For Popular Foods
For planning your meal, here’s how long different foods take in a wood oven:
| Food | Oven Temp (°F) | Cooking Time |
|---|---|---|
| Neapolitan Pizza | 800–900 | 90s–3min |
| Bread | 500–600 | 20–40min |
| Roast Chicken | 500 | 30–40min |
| Vegetables | 450 | 15–20min |
| Fruit Crisp | 400 | 30–35min |
Frequently Asked Questions
What Is The Best Wood To Use In A Wood Pizza Oven?
The best woods are hardwoods like oak, maple, or ash. They burn hot, clean, and give your pizza a great flavor. Avoid softwoods like pine, as they make a lot of smoke and can ruin the taste.
How Do I Know When My Wood Pizza Oven Is Hot Enough?
Use an infrared thermometer to check the oven floor—it should be between 700°F and 900°F. The oven walls should turn white or light gray, which means they are fully heated. A simple test: sprinkle a little flour on the oven floor; if it browns in seconds, you’re ready.
Can I Cook Other Foods Besides Pizza In My Wood Oven?
Yes! You can bake bread, roast meats, vegetables, and desserts. Use the oven’s cooling stages for different foods—pizza first at peak heat, then bread, followed by roasting and baking as the temperature drops.
How Do I Clean My Wood Pizza Oven?
Let the oven cool, then remove ash and leftover wood with a metal shovel and brush. Never use water inside the oven. For deeper cleaning, scrape the inside walls and floor to remove soot buildup.
Where Can I Learn More About Traditional Pizza Ovens?
For more details about the history and science of pizza ovens, you can visit the Wikipedia page on pizza ovens.
Cooking with a wood pizza oven is a rewarding process. It takes practice, patience, and some care—but the results are unique and delicious. With the right tools and these steps, you’ll soon be enjoying pizzas and more, just like they do in Italy.