Stacking wall cabinets to create a pantry is a clever solution for adding storage in kitchens, laundry rooms, or any space where you need more organized shelving. Many homes, especially older ones, have limited pantry space or none at all. Buying a pre-made pantry can be expensive, and custom cabinetry costs even more. But by stacking wall cabinets, you can build a tall, functional pantry for a fraction of the price. This project is accessible for most DIYers, and it offers a flexible way to design storage that fits your needs and space.
This guide will walk you through every step of the process. You’ll learn how to plan the project, choose the right cabinets, stack them safely, and finish your pantry so it looks built-in. You’ll also discover tips to avoid common mistakes, and practical advice that even experienced DIYers sometimes miss. By the end, you’ll have the confidence and knowledge to transform your space with a custom pantry made from stacked wall cabinets.
Why Choose Wall Cabinets For A Pantry?
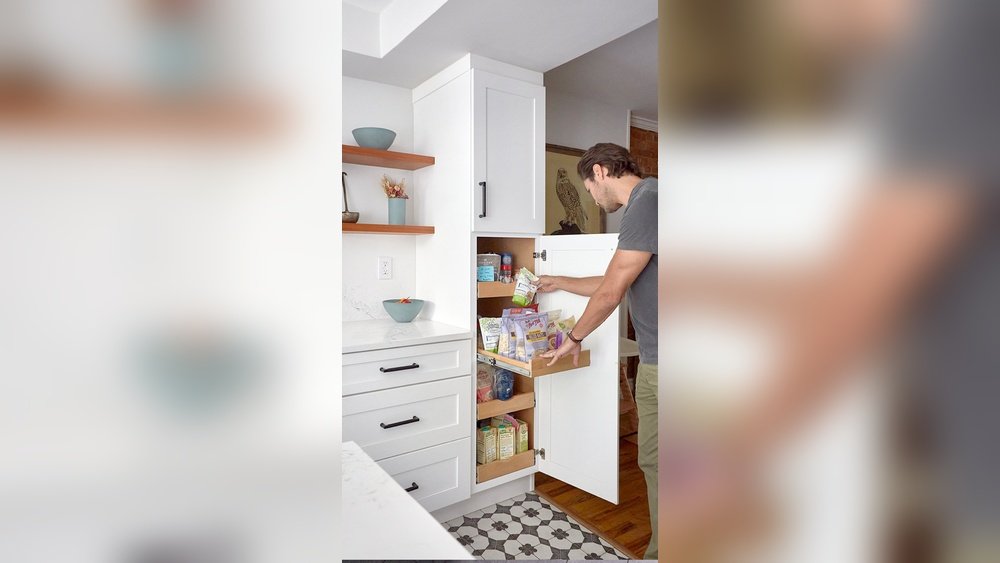
Wall cabinets are usually 12-15 inches deep, which is shallower than standard base cabinets. This depth is perfect for pantry storage because it keeps everything visible and easy to reach. With deeper cabinets, food and supplies often get lost in the back.
Wall cabinets are also lighter and easier to handle during installation.
Stacking wall cabinets lets you build up, not out. This means you can create a pantry on a small wall or in a tight corner. You control the height, number of shelves, and overall look. It’s a flexible system that works in homes, apartments, and even offices.
Advantages Of Stacked Wall Cabinet Pantries
- Customizable height: Build as tall as your ceiling allows.
- Adjustable shelving: Move shelves for cans, boxes, or tall items.
- Cost-effective: Less expensive than custom cabinetry.
- Easy access: Shallow shelves keep everything within reach.
- Flexible placement: Use in kitchens, laundry rooms, basements, or garages.
Planning Your Pantry Project
Good planning saves time, money, and frustration. Before you buy anything or start stacking, take time to measure and design your pantry.
Measure Your Space
Use a tape measure to get the height, width, and depth of the area where you want your pantry. Account for baseboards, vents, and outlets. Most wall cabinets are about 12 inches deep, but some brands offer 15-inch options. Make sure the depth fits your room.
- Ceiling height: Standard ceilings are 8 feet (96 inches) tall. Measure from floor to ceiling. Subtract a few inches from the top for safe stacking.
- Width: Typical wall cabinets come in 12, 15, 18, 24, 30, and 36 inch widths. Plan to use a combination to fill your wall.
- Depth: Standard is 12 inches, but verify before buying.
Sketch Your Pantry Layout
Draw a simple diagram of your wall. Mark the height and width. Plan how many cabinets you’ll need to stack to reach your desired height. For example, two 30-inch cabinets stacked make a 60-inch pantry. Add a 12-inch cabinet on top for extra space.
Consider Doors And Openings
Check that your cabinet doors have space to open fully. If placing your pantry near a wall or appliance, leave at least 1-2 inches so doors don’t hit anything. Think about door swing direction—some cabinets have reversible doors.
Power Outlets And Vents
If your pantry wall has outlets, decide if you’ll cover them or cut openings in the cabinet backs for access. Never block required air vents.
Example Layout
Suppose your wall is 84 inches tall and 30 inches wide. You might stack:
- One 30-inch high x 30-inch wide cabinet (bottom)
- One 30-inch high x 30-inch wide cabinet (middle)
- One 24-inch high x 30-inch wide cabinet (top)
This gives you an 84-inch tall pantry with three separate sections.
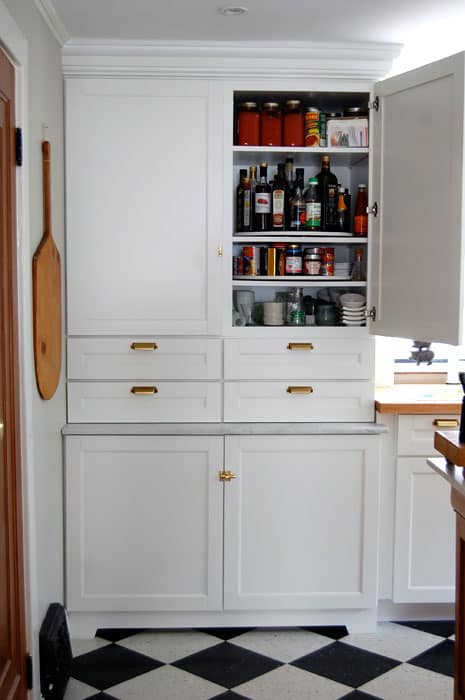
Credit: www.theartofdoingstuff.com
Choosing The Right Wall Cabinets
Selecting the best cabinets is a key step. You don’t need high-end cabinets for a pantry, but quality matters for safety and durability.
Ready-to-assemble (rta) Vs Pre-assembled Cabinets
- RTA cabinets: Come flat-packed, you build them at home. Usually less expensive.
- Pre-assembled cabinets: Arrive ready to install, cost more, save assembly time.
Both types work well for pantries. RTA cabinets are popular for DIY projects because they’re easy to transport and customize.
Cabinet Material
Most wall cabinets are made of:
- Plywood: Strong, lightweight, resists warping.
- MDF (medium-density fiberboard): Smooth finish, heavier, less moisture-resistant.
- Particleboard: Cheapest, not as durable.
For a pantry, plywood is preferred for its strength and lightness. If you choose MDF or particleboard, avoid placing the pantry in damp areas.
Cabinet Size And Configuration
Look for cabinets that stack evenly. Use same-width cabinets for a clean look. Cabinet heights can vary, but stacking cabinets of different heights may look less uniform.
- Common wall cabinet heights: 12″, 15″, 18″, 24″, 30″, 36″
- Common widths: 12″, 15″, 18″, 24″, 30″, 36″
Mix and match heights to reach your ceiling.
Door Style And Finish
Pantry cabinets don’t have to match your kitchen exactly, but consider shaker, slab, or raised panel doors for a clean look. White or neutral finishes are classic and make the pantry feel brighter.
Where To Buy
- Home improvement stores (Home Depot, Lowe’s)
- IKEA (affordable, easy to customize)
- Online retailers (Cabinets.com, Wayfair)
Always check return policies and reviews before buying.
Tools And Materials Needed
You won’t need advanced tools, but having the right equipment makes the job safer and faster. Gather these before starting.
Tools:
- Power drill and screwdriver bits
- Stud finder
- Level (2-foot or longer)
- Measuring tape
- Pencil
- Step ladder
- Safety goggles and gloves
- Clamps (optional for holding cabinets together)
Materials:
- Wall cabinets (as planned)
- Cabinet screws (2-1/2 inch or 3 inch)
- Wood shims
- Cabinet joining screws or bolts
- Wall anchors (if no studs)
- Paint or caulk (for finishing)
- Cabinet feet or platform (optional, for base)
Pro tip: Use cabinet mounting rails for a more professional, secure install.
Preparing The Area
Before you start stacking, get the space ready.
- Clear the wall. Remove any pictures, light switches, or obstacles.
- Mark stud locations. Use a stud finder to locate wall studs. Mark them with a pencil—they will support the cabinet’s weight.
- Check for level floors. If your floor is not level, use wood shims under the base cabinet or platform to create a flat surface.
- Protect the floor. Lay down a drop cloth or cardboard to catch dust and protect your flooring.
Building A Strong Base
Wall cabinets are not designed to sit directly on the floor. You need a sturdy base or platform for the bottom cabinets. This keeps the cabinets level and raises them to a comfortable height.
Platform Vs Cabinet Feet
- Platform: Build a simple frame from 2×4 wood, the same width and depth as your cabinet. Set the bottom cabinet on top. This is the most stable method.
- Cabinet feet: Metal or plastic feet can be attached to the cabinet bottom, but are less stable for tall stacks.
Building a platform:
- Cut two 2x4s to the width of your cabinet.
- Cut two 2x4s to the depth (minus the thickness of the front/back boards).
- Screw together to form a rectangle.
- Set on the floor, check for level, and shim as needed.
Place your first (bottom) cabinet on this platform.
Stacking And Securing Wall Cabinets
Now comes the main part: stacking your wall cabinets safely and securely.
Step 1: Position The Bottom Cabinet
Set the first cabinet on your platform or directly on the floor (if you choose). Check that it’s perfectly level, both front-to-back and side-to-side. Shim under the cabinet if necessary.
- Secure the cabinet to the wall by driving cabinet screws through the back rail and into wall studs.
- Use at least two screws per stud for each cabinet.
Step 2: Stack The Next Cabinet
Lift the second cabinet onto the first. You may need help—wall cabinets are lighter than bases, but stacking can be awkward.
- Align the sides and front edges carefully.
- Use clamps to hold the cabinets together temporarily.
Step 3: Join Cabinets Together
To prevent movement, connect the cabinets to each other.
- Open the doors.
- Drill pilot holes through the side panels (usually at the top and bottom).
- Drive cabinet joining screws through the holes to lock the cabinets together.
Pro tip: Some cabinets have thinner sides. Use screws designed for cabinets, and don’t overtighten—this prevents splitting.
Step 4: Attach The Stack To The Wall
With the cabinets stacked and joined, secure the upper cabinets to the wall.
- Drill through the back rail of each upper cabinet into wall studs.
- Use the level to keep everything straight.
- Use at least two screws per stud for each cabinet.
If you can’t hit a stud, use heavy-duty wall anchors rated for the cabinet’s weight.
Step 5: Add More Cabinets
Repeat the stacking and joining process for each cabinet. Always check for level as you go. Slight errors multiply with each layer, so adjust before moving higher.
Step 6: Secure The Top
Leave a small gap (about 1 inch) between the top cabinet and the ceiling for expansion and to prevent rubbing. Some people fill this gap with trim for a built-in look.
Finishing Touches
After your cabinets are stacked and secured, it’s time to make your pantry look polished and function perfectly.
Cover Gaps And Seams
- Use caulk to fill small gaps between cabinets or against the wall.
- For bigger gaps, use matching trim or molding.
Install Shelves
Most wall cabinets come with adjustable shelves. Arrange them to fit your pantry needs—tall shelves for cereal boxes, shorter shelves for cans and jars.
Add Cabinet Hardware
Install handles or knobs to match your kitchen or give your pantry a unique style.
Paint Or Touch Up
Touch up any scratches or exposed edges. Use matching paint, or repaint the entire pantry for a custom look.
Add Lighting (optional)
Install battery-powered LED puck lights or strip lights inside your pantry for easy visibility.
Organize Your Pantry
Sort and store your items:
- Place frequently used items on middle shelves.
- Store heavy items on lower shelves.
- Label shelves for easy access.
Example: Stacking Wall Cabinets For A Pantry (step-by-step)
Let’s see a real-world example to make things clearer.
Suppose you have a 90-inch high wall, 24 inches wide, and want a tall, slim pantry.
- Buy three 30″ high x 24″ wide wall cabinets.
- Build a 3″ high platform from 2x4s.
- Set the first cabinet on the platform, level it, and attach to wall studs.
- Stack the second cabinet on top, clamp, join with screws, and attach to wall.
- Stack the third cabinet, join, and secure.
- Fill seams with caulk, install shelves, add handles.
- Organize your pantry items.
You now have a custom, floor-to-ceiling pantry for much less than a custom cabinet.
Safety Tips And Common Mistakes
Safety First
- Always secure cabinets to wall studs.
- Get help lifting and stacking—don’t risk injury.
- Use the right screws for your wall type (wood, drywall, masonry).
- Never overload shelves—follow weight limits from the manufacturer.
Common Mistakes (and How To Avoid Them)
- Not finding studs: Drywall alone won’t hold heavy cabinets. Use a stud finder and double-check.
- Skipping the platform: Cabinets sitting on uneven floors may tip or have gaps.
- Not leveling each cabinet: Small errors add up—check level after every cabinet.
- Using the wrong screws: Cabinet screws are stronger than drywall screws.
- Forgetting door clearance: Make sure doors open without hitting walls or appliances.
- Ignoring ceiling height: Leave a gap at the top; don’t force cabinets tight against the ceiling.
- Not joining cabinets together: Unjoined cabinets can shift or tip.
Pro insight: If your cabinets don’t perfectly fill the wall, use filler strips or panels to create a seamless, built-in look.
Comparing Stacked Wall Cabinets To Other Pantry Solutions
Here’s a look at how stacked wall cabinets compare to other common pantry options.
| Pantry Type | Cost | Customizability | Installation | Durability |
|---|---|---|---|---|
| Stacked Wall Cabinets | $$ | High | DIY-friendly | Good |
| Freestanding Pantry | $-$$ | Low | Easy | Fair |
| Custom Built-In | $$$ | Very High | Professional | Excellent |
| Wire Shelving | $ | Medium | DIY | Fair |
Stacked wall cabinets offer a strong mix of affordability, customization, and DIY friendliness.
Practical Tips For A Professional Result
- Use cabinet filler strips to close gaps at the sides or ceiling.
- For a built-in look, add crown molding at the top.
- Paint the platform or use a kick plate for a seamless base.
- Consider adding pull-out shelves or baskets for easy access.
- Add a child lock if you have young children.
- For corner pantries, use angled cabinets or add open shelves on the side.
Storage Ideas For Your New Pantry
Once your pantry is built, organizing it well makes a big difference.
- Clear containers: Store pasta, grains, and snacks in see-through bins for quick identification.
- Lazy Susans: Use spinning trays for spices or small bottles.
- Tiered racks: Make cans and jars visible and reachable.
- Pull-out baskets: Great for potatoes, onions, or snacks.
- Hooks or racks: Add on the inside of doors for small items.
Maintenance And Upkeep
Keeping your pantry clean and sturdy will help it last for years.
- Wipe shelves regularly to prevent crumbs and spills.
- Check for loose screws every few months.
- Don’t overload shelves—follow weight limits.
- Repaint or touch up as needed.
- Air out the pantry now and then to prevent musty odors.
Real-world Example: Cost Breakdown
Let’s estimate the cost for a typical stacked wall cabinet pantry:
- Three 30″ x 24″ wall cabinets: $90 each = $270
- 2×4 lumber for platform: $15
- Cabinet screws, shims, caulk, handles: $30
- Paint/touch-up: $15
Total cost: Around $330
A custom built-in pantry of similar size could cost $1,000 or more. Stacked wall cabinets save hundreds of dollars.
When To Call A Professional
If you’re not comfortable with power tools, heavy lifting, or drilling into walls, you can hire a handyman or carpenter for installation. This is also a good idea if your walls are old, uneven, or have complicated wiring or plumbing.
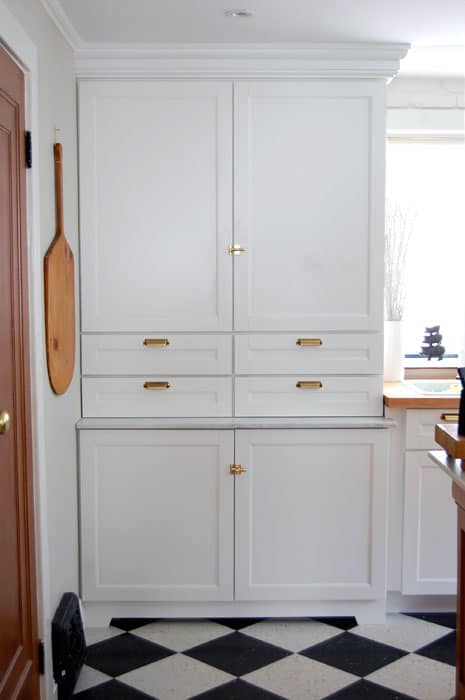
Credit: www.theartofdoingstuff.com
Environmental And Health Considerations
Choose cabinets with low-VOC finishes for better indoor air quality. If buying used cabinets, check for signs of mold or pests, especially if installing in a damp area like a basement.
Example Timeline
How long does it take to build a pantry from stacked wall cabinets? Here’s a typical timeline for a first-time DIYer:
| Task | Estimated Time |
|---|---|
| Planning & Measuring | 1-2 hours |
| Shopping for Cabinets/Materials | 2-3 hours |
| Building Platform | 1 hour |
| Assembling Cabinets | 1-2 hours |
| Stacking & Securing Cabinets | 2-3 hours |
| Finishing Touches | 1-2 hours |
Total: About 8-13 hours, spread over a weekend.
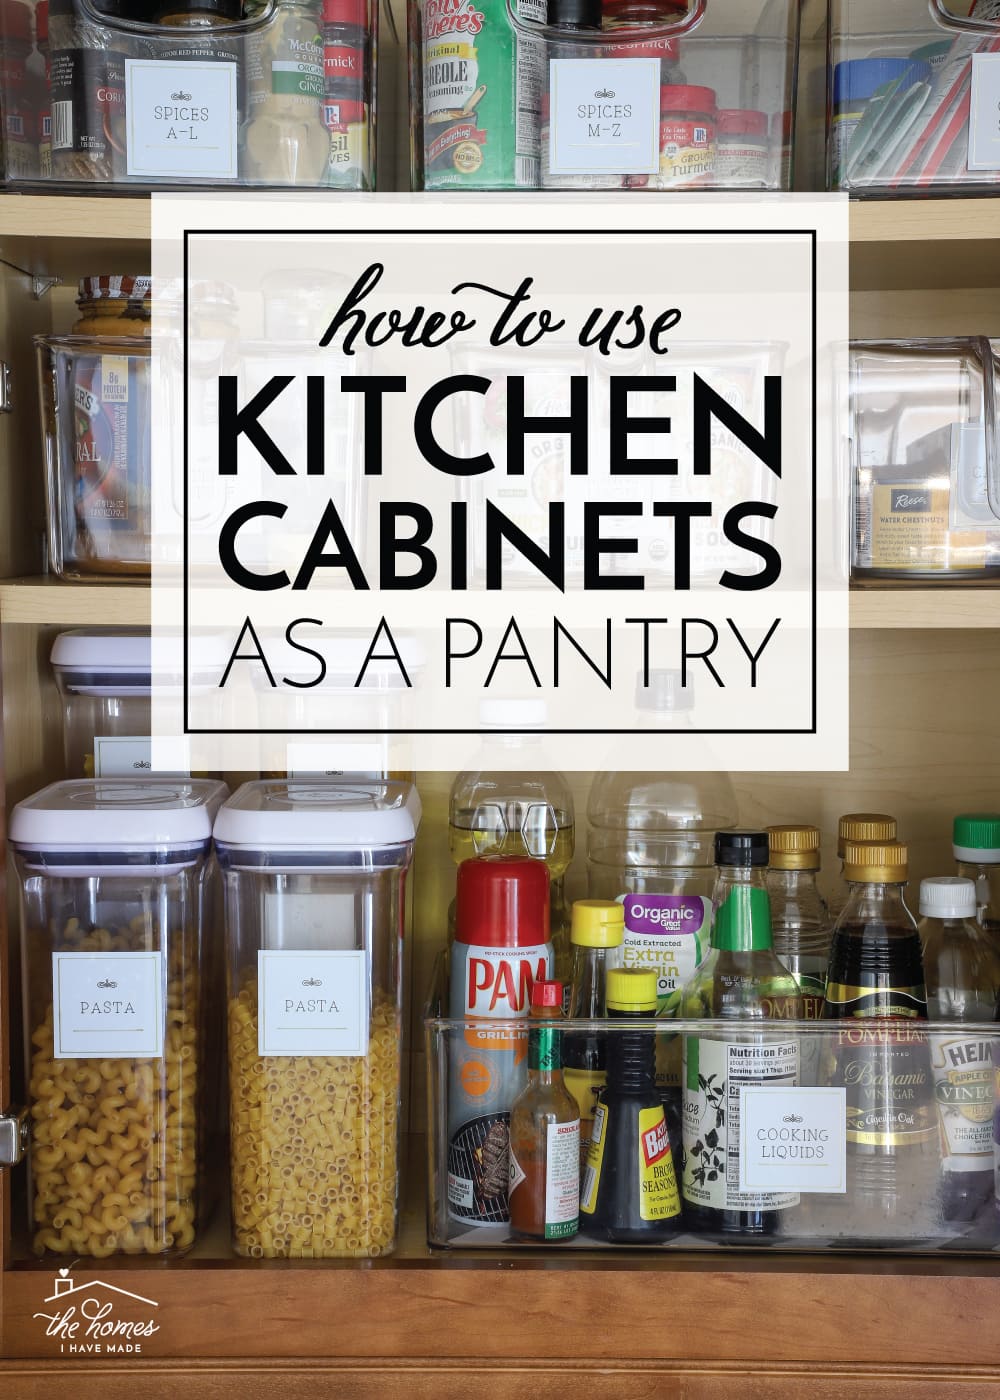
Credit: thehomesihavemade.com
Where To Find More Information
For more details on cabinet installation standards, you can visit the Wikipedia Cabinetry page.
Frequently Asked Questions
How Much Weight Can Stacked Wall Cabinets Hold?
Most wall cabinets are designed to hold 30-50 pounds per shelf, but this depends on the manufacturer and installation. Always check your cabinet’s specifications, and never overload shelves. Securing cabinets to studs is key for safety.
Can I Use Base Cabinets Instead Of Wall Cabinets?
Base cabinets are deeper (24 inches) and designed to sit on the floor. You can use them for the bottom section, but for a true pantry, wall cabinets are better because their shallow depth keeps everything easy to see and reach.
What If My Cabinets Are Not The Same Height?
You can still stack different-height cabinets, but the look will be less uniform. Use filler strips or trim to cover gaps and create a built-in appearance. Double-check measurements to avoid awkward shelf heights.
Can I Install Stacked Wall Cabinets On Plaster Walls?
Yes, but plaster is more brittle than drywall. Use a stud finder to locate studs, drill carefully, and use cabinet screws. If you can’t hit a stud, use heavy-duty wall anchors rated for cabinets.
How Do I Make My Pantry Look Built-in?
Use matching trim or molding to cover gaps at the sides and top. Paint the platform and seams to match the cabinets. Add crown molding for an elegant finish and use cabinet filler strips to close any spaces between cabinets and walls.
Stacking wall cabinets to make a pantry is a smart, affordable way to add organized storage to any home. With good planning and careful installation, you’ll have a pantry that looks great and makes your kitchen more functional for years to come.