
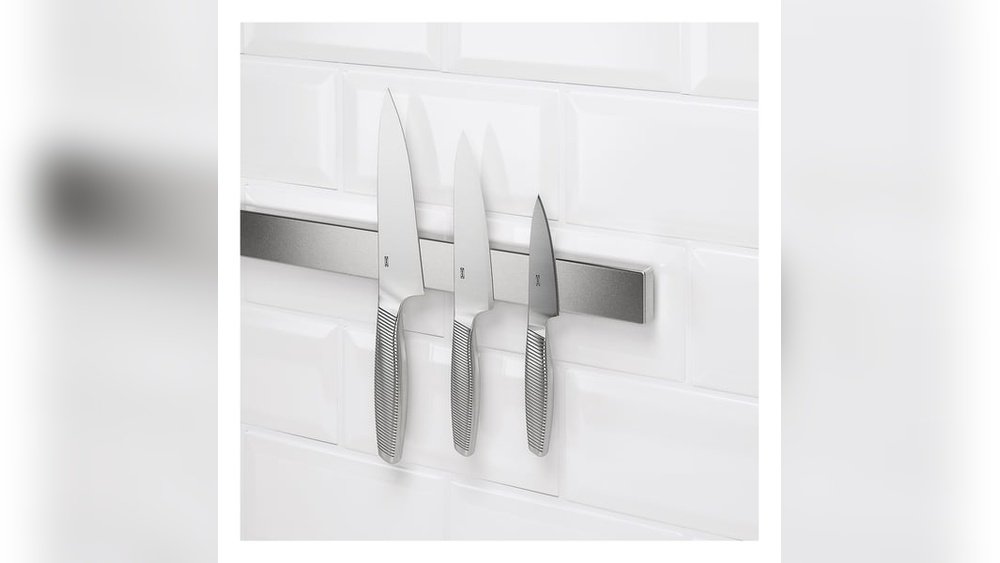
Removing an Ikea magnetic knife holder might look simple at first. You grab your screwdriver and think it will be quick. But if you have never done it before, you can run into surprises. The holder is strong, sometimes hidden screws keep it in place, and you want to avoid breaking your kitchen wall.
Many people damage their tiles, drywall, or even the holder itself during removal. This guide will help you do the job smoothly, step by step. You’ll learn about the different types of Ikea knife holders, what tools you really need, and how to avoid problems that most beginners face.
You’ll find detailed instructions for each step and advice for tricky situations—like if the holder is glued to tile or anchored in drywall. The process is different depending on your wall type, so you’ll get tips for wood, tile, and drywall.
At the end, you’ll also see solutions for patching holes and making your wall look new again. If you want your kitchen to stay neat, or plan to move your knife holder to a new spot, this article will help you succeed without stress.
Understanding Ikea Magnetic Knife Holders
Before you start, it’s important to know what you’re dealing with. Ikea offers several types of magnetic knife holders. The most popular is the KUNGSFORS series, but you might also have the FINTORP or an older model. All use strong magnets to hold knives safely, but the way they attach to the wall can differ.
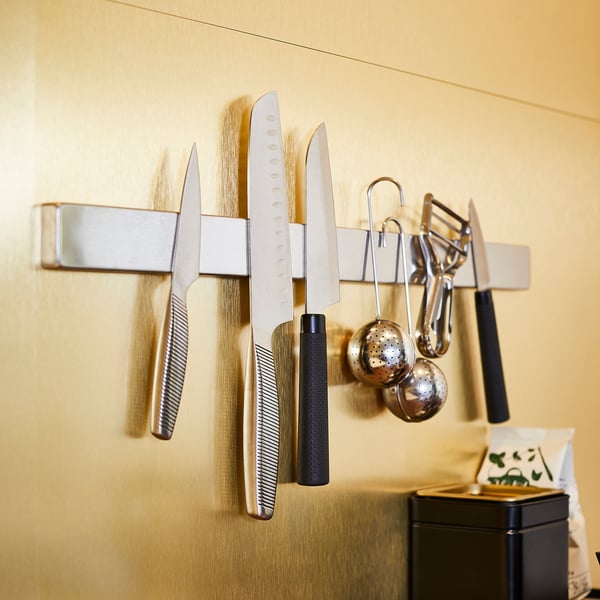
Most holders are about 15 to 22 inches long, made of stainless steel, and attach with screws through a back mounting plate. Some models have a hidden rail system, so you don’t see screws from the front. Others are mounted with visible screws.
Occasionally, people install them using heavy-duty adhesive, especially on tile. Understanding your model will help you remove it without damage.
Key Features Of Common Ikea Knife Holders
- Stainless steel body: Durable and easy to clean.
- Hidden or visible mounting: Some screws are hidden behind a cover.
- Magnetic strip: Runs the length of the holder.
- Mounting plate: Supports the holder on the wall.
Let’s compare the main Ikea models to help you identify yours:
| Model | Mounting Method | Length | Visible Screws | Special Notes |
|---|---|---|---|---|
| KUNGSFORS | Wall screws (hidden) | 22″ | No | Most common, modern kitchens |
| FINTORP | Wall screws (visible) | 15″ | Yes | Older model, black or steel |
| GRUNDTAL | Wall screws (hidden) | 15″ | No | Discontinued, still found in homes |
Knowing your model helps you pick the right tools and steps for removal.
Tools And Materials You’ll Need
Trying to remove a magnetic knife holder without the proper tools will likely damage your wall or the holder itself. Here’s a list of essential items that make the job much easier:
- Screwdriver (Phillips or flathead, depending on screw type)
- Drill (optional, for stubborn screws)
- Putty knife (for gently prying)
- Utility knife (to cut sealant or paint)
- Tape measure
- Stud finder (to check for wall studs)
- Painter’s tape (to protect the wall)
- Level (to check for reinstallation)
- Spackling paste (for patching holes)
- Sandpaper (for smoothing patched areas)
- Mild cleaner (to wipe the wall)
- Protective gloves (especially for tile or glass walls)
If you suspect the holder is glued, you may need a hairdryer or heat gun to soften the adhesive.
Wall Comparison: Tool Needs
Here’s a quick look at tools by wall type:
| Wall Type | Must-Have Tools | Special Considerations |
|---|---|---|
| Drywall | Screwdriver, putty knife, spackle | Easy to damage, patching needed |
| Tile | Utility knife, putty knife, gloves | Risk of chipping, remove slowly |
| Wood | Screwdriver, sandpaper | Holes can be filled easily |
Preparing For Safe Removal
Before starting, clear the area and protect your kitchen. This step is often skipped, but it’s one reason why beginners scratch their counters or floors.
- Remove all knives and objects from the holder. Store them safely out of the work area.
- Clean the holder and wall with a mild cleaner to remove grease. Sticky residue can make screws hard to turn.
- Lay down a towel or cardboard under the holder. This catches any falling screws or debris.
- Apply painter’s tape around the holder’s edges. This protects the wall surface during prying.
- Check for power outlets or switches near the holder. Some kitchens have wiring behind the backsplash.
- Use a stud finder to identify if the holder is mounted on a stud or just drywall anchors.
Step-by-step Guide To Removing Ikea Magnetic Knife Holder
Now you’re ready to get started. The process is different depending on your wall and holder model. Follow these steps for the most common situations.
1. Expose The Mounting Screws
Most Ikea holders use a hidden rail. To reach the screws:
- Look for a small notch or seam at the end of the knife holder.
- Slide or gently pry the metal cover off. Some models slide; others pop off with a putty knife. Do not force it—wiggle gently.
- If screws are visible from the front, you can skip this step.
Non-obvious tip: Some holders are mounted upside down, making the seam hard to find. If you see no seam, check both ends and even the bottom.
2. Unscrew The Holder From The Wall
- Use the correct screwdriver to loosen each screw. Hold the knife holder with your other hand to prevent it from falling.
- If a screw is stuck, tap lightly with the screwdriver handle to break any paint seal, or use a drill set to a low speed.
- Save the screws if you plan to reuse the holder.
Beginner mistake: Not supporting the holder when unscrewing the last screw can cause it to drop, potentially damaging your countertop or floor.
3. Remove The Mounting Plate Or Rail
- Some models have a separate mounting rail attached to the wall. After removing the main bar, you’ll see the rail.
- Unscrew the mounting plate (usually two or three screws).
- If anchors were used, pull the plate gently. If it doesn’t come off, check for hidden screws or adhesive.
4. Dealing With Adhesive Or Sealant
If you notice the holder does not come off after removing screws, it may be glued:
- Heat the area gently with a hairdryer for 1-2 minutes to soften adhesive.
- Slide a putty knife behind the holder and work slowly from one side to the other.
- Use a utility knife to score around the edges if caulk or sealant was used.
Example: Some installers add silicone around the edges to keep water out. Cutting this first avoids damaging the wall.
5. Removing Wall Anchors
If your holder was mounted on drywall with anchors:
- Unscrew the anchor if possible. Some anchors come out by turning counterclockwise.
- If stuck, push the anchor into the wall using the screwdriver tip, or gently pull with pliers.
- For tile walls, do not force anchors out. Instead, cut them flush and fill the holes.
6. Cleaning Up The Wall
- Remove any adhesive residue with mild cleaner or adhesive remover.
- Fill screw holes with spackling paste (for drywall) or wood filler (for wood).
- Sand the area lightly once dry.
- For tile, use color-matched caulk to fill holes.
- Wipe the wall to remove dust and debris.
Special Situations And Solutions
Every kitchen is different. Here’s how to handle less common problems:
If The Holder Is Mounted On Tile
Tile can chip easily. Move slowly.
- Cut any sealant with a sharp utility knife before prying.
- Heat adhesive with a hairdryer before trying to remove.
- Never use a metal tool directly on tile. Protect with painter’s tape or a thin plastic wedge.
- After removal, fill holes with waterproof caulk.
If The Holder Is Stuck Or Painted Over
Sometimes, paint or caulk glues the holder to the wall.
- Score the edge with a utility knife before prying.
- Use gentle, even pressure to avoid pulling off paint or drywall paper.
- If stuck, try working a thin wire or floss behind the holder to cut the bond.
If Screws Won’t Budge
- Spray a little WD-40 on the screw head and wait 5 minutes.
- Tap the handle of your screwdriver to help break the bond.
- Use a manual impact driver for very stubborn screws (rarely needed).
If You Want To Reuse The Holder
- Keep all screws and hardware in a labeled bag.
- Clean the holder with mild soap before reinstalling.
- Inspect for damage before mounting in a new location.
Patching And Repairing The Wall
After removing the holder, you might see holes, chipped paint, or even small cracks. Here’s how to make your wall look new again.
For Drywall
- Fill screw holes with spackling paste using your finger or a putty knife.
- Let it dry (usually 1-2 hours for small holes).
- Sand smooth with fine sandpaper.
- Touch up with paint that matches your wall.
For larger holes (bigger than a coin), use a drywall patch kit.
For Tile
- Clean the area with rubbing alcohol.
- Fill holes with color-matched caulk or grout.
- Smooth the surface with a damp finger.
- Let dry according to caulk instructions.
For Wood Walls
- Use wood filler for screw holes.
- Sand smooth once dry.
- Stain or paint to match the wood.
Pro tip: Save a small container of your wall paint for these repairs.

Credit: www.amazon.com
Preventing Damage During Removal
It’s easy to damage your wall if you rush. Here are expert tips to avoid common problems:
- Never force the holder if it does not move. Always check for hidden screws or adhesive.
- Protect tile with tape before prying.
- Support the holder with one hand while unscrewing.
- Use the right screwdriver size to avoid stripping screws.
- Work slowly when using a putty knife; wiggle gently instead of pushing hard.
- Check for wires if the holder is near outlets or switches.
Common Mistakes And How To Avoid Them
Many people make the same errors when removing a magnetic knife holder. Here are the most frequent mistakes—and how to avoid them:
- Trying to pry off before removing screws.
- Always check for mounting screws. Some are hidden under end caps.
- Using too much force on tile.
- Be gentle; chipped tile is expensive to repair.
- Not supporting the holder during removal.
- Hold with one hand so it doesn’t drop.
- Ignoring adhesive or caulk.
- Score around the edges before pulling.
- Skipping wall repairs.
- Fill and paint holes right away to prevent moisture damage.
Credit: www.ikea.com
When To Call A Professional
Most people can remove an Ikea magnetic knife holder with patience. But sometimes, it’s smarter to call an expert:
- If the holder is glued to expensive tile
- If you see electrical wiring nearby
- If the wall is already damaged or soft
- If you plan to install a new holder in the same spot and want a perfect finish
A handyman or contractor can do the job quickly and safely, especially if your kitchen uses delicate materials.
Moving And Reinstalling Your Knife Holder
If you want to reinstall the holder elsewhere, follow these best practices:
- Choose a new location away from sinks or stoves to avoid water or heat damage.
- Use a level to keep the holder straight.
- Mark holes carefully before drilling.
- Use new wall anchors if mounting on drywall.
- Clean the wall and holder before installing.
Reusing the same screws is fine if they are in good condition. For heavy-duty use, consider new anchors for a stronger hold.
Alternatives To Ikea Magnetic Knife Holders
After removal, you may want a different storage option for your knives. Here are a few alternatives:
- Magnetic knife blocks: Stand on the counter and use strong magnets.
- In-drawer knife trays: Safe and hidden, good for households with children.
- Traditional wall racks: Use slots instead of magnets.
- Magnetic strips from other brands: Some offer different lengths or finishes.
These options can suit different kitchen designs and safety needs.
Sustainability: Reusing Or Recycling Your Holder
Don’t just throw away your old Ikea knife holder. Here’s how to be eco-friendly:
- Reuse: Give it to a friend or neighbor.
- Upcycle: Use the magnet strip in your workshop for tools or screws.
- Recycle: Ikea stainless steel is recyclable; check your local center.
- Sell online: Many people look for gently used kitchen items.
Non-obvious insight: The magnets inside can be repurposed for creative DIY projects, such as tool organization or even magnetic spice jars.

Credit: www.reddit.com
Real-world Example: Removing A Kungsfors Holder From Tile
Let’s walk through a real example. Anna installed her KUNGSFORS magnetic holder on a white tile backsplash. She wanted to remove it without damaging the tiles.
- She removed all knives, then cleaned the holder with dish soap.
- Anna found the seam at the right end and gently pried off the cover with a plastic tool.
- She unscrewed the two mounting screws, holding the bar with her left hand.
- The holder wouldn’t move—it was stuck with clear silicone.
- Using a sharp utility knife, she scored around the holder edge.
- Anna heated the area for a minute with a hairdryer.
- She gently wiggled a putty knife behind the holder, moving from one side to the other.
- The holder popped off, leaving two small holes and a little caulk.
- She cleaned the tile with alcohol and filled the holes with white caulk.
- After drying, her backsplash looked as good as new.
Key takeaway: Patience and the right tools prevented expensive tile repairs.
Cost And Time Estimates
How long does it take to remove an Ikea magnetic knife holder? What will it cost?
- Time required: 20-40 minutes for most holders; up to 1 hour if glued or caulked.
- Cost: Most tools are basic and may already be in your home. Spackle, sandpaper, or caulk cost under $10 total.
If hiring a handyman, expect to pay $50–$100 for removal and wall repair.
Safety Precautions
Always put safety first:
- Wear gloves when working near sharp edges or tile.
- Keep children and pets away from the work area.
- Unplug appliances near your work zone.
- Use a step stool if the holder is mounted high—never stretch too far.
Frequently Asked Questions
How Do I Know If My Ikea Knife Holder Is Screwed Or Glued?
Most Ikea knife holders are screwed into the wall. If you see end caps or a seam, it likely hides screws. If you cannot find any screws after checking both ends and the bottom, or if the holder does not budge after gentle prying, it may be glued.
Sometimes, a combination of screws and adhesive is used—especially on tile.
Can I Remove The Knife Holder Without Damaging My Wall?
Yes, if you follow the steps carefully. Always check for screws first, use gentle heat for adhesive, and avoid using metal tools directly on tile. For drywall, expect to do some minor patching. With patience and the right tools, you can remove the holder with little or no damage.
What Should I Do If The Wall Anchors Are Stuck?
If anchors spin but don’t come out, gently push them into the wall with a screwdriver. For tile, do not force anchors out—cut them flush and cover with caulk. If the anchor is plastic, you can sometimes grab it with needle-nose pliers and pull slowly.
If unsure, it is better to leave them and fill the holes.
Can I Reuse My Ikea Magnetic Knife Holder In A New Location?
Yes, you can reuse the holder if it’s not bent or damaged. Save all screws and hardware. Clean the holder before reinstalling. Use new wall anchors if mounting on drywall, and make sure the new location is safe and easy to access.
Where Can I Find More Information On Ikea Kitchen Accessories?
You can find more details, product manuals, and installation guides on the official Ikea website. They offer downloadable PDFs and customer support for all kitchen accessories.
Removing an Ikea magnetic knife holder is a simple project with the right steps and tools. Take your time, follow these guidelines, and your kitchen wall will look as good as new—ready for your next project or a new storage solution.