If you love cooking but dread reaching into a messy corner cabinet, you’re not alone. The Lazy Susan—that spinning, circular shelf—can be a lifesaver for kitchen storage. But if you’ve ever crammed pots and pans inside, you know it can quickly become a frustrating jumble. Handles stick out, lids get lost, and items topple over each time you spin the tray. The good news? With the right strategy, you can turn your Lazy Susan into a smooth, organized space that saves you time and stress.
This guide will show you exactly how to organize a Lazy Susan for pots and pans—even if your kitchen is small or your cookware collection is large. You’ll learn practical methods, find out which products help most, and discover mistakes to avoid.
With just a little planning, you can make your Lazy Susan work like a charm.
Understanding The Lazy Susan Challenge
Lazy Susans are popular in corner cabinets because they make it easier to reach items at the back. But storing pots and pans on a spinning shelf isn’t as simple as tossing in boxes of pasta or spice jars. These items are bulky, heavy, and often have odd-shaped handles. Before you start, it’s important to understand a few unique challenges:
- Size and Weight: Pots and pans are heavier than most pantry items. Overloading a Lazy Susan can make it hard to spin and shorten the shelf’s life.
- Shape: Handles and lids take up extra room and can block the turntable.
- Access: Frequently used items should be easy to reach, while less-used items can go toward the back.
Many people try to solve these problems by stacking pots or cramming everything in. That creates new issues: things fall over, handles tangle, and you waste time digging for what you need.
Assessing Your Space And Inventory
Before you buy organizers or move things around, take a few minutes to study your space and what you want to store.
Measure Your Lazy Susan
Take a tape measure and check:
- Diameter of each shelf (most Lazy Susans are 24-32 inches across)
- Height between shelves (measure from the bottom to the next shelf above)
- Depth (how much space there is, front to back)
Write these numbers down. They will help you pick organizers or decide what fits best.
Sort Your Pots, Pans, And Lids
Pull out all the cookware you want to store. Group by type:
- Frying pans
- Saucepans
- Stock pots
- Lids
Check for duplicates, worn-out items, or things you rarely use. This is a great time to declutter. If you have three frying pans but only use one, consider giving away or storing the extras elsewhere.
Take Note Of Usage
Ask yourself:
- Which pots and pans do I use every day?
- Are there specialty items I only use for holidays?
- Do I need all lids handy, or just a few?
You want your Lazy Susan to hold the items you use most often. Everything else can go in harder-to-reach cabinets or storage.

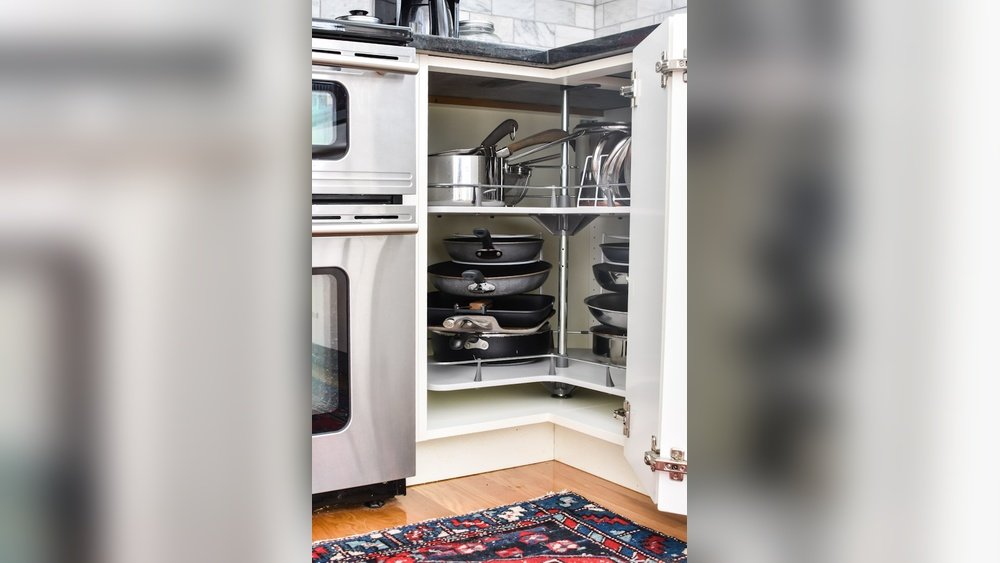
Credit: practicalmama.com
Planning The Layout: What Goes Where
A well-organized Lazy Susan groups items by type and frequency of use. Here’s a practical layout strategy:
- Heaviest Items on the Bottom: Place large stock pots or cast iron pans on the lowest shelf. Lazy Susans spin better when weight is distributed evenly.
- Daily Use Pans in Front: Keep your favorite frying pan or saucepan right at the edge for easy grabbing.
- Lids Together: Stack or use a rack for lids, so they don’t get lost or take up valuable space.
- Stack with Care: If you must stack, put smaller pans inside larger ones, but don’t stack more than two or three high—otherwise, you’ll be digging every time.
- Handles Facing Out: Arrange pots and pans with handles pointing outward or to the side, so they don’t block the spinning shelf.
Example Layout
Let’s say your Lazy Susan has two shelves. Here’s one way to arrange things:
- Bottom shelf: Large pots, Dutch ovens, or heavy pans, stacked if needed. Lids in a vertical rack at the side.
- Top shelf: Everyday frying pans, saucepans, and smaller items. Place the most-used pan right at the front edge, handle facing out.
This setup means you can grab what you need without moving everything else.
Choosing The Right Organizers
The right organizers make a huge difference. Not all products work for Lazy Susans—look for items designed to fit curved shelves and low heights.
Here are some top options:
1. Adjustable Pan Racks
These racks let you store pans vertically, saving space and preventing scratches. Look for models that adjust to fit different pan sizes.
2. Lid Holders
A vertical lid rack keeps lids upright, so you never have to dig. Some racks can be trimmed to fit the curved edge of a Lazy Susan.
3. Non-slip Liners
These keep pans from sliding around as you spin the shelf. Cut the liner to fit the circle.
4. Lazy Susan Bins
Curved bins fit perfectly on the shelf and create “zones” for different items.
5. Tension Rods
For a DIY solution, use small tension rods to create dividers. They keep stacks from toppling.
6. Stackable Baskets
If your Lazy Susan has tall shelves, baskets can hold lids or smaller pots.
Here’s a quick comparison of popular organizer types:
| Organizer Type | Best For | Drawbacks |
|---|---|---|
| Adjustable Pan Rack | Vertical storage, quick access | May not fit very large pans |
| Lid Rack | Keeping lids organized | Takes up space if not full |
| Non-Slip Liner | All cookware, prevents sliding | Must be cut to size |
| Curved Bin | Grouping small items | May reduce overall space |
Step-by-step: How To Organize A Lazy Susan For Pots And Pans
Now that you know your space and have the right tools, it’s time to get organized. Follow these steps for best results.
Step 1: Empty And Clean
Take everything off the Lazy Susan. Wipe the shelves with a damp cloth. This is the perfect time to clean away crumbs, dust, or spills.
Step 2: Add Non-slip Liners
Cut a non-slip liner to fit the shelf. This prevents pans from sliding or clanging when you spin the tray. Press it down firmly.
Step 3: Install Organizers
Set up your chosen racks, bins, or dividers. Place them before adding any pans, so you can see how they fit.
- Tip: If you’re using a pan rack, put it at the back edge to keep handles accessible in front.
- Tip: For curved bins, set them along the edge where the shelf is deepest.
Step 4: Arrange Large Pots And Heavy Pans
Put the biggest, heaviest items on the bottom shelf, close to the center. If you must stack, nest pots by size, but keep the stack low for easy grabbing.
Step 5: Place Frequently Used Items At The Front
Arrange your most-used pans on the top shelf, handles facing out. If you use the same frying pan every morning, put it front and center.
Step 6: Store Lids Upright
Put a lid rack in the corner or along the side. Stand lids vertically, sorted by size. If you don’t have a rack, try a small basket or bin.
Step 7: Fill In With Smaller Items
Use bins or baskets for small accessories like steamer inserts or pot holders. Keep these to the side so they don’t block access to pans.
Step 8: Test The Spin
Give the Lazy Susan a gentle spin. Make sure nothing tips over or blocks the turn. Adjust as needed until the shelf spins smoothly.
Step 9: Label If Helpful
If you share your kitchen with family, consider labeling bins or sections (“Lids,” “Frying Pans”) to keep things organized.
Step 10: Review And Adjust
Live with the setup for a week. If you find yourself struggling to reach something or if items keep falling, tweak your system. Organization is personal—find what works best for you.
Smart Tips For Maximum Space
Even a small Lazy Susan can hold a lot with the right tricks. Here’s how to get the most out of your space:
- Store vertically: Use racks to stand pans on their side instead of stacking.
- Limit stacking: Only nest two or three pans together.
- Use the “edge”: Place handles along the outer edge, not sticking into the center.
- Hang small items: If your Lazy Susan has a lip, use hooks for measuring cups or pot holders.
- Group by use: Keep all frying pans together, all lids together, etc.
One thing beginners often miss: the curved shape of Lazy Susans means not all organizers fit. Before buying, check the product shape against your shelf. Some racks are too square or too tall.
Common Mistakes To Avoid
When organizing a Lazy Susan for pots and pans, it’s easy to make mistakes that waste space or create new frustrations. Here’s what to watch out for:
Overloading The Shelves
Lazy Susans have a weight limit—usually 50-75 pounds per shelf. Too many heavy pans can damage the spinning mechanism or make it hard to turn.
Ignoring Handle Placement
If handles stick out into the walkway, they’ll block the shelf from spinning. Always turn handles to the outer edge or sideways.
Stacking Too High
Tall stacks of pans are unstable and make it hard to grab what you need. Limit stacks to two or three items.
Mixing Unrelated Items
Don’t use your pots-and-pans Lazy Susan for food, cleaning supplies, or random gadgets. Mixing items leads to clutter and confusion.
Forgetting About Lids
Loose lids easily get lost or take up valuable space. Always store them in a rack or bin.
Here’s a summary of what to avoid:
| Mistake | Why It’s a Problem | Better Solution |
|---|---|---|
| Too much weight | Damages shelf, hard to spin | Limit to daily-use pans |
| Handles blocking spin | Prevents easy turning | Turn handles outward |
| Tall stacks | Unstable, hard to access | Stack only 2-3 high |
| Mixing items | Creates clutter | Store only cookware |
The Best Organizers For Lazy Susans
Not every kitchen organizer works well in a Lazy Susan cabinet. Here are some products that get great reviews for this exact purpose:
- YouCopia StoreMore Adjustable Rack: Fits curved shelves and holds pans vertically.
- SimpleHouseware Lid Organizer Rack: Small enough for Lazy Susans, keeps lids upright.
- MDesign Lazy Susan Bins: Curved bins for grouping lids or small pots.
- Non-slip shelf liner: Essential for keeping heavy cookware in place.
Pro tip: Before you buy, check reviews and measure your shelf carefully. Not all “pan racks” fit Lazy Susans, so look for adjustable or curved options.
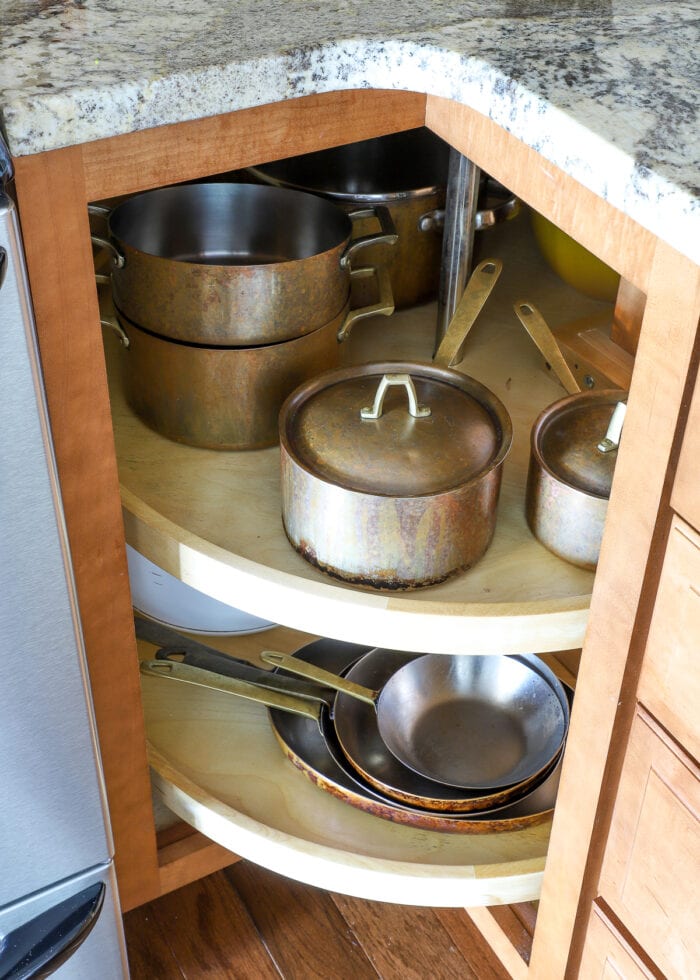
Credit: thehomesihavemade.com
Real-world Example: Small Kitchen, Big Results
Let’s look at how one home cook, Maria, transformed her kitchen:
Maria has a 30-inch Lazy Susan in a corner cabinet. She used to pile all her pans inside, but every time she spun the shelf, pans slid around and lids got stuck.
What she did:
- Measured her shelf space and bought a StoreMore adjustable rack for frying pans.
- Added a small lid rack for four glass lids.
- Placed a non-slip liner under everything.
- Put daily pans and pots on the top shelf, with handles outward.
- Moved rarely-used stock pots to a different cabinet.
After organizing, she could grab any pan in seconds, and nothing fell over. Her Lazy Susan spun smoothly, and she stopped dreading mealtime prep.
When To Rethink Lazy Susan Storage
A Lazy Susan is great for pots and pans if:
- You have a moderate number of items.
- You use the cookware often.
- Items fit without overloading the shelf.
But if you have a huge collection, or your pans are extra-large, you may need to store some items elsewhere. Heavy cast iron or oversized stock pots sometimes work better on a lower cabinet shelf or hanging rack.
Don’t force everything to fit—use the Lazy Susan for everyday items, and find other homes for specialty pieces.
Cleaning And Maintenance Tips
A well-organized Lazy Susan needs occasional care to keep working well:
- Clean spills quickly: Wipe up oil or crumbs right away to avoid stains.
- Check for wear: Inspect the spinning mechanism every few months. If the shelf feels loose, tighten the screws.
- Reorganize seasonally: As your cooking habits change, update what’s on your Lazy Susan.
Regular care keeps the shelf spinning smoothly and prevents clutter from building up.
Organizing For Different Kitchen Styles
Every kitchen is different. Here’s how to adjust your Lazy Susan setup for common layouts:
Small Kitchens
- Use every inch—vertical racks and bins are your friend.
- Limit to only the most-used items.
Large Kitchens
- Use the Lazy Susan for daily pans, and store specialty cookware elsewhere.
- Group by cooking type (e.g., all sauté pans together).
Open Shelving Or Glass Doors
- Choose organizers that look tidy, as everything is visible.
- Use matching bins for a cohesive look.
Rental Apartments
- Use non-permanent organizers like tension rods or removable bins.
- Avoid drilling or permanent racks.
Adapting your setup to your space ensures it stays practical and attractive.
Non-obvious Insights For Lazy Susan Success
Most beginners focus on fitting everything into the shelf. But two key points can make a huge difference:
1. Empty Space is Good: Leaving a little empty space makes spinning easier and prevents items from falling. Don’t aim to fill every inch—give pans “breathing room.”
2. Spin Direction Matters: Some Lazy Susans spin more easily one way. Place your most-used items on the side you naturally turn toward (clockwise or counterclockwise).
These subtle changes can save you frustration over time.
Environmental And Safety Considerations
Choosing the right organizers doesn’t just help you—it’s good for the environment and your home’s safety:
- Choose BPA-free plastics or metal racks for long-term durability.
- Avoid overloading: Too much weight can damage the shelf or cause it to break during use.
- Ventilation: Don’t store damp pans, as moisture can lead to mold or wood warping.
If you upgrade your organizers, donate old racks or bins to avoid waste.
Comparing Lazy Susan To Other Storage Options
Is a Lazy Susan the best spot for your pots and pans? Here’s how it compares to common alternatives:
| Storage Method | Pros | Cons |
|---|---|---|
| Lazy Susan | Easy access, uses corner space | Weight limits, odd shapes can be tricky |
| Drawer with dividers | Great visibility, stable | Needs more floor space |
| Wall-mounted rack | Frees up cabinets, shows off pans | Not for heavy items, dust collects |
| Cabinet shelf | Holds big pots, flexible | Hard to reach deep items |
For most kitchens, a Lazy Susan is ideal for daily-use pans and lids—especially if you organize it well.
Upgrading Your Lazy Susan: Diy Ideas
If your Lazy Susan is old or basic, a few upgrades can make it even more useful:
- Install LED strip lights for better visibility.
- Add extra shelf: Some Lazy Susans allow a third shelf for more storage.
- Replace with a heavy-duty model: If you cook a lot, consider upgrading to a steel turntable with higher weight limits.
For step-by-step DIY upgrades, check resources like This Old House.
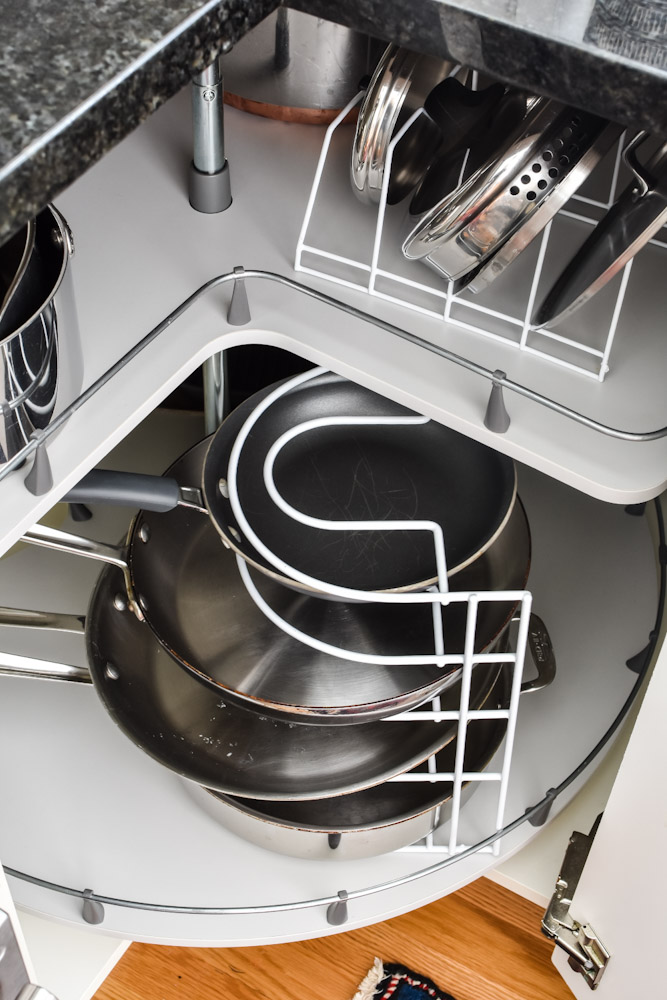
Credit: smallishhome.com
Staying Organized For The Long Term
The hardest part of organizing isn’t setting up—it’s keeping things tidy. Here’s how to stay on track:
- Put items back after each use.
- Remind family members where things go (labels can help).
- Do a quick tidy-up each week.
- Review your setup every few months and adjust as your cooking habits change.
Organization is an ongoing process, not a one-time task. But with a little effort, your Lazy Susan can stay neat and efficient for years.
Frequently Asked Questions
How Much Weight Can A Typical Lazy Susan Hold?
Most modern Lazy Susans hold 50 to 75 pounds per shelf. Check your cabinet’s manual or manufacturer’s website for exact details. Overloading can damage the spinning mechanism.
What Type Of Pans Are Best For Lazy Susan Storage?
Medium-sized frying pans and saucepans fit best. Oversized stock pots or heavy cast iron may be too big or heavy. If in doubt, test-fit before committing.
Can I Store Glass Lids Safely On A Lazy Susan?
Yes, but always use a lid rack or bin to keep them upright and prevent sliding. Never stack glass lids loose—they can break if they fall.
How Do I Stop Pots And Pans From Sliding When I Spin The Shelf?
A non-slip liner is the best solution. Cut the liner to fit your shelf exactly, and it will keep items stable during use.
Is It Okay To Mix Food And Cookware On The Same Lazy Susan?
It’s not recommended. Mixing food and cookware creates clutter and can lead to spills or cross-contamination. Use one Lazy Susan for cookware, and another for pantry items if possible.
Organizing a Lazy Susan for pots and pans takes a bit of planning and the right tools. But once you set it up, you’ll save time, avoid frustration, and enjoy a more efficient kitchen every day. A smart, organized Lazy Susan turns a messy corner into a cooking powerhouse—one easy spin at a time.