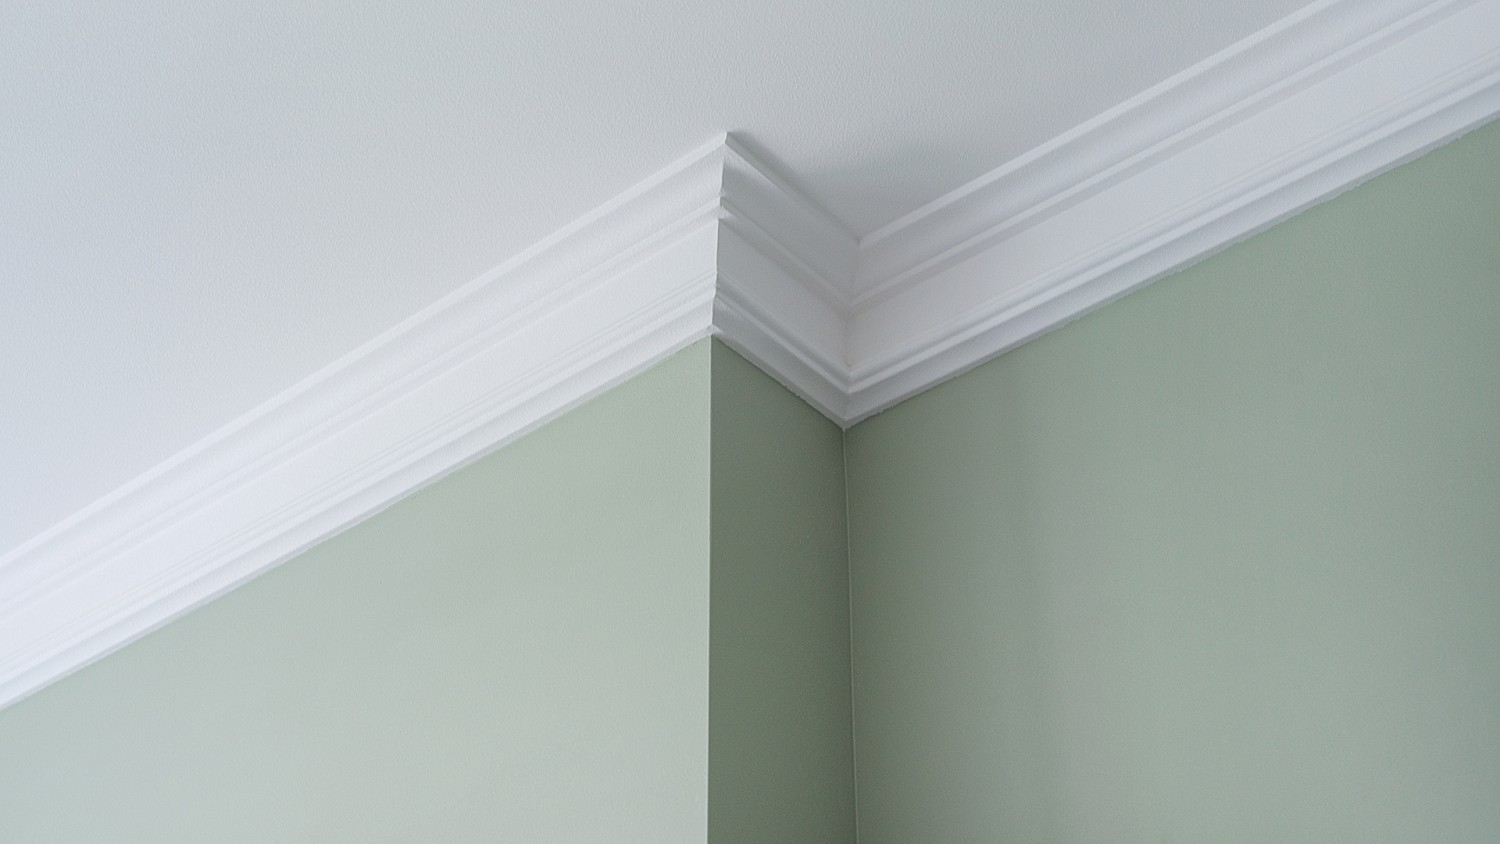
Crown molding adds a touch of elegance to any room, but over time, dust, grime, and even cobwebs can take away from its beauty. Many homeowners avoid cleaning crown molding because it seems hard to reach or easy to damage.
However, with the right approach and a little know-how, you can keep your crown molding looking fresh and sharp. Whether your molding is made of wood, plaster, or polyurethane, a proper cleaning routine can make a significant difference in the overall look of your home.
In this guide, you’ll discover practical steps, expert tips, and important safety advice to help you clean crown molding efficiently. Even if you’ve never cleaned molding before, you’ll learn what tools to use, how to avoid common mistakes, and how to handle even the trickiest spots.
Let’s get started so your rooms can shine from top to bottom.
Why Cleaning Crown Molding Matters
Crown molding is more than just a decorative border; it frames a room, draws the eye upward, and can even increase your home’s value. When clean, it reflects light and gives the room a crisp, cared-for look. But dust, smoke residue, and grease can settle on the surface, especially in kitchens or homes with ceiling fans.
Neglecting this area can lead to:
- Allergies: Dust buildup can trigger sneezing and breathing problems.
- Permanent stains: Grease and smoke can discolor molding if left too long.
- Dull appearance: Even beautiful paint or wood loses its impact when dirty.
Regular cleaning not only improves appearance but also helps protect your molding from long-term damage.
Understanding Crown Molding Materials
Before you start cleaning, it’s important to know what material you’re dealing with. Crown molding comes in several types, each with its own care needs.
| Material | Common Locations | Sensitivity to Moisture | Cleaning Needs |
|---|---|---|---|
| Wood | Living rooms, bedrooms | High | Gentle cleaning, avoid soaking |
| Plaster | Historic homes | Medium | No harsh scrubbing, avoid cracks |
| Polyurethane/Polystyrene | Modern homes, kitchens | Low | Wipeable, more durable |
| PVC | Bathrooms | Very low | Moisture-resistant, easy to clean |
Many people assume all crown molding can handle water, but real wood can warp if it gets too wet. Always check for paint, finish, or any visible damage before you begin cleaning.
Essential Tools And Supplies
Having the right tools makes the process faster and safer. Here’s what you’ll need for most cleaning jobs:
- Soft microfiber cloths: These trap dust and prevent scratches.
- Extendable duster or pole: For high or hard-to-reach areas.
- Vacuum cleaner with brush attachment: Useful for a first pass.
- Mild dish soap: For removing grease and grime.
- Bucket of warm water: For rinsing.
- Step ladder: Choose one that’s sturdy and tall enough for your ceiling height.
- Toothbrush or small brush: For detailed corners and crevices.
- Sponge or non-abrasive pad: For tougher spots.
- Old towel: To protect floors and catch drips.
- Rubber gloves: Protects your hands, especially if using cleaners.
It’s best to gather everything before you start. This prevents unnecessary trips up and down the ladder, which can be tiring and even dangerous.
Preparing The Room
Preparation is a step many people skip, but it can save you time and prevent accidents.
- Move furniture: Shift chairs and tables away from walls to give yourself space.
- Cover floors: Lay down an old towel or drop cloth to catch water and debris.
- Open windows: Good airflow helps dry surfaces and reduces cleaner fumes.
- Check lighting: Clean during daytime or use a bright lamp to see dust clearly.
If you have valuable decorations or electronics nearby, cover or move them. Cleaning can sometimes send dust flying.
Step-by-step Guide To Cleaning Crown Molding
Cleaning crown molding doesn’t have to be a struggle. Follow these steps for great results:
1. Dry Dusting
Start with dry cleaning to remove loose dust and cobwebs.
- Use an extendable duster or the vacuum’s brush attachment.
- Work from one corner to the other, moving slowly so dust doesn’t fall everywhere.
- For stubborn cobwebs, a microfiber cloth wrapped around a broom can help.
If you have allergies, wear a mask to avoid breathing in dust.
2. Wet Cleaning
After dusting, you’ll notice some spots or streaks left behind. These need a gentle wet clean.
- Mix a few drops of mild dish soap in a bucket of warm water.
- Dip a microfiber cloth or sponge, wring until just damp (not dripping).
- Wipe the molding in small sections, starting at one end.
- For corners or details, use a toothbrush dipped in soapy water.
Always rinse the cloth often and change the water if it gets dirty.
3. Rinsing
Soap residue can attract more dust. After washing, go over the molding with a clean, damp cloth.
- Wipe in the same direction as before.
- Don’t let water pool or drip onto walls or floors.
4. Drying
Dry the crown molding immediately to prevent water spots or damage.
- Use a clean, dry microfiber cloth.
- Pay extra attention to wood or painted molding.
Skipping this step can lead to streaks or even mold in humid rooms.
5. Spot Cleaning Tough Stains
Sometimes, you’ll find grease, smoke, or even crayon marks (if you have kids).
- Try a paste of baking soda and water on a cloth for small areas.
- For grease, a drop of vinegar in water can help (avoid on natural wood).
- Test any cleaner on a hidden spot first.
Avoid strong chemicals. They can strip paint or damage the finish.
Special Tips For Different Types Of Crown Molding
Not all molding should be cleaned the same way. Here’s how to handle different materials:
Wood Crown Molding
- Use as little water as possible.
- Dry quickly to prevent warping.
- Polish with a wood-safe product for extra shine.
Painted Crown Molding
- Avoid abrasive pads that can scratch the paint.
- Touch up chips with matching paint after cleaning.
Plaster Crown Molding
- Be gentle: Plaster can crack if scrubbed too hard.
- Use a barely damp cloth, and avoid soaking.
- For cracks or chips, consult a specialist before cleaning.
Polyurethane Or Pvc Crown Molding
- More tolerant of moisture and cleaners.
- Great for kitchens and bathrooms because they resist humidity.
- You can use a light vinegar solution for stubborn dirt.
Getting Into Corners And Detail Work
Ornate molding can collect dust in every groove. Here’s how to make sure every detail is clean:
- Use a toothbrush or soft paintbrush for grooves.
- Wrap a damp cloth around a butter knife for tight spots.
- For high corners, an extendable pole with a brush attachment works well.
Don’t rush this part. Careful cleaning here makes the molding stand out and look new.
How Often Should You Clean Crown Molding?
Many people only clean their crown molding during spring cleaning, but regular care keeps it looking best. Here’s a general guide:
| Room Type | Recommended Frequency | Reason |
|---|---|---|
| Living Room/Bedroom | Every 2-3 months | Dust and cobwebs build up slowly |
| Kitchen | Monthly | Grease and smoke residue |
| Bathroom | Every 1-2 months | Humidity can cause mold/mildew |
| Hallways | Every 2-3 months | General dust accumulation |
If you live in a dusty area or have pets, you may need to clean more often.
Safety Tips For Cleaning High Or Hard-to-reach Molding
Cleaning crown molding often means working at a height. Safety is crucial:
- Always use a stable, high-quality step ladder.
- Never reach too far—move the ladder instead.
- Wear shoes with good grip to prevent slipping.
- Ask someone to hold the ladder if possible, especially for very high ceilings.
Don’t be tempted to balance on furniture. Falls are a leading cause of home injuries.
Eco-friendly And Homemade Cleaning Solutions
You don’t need harsh chemicals to get good results. Many eco-friendly options work well:
- Baking soda: Mild abrasive, good for stains.
- White vinegar: Cuts grease (avoid on real wood).
- Castile soap: Plant-based, gentle cleaner.
- Lemon juice: Natural deodorizer (test on a small area first).
Mix these with water in a spray bottle for easy application. Using less chemical cleaner is better for your health and the environment.
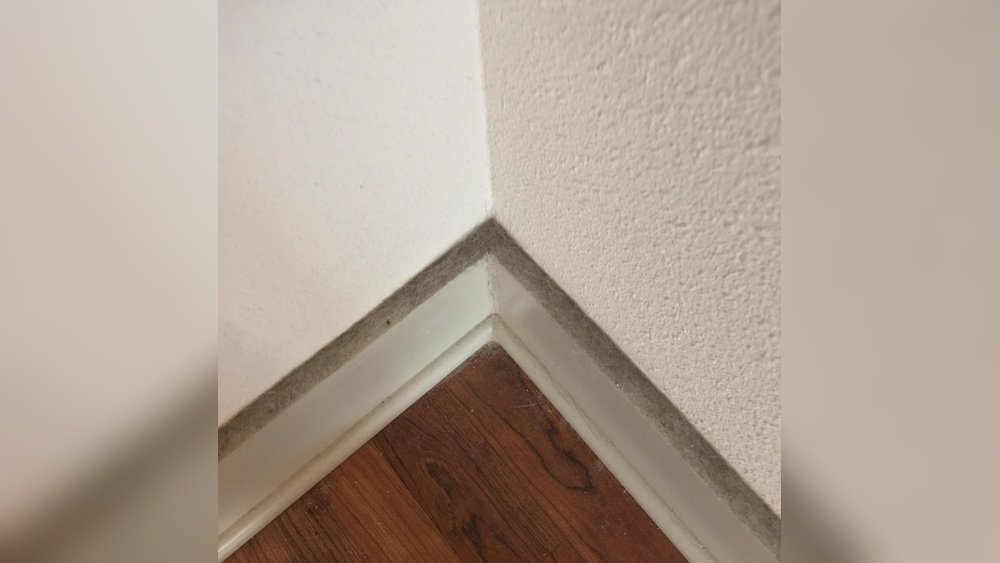
Dealing With Mold, Mildew, And Water Stains
Sometimes, especially in bathrooms or kitchens, you might find mold or water stains. Here’s how to handle them safely:
- Wear gloves and a mask to avoid breathing mold spores.
- Mix a solution of one part vinegar to two parts water.
- Spray lightly on the affected area and let sit for 10 minutes.
- Wipe clean with a damp cloth, then dry thoroughly.
For stubborn mold, you may need a commercial cleaner labeled safe for your molding material. If stains return quickly, check for leaks or poor ventilation.
Common Mistakes To Avoid
Cleaning crown molding can be simple, but there are some pitfalls to watch for:
- Using too much water: Especially risky for wood and plaster.
- Scrubbing with abrasive pads: Can scratch and dull the finish.
- Ignoring corners and grooves: Leaves dirt behind and spoils the look.
- Skipping drying: Water left behind can cause stains or warping.
- Not testing new cleaners: Always test a small hidden area first.
A surprising insight: Many people damage their molding by using kitchen degreasers, which are too harsh for painted or stained surfaces.
How To Clean Crown Molding In High-traffic Areas
Entryways, kitchens, and hallways often see more dirt and fingerprints. For these areas:
- Clean more frequently (every 1-2 months).
- Use a slightly stronger soap solution if needed.
- For scuff marks, a magic eraser can work—but always test first.
In busy homes, a quick dust every couple of weeks can keep things tidy between deeper cleans.
Cleaning Crown Molding With Tall Ceilings
High ceilings can make cleaning a real challenge. Here’s how to tackle them safely:
- Use an extendable pole with a microfiber duster for routine dusting.
- For deeper cleaning, consider a sturdy ladder and a helper.
- In extreme cases (over 12 feet), hiring a professional might be safest.
Never climb on unstable surfaces or stretch beyond your reach.

Credit: www.youtube.com
Maintaining Crown Molding After Cleaning
Once your molding is clean, regular care will keep it that way:
- Run a microfiber duster along the molding every few weeks.
- Check for new stains or cobwebs during routine cleaning.
- If you notice chips or cracks, address them quickly to prevent further damage.
A little ongoing effort means you won’t need to do deep cleaning as often.
Professional Cleaning Vs. Diy
Sometimes, hiring a professional makes sense, especially for large homes or very high molding.
Professional cleaning offers:
- Industrial tools for high or intricate molding
- Safe handling of delicate or historic materials
- Time savings
However, most homeowners can handle regular cleaning themselves with the right tools and safety measures. If you have expensive or historic molding, it’s worth asking for advice from a specialist.
For extra reading on home cleaning tips, see resources like Better Homes & Gardens.
Advanced Tips: Painting Or Touching Up Crown Molding
After cleaning, you might notice chips or faded paint. Here’s how to fix these minor issues:
- Clean the area thoroughly and let it dry.
- Lightly sand rough spots with fine-grit sandpaper.
- Use a matching paint or stain for touch-ups.
- For wood molding, apply a thin coat of wood polish or wax.
Touch-ups after cleaning help your molding look like new and protect it from future stains.
Troubleshooting: When Cleaning Isn’t Enough
Sometimes, cleaning won’t fix every problem. If you notice:
- Persistent stains: These may be water damage or smoke residue.
- Cracks or loose pieces: Structural problems may need a handyman or contractor.
- Mold that keeps returning: There could be a hidden leak or ventilation problem.
Don’t ignore these signs—addressing them early can save money and prevent bigger problems later.

Credit: www.reddit.com
Real-life Examples And Success Stories
Many people are surprised at how much cleaner molding transforms a room. For example, a homeowner in Atlanta noticed that after cleaning kitchen crown molding, the space looked brighter and the paint colors popped more. Another family with allergies found that regular dusting of molding, along with ceiling fans and vents, reduced sneezing and improved air quality.
One non-obvious insight: Ceiling fans often blow dust up to crown molding, especially in bedrooms. Cleaning both at the same time keeps your efforts from being undone.
Frequently Asked Questions
How Do I Clean Crown Molding Without A Ladder?
Use an extendable duster or a microfiber cloth attached to a broom or pole. For light dust, this is often enough. For deeper cleaning, wrap a damp cloth around the end of the pole and gently wipe. If your ceilings are very high or you need to remove stains, a ladder may still be necessary.
What Is The Safest Cleaner For Wood Crown Molding?
A mixture of mild dish soap and warm water is safest for most wood. Avoid strong chemicals, as they can strip the finish or cause discoloration. Always dry the wood quickly after cleaning to prevent warping or water spots.
Credit: www.today.com
Can I Use A Steam Cleaner On Crown Molding?
It’s best to avoid steam cleaners on crown molding. The high moisture and heat can damage wood, plaster, or even loosen paint. Stick to a damp cloth and gentle cleaning solutions for best results.
How Do I Remove Mold From Bathroom Crown Molding?
Spray a solution of one part vinegar to two parts water on the moldy area. Let it sit for 10 minutes, then wipe clean with a damp cloth. Dry the area well. If mold returns, check for leaks or poor bathroom ventilation.
How Do I Prevent Dust From Building Up On Crown Molding?
Regular dusting with a microfiber cloth helps a lot. You can also run an air purifier in the room to reduce airborne dust. Keeping ceiling fans clean and wiping nearby surfaces will help prevent dust from resettling on your molding.
Crown molding is one of those details that can make or break the look of a room. With the right approach, you can keep it looking flawless year-round. Whether you’re tackling a deep clean or just maintaining, these steps make the process manageable and safe.
Give your rooms the finishing touch they deserve—clean crown molding that truly shines.