Modifying a wall oven cabinet can be both a practical and creative project. Whether you’re upgrading your kitchen, replacing an old oven, or customizing for a new appliance, understanding how to adjust a wall oven cabinet safely and efficiently is essential.
Many homeowners and DIY enthusiasts struggle with this task, often underestimating the details involved. This guide breaks down the process, providing step-by-step instructions, real-life tips, and common pitfalls to avoid. With clear explanations and practical insights, you’ll gain the confidence to tackle your wall oven cabinet modification—without costly mistakes.
Understanding Wall Oven Cabinets
Before making any changes, it’s important to know what a wall oven cabinet is and how it differs from standard kitchen cabinets. Wall oven cabinets are specially built to house heavy appliances, provide heat resistance, and allow for proper ventilation. They must support the oven’s weight, align with electrical or gas connections, and match the kitchen’s design.
Key features of wall oven cabinets:
- Thicker sides for strength
- Heat-resistant materials or linings
- Cut-outs for wires, vents, and sometimes gas lines
- Face frames designed for oven trim kits
Many new ovens differ in size from older models. That’s why modifying the cabinet is often necessary when replacing an appliance or remodeling. Small errors can result in poor fit, unsafe operation, or a kitchen that doesn’t look right.
When Do You Need To Modify A Wall Oven Cabinet?
There are several situations where modification is required:
- Replacing with a different oven size: Newer ovens may be taller, wider, or deeper.
- Switching oven types: For example, changing from a single to a double oven, or from electric to gas.
- Improving accessibility: Lowering or raising the oven for easier reach.
- Upgrading the kitchen design: Integrating modern appliances or updating the cabinet style.
Non-obvious insight: Even if the new oven’s measurements look similar to the old one, manufacturers often change vent locations, mounting brackets, or trim kits, all of which may require cabinet adjustments.
Planning Your Modification
Proper planning makes the difference between a smooth project and a frustrating one. Here’s how to start:
Measure Everything Twice
Oven manufacturers publish cut-out dimensions—these are the space requirements for installation. Never rely on the overall size of the oven alone. Measure:
- Width, height, and depth of the cabinet’s opening
- Space behind the cabinet for electrical/gas connections
- Door swing clearance
- Distance from nearby drawers, doors, or walls
It’s wise to compare your current cabinet opening to the cut-out requirements of your new oven.
Gather The Right Tools
You’ll need basic carpentry tools, plus a few specialty items. Typical tools include:
- Tape measure (at least 25 feet)
- Level
- Drill/driver set
- Jigsaw or circular saw
- Pry bar
- Stud finder
- Clamps
- Safety gear (gloves, goggles, mask)
Practical tip: If you’re working alone, a cabinet jack or strong helper is invaluable for handling heavy oven units.
Check Building Codes And Safety Guidelines
Ovens involve electricity or gas. Always follow local codes for electrical connections, venting, and clearance. Some areas require a licensed electrician or plumber for final connections.
Not-so-obvious insight: Ignoring venting or clearance rules can void your oven’s warranty or create fire risks.
Removing The Old Oven And Preparing The Cabinet
Safety is the top priority. Wall ovens can weigh 100 to 300 pounds. Here’s how to safely remove an existing oven:
- Turn off power/gas: Flip the breaker for electric ovens, or shut off the gas supply for gas ovens.
- Remove oven doors (if possible): This makes the unit lighter and less awkward.
- Disconnect connections: Unplug electric cords or disconnect gas lines. Label wires for later.
- Unscrew mounting brackets: These are usually inside the oven door or at the trim.
- Carefully slide out the oven: Support the unit as you pull it out. Use a dolly or helper for heavy models.
Once the oven is out, inspect the cabinet:
- Check for damage, heat marks, or loose panels.
- Remove old mounting hardware and clean any debris.
- Confirm that the cabinet is level and secure.
Example: A warped or weakened base can’t support a new oven. Reinforce or repair as needed before moving forward.
Assessing And Marking For Modifications
With the old oven out, it’s time to adapt the cabinet for your new unit.
Comparing Old And New Cut-outs
Place the manufacturer’s template (often included with the oven) over the cabinet face. If you don’t have a template, carefully mark the cut-out size using measurements from the manual.
Tip: Mark both the final cut line and a “test fit” line slightly inside, so you can adjust before making large cuts.
Identify Obstacles
Look for:
- Structural braces or supports in the way
- Electrical boxes or plumbing that interfere with the new oven
- Cabinet face frames that need adjusting
It’s better to move utilities before cutting any wood.
Marking For Cuts
Use painter’s tape to outline the new cut-out on the cabinet face. This prevents splinters and helps you visualize the new opening.
Making The Cabinet Modifications
This is the part that requires patience and accuracy.
Adjusting The Opening Size
If your new oven is larger:
- Use a jigsaw or circular saw to carefully enlarge the opening.
- For small increases (1/4 inch or less), a multi-tool or hand saw may provide better control.
- If the new oven is smaller, you’ll need to fill gaps (see next section).
Cut slowly, checking your lines often. Always wear safety gear.
Reinforcing Cabinet Structure
When you remove material, you may weaken the cabinet. Add back strength using:
- 2×4 or 1×4 lumber screwed securely to the inside of the cabinet
- Metal angle brackets at corners
- Wood glue and screws for permanent support
Be sure the bottom panel can support the oven’s full weight (check the oven’s manual for weight specs).
Pro tip: Add extra reinforcement if you’re switching from a single to a double oven, as double ovens can weigh twice as much.
Adjusting Depth
Some modern ovens are deeper, especially with convection fans. If the back wall blocks installation:
- Cut a hole in the cabinet back panel (not a load-bearing wall!) To allow space for wiring or plugs.
- If you need more than 1 inch extra, consult a contractor. Removing too much can weaken the cabinet or violate code.
Addressing Ventilation
Most ovens vent from the front, but some require a vent channel or clearance at the top or bottom. Check for:
- Manufacturer-required vent holes
- Space above or below the oven for airflow
- No insulation or obstructions near vent paths
If in doubt, call the oven maker’s support line.

Credit: rtawoodcabinets.com
Filling Gaps And Customizing Trim
If your new oven is smaller, you’ll likely see gaps around the oven. Here’s how to handle it:
Using Filler Strips
- Purchase cabinet filler strips (wood or matching veneer) from a hardware store or cabinet supplier.
- Cut to fit the vertical or horizontal gaps.
- Attach using wood glue and finish nails.
- Paint or stain to match the cabinet.
Building A Custom Face Frame
For larger gaps or mismatched styles, build a new face frame:
- Measure the space and cut frame pieces (usually 1×2 or 1×3 wood).
- Assemble with pocket screws or wood glue.
- Attach to the cabinet front, then sand and finish.
Installing A Trim Kit
Most modern ovens offer trim kits to cover minor gaps. Follow the manufacturer’s instructions. Trim kits snap or screw in place after installation.
Example: If you replaced a 27-inch oven with a 30-inch model, you may need to remove and replace the surrounding trim for a seamless look.
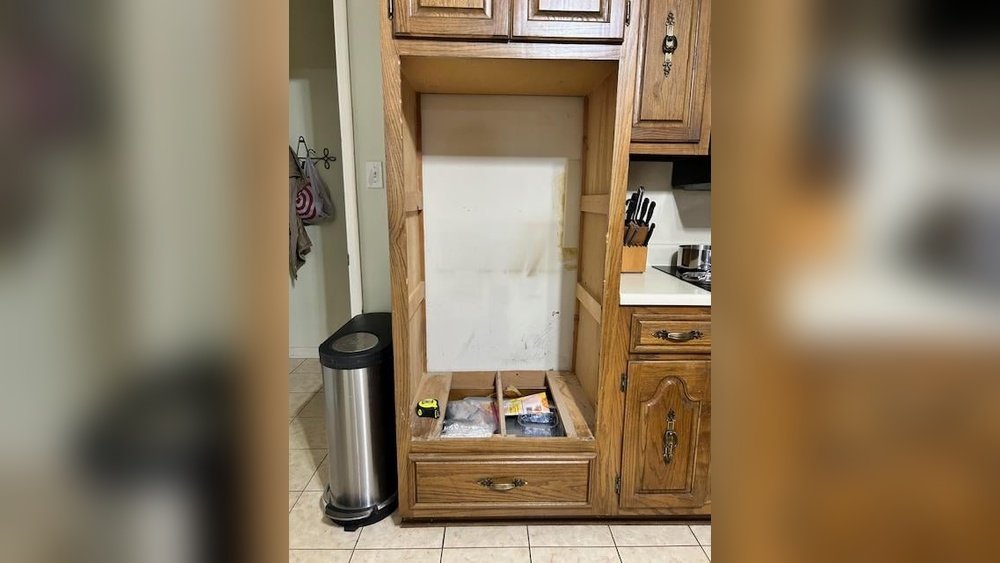
Repositioning Shelves And Drawers
When you change the oven size or location, you may need to adjust or remove adjacent shelves or drawers. Here’s what to consider:
- Some cabinets have a drawer below the oven. If the new oven is taller, remove the drawer and reinforce the bottom.
- For shorter ovens, add a shelf above or below to use the extra space.
- Reposition shelf supports and check that all hardware is secure.
Practical tip: Use the extra space for baking sheets or pans, but keep clearance for venting.

Credit: lifeofthelorenzens.blogspot.com
Handling Electrical And Gas Connections
Never modify electrical or gas lines unless you are licensed. Here’s what to check:
- The electrical outlet or hardwired connection must match the oven’s requirements (typically 240V for electric, or proper gas shutoff for gas).
- If the outlet is too high, low, or off-center, hire a pro to move it.
- Use only metallic conduit or code-approved wiring.
For gas ovens:
- Check for leaks using soapy water after connecting.
- Do not run flexible gas lines through sharp cabinet cuts.
Important: Many oven warranties require professional installation for electrical or gas connections. Check before you DIY.
Installing The New Oven
With the cabinet fully modified, you’re ready for installation. Here’s a step-by-step process:
- Slide the oven into place: Use a dolly or strong helpers. Avoid damaging the cabinet or flooring.
- Connect power or gas: Follow all safety rules. Double-check wiring and shutoffs.
- Secure mounting brackets: Use the provided screws and confirm the oven is level.
- Install trim kit: Snap or screw in the trim pieces to cover gaps.
- Test operation: Turn on the power or gas and verify the oven works correctly. Watch for error codes or leaks.
Pro tip: Run the oven empty for 20-30 minutes to burn off any factory residues before cooking food.
Safety And Compliance Checks
Before finishing, review these key points:
- Verify clearance around the oven matches the manual and local codes.
- Make sure all connections are tight, with no exposed wires or gas leaks.
- Test the oven’s door swing and controls for smooth operation.
If you’re unsure about any step, consult a licensed installer or your local building department.
Real-world Examples
Here are some common modification scenarios:
Example 1: Replacing A 27-inch Oven With A 30-inch Model
- The cabinet opening is too narrow.
- Solution: Cut 1.5 inches from each side, reinforce the sides with 1×4 lumber, and install a new face frame.
- Result: The new oven fits flush, with updated trim matching the kitchen.
Example 2: Upgrading To A Double Oven
- The cabinet base is not strong enough.
- Solution: Remove the old shelf, add 2×4 cross braces, and build a new support platform.
- Result: The double oven is stable and secure, with no sagging.
Example 3: Installing A Smaller Oven
- Gaps appear above and beside the oven.
- Solution: Custom stain-grade filler strips and a factory trim kit.
- Result: Seamless appearance, matching the rest of the cabinetry.

Credit: rtawoodcabinets.com
Cost Comparison: Diy Vs Professional Modification
A common question is whether to hire a pro or do it yourself. Here’s a side-by-side comparison:
| Task | DIY Cost | Professional Cost | Pros/Cons |
|---|---|---|---|
| Basic cabinet modification | $50-$200 (materials only) | $300-$600 | DIY saves money; pro ensures perfect fit |
| Electrical/gas line move | N/A (not recommended) | $150-$400 | Pro required for safety and code |
| Full installation (cabinet + oven) | $0 (your labor) | $500-$1,200 | DIY possible for skilled; pro is faster and insured |
Note: Prices are for guidance only and may vary by location and project complexity.
Common Mistakes And How To Avoid Them
Many first-time DIYers run into preventable issues. Watch out for:
- Poor measurements: Double-check both the opening and the oven’s cut-out size.
- Ignoring venting requirements: Overheating can damage cabinets and appliances.
- Weak supports: Failing to reinforce the cabinet leads to sagging or collapse.
- Rushing electrical/gas work: Always hire a professional for utility changes.
- Not matching finishes: Filler strips or trim that don’t match stand out.
Expert advice: Always keep leftover cabinet material for touch-ups or future repairs.
Materials And Sizing Reference Table
Here’s a quick reference for common wall oven and cabinet dimensions:
| Oven Size (Nominal) | Typical Cut-out (W x H x D) | Cabinet Min. Width | Support Needed |
|---|---|---|---|
| 24-inch | 22″ x 27″ x 23″ | 24″ | Standard |
| 27-inch | 25″ x 28.25″ x 24″ | 27″ | Reinforced |
| 30-inch | 28.5″ x 28.25″ x 24″ | 30″ | Heavy-duty |
| Double oven | 28.5″ x 50.25″ x 24″ | 30″ | Extra heavy-duty |
Always check your oven’s manual for exact requirements.
Tips For A Professional Finish
- Use cabinet touch-up markers to hide small scratches or nail holes.
- Sand all cut edges smooth before installing the oven.
- Mask off nearby cabinets and counters to prevent accidental damage.
- Vacuum all sawdust and debris before reconnecting power or gas.
Insider tip: Photograph your steps. If you sell your home, buyers or inspectors may want to see the quality of the modification.
When To Call A Professional
Some projects are best left to the experts. Call a pro if:
- The cabinet is part of a load-bearing wall.
- You need to reroute electrical or gas lines.
- Your cuts affect nearby cabinets or countertops.
- You’re unsure about safety codes.
Professional installers have the tools and experience to ensure a safe, code-compliant result. For more guidance, visit the official National Fire Protection Association.
Frequently Asked Questions
How Do I Know If My Wall Oven Is Too Heavy For My Cabinet?
Check your oven’s weight in the manual. Most wall oven cabinets can support up to 300 pounds, but older cabinets may need reinforcement. If the base or sides feel weak, add support before installing.
Can I Reduce The Cabinet Opening If My New Oven Is Smaller?
Yes, use filler strips or a custom face frame to close gaps. Secure them well and finish to match the cabinet. Trim kits are also available for a seamless look.
Do I Need A Professional To Move Electrical Or Gas Connections?
It’s strongly recommended. Incorrect wiring or gas lines are dangerous and may violate local codes. Many oven warranties require professional connection for safety.
What If My New Oven Doesn’t Fit Even After Modification?
First, re-check your measurements and the oven’s cut-out requirements. Some ovens need more depth or clearance than expected. If it still won’t fit, consult a cabinetmaker or installer for further options.
How Can I Make My Modified Cabinet Look As Good As New?
Use matching materials for fillers and trim. Sand, paint, or stain to blend with the existing cabinet. Cabinet touch-up kits help hide small flaws and nail holes.
Upgrading your kitchen by modifying a wall oven cabinet is a rewarding project—if you approach it with planning, precision, and safety. By following these steps and tips, you can achieve a professional result that lasts for years and enhances your home’s value.