When your microwave open button stops working, it can feel frustrating and inconvenient. You press the button, but the door stays closed. You push harder, but nothing happens. This simple problem can make heating food a daily struggle and sometimes even lead you to think about buying a new appliance. But before you spend money on repairs or a replacement, you should know that many microwave door button issues are fixable at home with some basic tools and a bit of patience.
This guide will show you clear, step-by-step instructions to diagnose and fix a microwave open button. You’ll learn why this problem happens, how to take your microwave apart safely, what to look for inside, and how to solve common issues.
Whether your button feels loose, stuck, or unresponsive, you’ll find practical solutions here. Along the way, you’ll discover a few tips that most beginners miss—like the importance of cleaning hidden parts and checking for spring tension. With the right knowledge, you can save time and money, avoid common mistakes, and restore your microwave’s convenience.
Understanding The Microwave Open Button Mechanism
Before you start fixing, it’s useful to know how the microwave open button works. When you press the button, it pushes a lever or releases a latch inside. This action moves a hook or catch that holds the microwave door closed. If any part of this system breaks, bends, or gets blocked, the button stops working as it should.
Microwave doors are designed for safety. The open button is part of a series of switches and catches that make sure the microwave can’t run if the door isn’t securely closed. That’s why it’s important to fix any open button problem carefully and correctly.
Main Parts Involved
- Open button: The part you press on the outside.
- Actuator/Lever: Connects the button to the door latch mechanism.
- Latch hook: Holds the door closed.
- Spring: Helps the latch or lever return to position.
- Door switches: Detect if the door is closed (these are safety devices).
Understanding these parts helps you diagnose where the problem might be.
Safety First: Preparing To Fix Your Microwave
Microwaves can hold dangerous high voltage even when unplugged. Before you open your microwave, always take safety precautions.
- Unplug the microwave. Never work on a plugged-in appliance.
- Wait 30 minutes after unplugging. This allows some internal parts (like the capacitor) to discharge.
- If possible, press the Start button after unplugging to help discharge any remaining electricity.
- Wear rubber-soled shoes and work on a dry surface.
- Keep metal tools away from the large capacitor inside (usually a silver cylinder). Do not touch wiring you don’t understand.
Most open button repairs do not require you to touch the microwave’s electronic components. But always put safety first.
Quick Fixes: Try These First
Sometimes, the problem is simple and does not need tools or parts.
- Clean around the button. Dirt, grease, and crumbs can block movement. Use a damp cloth to wipe the button and the area around it.
- Check for visible obstructions. Look for anything stuck in the door latch or around the button.
- Try gentle pressure. Sometimes, the button can realign if pressed at a slightly different angle.
If these steps don’t work, you may need to open the microwave’s outer casing.
Tools And Supplies Needed
You don’t need many special tools to repair the microwave open button, but having the right ones makes the job easier.
- Phillips screwdriver (most common)
- Flat-head screwdriver
- Needle-nose pliers
- Small brush or compressed air can
- Replacement parts (if needed; see later sections)
- Flashlight
- Safety gloves
Most microwaves use a few screws to hold the outer cover. Some may have security screws, so check your model.
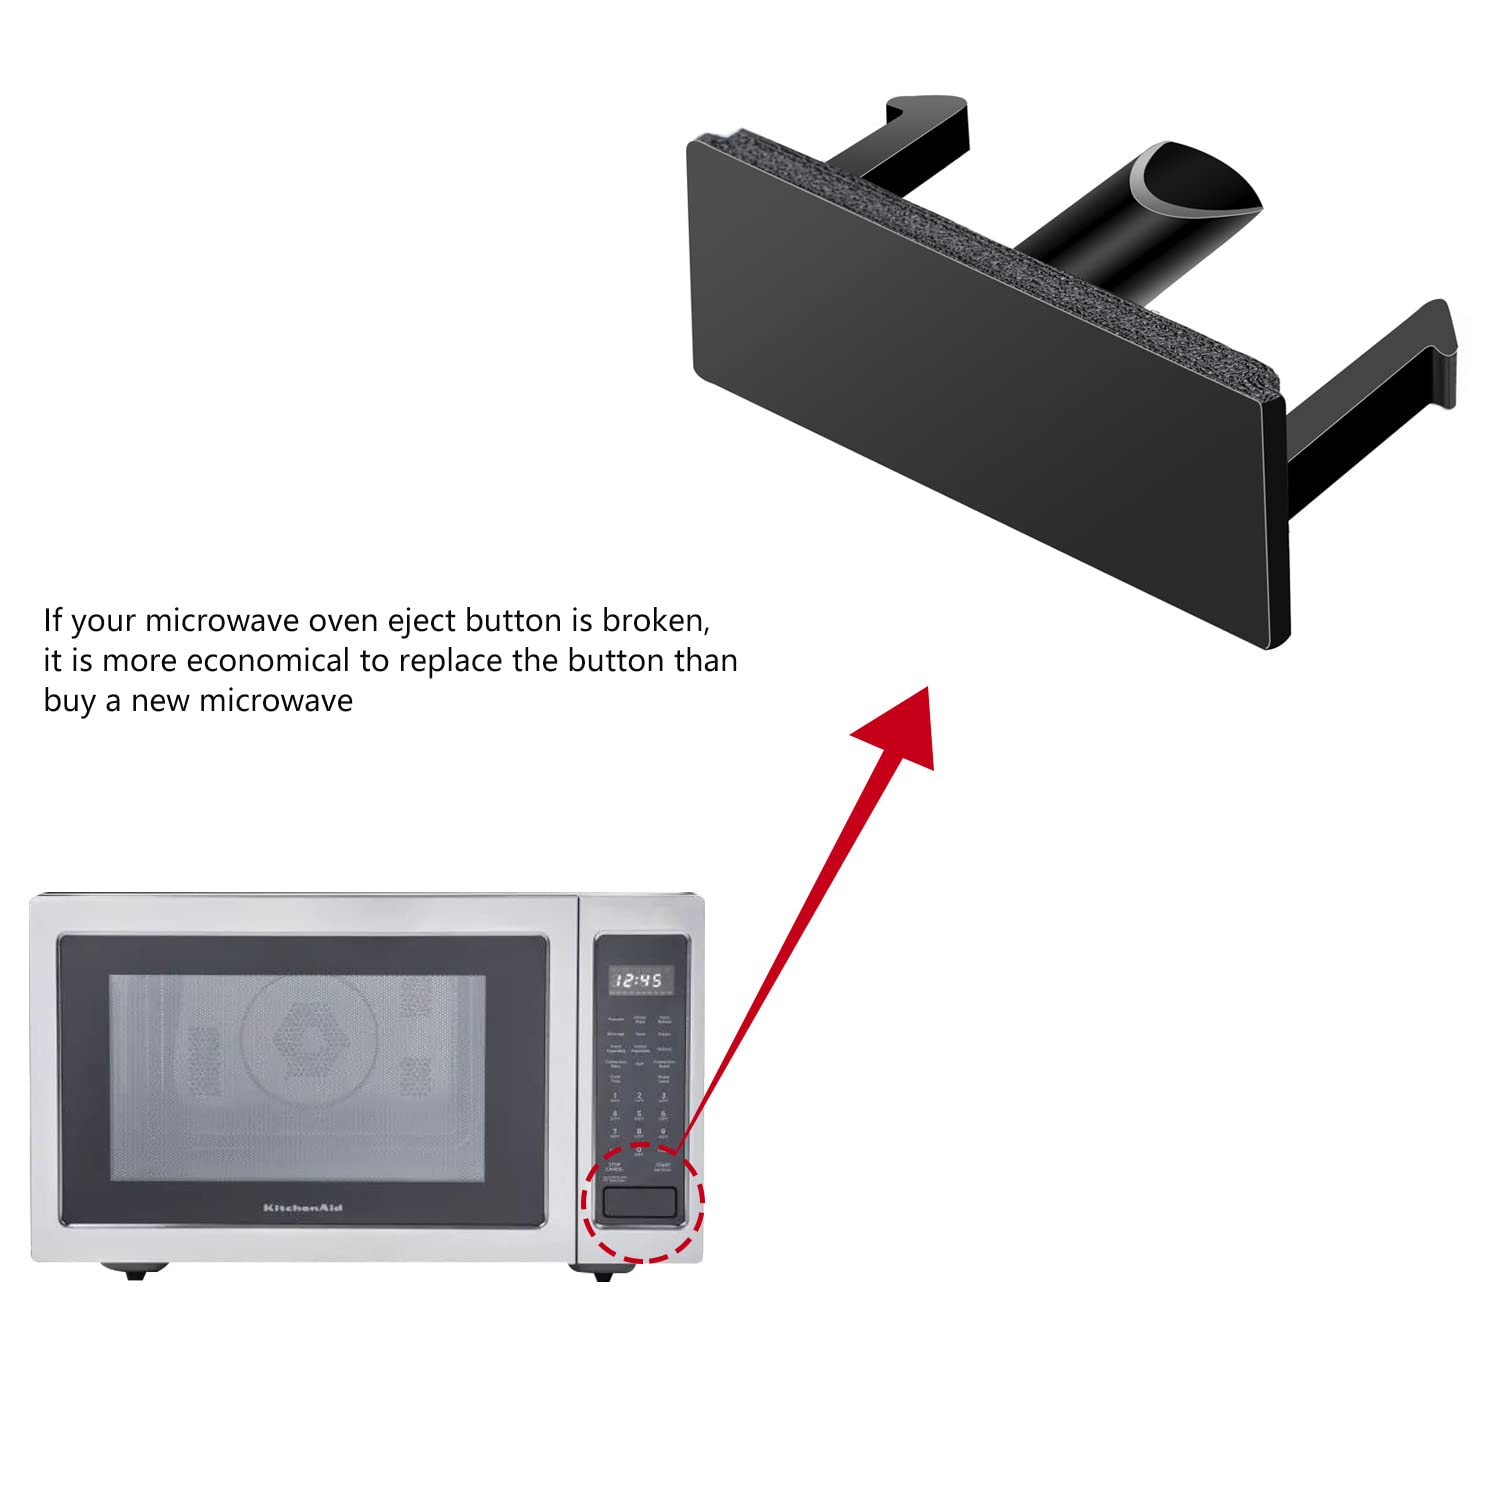
Credit: www.amazon.com
Opening The Microwave Safely
To access the open button mechanism, you’ll need to remove the microwave’s outer cover. Here’s how to do it:
- Unplug the microwave and wait as described above.
- Remove all items from inside the microwave.
- Place the microwave on a clean, flat surface.
- Find the screws holding the cover in place (often on the back and sides).
- Remove the screws and gently lift the cover off. Be careful—some covers fit tightly and may need a little wiggling.
Now you can see the internal latch and button assembly. Avoid touching wires or the capacitor.
Diagnosing The Open Button Problem
Once the cover is off, you can check what’s wrong. Here are the most common problems:
1. Broken Or Disconnected Actuator/lever
The actuator is a plastic or metal part that connects the button to the latch. If it’s broken or has come loose, the button won’t work.
How to check: Press the button and watch the actuator. If it doesn’t move or is out of place, it’s a likely problem.
2. Weak Or Missing Spring
A small spring returns the button or latch to its position. If the spring is missing, stretched, or broken, the button may feel loose or not pop back out.
How to check: Look for a spring near the latch or lever. Try moving it gently to see if it feels weak.
3. Damaged Door Latch Hook
The hook holds the door closed. If it’s bent or broken, the button may not release the door.
How to check: Inspect the hook and test the button. If the hook doesn’t move, it might need repair or replacement.
4. Stuck Or Jammed Button
Grease, food particles, or debris can cause the button to stick.
How to check: Press the button and feel for resistance. Inspect the button edges for dirt.
5. Misaligned Button Or Casing
If the microwave was dropped or bumped, the button or cover may be out of alignment.
How to check: Look for gaps or uneven edges around the button.

Credit: www.youtube.com
Step-by-step Repair: Fixing Common Microwave Open Button Issues
Let’s look at how to fix each of these problems in detail. Follow the steps that match your diagnosis.
Reconnecting Or Replacing A Broken Actuator/lever
- Remove the old actuator. If it’s broken, gently unclip or unscrew it.
- Find a replacement. Check your microwave’s model number and order the correct part online or from an appliance store.
- Install the new actuator. Clip or screw it into place, making sure it lines up with both the button and the latch.
- Test the movement by pressing the button before reassembling the cover.
If the actuator is just loose, sometimes you can reattach it with a small screw or snap it back into place.
Replacing Or Adjusting The Spring
- Remove the old spring with needle-nose pliers.
- Match the spring to a replacement. Bring the old one to a hardware store if possible.
- Attach the new spring to the same points as the old one.
- Test the button. It should pop back out and move smoothly.
If the spring is simply stretched, you can sometimes bend the ends to restore tension, but replacing is best.
Fixing A Damaged Door Latch Hook
- Remove the latch hook if it’s broken (usually snaps out or unscrews).
- Order a matching replacement based on your microwave’s brand and model.
- Install the new hook and check that it moves correctly when the button is pressed.
- Test with the door closed to make sure it latches and opens.
A bent hook can sometimes be straightened with pliers, but replace it if it looks cracked or weak.
Cleaning And Lubricating A Stuck Button
- Remove the button if possible (some pop out, others require the cover off).
- Clean all surfaces with a damp cloth and a little dish soap. Use a small brush for corners.
- Dry the button completely.
- Lubricate lightly (if allowed by your manual) with a food-safe spray on the button’s moving parts.
- Reinstall and test the button.
Never use strong oils or sprays that could get inside the microwave’s cooking chamber.
Realigning The Button Or Casing
- Check for bent metal or plastic around the button area.
- Gently bend back any misaligned parts with pliers.
- Re-seat the button so it lines up perfectly with the actuator.
- Test the button’s movement before replacing the cover.
Sometimes, simply loosening the cover screws and adjusting the fit will solve sticking or misalignment.
When To Replace Vs. Repair Parts
Some problems are best solved with new parts. Here’s a quick look at when you should replace instead of repair:
| Part | Repair | Replace | Notes |
|---|---|---|---|
| Actuator/Lever | Loose or slightly bent | Cracked or missing pieces | Replacement often affordable |
| Spring | Stretched (minor) | Broken or lost | Easy to replace |
| Door Latch Hook | Bent (minor) | Snapped or worn out | Check for matching part |
| Button | Dirty | Cracked or jammed inside | May need full assembly |
If you need a part, search for your microwave’s model number + the part name. Many parts are available online or through appliance repair shops.
Common Mistakes To Avoid
Even simple repairs can go wrong if you’re not careful. Here are mistakes to watch out for:
- Forcing parts into place. If something doesn’t fit, check for the correct part or alignment.
- Touching the capacitor or wiring. This can be dangerous. Stay focused on mechanical parts.
- Using the wrong lubricant. Only use food-safe lubricants if needed.
- Skipping safety steps. Always unplug and wait before opening your microwave.
- Losing small parts. Work over a tray or towel to catch screws and springs.
Testing Your Microwave After Repair
Once you’ve fixed the button, it’s important to test your microwave safely.
- Reattach the cover and secure all screws.
- Plug the microwave back in.
- Open and close the door several times, checking that the button works smoothly.
- Run the microwave for 10 seconds with a cup of water inside. Make sure it heats and stops when the door opens.
- Listen for any unusual sounds. If you hear grinding, stop and recheck your work.
If the door does not open or the microwave does not run, double-check that the latch, actuator, and button are installed correctly.
Preventing Future Problems
A bit of regular maintenance can keep your microwave open button working well for years.
- Wipe the button area weekly to prevent dirt buildup.
- Open and close gently—don’t slam the door or jab the button.
- Check for loose parts if the button feels different.
- Avoid overfilling the microwave, which can cause spills and block the mechanism.
With good care, most microwave buttons last many years.
What If The Problem Persists?
If you’ve tried all these steps and the button still does not work, here are a few possibilities:
- Internal damage: If the internal frame is cracked or warped, a professional may need to repair or replace it.
- Broken door switches: Sometimes, the problem is with the internal switches, not the button. These are more complex to replace.
- Rare models: Some microwaves use unique latch designs. Check your manual or manufacturer’s website for specific instructions.
In these cases, contact a local appliance repair service. If your microwave is older or parts are expensive, consider if replacement is a better choice.
Cost Comparison: Diy Vs. Professional Repair
Let’s compare the cost of fixing a microwave open button yourself versus hiring a repair service.
| Repair Option | Average Cost | Time Needed | Notes |
|---|---|---|---|
| DIY (with new parts) | $10 – $35 | 30–60 minutes | Parts are usually inexpensive |
| Professional repair | $60 – $120 | 1–2 hours | Includes labor and parts |
| New microwave | $70 – $350+ | Immediate | Depending on features/brand |
DIY is usually the most cost-effective, especially if your microwave is only a few years old.
Non-obvious Insights For Beginners
Many people focus only on the button, missing these important details:
- Clean inside the button housing. Food particles and grease can hide in places you can’t see. Use a brush or compressed air to clean deep inside.
- Check spring tension. If the button pops out too slowly or feels mushy, the spring might be weak. Replacing the spring often restores the “like new” feel.
- Order extra parts. Springs and actuators are cheap. Having a spare can save time in the future.
- Document your disassembly. Take photos with your phone as you work. This helps you remember how to put everything back.
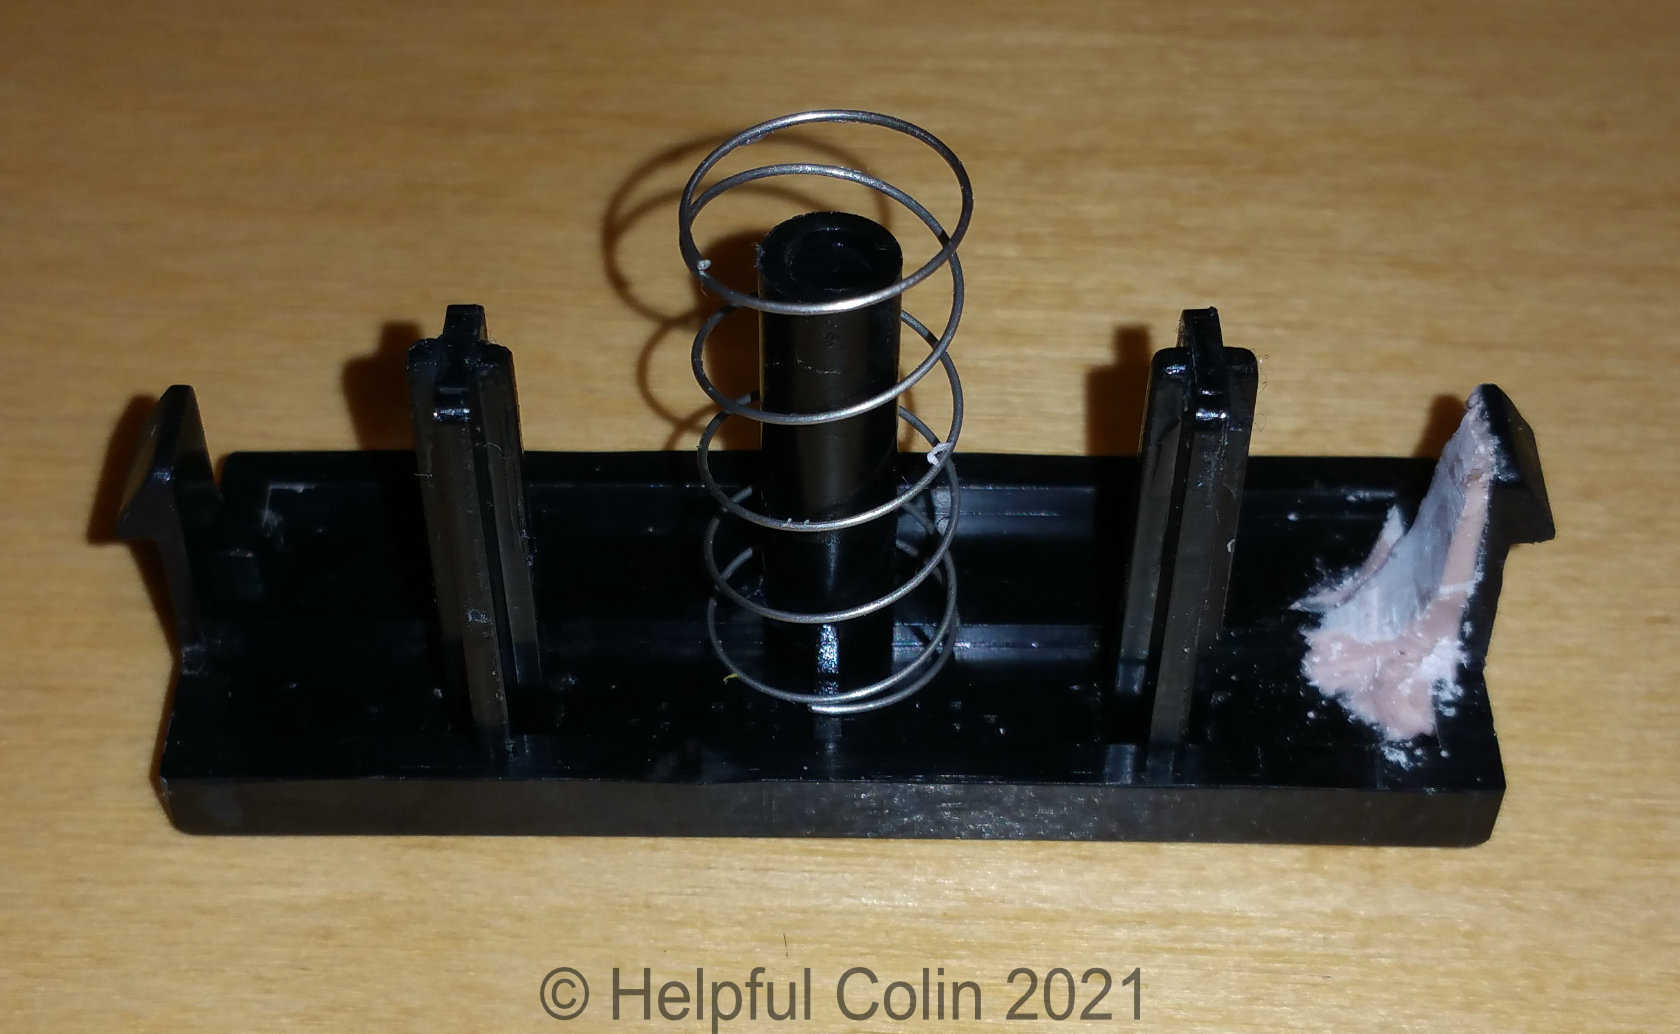
Credit: helpfulcolin.com
When To Call A Professional
While most open button problems are safe for DIY repair, call a professional if:
- You’re not comfortable opening appliances.
- The problem involves wiring or door switches.
- The microwave has a burning smell or visible damage.
- Your microwave is under warranty (DIY may void it).
A professional repair may cost more, but safety comes first.
Example: Repairing A Popular Microwave Brand
Let’s walk through a real-world example using a common Panasonic microwave:
- The open button feels stuck and won’t pop out.
- Unplug, wait 30 minutes, and remove the cover.
- Find that the actuator lever has come loose from its mount.
- Snap the lever back into place. Check the spring; it’s stretched, so replace it with a $3 part from a hardware store.
- Clean around the button and latch with a brush.
- Reassemble, test, and the button works smoothly again.
This whole process takes about 45 minutes and costs less than $5. Most other brands use similar mechanisms.
Environmental Consideration: Repair Vs. Replace
Repairing your microwave is better for the environment. Every year, millions of appliances go to landfills when simple repairs could give them years of extra use. By fixing your microwave open button, you reduce waste, save energy, and avoid unnecessary spending.
For more on the environmental impact of e-waste, visit the US EPA’s e-waste page.
Frequently Asked Questions
Why Does My Microwave Open Button Get Stuck Often?
Frequent sticking is usually caused by dirt, grease, or food particles building up inside the button housing. Sometimes, a weak spring or worn actuator can also make the button stick. Regular cleaning and checking the internal mechanism can prevent this issue.
Is It Safe To Open My Microwave For This Repair?
Yes, as long as you unplug the microwave and wait at least 30 minutes before opening. Avoid touching electrical parts, especially the capacitor. Focus on the mechanical button and latch area. If you feel unsure, call a professional.
How Do I Find The Right Replacement Parts For My Microwave?
Look for your microwave’s brand and model number, usually found on a sticker inside the door or on the back. Search online for “[model number] + open button” or “[model number] + latch.” Appliance parts stores can also help you match parts.
Can I Use Oil To Lubricate The Open Button?
Only use a food-safe lubricant (like silicone spray made for kitchen appliances), and use it sparingly. Never use cooking oil or non-food-safe sprays, as these can break down and attract more dirt or contaminate food.
What If My Microwave Still Doesn’t Work After Fixing The Button?
If the door won’t open or the microwave won’t run after repair, double-check your assembly. The actuator, latch, and button must all line up properly. If everything looks correct but the problem remains, the door switches may be faulty, or there could be internal frame damage. At this point, professional repair is recommended.
Getting your microwave open button working again isn’t just about convenience—it’s about making your kitchen work smoothly. With patience and the steps above, you’ll likely solve the problem quickly and confidently.