Adding trim to kitchen cabinets is one of the most effective ways to upgrade your kitchen without a full remodel. Trim can transform plain cabinets into custom-looking pieces, add architectural interest, and even help hide flaws or gaps. Whether you want a classic crown molding look or a sleek, modern finish, learning how to add trim to kitchen cabinets opens up a world of possibilities for your home.
Many people assume cabinet trim is a job only for professionals. But with the right tools, careful planning, and some patience, homeowners can achieve stunning results. This guide will walk you through everything you need to know about adding trim to kitchen cabinets, from choosing the right materials to installation tips, painting, and even troubleshooting.
You’ll find real-world examples, practical advice, and solutions to common problems—so you can approach your project with confidence.
Understanding Cabinet Trim
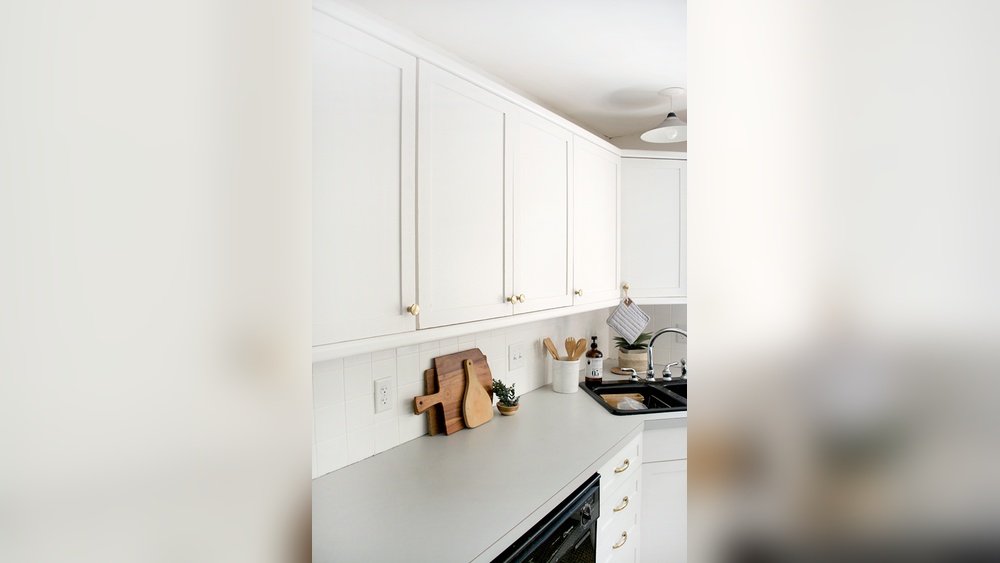
Before you start, it’s important to understand what cabinet trim is and why it makes such a difference in a kitchen. Trim refers to the decorative wood or composite pieces that are attached to the top, bottom, or face of cabinets. The most popular types are crown molding (top), light rail molding (bottom of upper cabinets), and applied molding (added to doors or face frames).
Trim serves both style and function. It can:
- Cover gaps between cabinets and the ceiling or walls
- Hide under-cabinet lighting
- Add shadow lines and depth for a more upscale look
- Unify mismatched cabinets or update outdated styles
- Protect cabinet edges from wear
Types Of Cabinet Trim
Here’s a quick overview of the most common types:
- Crown Molding: Sits at the top of wall cabinets, creating a finished, elegant look and bridging the gap to the ceiling.
- Light Rail Molding: Installed at the bottom of wall cabinets, often to hide lighting or give a thicker edge.
- Base Molding: Runs along the bottom edge of base cabinets, covering gaps and providing a custom-built appearance.
- Scribe Molding: Thin strips used to cover tiny gaps between cabinets and walls.
- Applied Molding: Decorative pieces attached to cabinet doors or frames, such as beaded, rope, or shaker-style moldings.
Different trims suit different kitchen styles. For example, crown molding is popular in traditional kitchens, while flat, minimal trims work well in modern spaces.
Planning Your Cabinet Trim Upgrade
Good planning is half the battle in any home improvement project. Rushing in without measuring or considering the look you want can lead to frustration and wasted materials.
Measuring And Sketching
Start by measuring your cabinets. Write down:
- The length of each cabinet run (top, bottom, sides as needed)
- Ceiling height and any obstacles (vents, lights, pipes)
- The distance between cabinet tops and ceilings (for crown molding)
Sketch your kitchen, noting where you want each type of trim. This helps you visualize the final look and prevents mistakes.
Choosing Trim Profiles
Trim comes in many profiles (shapes and sizes). Consider:
- Style of your kitchen: Ornate for classic, simple for modern
- Cabinet height: Tall cabinets can handle wider moldings
- Ceiling height: Small crown moldings for low ceilings, larger for high
Visit a home improvement store or browse catalogs to compare profiles. Hold sample pieces up to your cabinets to see what fits best.
Calculating Material Needs
Always buy at least 10% more trim than your measurements indicate. This covers mistakes and waste from cutting angles. For example, if your cabinets need 40 feet of crown molding, buy at least 44 feet.
Selecting Materials
Trim is usually made from:
- Solid wood (pine, oak, maple): Paintable or stainable, durable but can warp
- MDF (medium-density fiberboard): Smooth, paint-ready, less expensive, but not as moisture-resistant
- PVC or polystyrene: Lightweight, moisture-resistant, ideal for kitchens with high humidity
Choose materials that match your budget and kitchen conditions. For most kitchens, paint-grade MDF is a popular, cost-effective choice.
Tools And Supplies You’ll Need
Having the right tools makes installation smoother and safer. Here’s what you’ll need:
- Measuring tape and pencil
- Miter saw (for precise angle cuts)
- Coping saw (for inside corners, especially crown molding)
- Nail gun (18-gauge brad nailer is common) or hammer and finish nails
- Level and/or laser level
- Wood glue (for added hold)
- Caulk (paintable, for filling gaps)
- Wood filler (for nail holes)
- Sandpaper (120-180 grit)
- Primer and paint (or stain, if staining)
- Safety glasses and hearing protection
Optional but helpful: a stud finder (for secure nailing into walls), clamps, and a work table.
Preparing Cabinets For Trim
Before adding trim, cabinets need to be clean and secure. Dirt, grease, or loose cabinets make for poor results.
- Clean all cabinet surfaces with a degreaser or mild soap. Focus on areas where trim will be attached.
- Check for loose cabinets. Tighten any screws or mounting hardware. Trim can crack or shift if the cabinets move.
- Remove doors and drawers if adding applied molding or painting afterward.
- Mark stud locations on the wall if attaching large crown moldings. Secure trim into studs whenever possible.
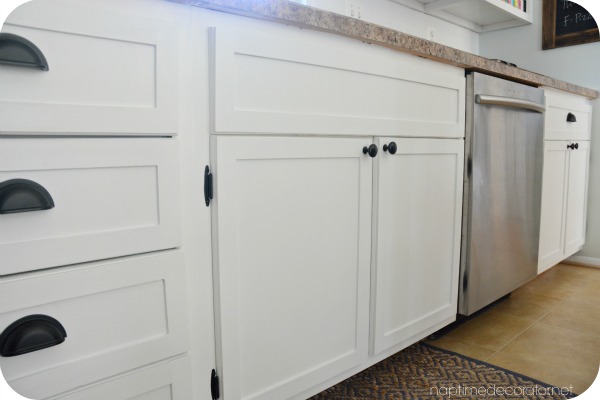
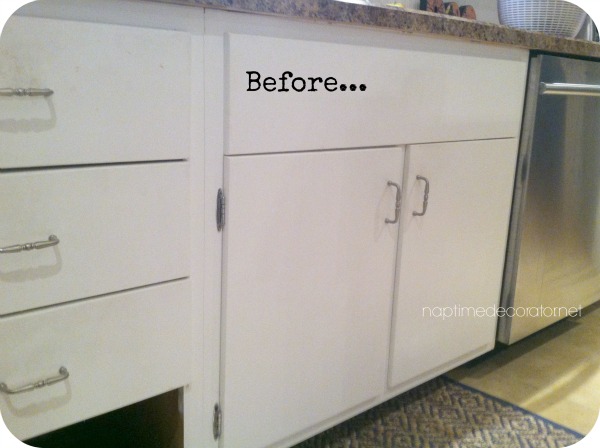
Credit: www.naptimedecorator.net
Cutting And Fitting Trim Pieces
Cutting trim, especially at angles, is the most technical part of the process. Take your time to ensure a professional look.
Measuring And Marking
- Measure each section twice before cutting.
- Mark the back side of trim pieces, using a pencil for clarity.
- For corners, note if you need inside or outside miter cuts.
Cutting Angles
Most kitchen trim involves 45-degree miter cuts for outside corners. For inside corners (especially crown molding), professionals often use coping for a perfect fit. Coping means cutting along the profile of the molding so one piece fits over the other.
Example: Cutting Crown Molding
Crown molding sits at an angle between the ceiling and cabinet. This makes cuts a bit tricky. Use a miter saw, set at the correct angle (usually 45 degrees), and always keep the molding in the same orientation on the saw.
Dry Fitting
Before attaching, dry fit each piece to the cabinet. Hold it in place to check for tight corners and accurate lengths. Sand or trim as needed for a snug fit.
Attaching Trim To Cabinets
Now it’s time to secure the trim to your cabinets. The process varies a bit depending on the trim type, but the basics are similar.
Positioning The Trim
- Use a level to ensure trim is straight, especially on uneven ceilings or walls.
- For crown molding, use a temporary support block or a helper to hold long pieces in place.
Securing With Nails And Adhesive
- Apply a thin bead of wood glue to the back of the trim for extra strength.
- Use a nail gun to drive nails through the trim into the cabinet face or frame. Place nails every 12-16 inches.
- On ends and corners, use more nails for a secure fit.
- For delicate or narrow trim, hand nailing may be easier to control.
Handling Corners And Joints
- For outside corners, miter both pieces at 45 degrees for a clean joint.
- For inside corners, cope one piece to fit over the other, or miter both if coping isn’t possible.
- For long runs, stagger the joints where possible and join with a 45-degree scarf joint for a seamless look.
Example: Installing Crown Molding
- Start in a less visible corner of the kitchen in case of mistakes.
- Work your way around the cabinets, nailing into the tops or faces as needed.
- Fill any gaps with caulk after installation.
Table: Common Trim Attachment Methods
| Trim Type | Attachment Method | Recommended Fastener |
|---|---|---|
| Crown Molding | Cabinet top, into studs if possible | 2″ brad nails |
| Light Rail Molding | Bottom of upper cabinet | 1″ brad nails |
| Base Molding | Base cabinet kick plate | 1.5″ finish nails |
| Applied Molding | Door or frame face | 3/4″ brad nails |
Credit: www.naptimedecorator.net
Filling, Sanding, And Caulking
Trim will always have small gaps, nail holes, or joints that need attention before painting or staining.
- Fill nail holes with wood filler. Let dry, then sand smooth.
- Caulk gaps between trim and walls, ceiling, or cabinet faces with a paintable latex caulk. This hides imperfections and gives a built-in look.
- Sand joints or rough spots with fine-grit sandpaper for a smooth finish.
Don’t skip these steps—filling and caulking separate amateur results from professional quality.
Painting Or Staining Trim
Finishing your trim gives it that final, polished look. Whether painting or staining, the process is similar.
Priming And Painting
- If using MDF, always prime first to seal the surface.
- Use a high-quality brush or small roller for a smooth finish.
- Apply at least two coats of paint, sanding lightly between coats.
- For best results, match the trim paint to your cabinet color.
Staining Wood Trim
- Choose a stain that matches or complements your cabinets.
- Apply with a clean cloth or brush, wiping off excess.
- Seal with a clear polyurethane for durability.
Table: Paint Vs. Stain For Cabinet Trim
| Finish Type | Pros | Cons |
|---|---|---|
| Paint | Hides flaws, endless color options, matches cabinets easily | Can chip, shows brush marks if not careful |
| Stain | Shows wood grain, classic look, durable with sealant | Harder to match color, requires sanding between coats |
Pro Tip: If painting, use a semi-gloss or satin finish for easy cleaning.
Advanced Techniques And Design Ideas
Once you understand the basics, trim can be used creatively for more dramatic transformations.
Stacking Multiple Moldings
Layering two or more types of molding creates a custom, high-end look. For example, combine a simple cove molding under a crown for extra depth.
Adding Beadboard Or Panel Molding
Attach beadboard panels or slim moldings to cabinet ends or flat doors. This adds texture and a cottage or shaker-style look.
Using Contrasting Colors
Painting trim in a different color than the cabinets creates visual interest. For example, white cabinets with black crown molding for a bold, modern effect.
Open Shelf Trim
Add trim to the exposed edges of open shelves to match cabinets and provide a cohesive look.
Common Mistakes And How To Avoid Them
Even simple trim projects can go wrong if you’re not careful. Here are mistakes beginners often make—and how to avoid them.
- Poor Measuring: Always measure twice, cut once. Account for miter angles and overlapping joints.
- Skipping Dry Fitting: Trim often needs tiny adjustments. Test-fit every piece before nailing.
- Nailing Only into Cabinet Boxes: For heavy moldings, try to nail into wall studs or use construction adhesive.
- Not Filling Gaps: Caulk and wood filler are essential for a seamless look.
- Painting in Place: If possible, paint or prime trim before installation to save time and avoid drips.
Credit: erinzubotdesign.com
Budget And Time Estimates
Adding trim is a relatively low-cost upgrade, but prices vary based on materials and kitchen size.
Table: Estimated Cost And Time By Kitchen Size
| Kitchen Size | Material Cost (DIY) | Time Needed |
|---|---|---|
| Small (10 ft run) | $50–$120 | 4–6 hours |
| Medium (20 ft run) | $100–$250 | 1 day |
| Large (30+ ft run) | $200–$400 | 1–2 days |
Labor costs for hiring a carpenter can increase the price by 2–3 times, but most homeowners can tackle this as a DIY project with basic tools.
Practical Tips For Success
Many people focus on the cutting and nailing, but there are small tricks that can make a big difference:
- Label each trim piece as you cut to avoid confusion during installation.
- Use painter’s tape to mark cabinet surfaces and protect finishes.
- Practice your cuts on scrap pieces before starting on your actual trim.
- Install longest runs first and work toward smaller pieces.
- Check for level and plumb after attaching each section, not just at the end.
- Keep joints tight by using clamps or having a helper hold pieces together while nailing.
When To Call A Professional
Some situations call for expert help:
- Uneven ceilings or walls: If your kitchen has major slopes, fitting crown molding perfectly can be tricky.
- Very large kitchens: The logistics of handling long, heavy trim pieces may require more hands.
- Complex designs: If you want multi-layered trim or detailed profiles, a carpenter’s experience can save time and ensure a flawless look.
However, for most kitchens, with care and patience, you can achieve beautiful results on your own.
Final Checks And Cleaning Up
After all trim is installed, painted, and caulked, step back and check your work:
- Look for any gaps or joints that need more filler or caulk.
- Check paint coverage and touch up any missed spots.
- Clean up all dust and debris so your new trim can shine.
Reinstall cabinet doors and hardware, and admire your upgraded kitchen.
Frequently Asked Questions
How Hard Is It To Add Trim To Kitchen Cabinets For A Beginner?
Adding trim is a manageable project for most beginners, especially if you take your time and follow each step. The most challenging part is making accurate miter cuts for corners, but with practice and careful measuring, you can achieve a professional look.
Watching a few tutorial videos or practicing on scrap trim can help boost your confidence.
What’s The Best Type Of Trim For A Modern Kitchen?
For a modern kitchen, choose simple, flat trim profiles without ornate details. Shaker-style moldings or slim, square-edge pieces work well. Paint the trim the same color as your cabinets for a seamless effect, or try a contrasting color for a bold look.
Can I Add Trim To Laminate Or Thermofoil Cabinets?
Yes, you can add trim to laminate or thermofoil cabinets, but you’ll need to use construction adhesive in addition to nails. Pre-drill nail holes to avoid cracking the cabinet surface, and be sure to clean thoroughly for the adhesive to stick.
Should I Paint Trim Before Or After Installing It?
Both methods work, but many pros recommend priming and painting trim pieces before installation. This makes it easier to reach all surfaces and reduces the risk of getting paint on cabinets. Touch up nail holes and caulk lines after installing for a perfect finish.
Where Can I Find More Inspiration Or Detailed Trim Ideas?
Websites like This Old House offer many ideas and step-by-step guides for kitchen cabinet upgrades, including different trim styles and before-and-after photos.
Adding trim to kitchen cabinets is one of the most rewarding DIY projects you can tackle. With careful planning, the right materials, and a bit of patience, you can give your kitchen a high-end, custom look for a fraction of the cost of new cabinets.
Don’t rush—measure twice, cut once, and soon you’ll have a kitchen you’re proud to show off.