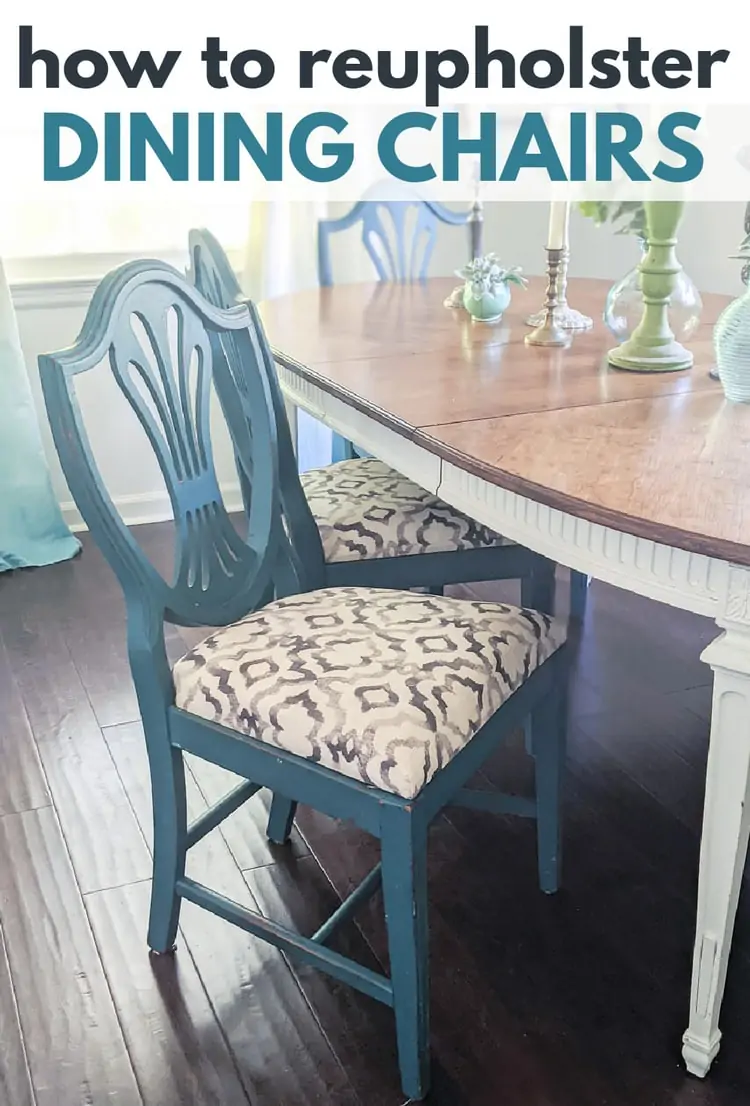
Reupholstering kitchen chairs is one of the most rewarding DIY projects for your home. It gives your kitchen a fresh look, lets you express your style, and saves money compared to buying new chairs. Many people think this task is difficult or only for experts.
In reality, with a bit of patience, basic tools, and some good advice, anyone can transform worn-out chairs into something beautiful and comfortable.
This guide will take you step by step through the whole process of how to reupholster kitchen chairs. You’ll learn how to choose the right materials, remove the old fabric, fix or add padding, attach new upholstery, and finish the details. You’ll also find practical tips, common mistakes to avoid, and answers to common questions.
If you want to refresh your kitchen decor without spending a lot, or if you have a set of chairs with sentimental value, reupholstering is a smart choice. Let’s get started and discover how to bring new life to your kitchen chairs.
Why Reupholster Kitchen Chairs?
Reupholstering is more than just a cosmetic fix. There are several reasons why you might want to take on this project:
- Cost-effective: Buying new kitchen chairs can be expensive. Reupholstering often costs less than half the price of new chairs.
- Customization: You can pick any fabric, color, or pattern to match your home style.
- Sustainability: Reusing furniture is better for the environment. It reduces waste and the need for new materials.
- Sentimental value: If your chairs are family pieces or have a unique design, reupholstering keeps their story alive.
What You Need Before You Start
Preparation is the key to a successful project. Here’s what you’ll need:
Tools
- Staple gun: Manual or electric, for attaching fabric
- Staple remover or flathead screwdriver: To take out old staples
- Scissors: Sharp enough for fabric and foam
- Pliers: For pulling out stubborn staples or tacks
- Measuring tape: For accurate fabric cuts
- Screwdriver or drill: To remove the chair seat if needed
- Hammer: For fixing any nails or tacks
Materials
- Upholstery fabric: Durable and easy to clean (cotton, polyester blends, vinyl, or leather)
- Foam or padding: 1–2 inches thick, for a comfortable seat
- Batting (optional): A thin layer over foam for smoother shape
- Dust cover (cambric): For the bottom of the seat (optional)
- Staples: 1/4″ or 3/8″ heavy-duty
How Much Fabric Do You Need?
Most kitchen chair seats need about 1/2 yard of fabric each, but always measure. Add a few extra inches on each side to wrap under the seat.
Step 1: Remove The Old Seat And Fabric
The first real task is taking your chair apart, but don’t rush this step.
- Turn the chair upside down. Most seats are attached with screws. Use your screwdriver or drill to remove them.
- Lift off the seat. Place the chair frame aside to avoid damage.
- Remove old staples or tacks. Use your staple remover or a flathead screwdriver. Take your time—leftover staples can rip your new fabric.
- Peel away the old fabric. Save it! This piece will be your template for cutting new fabric.
- Check the foam. If it’s in good shape and comfortable, you can reuse it. If it’s flat, crumbly, or smells bad, replace it.
Non-obvious tip: Take photos as you go. If you forget how everything fits, these pictures are a lifesaver.
Step 2: Prepare The Seat Base
Once you’ve removed the old fabric, it’s time to check the seat base. Most kitchen chair seats are made from plywood or particleboard.
- Check for damage. Look for cracks, weak spots, or water damage. If the base is broken, consider replacing it with a new piece of wood cut to size.
- Clean the surface. Remove any dust or bits of old foam. A clean surface helps the new materials stick and stay smooth.
If you want to increase comfort, you can add extra padding or a thicker foam layer now.
Step 3: Cut And Attach The New Foam
Comfort is key for kitchen chairs, especially if you sit for long meals. Good foam makes a big difference.
- Lay the seat base on the foam. Use the old foam or seat as a template.
- Trace around the base. Cut the foam with scissors or a utility knife. Keep the foam edges as smooth as possible.
- Attach the foam. Some people use spray adhesive to hold the foam in place. This step is optional but helps prevent shifting during fabric attachment.
- Add batting (optional). Batting creates a rounded, soft edge. Lay it over the foam and trim so it hangs about 2 inches beyond the edge of the seat.
Non-obvious tip: High-density foam holds up better over time. It costs more but keeps its shape for years.
Step 4: Cut The New Fabric
Using the old fabric as a pattern makes this step simple.
- Lay your new fabric face down. Place the old fabric on top.
- Add 2–4 inches extra around all sides. This extra lets you pull the fabric tight and staple it securely.
- Mark and cut the fabric. Use fabric chalk or a washable marker for accuracy.
If you’re using a patterned fabric, line up the design so it’s centered and straight before cutting.
Step 5: Attach The New Fabric
This is where your chair starts to look new again. Take your time and make small adjustments as you go.
- Lay the fabric face down. Place the foam-covered seat upside down on top of the fabric.
- Center the seat. Make sure patterns or stripes are straight.
- Start stapling: Begin at the center of one side. Pull the fabric snug (not too tight!) And place your first staple about 2 inches from the edge.
- Staple the opposite side. Go to the other side, pull the fabric tight, and staple.
- Repeat for the other two sides. Keep working from the center out toward the corners, alternating sides so the fabric stays even.
- Finish the corners. Fold the fabric neatly—like wrapping a gift—and staple. Make small pleats for rounded corners.
- Trim excess fabric. Leave about 1/2 inch beyond the staples.
Practical tip: If you make a mistake, just remove the staple and try again. Upholstery is very forgiving.
Step 6: Attach The Dust Cover (optional)
The dust cover, or cambric, gives your chair a professional finish and keeps dust out of the padding.
- Cut a piece of dust cover slightly smaller than your seat base.
- Lay it over the bottom. Staple around the edges, tucking in any loose fabric.
- Trim the edges so nothing hangs down.
This step isn’t required, but it makes your project look polished and helps the seat last longer.

Credit: upcyclemystuff.com
Step 7: Reattach The Seat To The Chair Frame
With your new upholstery done, it’s time to put the seat back.
- Line up the seat with the chair frame.
- Insert the screws back into their holes. Tighten securely, but don’t overtighten—this can strip the wood.
- Check for stability. Sit on the chair to test for squeaks or wobbles. If something feels loose, tighten the screws a bit more.
Choosing The Right Upholstery Fabric
Not all fabrics are equal. Kitchen chairs need material that’s both durable and easy to clean.
Key Factors To Consider
- Durability: Look for tightly woven fabrics. Heavy-duty cotton, polyester blends, or microfiber work well.
- Stain resistance: Kitchens are messy. Consider fabrics labeled as stain-resistant or add a fabric protector spray.
- Easy to clean: Choose materials you can wipe or spot-clean.
- Style: Patterns hide stains better. Darker colors show less wear over time.
Common Fabric Types Compared
Here’s a quick comparison of popular upholstery fabrics for kitchen chairs:
| Fabric Type | Durability | Cleaning Ease | Comfort | Cost |
|---|---|---|---|---|
| Cotton Blend | High | Easy | Soft | $$ |
| Vinyl | Very High | Very Easy | Firm | $ |
| Leather | Very High | Easy | Luxurious | $$$ |
| Microfiber | High | Easy | Soft | $$ |
| Jacquard | Medium | Medium | Textured | $$$ |
Tip: Avoid silk or other delicate fabrics. They stain easily and wear out fast in kitchens.
How Much Does It Cost To Reupholster Kitchen Chairs?
The cost depends on the materials you choose and whether you already own basic tools.
Average Diy Costs Per Chair
| Item | Low-End | Mid-Range | High-End |
|---|---|---|---|
| Upholstery Fabric | $8 | $20 | $40+ |
| Foam | $5 | $10 | $20 |
| Batting | $3 | $7 | $12 |
| Staples | $2 | $2 | $2 |
| Dust Cover | $2 | $4 | $8 |
| Total (per chair) | $20 | $43 | $82+ |
Insight: Doing several chairs at once saves money, as fabric and foam often come in larger pieces.
Common Mistakes To Avoid
Even simple projects have pitfalls. Here’s what to watch for:
- Not measuring carefully: Always double-check fabric size before cutting.
- Pulling fabric too tight or too loose: Over-tightening can make the seat uncomfortable, while loose fabric wrinkles.
- Ignoring foam quality: Cheap foam flattens quickly. Invest in better foam for long-term comfort.
- Skipping the dust cover: This leaves the underside exposed and can let dust or crumbs in.
- Not aligning patterns: If your fabric has stripes or prints, make sure they’re straight before stapling.
- Forgetting to save old fabric: Old pieces are perfect templates for new cuts.

Credit: www.youtube.com
How Long Does It Take?
For beginners, reupholstering one kitchen chair usually takes 1–2 hours. Doing several at once is faster, as you get into a rhythm.
Pro tip: Set aside a weekend to do all your chairs. Work in a well-lit space with plenty of room.
When Should You Hire A Professional?
DIY reupholstery works well for most kitchen chairs with removable seats. However, call a pro if:
- The chair has a fixed seat or complex curves.
- The frame is antique or valuable.
- You want advanced features like tufting or decorative nails.
- You lack tools or time.
Professional reupholstery can cost $75–$200 per chair, but it’s worth it for tricky jobs.
Advanced Tips For A Flawless Finish
If you want your chairs to look like they came from a high-end store, try these techniques:
- Layer batting over foam: It softens sharp corners and gives a smooth, puffy look.
- Use decorative trim or piping: Cover raw edges or staples with upholstery trim, available at craft stores.
- Protect with fabric spray: Use a stain-resistant spray to keep chairs looking new longer.
- Add felt pads under chair legs: This protects your floor and helps the chair sit flat.
Comparing Diy Vs. Professional Reupholstery
If you’re deciding whether to do it yourself or hire a professional, consider these points:
| Factor | DIY | Professional |
|---|---|---|
| Cost | Low (about $30–$50 per chair) | High ($75–$200 per chair) |
| Customization | Full control over choices | Can request any style |
| Skill Needed | Basic tools, patience | None (done for you) |
| Time | Several hours | Drop off, pick up |
| Finish Quality | Good, with care | Excellent, professional |
Caring For Your New Upholstered Kitchen Chairs
Once your chairs look brand new, keep them that way with simple care:
- Wipe spills quickly: Use a damp cloth for most stains.
- Vacuum regularly: Keeps crumbs and dust from building up.
- Spot clean: Use mild soap and water. Test in a hidden spot first.
- Rotate chairs: Switch places so they wear evenly.
- Check and tighten screws: Every few months, especially in busy kitchens.
Some fabrics, like vinyl or treated polyester, can handle more rough use. Others need gentle care.
Real-life Example
Sara, a mom of three from Ohio, decided to reupholster her six kitchen chairs. The original seats were stained and flat. She chose a navy blue cotton blend with a fun geometric pattern. The total cost for all six chairs was $110—much less than buying new ones.
Sara made one common mistake: she forgot to align the pattern on two of the chairs, so they looked a bit off. She learned to check this before stapling. Now, the chairs are comfortable, easy to clean, and match her kitchen perfectly.
Credit: ghurairproperties.com
Where To Find Good Upholstery Supplies
- Local fabric stores: Offer a wide range of materials and expert advice.
- Online retailers: Sites like Joann Fabrics or Fabric.com have huge selections.
- Home improvement stores: Good for tools, foam, and batting.
- Upholstery supply stores: Specialize in heavy-duty fabrics and trims.
If you want more details on fabric types and durability, the Wikipedia page on upholstery is a helpful resource.
Frequently Asked Questions
How Do I Know If My Chair Is Worth Reupholstering?
If the frame is solid and the seat is comfortable after new foam is added, it’s worth reupholstering. If the wood is cracked or joints are loose beyond repair, it might be better to replace the chair.
Can I Reupholster A Chair Seat Without Removing It From The Frame?
It’s possible, but not recommended. Removing the seat gives you better control, lets you staple fabric tightly, and avoids damaging the chair frame.
What Type Of Foam Should I Use?
Choose high-density upholstery foam for kitchen chairs. It’s firm, supportive, and lasts longer than craft foam. Look for foam rated for seating, usually 1–2 inches thick.
How Do I Get Wrinkles Out Of My New Fabric?
Work from the center out when stapling, and pull the fabric snug but not overstretched. If you see wrinkles, remove a few staples, smooth the fabric, and restaple.
Is It Cheaper To Reupholster Or Buy New Chairs?
Reupholstering is almost always cheaper, especially if you already own tools. The biggest savings come from doing multiple chairs at once and choosing durable, affordable fabric.
Reupholstering kitchen chairs can seem challenging, but with clear steps and the right materials, it’s a project anyone can tackle. You’ll end up with chairs that are both stylish and comfortable—made exactly the way you want. With a little care, your “new” chairs will last for years and make your kitchen feel like home.