Packing up your kitchen for a remodel is a big task. It’s not just about putting dishes into boxes. The kitchen is full of fragile items, food, appliances, and things you use every day. If you don’t plan well, you can end up with broken glass, lost items, or weeks of chaos. But with the right steps, you can make this process smoother, safer, and less stressful. Whether you’re remodeling a small kitchen or a big one, the strategy is the same: organize, protect, and simplify.
Most people underestimate how much is in their kitchen. There are things in the back of drawers you forgot about. Some items are valuable or sentimental. Others are just clutter. Packing up a kitchen takes time, focus, and the right materials.
If you rush, you may break things or make unpacking harder. But if you follow a clear plan, you’ll save time, money, and stress later.
This guide will walk you through every step of packing up your kitchen for a remodel. You’ll learn what to do first, how to pack each type of item, and how to set up a temporary kitchen. Along the way, you’ll find practical tips, common mistakes to avoid, and answers to questions people often have.
Why Careful Packing Matters
Packing up a kitchen is not like packing up a bedroom. Kitchens have many breakables, heavy items, and things you use daily. If you don’t pack carefully, you can damage your favorite glassware or lose important tools. Insurance rarely covers sentimental or small-value items lost during a remodel. Plus, a kitchen remodel can last weeks or months, so you need to live without your normal setup for a while.
A well-packed kitchen:
- Keeps your items safe from breakage and dust
- Makes the unpacking process much easier
- Helps you find what you need during the remodel
- Protects your investment in appliances and tools
- Reduces stress and unexpected costs
Step 1: Planning Your Packing Timeline
Before you grab any boxes, step back and make a plan. A kitchen remodel often takes 4-8 weeks, sometimes longer. Packing should be done in stages, not all at once.
- Set a moving date: Know when the remodel starts. Plan to finish packing at least 2 days before that.
- Make a packing schedule: Spread packing over several days or weeks. For example, pack rarely used items first and daily-use items last.
- List your essentials: Choose what you’ll need in a temporary kitchen setup. Don’t pack these yet.
A good rule: Start packing 2–3 weeks before the remodel. This gives you time to sort, clean, and decide what to keep or donate.
Step 2: Gather Packing Supplies
Having the right packing materials makes everything easier. Don’t cut corners on supplies—your kitchenware is valuable.
Here are the basics you’ll need:
- Sturdy boxes in various sizes (small for heavy items, medium for lighter ones)
- Packing tape (strong, wide rolls)
- Bubble wrap and packing paper
- Dish barrel boxes for extra-fragile items
- Plastic wrap and zip bags for small items and food
- Permanent markers for labeling
- Labels or colored stickers
You may also want:
- Plastic bins for food or items you’ll access often
- Trash bags for donations or things to throw out
- Shoe boxes for small gadgets or utensils
Here’s a comparison of common packing supplies and their uses:
| Supply | Best Use | Cost Level |
|---|---|---|
| Cardboard boxes | Dishes, pots, pans, pantry items | Low |
| Plastic bins | Food, fragile or valuable items | Medium |
| Dish barrels | Fine china, glassware | High |
| Bubble wrap | Glasses, breakables | Medium |
| Packing paper | Plates, bowls, filler | Low |
Non-obvious tip: Don’t use newspaper for wrapping food-contact items—it can transfer ink.
Step 3: Declutter Before You Pack
Packing is the perfect time to get rid of things you don’t use. There’s no point in storing or moving items you don’t need.
Go through every cabinet, drawer, and shelf. Separate your items into four groups:
- Keep (useful and wanted)
- Donate (good condition, but you don’t need)
- Throw away (broken or expired)
- Sell (valuable, but not needed)
Be ruthless, especially with things you haven’t used in a year. If you have three garlic presses, keep your favorite and let go of the rest.
Non-obvious insight: Many people keep old spices for years. Most spices lose flavor after 1–2 years. Now is the time to toss them.
Credit: www.neilkelly.com
Step 4: Clean And Prepare Everything
Before you pack, clean all your dishes, cookware, and appliances. Packing dirty or greasy items can attract pests or cause smells.
- Wash all pots, pans, and utensils
- Wipe down appliances (inside and out)
- Clean drawers and shelves as you empty them
- Check for food crumbs or spills
Cleaning now saves work later. When you unpack, everything will be ready to use.
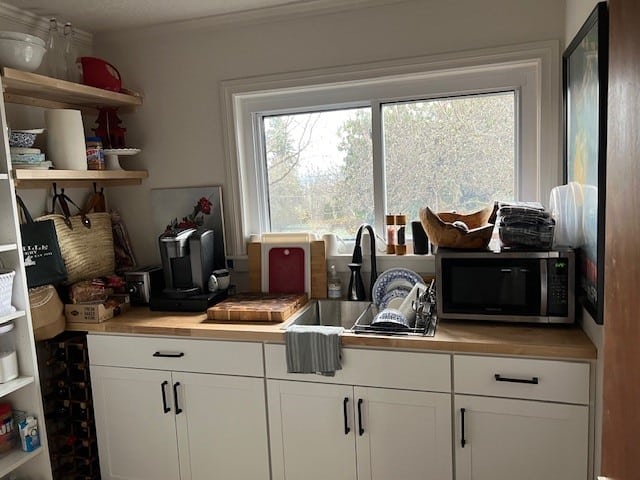
Step 5: Set Up A Temporary Kitchen
During your remodel, you’ll need a place to make simple meals, coffee, and snacks. Set up a temporary kitchen in another room, garage, or basement.
What to include:
- Microwave or toaster oven
- Coffee maker or kettle
- Mini fridge or cooler
- Basic utensils (1-2 knives, spoon, fork, spatula)
- Plates and cups (enough for each family member)
- Cutting board
- Can opener
Choose a place with a sink if possible. Use folding tables or storage bins as work surfaces. Store pantry staples in clear bins.
Real-life example: Some families use a laundry room for their temporary kitchen because it has a sink and outlet.
Practical tip: Plan for more takeout or simple meals (salads, sandwiches, microwave meals) during the remodel.
Step 6: Start Packing By Category
Don’t just pack randomly. Start with items you rarely use. Save everyday items for last.
1. Specialty And Seasonal Items
Pack cake pans, roasting pans, holiday dishes, and items you use only on special occasions. These can be boxed up weeks before the remodel.
2. Fine China And Glassware
Wrap each piece in bubble wrap or packing paper. Use dish barrels for extra protection. Fill spaces with crumpled paper so items don’t shift.
3. Small Appliances
Pack blenders, toasters, mixers, and food processors in their original boxes if possible. If not, use a sturdy box and wrap cords neatly.
Tip: Remove any loose parts and pack them in a labeled bag inside the box.
4. Cookware And Bakeware
Stack pots and pans with paper or bubble wrap between them. Place heavy items at the bottom of the box. Lids can go on top or be wrapped separately.
5. Utensils And Cutlery
Sort utensils into bundles and wrap them in paper or plastic wrap. Use rubber bands to keep sets together. For knives, cover blades with cardboard for safety.
6. Pantry And Dry Goods
Go through your pantry and check expiration dates. Donate unopened, unexpired food you won’t use. Pack what’s left in small boxes or bins.
Non-obvious insight: Open packages can spill. Seal them in zip bags or airtight containers before packing.
7. Cleaning Supplies
Some cleaning products can’t be stored for long or may leak. Dispose of almost-empty bottles and pack the rest upright in a plastic bin.
8. Fridge And Freezer Contents
Eat or use up as much as possible before the remodel. Move what’s left to a mini fridge or cooler. Don’t pack items that will spoil.
9. Everyday Items
Leave out only what you need for your temporary kitchen. Pack the rest last, just before the remodel starts.
Step 7: Packing Techniques For Different Items
How you pack matters as much as what you pack. The right technique keeps things safe.
Glasses And Cups
- Wrap each glass individually in bubble wrap or paper
- Place upright in a box with dividers
- Fill empty spaces with paper to prevent movement
Plates And Bowls
- Pack plates vertically, like records, with paper between each one
- Bowls can be nested with padding between them
- Use small boxes—plates get heavy fast
Pots And Pans
- Stack with padding in between
- Use a box just big enough to hold them
- Place heavier pans at the bottom
Knives
- Cover blades with cardboard or bubble wrap
- Bundle knives together, handle-out, in a towel or cloth
- Label the box clearly for safety
Food
- Seal open packages in bags or containers
- Label bins with contents and expiration dates
- Don’t pack anything that will spoil during the remodel
Packing tip: Always mark boxes “FRAGILE” when needed. Write the room and a short list of contents (e.g., “Kitchen – Wine Glasses”).
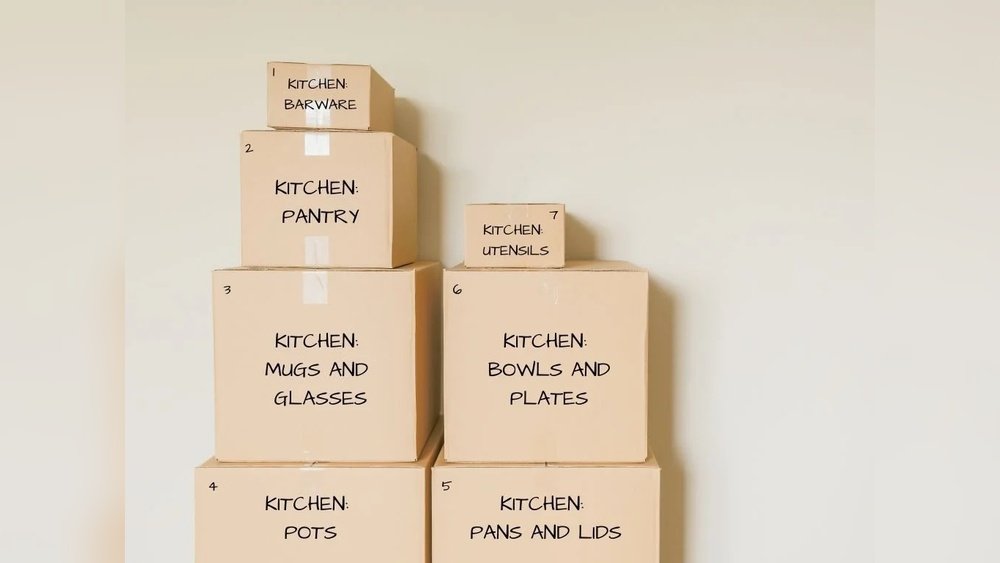
Step 8: Label Everything Clearly
Good labeling saves time and stress. Don’t just write “kitchen. ” Be specific.
- Write the main items in each box (“Plates and Mugs”)
- Use color-coded labels or stickers for fast sorting
- Mark boxes “OPEN FIRST” for temporary kitchen or essentials
- Number your boxes if you want to track them
Here’s a simple labeling system:
| Label Color | Category | Example |
|---|---|---|
| Red | Fragile glassware | “Wine Glasses – Fragile” |
| Blue | Cookware | “Pots and Pans” |
| Green | Appliances | “Toaster & Blender” |
| Yellow | Pantry/Dry Food | “Canned Goods” |
| Orange | Essentials | “Temporary Kitchen Essentials” |
Pro tip: Write “THIS SIDE UP” on boxes with fragile items.
Step 9: Where And How To Store Packed Boxes
During a remodel, dust and debris can get everywhere. Where you store your packed kitchen boxes matters.
- Choose a clean, dry room away from construction
- Stack heavier boxes at the bottom, lighter ones on top
- Don’t stack too high—boxes can crush under weight
- Keep fragile items separate from heavy stacks
- Cover boxes with plastic sheets to protect from dust
If you don’t have space at home, consider renting a small storage unit or asking a friend or neighbor for help.
Step 10: Packing Large Appliances
Moving large appliances is different from packing dishes. Take special care with the following:
Refrigerator
- Empty and unplug 24 hours before moving
- Defrost freezer and wipe dry
- Tape shelves and drawers in place
- Move upright, not on its side
Oven And Stove
- Remove racks and pack separately
- Clean thoroughly
- Tape doors shut
Dishwasher
- Run a cleaning cycle
- Leave the door open to dry for a day
- Disconnect hoses and drain water
Note: Some appliances need to be disconnected by a professional.
Here’s a quick comparison:
| Appliance | Preparation Steps | Special Handling? |
|---|---|---|
| Refrigerator | Empty, unplug, defrost, dry | Keep upright |
| Oven | Remove racks, clean, tape doors | None |
| Dishwasher | Clean, dry, disconnect hoses | Leave door open |
Non-obvious tip: For gas appliances, always hire a licensed technician for disconnect and reconnect.
Step 11: Handling Hazardous Materials
Kitchens often contain hazardous items like cleaning chemicals, propane, or flammable sprays. These shouldn’t be stored near food or in hot places.
- Read labels for storage instructions
- Take old or unneeded chemicals to a local hazardous waste site
- Never pack propane or lighter fluid inside your home
Safety note: Don’t store hazardous items near children or pets.
Step 12: What Not To Pack
Some things should not be packed or stored at all during a remodel.
- Perishable food (milk, eggs, leftovers)
- Opened liquids (can spill)
- Hazardous chemicals (see above)
- Valuables (cash, jewelry—keep with you)
- Important documents
If you’re not sure, ask yourself: “Will this spoil, spill, or cause harm in storage?”
Step 13: Working With Movers Or Contractors
If you hire movers or your remodel contractor offers packing services, discuss your needs clearly.
- Show them fragile or valuable items
- Ask how they handle appliances and breakables
- Make sure everything is labeled as you want
Real-life insight: Contractors often focus on speed, not careful packing. If you want extra care, pack fragile items yourself.
Credit: kowalske.com
Step 14: Preparing For Unpacking
Unpacking is easier if you plan ahead. Keep your essentials and “open first” boxes separate. When the remodel is done, open those boxes first to get your kitchen running again.
- Double-check labels before opening
- Clean cabinets and shelves before restocking
- Start with daily items, then move to extras and seasonal things
Step 15: Common Mistakes And How To Avoid Them
- Leaving packing until the last minute: You’ll feel rushed and make mistakes.
- Using oversized boxes: Heavy boxes break or are hard to move.
- Packing dirty items: Causes smells and extra cleaning work later.
- Not labeling clearly: You’ll waste time searching for things.
- Packing perishable food: Leads to mess and waste.
- Forgetting a temporary kitchen: Makes daily life difficult.

Credit: www.teamshane.com
Step 16: Useful Packing Hacks
- Use towels and dishcloths as padding for fragile items
- Stack plates vertically to reduce breakage
- Keep screws or small parts from appliances in labeled zip bags
- Photograph how shelves or drawers are arranged for easy setup later
- Store hardware (like shelf clips) in taped envelopes inside boxes
Step 17: Resources For More Help
For extra guidance, you can check out professional remodel advice from the National Association of Home Builders. They offer tips and checklists for planning a kitchen remodel.
Frequently Asked Questions
How Far In Advance Should I Start Packing My Kitchen For A Remodel?
Start packing your kitchen 2–3 weeks before the remodel begins. This gives you time to sort, clean, and pack carefully without feeling rushed.
What Should I Keep Out For My Temporary Kitchen?
Keep out a microwave or toaster oven, basic utensils, a few plates and cups, a coffee maker, and a mini fridge or cooler if you have one. Store pantry basics in easy-to-reach bins.
Can I Leave Things In Cabinets And Drawers During A Remodel?
No, you should empty all cabinets and drawers. Construction dust and debris can ruin your items, and workers need empty spaces to do their job safely.
How Do I Pack Fragile Items Like Wine Glasses And China?
Wrap each item in bubble wrap or packing paper, use sturdy boxes, and fill empty spaces so nothing moves. Label boxes “FRAGILE” and “THIS SIDE UP.”
What Is The Best Way To Store Packed Boxes During A Remodel?
Store boxes in a clean, dry room away from construction. Stack lighter boxes on top, cover with plastic sheets, and keep essentials separate for easy access.
Packing up your kitchen for a remodel may seem hard, but with careful planning and the right steps, you can keep your things safe and make the whole process smoother. This is your chance to declutter, organize, and start fresh when your new kitchen is ready.
Remember, the more effort you put in now, the easier life will be during and after your remodel.