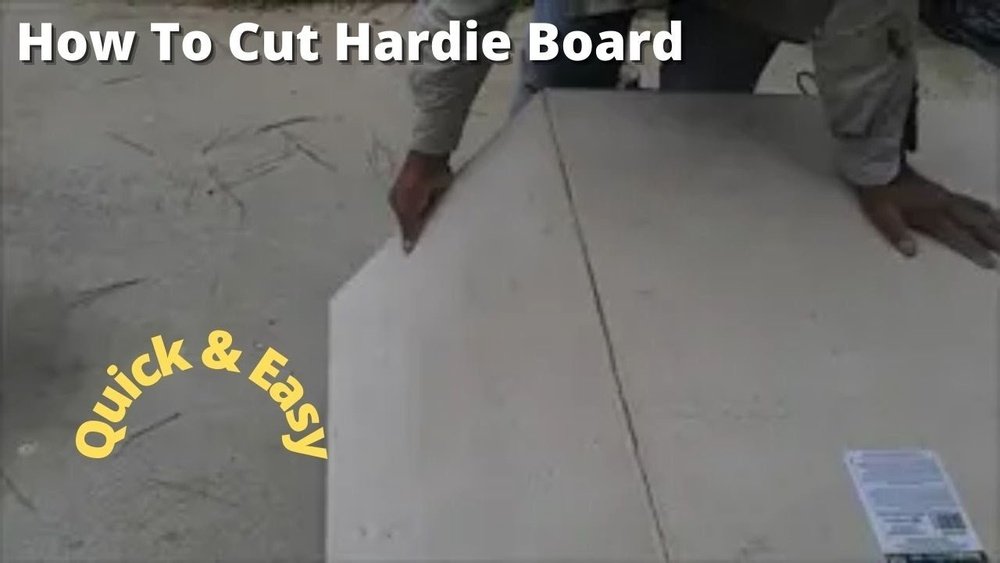
Cutting HardieBacker board is an important skill for anyone working with tile or remodeling bathrooms and kitchens. HardieBacker, a type of cement board, is known for its strength and water resistance. It’s a favorite underlayment for tile jobs, but many DIYers and even some professionals find it tough to cut cleanly. If you’re about to start a project with HardieBacker, you might wonder which tools are best, what steps to follow, and how to avoid common mistakes. In this guide, you’ll learn every method for cutting HardieBacker board, plus tips for safety and getting the best results.
Understanding Hardiebacker Board
Before you cut, it helps to know what you’re working with. HardieBacker board is made from cement, sand, and cellulose fibers. This makes it strong, but also heavier and dustier than materials like drywall. It’s usually sold in 1/4-inch and 1/2-inch thicknesses, with sheet sizes like 3×5 feet. HardieBacker is resistant to mold and won’t rot, so it’s perfect for wet areas like showers.
Some people confuse HardieBacker with other cement boards, but HardieBacker is a brand name from James Hardie. It’s recognized for its smooth surface, which makes tiling easier. The board is tough on tools, which means you need the right approach for cutting.
It’s also worth noting that HardieBacker comes in different versions—some are “EZ Grid,” with printed gridlines to help you measure and cut straight. Others are plain. Whichever style you choose, they behave the same when cutting, but gridlines can make layout faster and reduce mistakes.
Another feature of HardieBacker is its high compressive strength. This means it won’t bend or flex under tile, which is important for preventing cracked grout or tiles later. However, that same strength means it doesn’t “give” during cutting, so planning your cuts and using the right technique is key.
Essential Tools For Cutting Hardiebacker
You don’t need expensive equipment, but having the right tools makes the process safer and the results cleaner. Here are the main tools you’ll need:
- Utility knife with carbide-tipped blade: For scoring and snapping straight cuts.
- Scoring tool: Specially made for cement board, offers better durability than a regular knife.
- Circular saw with carbide-tipped blade: Ideal for multiple sheets or long straight cuts.
- Jigsaw with carbide-grit blade: Best for curves, holes, or cutouts.
- Nippers: For small adjustments or notches.
- Measuring tape and straightedge: For accurate lines.
- Clamps: To keep the board steady.
- Dust mask, safety glasses, and gloves: Cutting cement board creates dust and sharp edges.
Pro tip: Never use your best wood-cutting blades on HardieBacker—cement will quickly dull them.
There are also a few optional accessories that can make life easier. For example, a vacuum attachment for your saw can help collect dust at the source. If you’re doing a large job, a dedicated cement board cutter (which works like a heavy-duty paper cutter) can save time and keep cuts straight.
Some professionals also use a wet saw for especially clean edges, though this is usually overkill for most DIY projects.
Preparing Your Workspace
Cutting HardieBacker board is messy. Plan ahead to keep things clean and safe:
- Work outside or in a well-ventilated space if possible.
- Cover floors with a tarp or drop cloth.
- Set up saw horses or a sturdy workbench.
- Have a broom and dustpan nearby.
- Wear a N95 mask to avoid breathing silica dust.
Non-obvious insight: Many people cut indoors, but silica dust can linger in your home and is harmful to your lungs. If you must cut inside, open windows and use a shop vacuum to collect dust.
If you’re working inside and can’t move the board outside, try wetting the cut line with a damp sponge before cutting. This can help keep the dust down, though it might make the board a bit harder to snap. Also, remember to clear away anything you don’t want covered in dust—electronics, food, or open containers should be kept away from your cutting area.
Lighting is another overlooked part of workspace prep. Cement board is gray, and pencil lines can be hard to see in dim light. Use a bright lamp or portable work light to help you see your cut lines clearly. This reduces mistakes and makes the job safer.
Methods For Cutting Hardiebacker Board
There are several ways to cut HardieBacker. Each has strengths and weaknesses. Let’s explore each method in detail.
1. Score-and-snap Method
This is the most common and cleanest way for straight cuts.
Steps:
- Mark your cut line with a pencil and straightedge.
- Place the straightedge along the line.
- Using a carbide-tipped scoring knife or utility knife, score the board deeply—at least 3-4 passes.
- Lift the board and snap it over the edge of a workbench, similar to snapping drywall.
- Clean up any rough edges with a rasp or sanding block.
Advantages:
- No power tools required.
- Low dust.
- Quick for straight cuts.
Limitations:
- Not effective for curves or cutouts.
- Harder with thicker boards.
Tip: Press firmly when scoring—shallow cuts make snapping difficult.
If you’re new to the score-and-snap method, start with a light score to “find” your line, then go deeper on the next passes. Make sure your straightedge is solid—some people use a level or a piece of scrap wood. Always keep your hands away from the scoring path to avoid slips.
A beginner’s mistake is trying to snap the board without supporting it on both sides. The board can break unevenly. Make sure the scored line is right on the edge of your bench or table before applying downward pressure.
2. Cutting With A Circular Saw
A circular saw is best for making many cuts or when working with thick boards.
Steps:
- Mark your line and support the board on sawhorses.
- Fit your saw with a carbide-tipped blade (do not use a regular wood blade).
- Wear a mask and eye protection.
- Cut slowly, letting the saw do the work.
- Support both sides of the cut to prevent breakage.
Advantages:
- Fast for lots of cuts.
- Handles thick boards easily.
Limitations:
- Creates lots of dust.
- Louder and needs power.
Non-obvious insight: Score the line first, even if using a saw. This helps the blade follow the line and reduces edge chipping.
It’s a good idea to cut with the “good” side (the side to be tiled) facing down when using a saw. This helps minimize chipping on the finished surface. If you’re using a circular saw, try to keep the blade just deep enough to cut the board and not the workbench underneath.
If you have access to a shop vacuum, have someone hold the hose close to the blade as you cut—this can dramatically reduce airborne dust. Some circular saws have vacuum ports, which are worth using if available.
3. Cutting With A Jigsaw
Jigsaws are excellent for curves, circles, and outlet holes.
Steps:
- Mark your shape clearly.
- Drill a starter hole for inside cuts.
- Install a carbide-grit jigsaw blade.
- Cut slowly, guiding the jigsaw with both hands.
Advantages:
- Handles complex shapes.
- Precise for small cutouts.
Limitations:
- Slower than a circular saw for long cuts.
- Still produces dust.
Tip: Jigsaw blades get hot quickly—take breaks to avoid burning out the blade.
A small but important detail: If your cutout is near the edge of the board, be gentle—cement board is brittle and can crack. Try to leave at least 1 inch of material between the cutout and the edge for strength. For large circular cuts (like for shower valves), a hole saw with a carbide edge can be even faster and neater than a jigsaw.
4. Using Shears
Electric or manual cement board shears are designed for fiber cement. They cut cleanly with almost no dust.
Steps:
- Mark your cut.
- Align the shears and squeeze the handles or activate the tool.
- Follow the line slowly.
Advantages:
- Very little dust.
- Quiet and safe.
Limitations:
- Tools are specialized and costly.
- Not everyone has shears on hand.
If you’re doing a lot of cement board work, renting shears from a tool rental shop can be a good investment. Manual shears work like heavy-duty scissors—slow but easy to control. Electric shears move quickly and are best for straight or gentle curved cuts.
5. Cutting Small Notches And Holes
For tiny adjustments, nippers or a keyhole saw work well.
- Nippers: Use to break off small corners or create notches.
- Keyhole saw: Good for small holes or notches, but slow.
Tip: For pipe holes, drill a series of small holes in a circle, then tap the center out.
When using nippers, break off tiny pieces at a time, not large chunks—this keeps the rest of the board from cracking. For a neater finish on holes, after breaking out the center, use a rasp or a round file to smooth the edges.
Credit: www.diyeasycrafts.com
Comparing Cutting Methods
To help you decide which method is best for your project, here’s a comparison of the main approaches:
| Method | Best For | Speed | Dust | Cost | Skill Needed |
|---|---|---|---|---|---|
| Score-and-Snap | Straight cuts | Fast | Low | Low | Beginner |
| Circular Saw | Multiple cuts, thick board | Very fast | High | Medium | Intermediate |
| Jigsaw | Curves, holes | Medium | Medium | Low/Medium | Intermediate |
| Shears | Clean, straight cuts | Medium | Very low | High | Beginner |
No one method is perfect for all jobs. If you’re doing a bathroom, for example, you might score-and-snap for the main sheets, use a jigsaw for plumbing holes, and shears for fine-tuning. Mixing methods often gives the best results.
Step-by-step Example: Cutting For An Outlet
Let’s say you need to cut an opening for an electrical outlet:
- Measure the outlet location on the wall.
- Transfer the measurements to the HardieBacker board. Double-check for accuracy.
- Drill a hole in each corner of the marked rectangle.
- Insert a jigsaw blade into one hole and cut along the lines.
- Test-fit the board. If needed, use nippers to fine-tune the opening.
Pro tip: Always make the opening slightly larger than the box so the board doesn’t crack during installation.
Here’s another tip for accuracy: Use painter’s tape to mark your cut lines—it’s easier to see and provides a guide for the jigsaw. If you’re installing multiple outlets in a row, use a template to keep all openings the same size.
For round holes (like for water pipes), use a hole saw with a carbide grit—this is faster and more precise than trying to cut a circle with a jigsaw.
Common Mistakes To Avoid
Even experienced DIYers make errors. Here are some to watch out for:
- Using the wrong blade: Regular wood blades will burn out quickly and give ragged cuts.
- Not wearing a dust mask: Cement dust is harmful—always wear protection.
- Forcing the cut: Let the tool do the work to avoid chipping and breakage.
- Skipping the scoring step: Scoring helps guide your blade for a cleaner cut.
- Cutting unsupported: Always support both sides of the board to prevent it from snapping unintentionally.
- Measuring only once: Double-check your measurements before you cut.
Another common mistake is not labeling the pieces after cutting, especially if you’re pre-cutting several boards at once. Write the location or orientation on the edge with a marker—this avoids confusion during installation.
Some people also forget to clean up dust between cuts. Dust can make the floor or workbench slippery and dangerous, so sweep or vacuum after each major cut.
Cleaning Up Edges After Cutting
Cut edges can be rough or sharp. To finish them:
- Use a sanding block or rasp to smooth rough spots.
- Wear gloves—edges can be sharp.
- For exposed areas, consider sealing the edge with a waterproofing product.
Non-obvious insight: Clean edges not only look better but help tiles lie flat, reducing the risk of cracking later.
For tile jobs, a flat surface is critical. Uneven edges can create “lips” under the tile, which lead to uneven grout lines and tiles that rock or break. Spend a few extra minutes cleaning up each edge—it pays off in the finished look.
If you’re using HardieBacker in a shower or other wet area, use a brush or sponge to remove any loose dust from the edge before applying waterproofing or tile adhesive. Dust can prevent good bonding.

Credit: www.youtube.com
Safety When Cutting Hardiebacker
Cement dust is fine and can stay in the air for hours. Here’s how to stay safe:
- Always wear an N95 mask or better.
- Use safety glasses to protect your eyes.
- Wear gloves to prevent cuts.
- Work outdoors if possible.
- Clean up dust with a damp cloth—do not sweep it dry, as this raises more dust.
Stat: Inhalation of silica dust can cause lung disease over time. The Occupational Safety and Health Administration (OSHA) sets strict limits for silica exposure. Always take safety seriously.
One extra safety step: if you’re working indoors, seal off the area with plastic sheeting to keep dust from spreading to the rest of your home. Also, keep children and pets out of the workspace until all dust has settled and been cleaned up.
Handling Waste And Leftover Pieces
HardieBacker is heavy and not biodegradable. Here’s what to do with scraps:
- Collect all off-cuts and dust in heavy-duty trash bags.
- Most local dumps accept cement board as construction waste—check your area’s rules.
- Do not burn or compost HardieBacker.
- Small pieces can be saved for patching or future repairs.
If you have large, usable off-cuts, store them flat in a dry area—cement board can absorb moisture if left outside, which makes it weaker and harder to cut later. For small projects, these pieces are perfect for filling gaps or reinforcing areas behind fixtures.
Check with your local recycling center—some communities recycle cement-based materials for road base or fill.
Cutting Hardiebacker In Tight Spaces
Sometimes you need to cut a board that’s already partly installed or in a tight spot.
- Use a jigsaw with a short blade for small cuts.
- For straight cuts, try a compact oscillating multi-tool with a carbide blade.
- Always protect the surrounding surfaces with painter’s tape to avoid scratches.
Oscillating tools are especially helpful around corners, pipes, or when trimming a board to fit after it’s been screwed in place. Go slow—these tools can jump if pushed too quickly.
If you need to adjust a board that’s already fastened, loosen nearby screws before cutting to relieve stress and prevent cracking.
Choosing The Right Method For Your Project
Your project’s needs and your available tools will influence your cutting method. Here’s a quick guide:
| Project Type | Best Method | Why |
|---|---|---|
| Single sheet, simple cuts | Score-and-snap | Clean, fast, minimal tools |
| Multiple sheets, heavy use | Circular saw | Speed, efficiency |
| Curves or outlets | Jigsaw | Precision for shapes |
| Indoor work (dust control) | Shears | Almost no dust |
If you’re not sure, start with score-and-snap on a scrap piece. If it doesn’t work well for your board or cut, move to a powered tool. The more complicated the cut, the more likely you’ll need a jigsaw or shears.
Troubleshooting: What To Do If The Board Chips Or Breaks
Sometimes, even when you follow all the steps, HardieBacker can chip or snap in the wrong place.
- For small chips, use thinset mortar to fill gaps before tiling.
- If the board breaks badly, cut a patch and secure it with mesh tape and thinset.
- Avoid screwing too close to cut edges—cement board can split easily.
If the damage is near a wall or in a spot that will be covered by tile, don’t panic. As long as the board is securely fastened and there are no gaps bigger than a quarter inch, thinset and mesh tape will usually solve the problem.
When cutting complex shapes, always cut outside your line and trim back slowly—this gives you more control and lets you fix mistakes more easily.
How Hardiebacker Cutting Affects Your Tile Job
Clean, accurate cuts are not just for looks. If your boards are straight and edges are smooth:
- Tiles will lay flatter and bond better.
- There’s less risk of cracked tiles or grout lines.
- Waterproofing products adhere more evenly.
Example: If you leave a jagged edge near a shower, water can find its way behind the tile, causing long-term damage.
Another issue with rough cuts is they can create hollow spots under tiles. When you step on the tile, it can break or the grout can crack. Taking time to make clean cuts helps the entire tile job last longer and perform better.
Credit: www.reddit.com
Practical Tips For Beginners
- Practice on a scrap piece before making critical cuts.
- Mark your lines on the back side of the board—less likely to chip.
- Clamp your board securely to avoid shifting.
- Buy an extra sheet of HardieBacker for mistakes—cement board is unforgiving if you mess up.
- Clean your tools after use—cement dust can harden and ruin them.
Non-obvious insight: If you’re tiling a floor, lay out your tile pattern before cutting the board. This prevents small slivers of board that are hard to fasten and easy to break.
Also, keep a bucket of water and a sponge nearby to wipe down tools and your workspace. Wetting dust before cleaning up helps prevent it from becoming airborne.
Don’t rush your cuts. Cement board is tough, and going slow reduces mistakes. If you’re unsure, stop and check your measurements again.
When To Call A Professional
If your project involves complex shapes, tight deadlines, or you lack the right tools, consider hiring a pro. They have specialized tools like score-and-snap shears and industrial vacuums for dust control.
Stat: According to the National Association of Home Builders, improper installation of cement board is a common cause of tile failure in wet areas.
Professionals can also help with waterproofing, ensuring that your tile job will last for years. If you’re doing a steam shower, sauna, or another high-moisture space, a pro’s experience can prevent costly mistakes.
Additional Resources
For more on cement boards, check the manufacturer’s guide or visit the official James Hardie website. For technical data about silica dust and safety, see the OSHA Silica Standard.
Frequently Asked Questions
What Is The Easiest Way To Cut Hardiebacker Board?
For most DIYers, the score-and-snap method is the easiest. It’s simple, dust-free, and requires only a carbide-tipped scoring tool and straightedge. It works best for straight lines on thinner boards.
Can I Use A Regular Saw To Cut Hardiebacker?
You can, but it’s not recommended. Regular saw blades dull quickly on cement board. Use a carbide-tipped blade or a saw specifically designed for fiber cement. Always wear a dust mask due to the high dust production.
How Do I Cut Holes For Plumbing In Hardiebacker?
Mark the location, drill a starter hole, and use a jigsaw with a carbide-grit blade to cut the shape. For small round holes, a hole saw with a carbide bit also works well.
Is Hardiebacker Board Safe To Cut Indoors?
It’s safe if you use cement board shears (which create little dust) or if you control dust with wet cutting or a vacuum. If you must use a saw, open windows and wear a mask. Avoid indoor cutting if possible due to silica dust risks.
What Should I Do If I Make A Mistake While Cutting?
If the cut is off by a small amount, use nippers or a rasp to adjust. For larger mistakes, cut a patch to fit, secure it with mesh tape, and fill gaps with thinset mortar before tiling.
Cutting HardieBacker board is a skill every tiler or remodeler should master. With the right tools, careful planning, and these tips, you’ll get clean, professional results every time. Always put safety first, measure twice, and don’t rush the process. Your tiles—and your lungs—will thank you.