Drying plums in the oven is a rewarding process that turns fresh fruit into sweet, chewy, and nutritious snacks. Many people know dried plums as prunes, which are not only tasty but also full of fiber, vitamins, and antioxidants. With the right steps, you can make your own dried plums at home—without buying expensive dehydrators or store-bought options that may contain preservatives. This guide will show you how to dry plums in the oven, from choosing the best fruit to storing your finished prunes. You’ll learn practical tips, important details, and even some insights that beginners often miss.
Why Dry Plums At Home?
Drying plums at home has several advantages. First, you control the ingredients—no need for added sugar, preservatives, or artificial flavors. Homemade dried plums are often more flavorful and have a better texture than commercial ones. Plus, drying plums yourself can be cost-effective, especially if you have access to a plum tree or can buy fruit in bulk when it’s in season.
Another benefit is reducing food waste. Ripe plums can spoil quickly, but drying them extends their shelf life for months. You can use dried plums for snacking, baking, or cooking. They’re a healthy addition to oatmeal, salads, and even savory dishes.
Understanding The Drying Process
Oven drying removes water from plums using low heat and air circulation. This process preserves the fruit and gives it a chewy texture. Drying plums takes time—usually 8 to 18 hours—depending on the size, variety, and your oven’s performance.
It’s important to remember that oven drying is not exactly the same as using a professional food dehydrator. Ovens do not always maintain perfect low temperatures or airflow. However, with careful attention and the right method, you can get excellent results.
Choosing The Right Plums
Not all plums are the same when it comes to drying. Some become sweeter and more flavorful, while others may turn tart or hard.
Best types of plums for drying:
- European plums (such as Italian or Stanley): These have firmer flesh and higher sugar content, making them ideal for drying. Their oval shape and small pit are also convenient.
- Japanese plums: These are rounder, juicier, and often larger. They can be used, but the texture may be softer and the drying time longer.
What to look for:
- Ripe, but not overripe. The fruit should be slightly soft to the touch, with rich color and no green patches.
- Avoid plums with bruises, mold, or deep cracks.
- Uniform size helps ensure even drying.
Interesting tip: Many beginners think they can use any plum, but firmer European varieties (like Stanley) actually create a better, chewier dried fruit. Softer varieties may turn mushy or dry unevenly.
Preparing Plums For Oven Drying
Proper preparation is key to good results. Follow these steps:
1. Wash The Plums
Rinse the plums under cool running water to remove dirt, pesticides, or wax. Gently rub them with your fingers. Pat dry with a clean towel.
2. Remove The Pit
Cut each plum in half lengthwise along the natural seam. Twist the halves apart and remove the pit. Leaving the skin on is recommended, as it helps hold the fruit together and adds fiber.
For larger plums: You may want to quarter them for faster drying. Just remember that smaller pieces may shrink more and dry faster.
3. Optional: Pre-treat The Fruit
Plums can turn brown as they dry because of oxidation. To reduce this, you can pre-treat them:
- Dip in lemon water: Mix 1/4 cup lemon juice with 4 cups water. Soak the plum halves for 10 minutes, then drain and pat dry.
- Blanching: Dip the plums in boiling water for 30 seconds, then in ice water. This loosens the skin, helps with drying, and can soften tartness. Not essential, but useful for thicker-skinned varieties.
Beginner’s insight: Many skip pre-treatment, but it can help your prunes keep a beautiful color and slightly softer texture.
Setting Up Your Oven For Drying Plums
Not all ovens are perfect for drying fruit, but almost every home oven can do the job with a little preparation.
Temperature
The ideal oven temperature for drying plums is between 130°F and 175°F (54°C to 80°C). Lower temperatures help keep fruit flavor and nutrients, but not all ovens can go below 170°F. If yours cannot, you can use the “warm” setting or prop the oven door open slightly to reduce heat.
Tip: Use an oven thermometer to check the actual temperature on your racks, as home ovens can be inaccurate at low settings.
Air Circulation
Airflow is important for even drying. Arrange oven racks so there’s enough space for hot air to move. Some people use a fan to increase circulation, but it’s not required.
Key mistake to avoid: Don’t crowd the oven racks. Overlapping plums will dry slowly and may mold.
Arranging Plums For Drying
Spread plum halves, skin side down, on a baking sheet or wire rack. If using a baking sheet, line it with parchment paper or a silicone mat for easy removal. If you have a wire cooling rack, place it on top of the baking sheet. This lets air reach both sides.
Leave space between pieces. The fruit should not touch.

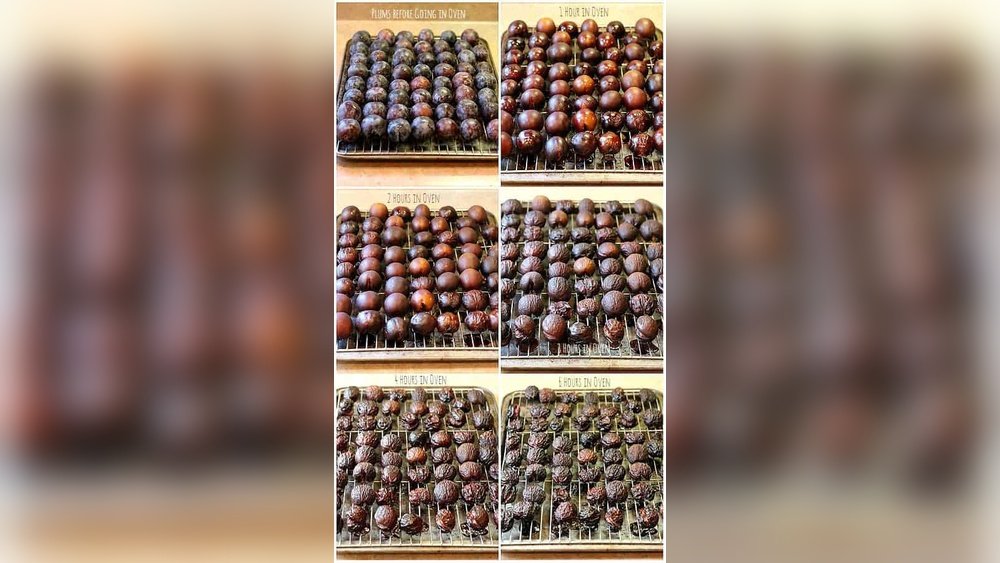
Credit: anoregoncottage.com
Drying Plums: Step-by-step Instructions
Follow these steps for best results:
1. Preheat The Oven
Set your oven to the lowest temperature (130–175°F). Place the oven thermometer inside if you have one.
2. Arrange The Plums
Place your prepared plum halves (or quarters) on the lined baking sheet or wire rack. Position the cut side up for more even drying.
3. Keep The Oven Door Slightly Open
Prop the oven door open about 1–2 inches using a wooden spoon or oven-safe object. This allows moisture to escape and improves airflow.
Insight: Many first-timers forget this step. Closing the oven door traps moisture, causing plums to steam rather than dry.
4. Monitor And Rotate
Check plums every 2–3 hours. Rotate the baking sheets and turn the fruit if needed for even drying. Watch for smaller pieces, as they may finish sooner.
5. Drying Time
Drying can take 8 to 18 hours. Time depends on plum size, juiciness, and oven performance. Plums are ready when they are dark, shriveled, and leathery but still slightly flexible. If they’re sticky, they need more time.
Table: Estimated Drying Times for Different Plums
| Plum Type | Cut Size | Estimated Drying Time |
|---|---|---|
| European (Stanley) | Halves | 10–14 hours |
| Japanese | Quarters | 8–12 hours |
| Large Plums | Halves | 14–18 hours |
Tip: Drying time is not exact. Always check texture instead of just following the clock.
6. Test For Doneness
Let a few pieces cool for 5 minutes, then check:
- They should feel leathery and a bit sticky but not wet.
- If squeezed, no juice should come out.
- If you tear a piece, the inside should not look raw or shiny.
If you’re not sure, it’s better to slightly under-dry. You can always put them back for another hour.
Conditioning Dried Plums
This step is often skipped by beginners but is very important for quality and safety.
Conditioning means evening out the moisture so your prunes store well and don’t mold. Here’s how:
- Cool the dried plums fully.
- Place them in a large, airtight container or jar. Fill only about two-thirds full.
- Shake or stir the container daily for 7–10 days. This lets moisture from less-dry pieces spread evenly.
- If you see condensation inside, return plums to the oven for 1–2 more hours.
Why it matters: Proper conditioning prevents spoilage and gives you a better texture.
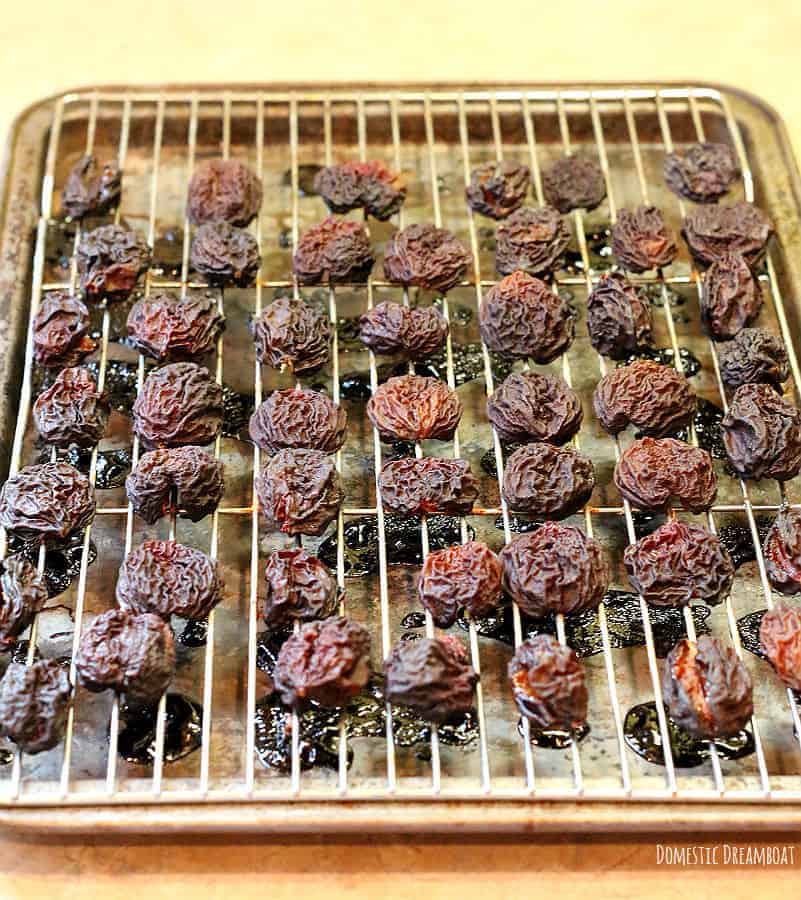
Credit: domesticdreamboat.com
Storing Your Oven-dried Plums
Correct storage keeps dried plums fresh and safe.
Storage Containers
Use airtight glass jars, plastic containers, or vacuum-sealed bags. Label with the date.
Where To Store
- Cool, dark places: Pantry or cupboard, away from sunlight and heat.
- Refrigerator: For longer storage—up to 6 months.
- Freezer: For up to a year or more.
Shelf Life
Properly dried and conditioned plums can last 6–12 months in the pantry, longer if kept cold.
Table: Storage Methods and Shelf Life
| Storage Method | Expected Shelf Life | Best For |
|---|---|---|
| Pantry (airtight) | 6–12 months | Everyday use |
| Refrigerator | 12+ months | Long-term snacking |
| Freezer | 18–24 months | Bulk storage |
Checking For Spoilage
Before eating, check for off smells, mold, or sticky syrup. If you see any, discard the fruit.
Beginner’s insight: Dried plums can absorb moisture from the air. Always keep them sealed, and never store near humid areas.
Practical Tips For Better Oven-dried Plums
Drying fruit is easy, but a few tips can help you get better results:
- Uniform Size: Cut all plums to similar size for even drying.
- Don’t Skip Conditioning: It prevents mold and improves flavor.
- Use a Thermometer: Oven temperatures can be inaccurate—check for best results.
- Rotate Racks: Even heat and airflow make a difference.
- Experiment with Flavors: Try sprinkling cinnamon or soaking in vanilla water before drying.
- Don’t Over-Dry: Prunes should be chewy, not hard.
- Label Batches: If you dry plums in several batches, label containers with date and variety.
- Try Different Varieties: Each type of plum tastes a little different when dried.
What To Do With Oven-dried Plums
Homemade dried plums are more than just snacks. Here are some creative ways to use them:
- Chop and add to oatmeal or cereal.
- Mix into trail mix with nuts and seeds.
- Bake in muffins, bread, or cakes for moisture and sweetness.
- Use in salads for a sweet-tart bite.
- Simmer with meat (like pork or chicken) for a rich sauce.
- Blend into smoothies for natural sweetness.
- Rehydrate in warm water for a few minutes and use in sauces or desserts.
Non-obvious idea: Try making a homemade energy bar with oats, dried plums, and peanut butter for a healthy snack.
Common Mistakes When Drying Plums In The Oven
Even experienced cooks can make errors. Here are mistakes to watch for:
- Drying at too high a temperature: This cooks the outside, leaving the inside wet.
- Skipping the oven door prop: Without airflow, plums steam and may spoil.
- Overcrowding the tray: Touching pieces dry unevenly or stick together.
- Not checking often enough: Some pieces dry faster, leading to hard or burnt fruit.
- Not conditioning after drying: Moisture can collect and cause mold.
- Storing before cooling completely: Warm plums in sealed containers sweat and spoil.
Helpful tip: Take notes the first few times you dry plums—record the variety, oven temp, and time. This will help you adjust for perfect results next time.
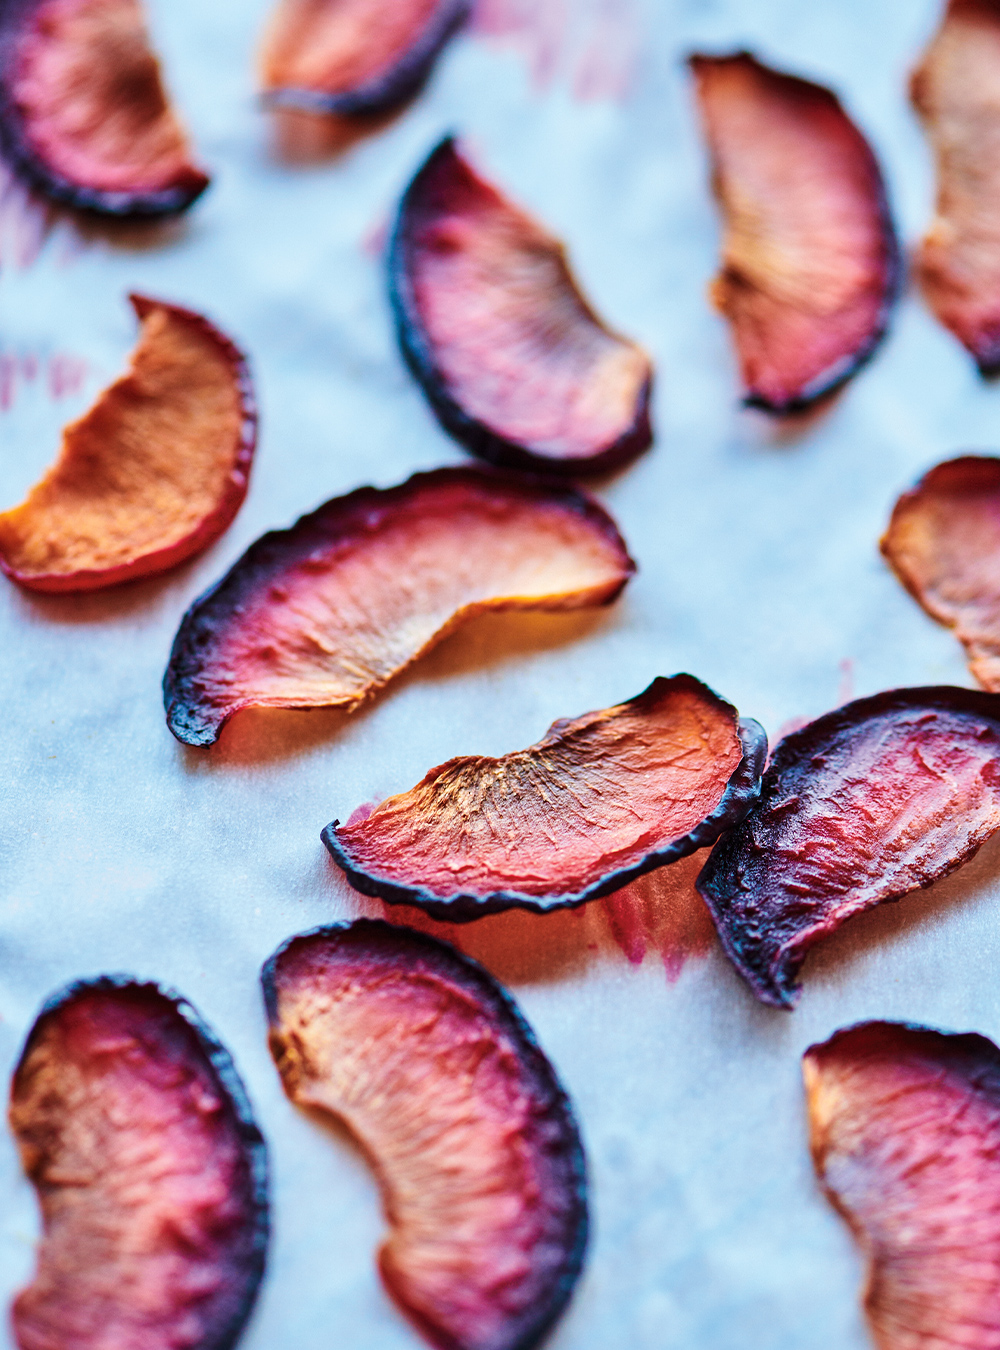
Credit: www.ricardocuisine.com
Nutritional Value Of Dried Plums
Dried plums are not just tasty—they’re good for you. They are high in fiber, potassium, and antioxidants. One serving (about 5–6 prunes) contains:
- Around 100 calories
- 3 grams of fiber
- 290 mg of potassium
- Vitamin K, B vitamins, and iron
Eating dried plums can help with digestion and provide a slow, steady energy source. Studies even show they may support bone health.
For more on the nutritional benefits, see the WebMD guide to prunes.
Comparing Oven Drying With Other Methods
Oven drying is popular, but it’s not the only way to make prunes. Here’s a comparison with other methods:
| Method | Cost | Ease | Flavor | Time |
|---|---|---|---|---|
| Oven Drying | Low | Moderate | Rich, Chewy | 8–18 hrs |
| Food Dehydrator | Medium | Easy | Very Good | 8–14 hrs |
| Sun Drying | Lowest | Hard | Unique, Slightly Tart | 2–4 days |
Key point: Oven drying is the most accessible method for most people, and you can get great results without special equipment.
Safety And Food Hygiene When Drying Plums
Food safety matters when drying any fruit. Here’s how to keep your prunes safe:
- Wash hands and equipment before starting.
- Use clean, undamaged fruit.
- Dry plums completely to prevent mold.
- Condition after drying to even out moisture.
- Store in airtight containers and check for spoilage before eating.
Extra tip: If you have pets or small children, keep drying trays out of reach during the long oven process.
Troubleshooting: When Things Go Wrong
Sometimes, things don’t go as planned. Here’s how to fix common problems:
- Plums are too hard: They were over-dried. Try soaking in warm water for 10 minutes to soften.
- Plums are sticky/wet: They need more time in the oven. Put them back for 1–2 hours, checking often.
- Fruit molds in storage: It was not dried or conditioned enough. Always check for moisture before sealing.
- Fruit tastes bland: Try using a sweeter variety or pre-treating with a little lemon juice.
Pro insight: Each oven is different. Keep notes and adjust your method with each batch.
Frequently Asked Questions
How Do I Know When The Plums Are Fully Dried?
Dried plums should be leathery, flexible, and not wet inside. Tear one open—if there’s no visible moisture and the inside is uniform, they’re done. Over-drying makes them hard; under-drying risks mold.
Can I Dry Plums Without Cutting Them?
It’s best to cut plums in half or quarters. Whole plums take much longer and may not dry evenly. The pit must be removed for safety and better drying.
Is It Safe To Dry Plums In A Gas Oven?
Yes, but monitor temperature carefully. Gas ovens can have hot spots and may not stay at low temperatures. Always use an oven thermometer and prop the door open for airflow.
Can I Flavor The Plums Before Drying?
Absolutely. Try soaking plum halves in lemon water, cinnamon, or vanilla before drying. This adds a unique taste and helps prevent browning.
How Long Can I Store Homemade Dried Plums?
If stored airtight in a cool, dark place, dried plums last 6–12 months. In the refrigerator or freezer, they can last even longer—up to two years.
Drying plums in the oven is simple, practical, and lets you enjoy fresh fruit year-round. With a little patience and care, you’ll have tasty, healthy prunes for snacking, baking, or cooking. The first batch may take some practice, but the results are worth it—especially when you know exactly what’s in your food.