To enter Samsung Dryer Diagnostic Mode, press and hold the Wrinkle Release button while the dryer is powered off. Continue holding the button and press the Power button to turn on the dryer.
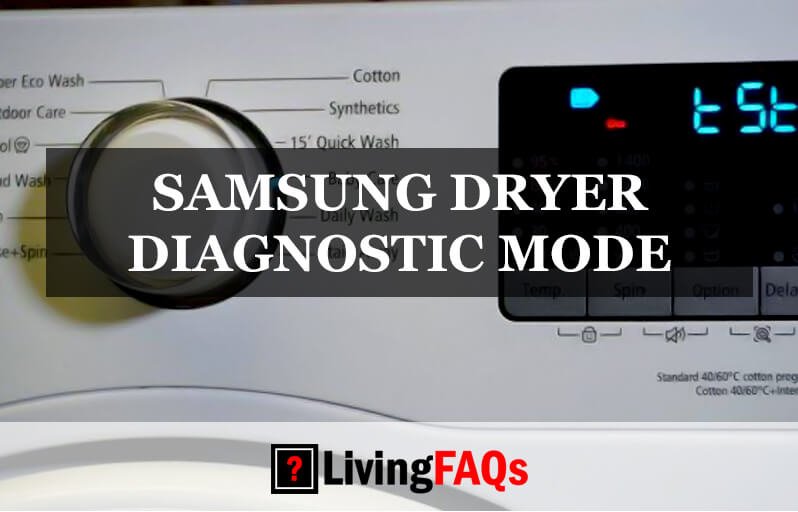
Once the machine is in diagnostic mode, a “d” will appear, indicating that you are in diagnostic mode. You can then use the Wrinkle Release button to navigate through the available diagnostic tests. This mode allows you to troubleshoot and identify any potential issues with your Samsung dryer.
When it comes to troubleshooting and resolving issues with your Samsung dryer, entering the diagnostic mode can be incredibly helpful. By following a simple set of steps, you can access the diagnostic mode on your dryer and perform various tests to identify any problems or error codes. This enables you to have a better understanding of what might be causing your dryer to not function properly. We will guide you through the process of entering Samsung Dryer Diagnostic Mode and explain how you can use it to troubleshoot and fix any issues with your dryer.
Understanding Samsung Dryer Diagnostic Mode
When it comes to troubleshooting and identifying potential issues with your Samsung dryer, understanding the diagnostic mode is crucial. This feature allows you to access valuable information about your dryer’s condition, error codes, and problem diagnosis. In this article, we will explain the purpose and benefits of the diagnostic mode, how Samsung dryers use it for troubleshooting, error code identification, and the importance of accessing this mode for quick and accurate problem diagnosis.
Explaining the Purpose and Benefits of the Diagnostic Mode
In Samsung dryers, the diagnostic mode serves as a powerful tool that enables you to gather important information about your appliance’s performance. It helps you troubleshoot and identify any potential problems that may arise. By entering the diagnostic mode, you can access valuable error codes, which are useful for diagnosing specific issues or malfunctions that your dryer may be experiencing.
Here are some key benefits of using the Samsung dryer diagnostic mode:
- Identify error codes: The diagnostic mode provides you with error codes that indicate specific problems or malfunctions. These codes can guide you in diagnosing and fixing the issue quickly and accurately.
- Efficient troubleshooting: With the diagnostic mode, you can easily troubleshoot your dryer without the need for a professional technician. It helps you save time and money by allowing you to identify and address the problem yourself.
- Accurate problem diagnosis: Accessing the diagnostic mode ensures that you get an accurate diagnosis of the problem. This allows you to fix the issue promptly and prevent further damage to your dryer.
- Saves on repair costs: By understanding the error codes and troubleshooting the problem yourself, you can avoid unnecessary repair costs. You’ll have a better understanding of whether a professional technician is required or if you can successfully resolve the issue on your own.
How Samsung Dryers Use Diagnostic Mode for Troubleshooting and Error Code Identification
Samsung dryers utilize diagnostic mode as a handy feature that helps users troubleshoot and identify potential issues. By entering this mode, you can access error codes and other valuable information that aids in problem diagnosis. Here’s how Samsung dryers utilize diagnostic mode:
- Accessing diagnostic mode: To enter diagnostic mode on your Samsung dryer, follow specific key sequences or button combinations. This will vary depending on the model of your dryer. Consult the user manual or online resources for the specific steps to enter diagnostic mode.
- Obtaining error codes: Once you’re in diagnostic mode, your Samsung dryer will display error codes if any issues are detected. These codes provide valuable information about the problem or malfunction that your dryer is experiencing.
- Interpreting error codes: Each error code corresponds to a specific problem. By referring to the user manual or online sources, you can interpret and understand the meaning of the error code. This will help you identify the root cause of the problem and take appropriate action to resolve it.
Importance of Accessing Diagnostic Mode for Quick and Accurate Problem Diagnosis
Accessing the diagnostic mode of your Samsung dryer is crucial for quick and accurate problem diagnosis. Here’s why:
- Time-saving: The diagnostic mode allows you to quickly gather information about the problem without the need for professional help. This saves you time that would otherwise be spent waiting for a technician to arrive.
- Cost-effective: By diagnosing the problem accurately, you can determine if it requires professional intervention or if you can fix it yourself. This helps you save on unnecessary repair costs.
- Precise troubleshooting: With the information obtained from the diagnostic mode, you can troubleshoot the problem more efficiently. This reduces the chances of misdiagnosis and ensures that you address the root cause appropriately.
- Prevention of further damage: Prompt problem diagnosis through diagnostic mode helps prevent further damage to your dryer. By taking timely action, you can minimize the impact of the problem and avoid costly repairs in the future.
Now that we’ve covered the purpose, benefits, and how Samsung dryers use diagnostic mode, you can make the most of this valuable feature to keep your dryer in optimal condition.
Accessing Diagnostic Mode On Samsung Dryer
In order to troubleshoot and diagnose issues with your Samsung dryer, you can access the diagnostic mode. This mode allows you to check for error codes, run tests, and gather information about the dryer’s performance. Here are the step-by-step instructions for entering diagnostic mode on Samsung dryers:
Step-by-step instructions for entering diagnostic mode on Samsung dryers
- Start by ensuring that your Samsung dryer is powered off and unplugged from the electrical outlet. Safety is always a top priority when performing any maintenance or diagnostics.
- Next, locate the dryer’s control panel. Depending on the model, it may be located on the front or the back of the dryer.
- Once you have located the control panel, you will need to press and hold the Power button and the Start/Pause button simultaneously.
- While holding these buttons, plug the dryer back into the electrical outlet.
- Continue to hold the Power button and the Start/Pause button for about 5 seconds. You will see the dryer’s display light up and enter the diagnostic mode.
Explaining the buttons or combination of buttons required to access the mode
In order to access the diagnostic mode on Samsung dryers, you need to press and hold the Power button and the Start/Pause button simultaneously while the dryer is unplugged. These buttons are typically located on the control panel of the dryer.
Highlighting any specific details or precautions to take while entering diagnostic mode
It is important to follow these specific steps while entering diagnostic mode on your Samsung dryer to ensure accurate results and avoid any potential hazards:
- Make sure that the dryer is powered off and unplugged before beginning the process.
- Hold the Power button and the Start/Pause button simultaneously for about 5 seconds.
- Do not release the buttons until the dryer’s display lights up and enters the diagnostic mode.
- Once in diagnostic mode, be cautious and follow any instructions or prompts that appear on the screen.
- If at any point you encounter any difficulties or the dryer does not enter diagnostic mode, refer to the user manual or contact a professional for assistance.
By following these steps and taking the necessary precautions, you will be able to successfully access the diagnostic mode on your Samsung dryer and gather important information for troubleshooting and resolving any issues you may be experiencing.
Performing Diagnostic Tests In Samsung Dryer Diagnostic Mode
Performing diagnostic tests in Samsung Dryer Diagnostic Mode is an essential step in identifying and resolving any issues or malfunctions with your dryer. This mode provides a range of tests that help pinpoint specific problems within the machine. By understanding the available diagnostic tests, you can effectively troubleshoot and determine the best course of action to get your dryer back up and running smoothly.
How to navigate through the different tests and options in diagnostic mode
Accessing and navigating through the different tests and options in Samsung Dryer Diagnostic Mode is a straightforward process. Follow these simple steps to get started:
- Turn off the dryer and unplug it from the power source.
- Press and hold the “Temp” and “Time” buttons simultaneously.
- While holding the buttons, plug the dryer back into the power source.
- Continue holding the buttons until the display shows “0” and the dryer begins its diagnostic mode. This may take a few seconds.
- Once in diagnostic mode, you can navigate through the various tests and options by pressing the “Start/Pause” button to cycle through the available selections.
Explanation of each test and how they help identify specific dryer issues or components malfunctioning
Now that you are in Samsung Dryer Diagnostic Mode, let’s explore the different tests and their significance in identifying specific dryer issues or malfunctioning components:
| Test | Explanation |
|---|---|
| Vent Blockage Test | This test automatically detects any blockages or problems in the exhaust ducts and reports them. It ensures proper airflow and prevents overheating. |
| Moisture Sensor Test | This test checks the functionality of the moisture sensor, which determines the drying time based on the moisture levels of the clothing. It ensures efficient and accurate drying. |
| Heating Element Test | This test checks the heating element and its operation. It helps determine if the heating element is functioning properly or if it needs replacement. |
| Motor Test | This test checks the motor’s operation and helps identify any issues with the motor or its components. It ensures proper rotation and functionality. |
| Thermal Fuse Test | This test checks the thermal fuse and its functionality. It helps identify if the thermal fuse has blown, indicating a potential overheating issue. |
By running these diagnostic tests, you can determine the specific problem with your Samsung dryer and take appropriate action. Remember to refer to your dryer’s user manual for detailed instructions on interpreting the test results and resolving any identified issues. Taking the time to perform these tests can save you money on unnecessary repairs and extend the lifespan of your dryer.
Vent Blockage Test
The vent blockage test is an essential diagnostic procedure for your Samsung dryer. This test helps you determine if there are any blockages or problems in the exhaust ducts, ensuring optimal performance of your appliance. By running this test, you can identify and address any issues that may be affecting your dryer’s efficiency. Let’s take a closer look at the purpose, procedure, and steps to run the vent blockage test.
Purpose and procedure of the vent blockage test
The vent blockage test is designed to automatically detect the status of the exhaust ducts of your Samsung dryer. Its purpose is to identify if there are any blockages or issues that could hamper the proper functioning of the appliance. This test is crucial in ensuring efficient drying and preventing potential hazards such as overheating or excessive lint build-up.
To perform the vent blockage test, follow these simple steps:
- Start by ensuring that your dryer is turned off.
- Press and hold the “Temp. Adjust” and “Time +” buttons simultaneously.
- While holding these buttons, turn on the dryer by pressing the “Power” button.
- Continue holding the “Temp. Adjust” and “Time +” buttons for approximately 5 seconds.
- Release the buttons once the display shows the code “dE” or “dr” followed by the remaining time.
How the test detects and reports blockages or problems
Once you have successfully entered the vent blockage test mode, your Samsung dryer will initiate the test by running a series of checks on the exhaust ducts. It will analyze the air pressure and flow within the system to determine if there are any blockages or restrictions. If any issues are detected, the dryer will display an error code or provide a specific indication to alert you of the problem.
In case of a blockage or problem, it is recommended to check the exhaust ducts for any obstructions, such as lint buildup or debris. Clearing any blockages will help restore proper airflow and prevent further issues with your Samsung dryer.
Steps to run the vent blockage test and interpret the results
Running the vent blockage test is a straightforward process. However, interpreting the results may require some troubleshooting. Here are the steps to run the test and interpret the outcome:
- Follow the procedure outlined above to enter the vent blockage test mode.
- Observe the display for any error codes or indicators related to blockages or airflow problems.
- If an error code or indicator is displayed, consult your Samsung dryer’s user manual or online resources for the specific meaning of the code.
- Address the issue as recommended by the manufacturer, such as checking for obstructions in the exhaust ducts or seeking professional assistance if needed.
Remember to document any error codes or notifications, as this information can be helpful when troubleshooting or seeking technical support for your Samsung dryer.
In conclusion, the vent blockage test is a valuable diagnostic tool to ensure the optimal performance of your Samsung dryer. By running this test and interpreting the results, you can identify and resolve any blockages or problems affecting your dryer’s exhaust ducts. Regularly performing this test will help maintain the efficiency and safety of your appliance, ensuring years of reliable service.
Error Code Checking
When it comes to troubleshooting your Samsung dryer, error codes can be incredibly helpful in identifying specific problems. By entering the diagnostic mode, you can easily check for error codes and decipher what they mean. This section will guide you through the importance of error codes, how to interpret them correctly, as well as some common error codes and their corresponding malfunctions.
Importance of error codes in identifying specific dryer problems
Error codes play a crucial role in pinpointing the exact issues your Samsung dryer may be experiencing. Each error code corresponds to a specific problem or malfunction, allowing you to better understand what needs to be fixed. By identifying the root cause of the issue, you can save time and money by addressing the problem directly instead of relying on trial and error.
How to interpret the error codes displayed in diagnostic mode
When you enter the diagnostic mode on your Samsung dryer, error codes will be displayed on the screen. These codes follow a specific pattern and provide valuable information about the problem. It is important to correctly interpret these error codes to effectively troubleshoot your dryer. Below is a table outlining the most common error codes and their meanings:
| Error Code | Meaning |
|---|---|
| E1 | Thermistor failure |
| E2 | Thermal fuse failure |
| E3 | Motor failure |
| E4 | Heating element failure |
| E5 | Door switch failure |
By referring to this table, you can easily identify the specific problem indicated by the error code. This allows you to take appropriate action, such as replacing a faulty component or scheduling a repair service.
Common error codes and their corresponding issues or malfunctions
Here are some of the most common error codes you may encounter on your Samsung dryer:
- E1: This error code indicates a thermistor failure, which means the temperature sensor is not functioning properly. It may require a replacement to restore proper dryer operation.
- E2: The E2 error code signifies a thermal fuse failure. This safety component is designed to interrupt the electrical current in case of overheating. If the thermal fuse has blown, it will need to be replaced to resolve the issue.
- E3: When you see the E3 error code, it means there is a motor failure. This could be due to various reasons, such as a faulty motor or a wiring issue. Professional repair may be required to fix this problem.
- E4: The E4 error code indicates a heating element failure. This means that the heating element, which is responsible for generating heat in the dryer, is not functioning properly. It may need to be replaced to restore heat to your dryer.
- E5: This error code points to a door switch failure. The door switch is responsible for detecting whether the dryer door is securely closed. If the switch is faulty, the dryer may not start or may stop during the cycle. A replacement switch may be necessary.
By understanding the meaning behind these common error codes, you can be better equipped to troubleshoot and resolve any issues with your Samsung dryer.
Moisture Sensor Test
In the diagnostic mode of a Samsung dryer, one of the essential tests that can help troubleshoot sensor-related issues is the Moisture Sensor Test. The moisture sensor plays a significant role in the performance of the dryer, ensuring efficient and effective drying of your clothes. In this section, we will explore the significance of the moisture sensor, the procedure to perform the test, and how to understand the results and troubleshoot any sensor-related problems.
Significance of the moisture sensor in dryer performance
The moisture sensor in a Samsung dryer is responsible for detecting the moisture level in the clothes during the drying cycle. It ensures that the dryer stops when the clothes are sufficiently dry, preventing over-drying and saving energy. The sensor measures the electrical resistance between two metal bars, and when the clothes are wet, the resistance is low. As the clothes dry, the resistance increases, triggering the dryer to stop once the desired dryness level is reached. The moisture sensor not only helps protect your clothes from damage but also saves you time and energy by preventing unnecessary drying.
Procedure to perform the moisture sensor test in diagnostic mode
To perform the moisture sensor test in diagnostic mode on your Samsung dryer, follow these steps:
- Turn off the dryer and unplug it from the power source for safety.
- Press and hold the “Temp” and “Time” buttons simultaneously.
- While holding the buttons, plug the dryer back into the power source.
- Release the buttons once the display shows “Test Mode” or “4E”.
- Rotate the cycle selector knob to the “Moisture Sensor Test” option.
- Press the “Start/Pause” button to begin the test.
- Observe the display for any error codes or abnormal behavior during the test.
Understanding the results of the test and troubleshooting any sensor-related issues
After performing the moisture sensor test, it is important to understand the results and identify any sensor-related issues. If the test completes without any error codes and the dryer functions properly, it indicates that the moisture sensor is working correctly. However, if the test displays an error code or there are abnormalities during the test, further troubleshooting is required.
Some common sensor-related issues include a faulty sensor, sensor contamination, or wiring problems. In such cases, the sensor may need to be cleaned, calibrated, or replaced. It is recommended to consult the user manual or seek professional assistance for detailed instructions on troubleshooting and resolving sensor-related problems.
Regular maintenance of the moisture sensor, such as cleaning it with a soft cloth and ensuring the sensor bars are free from debris, can help optimize its performance.
In conclusion, the moisture sensor test in the diagnostic mode of a Samsung dryer is a valuable tool for identifying and resolving sensor-related issues. By understanding the significance of the moisture sensor, following the proper procedure to perform the test, and troubleshooting any problems, you can ensure optimal drying performance and extend the lifespan of your dryer.
Frequently Asked Questions
How Do I Put My Dryer In Diagnostic Mode?
To put your dryer in diagnostic mode, follow these steps:
- Go to the Smart Care feature on your Samsung washer and dryer.
- Select the diagnostic check option.
- The dryer will display a code indicating the diagnostic mode.
- Press the wrinkle release key to access the mode.
- A “d” will appear, confirming that you are in diagnostic mode.
How Do I Run Codes On My Samsung Dryer?
To run codes on your Samsung dryer, follow these steps:
- Press and hold the “Smart Care” button on the control panel.
- After a few seconds, the dryer will display a code on the screen.
- Refer to the user manual or online resources to decipher the meaning of the code.
- Troubleshoot the issue based on the code and take necessary steps to fix it.
- If the problem persists, contact Samsung customer support for further assistance.
How Do I Get Diagnostics On My Samsung Washer?
To get diagnostics on your Samsung washer, use the Smart Care feature. Press the Smart Care button and the washer will display a code. This allows you to run a diagnostic check on your washer.
How Do I Fix My Samsung Moisture Sensor Dryer?
To fix your Samsung moisture sensor dryer, you can run a Vent Blockage test. This test will detect any blockages or problems in the exhaust ducts. Simply follow the instructions in the user manual to perform the test. Ensure proper airflow for optimal drying performance.
How Do I Put My Samsung Dryer In Diagnostic Mode?
To put your Samsung dryer in diagnostic mode, follow these steps: unplug the dryer, wait for 30 seconds, and then plug it back in. Press and hold the “Temp” and “Tumble” buttons simultaneously. After a few seconds, the dryer will enter diagnostic mode.
Conclusion
Accessing the diagnostic mode on your Samsung dryer can be a useful troubleshooting tool. By following the right steps and understanding the error codes, you can identify and fix potential issues with your dryer. Whether it’s a vent blockage or a sensor problem, the diagnostic mode provides valuable information to keep your dryer running smoothly.
Don’t hesitate to utilize this feature to ensure optimal performance and longevity for your Samsung dryer.