Sharpening a meat slicer blade might seem like a small kitchen task, but it can make a big difference in your daily work. If you use a meat slicer, you know how important it is to keep the blade sharp.
A dull blade can tear the meat, make your slices uneven, or even damage the slicer. Worse, it can be dangerous, leading to accidents because you need to push harder. Many people avoid sharpening because they think it’s hard or risky.
But with the right steps, anyone can safely keep their meat slicer in top shape.
This article will show you exactly how to sharpen meat slicer blade at home or in your business. You’ll learn why sharpening matters, when to do it, and the best methods. We’ll look at the tools you need, the safest way to work, and some common mistakes to avoid. There are also tips to keep your blade sharp longer, so you don’t waste time or money. Whether you’re a restaurant owner, a deli worker, or just love preparing food at home, you’ll find clear, step-by-step advice here.
If you want your slices to look professional and your slicer to last for years, keep reading. You’ll see that sharpening a meat slicer blade is easy with the right guidance. And by the end, you’ll feel confident to do it yourself—no guesswork, no stress.
Why A Sharp Meat Slicer Blade Is Important
A sharp blade is not just about making your work easier. It also affects the quality of your food and the safety of your kitchen. Here are the main reasons why you should keep your meat slicer blade sharp:
- Better slicing results: A sharp blade cuts meat and cheese cleanly, giving you even, thin slices every time. This is especially important for dishes that need a precise cut, like carpaccio or deli meats.
- Less food waste: A dull blade can mash or tear the meat, leading to uneven pieces and more waste. With a sharp blade, you get more usable slices from every piece of meat.
- Faster work: Cutting with a sharp blade is quicker and needs less effort. You won’t have to push as hard, so you can slice more food in less time.
- Safer operation: Surprisingly, sharp blades are safer than dull ones. That’s because you don’t have to force the slicer, reducing the risk of slips and accidents.
- Longer slicer life: Keeping the blade sharp also protects the slicer’s motor. The machine won’t have to work as hard, which helps it last longer.
Many beginners think that they can use the blade for months without sharpening. In reality, even high-quality blades need regular attention. Some commercial kitchens sharpen their blades weekly, depending on use.
Signs Your Meat Slicer Blade Needs Sharpening
Knowing when to sharpen your blade is just as important as knowing how. Here are some clear signs that your meat slicer blade is getting dull:
- Uneven slices: The food comes out thicker on one side or tears instead of slicing.
- More effort required: You need to push the meat harder through the blade.
- Squeaking or grinding sounds: Dull blades can create noise when they rub against food.
- Food sticking to the blade: If meat or cheese starts to stick, the edge is probably dull.
- Visible nicks or damage: Check the blade for chips, dents, or shiny spots.
If you notice any of these problems, it’s time to sharpen your blade. Don’t wait until the machine struggles or slices look bad. Regular maintenance prevents bigger problems later.
Tools And Materials Needed For Sharpening
Before you start, it’s important to have the right tools. Sharpening your meat slicer blade without proper equipment can be dangerous or damage the blade. Here’s what you’ll need:
- Sharpening stone or built-in sharpener: Most commercial slicers come with a built-in sharpener. If yours doesn’t, you’ll need a sharpening stone designed for slicer blades.
- Protective gloves: Always use cut-resistant gloves to protect your hands.
- Safety goggles: Tiny metal particles can fly off during sharpening.
- Cleaning brush: A small brush helps you clean the blade before and after sharpening.
- Food-grade lubricant: Keeps the blade and moving parts smooth.
- Screwdriver or wrench: Needed if you must remove the blade for sharpening.
- Towel or paper towels: For drying and wiping the blade.
Not all slicers need the same sharpening tools. For example, some home models have a removable blade while others have a fixed blade and built-in sharpening stones. Check your slicer’s manual before you start.
Preparation: Safety First
Sharpening a meat slicer blade is safe if you follow some basic rules. Skipping these steps is one of the most common mistakes beginners make.
Unplug The Slicer
Before you touch the blade, unplug the machine from the wall. Don’t just switch it off—unplug it completely. This prevents any accidental start and protects you from electric shock.
Remove And Clean The Blade
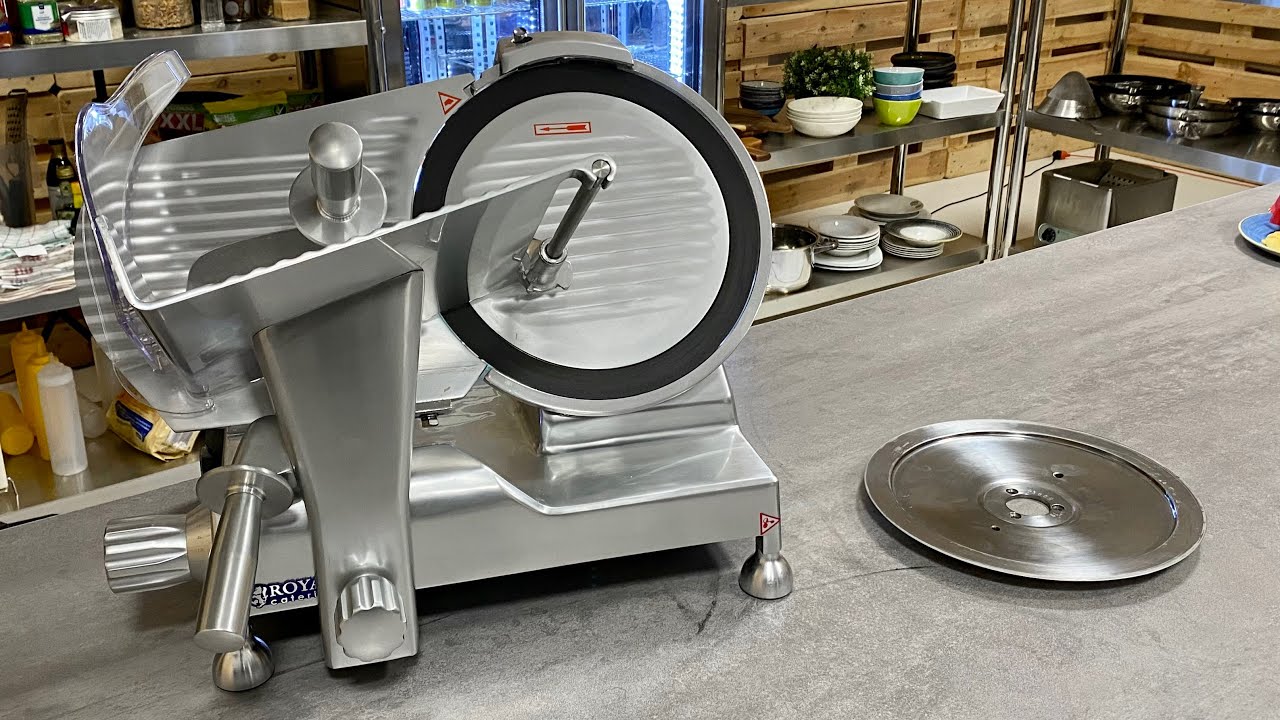
If your slicer allows, carefully remove the blade. Use a screwdriver or wrench as needed. Some models have a safety lock to make this easier.
Clean the blade with hot, soapy water and a brush. Remove any food, grease, or rust. Dry the blade fully with a towel. Never sharpen a dirty blade; debris can damage the sharpening stone or blade edge.
Wear Protective Gear
Put on cut-resistant gloves and safety goggles. Even a dull blade can cause serious cuts. Gloves also help you grip the blade securely.
Understanding Meat Slicer Blade Types
Not all blades are the same. Knowing your blade type helps you choose the right sharpening method and tools.
| Blade Type | Description | Common Use |
|---|---|---|
| Straight edge | Flat, smooth edge for clean cuts | Deli meats, cheese, vegetables |
| Serrated edge | Small teeth along the edge | Bread, tough meats, some frozen items |
| Removable blade | Can be detached for cleaning/sharpening | Home slicers, some commercial units |
| Fixed blade | Stays attached; sharpened in place | Most heavy-duty commercial slicers |
Straight edge blades are easiest to sharpen and most common. Serrated blades require special sharpening tools and more skill. Always check your blade type before starting.
Methods To Sharpen A Meat Slicer Blade
There are two main ways to sharpen a meat slicer blade: with a built-in sharpener or using a separate sharpening stone. Each method has pros and cons.
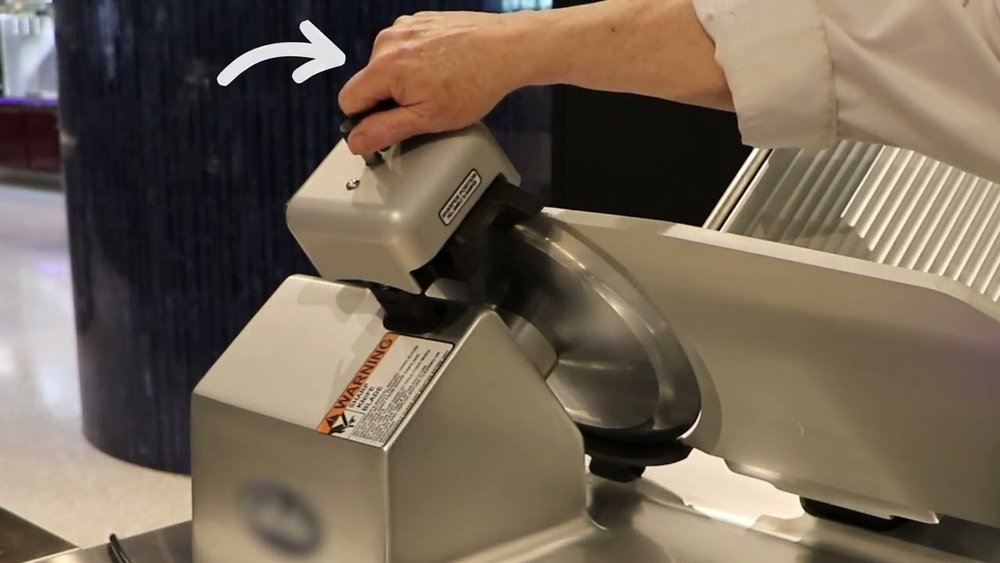
Using The Built-in Sharpener
Many commercial slicers include a sharpening attachment. This is the safest and quickest option if your slicer has it.
Steps:
- Position the sharpener: Move the sharpening stones into place, following your slicer’s manual. Usually, this means swinging the sharpener over the blade.
- Lock the blade: Make sure the blade can’t spin freely. Some machines have a special lock for this.
- Turn on the slicer: Plug in and switch on the slicer to let the blade spin against the sharpening stones. Hold for 30–60 seconds.
- Hone the blade: Move the blade to the honing stone (if available) for 5–10 seconds. Honing polishes and refines the edge.
- Turn off and unplug: Always unplug after sharpening.
- Clean the blade: Wipe away any metal dust or debris with a damp towel.
Non-obvious insight: Don’t press down hard—let the sharpening stones do the work. Too much pressure can wear down the blade faster.
Using A Sharpening Stone (manual Method)
If your slicer doesn’t have a built-in sharpener, you’ll need a sharpening stone. Choose a stone made for metal blades, not kitchen knives.
Steps:
- Remove the blade: Use gloves and follow your slicer’s manual.
- Secure the blade: Place it flat on a non-slip surface or use a clamp.
- Hold the sharpening stone at the correct angle: Most slicer blades need a 20–25 degree angle. Check your manual or manufacturer’s website for the exact angle.
- Sharpen the blade: Move the stone in smooth, even circles along the blade edge. Cover the entire edge, not just one spot. Repeat 10–12 times.
- Flip and repeat: Turn the blade over and sharpen the other side.
- Hone the edge: Use a finer grit stone or a honing tool to polish the edge.
- Clean and dry: Wipe the blade with a damp towel, then dry completely.
- Reinstall the blade: Carefully put the blade back into the slicer.
Non-obvious insight: If you use too steep or shallow an angle, you can ruin the blade’s edge. Always check the recommended angle.
Professional Sharpening Services
If you’re not comfortable sharpening the blade yourself, or if the blade has deep nicks, consider a professional service. They use industrial equipment to restore the edge. This costs more but guarantees a perfect result.
Credit: waltons.com
Step-by-step: How To Sharpen Meat Slicer Blade Safely
Let’s break down the safest and most effective process for sharpening a typical straight edge meat slicer blade with a built-in sharpener.
1. Unplug And Prepare
Make sure the slicer is unplugged. Remove any food debris and clean the blade. Wear gloves and goggles.
2. Mount The Sharpener
Swing the built-in sharpening device into place. If you’re using a manual stone, set up your sharpening area on a stable counter.
3. Lock The Blade
Engage the blade lock. This prevents accidents and keeps the edge at the right angle.
4. Sharpen
Turn on the slicer and let the blade spin against the sharpening stone for about 30 seconds. If using a manual stone, run the stone across the blade edge in a circular motion, keeping a steady angle.
5. Hone
If your sharpener has a honing wheel, use it for 10 seconds. Honing removes tiny burrs and smooths the edge.
6. Turn Off, Unplug, And Clean
Shut off power and unplug the slicer. Use a towel to wipe away any metal dust. Inspect the blade for even sharpness.
7. Lubricate
Apply a small amount of food-grade lubricant to the blade’s edge and moving parts. This step is often skipped but helps the blade last longer.
8. Test
Try slicing a small piece of meat or bread. If the slicer moves smoothly and the slices look even, you’re done.
Practical tip: Always clean and sanitize the blade after sharpening. Fine metal particles can stick to the edge.
How Often Should You Sharpen Your Meat Slicer Blade?
The right sharpening schedule depends on how often you use your slicer. Here’s a general guide:
| Usage Level | Recommended Sharpening Frequency |
|---|---|
| Heavy (daily use, commercial) | Every 1–2 weeks |
| Moderate (few times a week) | Every 2–4 weeks |
| Light (occasional home use) | Every 2–3 months |
If you slice a lot of cheese, bread, or cured meats, you may need to sharpen more often. These foods are tougher and wear down the blade faster.
Expert tip: Don’t wait for obvious signs of dullness. Regular, gentle sharpening is better than waiting until the blade is completely dull.
Cleaning The Blade After Sharpening
After sharpening, it’s important to remove all metal dust and debris. Here’s the best way to clean your slicer blade:
- Wipe the blade with a damp towel to collect dust.
- Wash with hot, soapy water. Use a soft brush to clean around the edge and mounting area.
- Rinse well with clean water.
- Dry with a towel. Make sure no water remains, as moisture can cause rust.
- Sanitize with a food-safe disinfectant spray.
Regular cleaning after sharpening keeps your food safe and the slicer in good condition.
Common Mistakes To Avoid
Even experienced users make mistakes when sharpening slicer blades. Avoid these common errors for the best results:
- Skipping cleaning: Sharpening a dirty blade can damage the edge and the stone.
- Applying too much pressure: Let the stone or sharpener do the work. Forcing the blade can cause uneven edges.
- Wrong angle: Every blade has a recommended sharpening angle. Using the wrong angle makes the blade duller, not sharper.
- Not wearing gloves: Even a slightly sharp blade can cause serious cuts.
- Using the wrong stone: Only use stones or sharpeners made for your slicer’s blade material.
- Neglecting to hone: Sharpening creates a rough edge. Honing polishes it for smooth, clean slicing.
- Over-sharpening: Too much sharpening wears away the blade quickly. Stick to a regular schedule.
Practical Tips To Keep Your Blade Sharper Longer
Sharpening is important, but you can reduce how often you need to do it. Try these tips:
- Clean the blade after every use: Leftover food can cause corrosion and dull the edge.
- Avoid cutting bones or frozen food: These are hard on the blade and can cause nicks.
- Use a food pusher, not hands: This keeps pressure even and protects the blade.
- Store your slicer in a dry place: Moisture causes rust, which dulls the blade fast.
- Check the blade regularly: Look for chips or discoloration, which are early signs of dullness.
Advanced tip: If your slicer is used for both cheese and meat, slice meat first. Cheese is stickier and dulls the blade more quickly.
When To Replace Your Meat Slicer Blade
No blade lasts forever. Even with perfect sharpening, there comes a time to replace the blade. Here’s when to do it:
- Deep chips or cracks: If the blade is visibly damaged, sharpening won’t help.
- Blade is too thin: After many sharpening sessions, the blade may become too thin to hold a good edge.
- Rust or pitting: Deep rust spots weaken the blade.
- Poor slicing even after sharpening: If slices are still uneven or ragged, it’s time for a new blade.
Check with your slicer’s manufacturer for the right replacement part. Using the wrong blade can damage the slicer or make it unsafe.
Comparing Built-in Vs Manual Sharpeners
Many users wonder whether a built-in sharpener or a manual stone is better. Here’s a quick comparison:
| Feature | Built-in Sharpener | Manual Sharpening Stone |
|---|---|---|
| Ease of Use | Very easy | Requires skill |
| Speed | Quick (1–2 minutes) | Slower (5–10 minutes) |
| Accuracy | Consistent angle | Depends on user |
| Cost | Included with slicer | Extra purchase |
| Best for | Commercial kitchens | Home use, custom blades |
If you’re not confident with sharpening, a built-in sharpener is the safer choice.
Troubleshooting: If Your Blade Still Feels Dull
Sometimes, even after sharpening, the blade doesn’t feel as sharp as it should. Here’s what you can check:
- Did you clean the blade before and after sharpening?
- Did you use the correct angle?
- Did you hone the blade after sharpening?
- Is the sharpener or stone worn out? Old or glazed stones don’t sharpen well.
- Is the blade damaged? Chips, cracks, or rust can stop the blade from getting sharp.
If all else fails, consider getting a professional sharpening service. They can restore even badly worn blades.
Credit: www.youtube.com
Advanced: Sharpening Serrated Meat Slicer Blades
Serrated blades are less common but used for special tasks. Sharpening them is tricky and requires a special triangular file or sharpening rod.
- Remove the blade from the slicer.
- Clean thoroughly.
- Hold the file at the same angle as the serrations.
- Gently file each tooth, moving in one direction.
- Clean and reinstall.
If you’re not experienced, it’s better to send serrated blades to a professional. Incorrect sharpening can ruin the teeth.
Safety Reminders And Best Practices
- Never rush. Take your time to avoid accidents.
- Keep children and pets away during sharpening.
- Check all screws and locks before reassembling the slicer.
- Store sharpening stones and tools out of reach when not in use.
Following these practices keeps you, your food, and your slicer safe.

Credit: www.partstown.com
Frequently Asked Questions
How Do I Know If My Meat Slicer Blade Is Sharp Enough?
A sharp blade cuts meat smoothly and evenly with little effort. Slices should be thin and uniform. If you need to push hard or the slices tear, the blade needs sharpening.
Can I Use A Regular Knife Sharpener On My Meat Slicer Blade?
No, regular knife sharpeners are not designed for slicer blades. They can damage the edge or change the blade’s angle. Always use the tool recommended for your slicer.
Is It Safe To Sharpen The Blade While It’s Still Attached To The Slicer?
Yes, if your slicer has a built-in sharpener, it’s designed for safe use with the blade attached. Always unplug the machine and follow the manual. If using a manual stone, remove the blade for safety.
How Long Does It Take To Sharpen A Meat Slicer Blade?
With a built-in sharpener, it usually takes 1–2 minutes. Manual sharpening can take 5–10 minutes, depending on the blade’s condition and your skill.
Where Can I Find A Professional Sharpening Service?
You can find professional services at kitchen supply stores, restaurant supply companies, or through your slicer’s manufacturer. For more information, visit the Wikipedia page on sharpening.
Keeping your meat slicer blade sharp is one of the simplest ways to improve your food’s quality and your kitchen’s safety. With the steps and tips in this guide, you can confidently maintain your slicer for years of reliable use.
Remember, regular care is easier than fixing problems later—so make blade sharpening a normal part of your routine.