
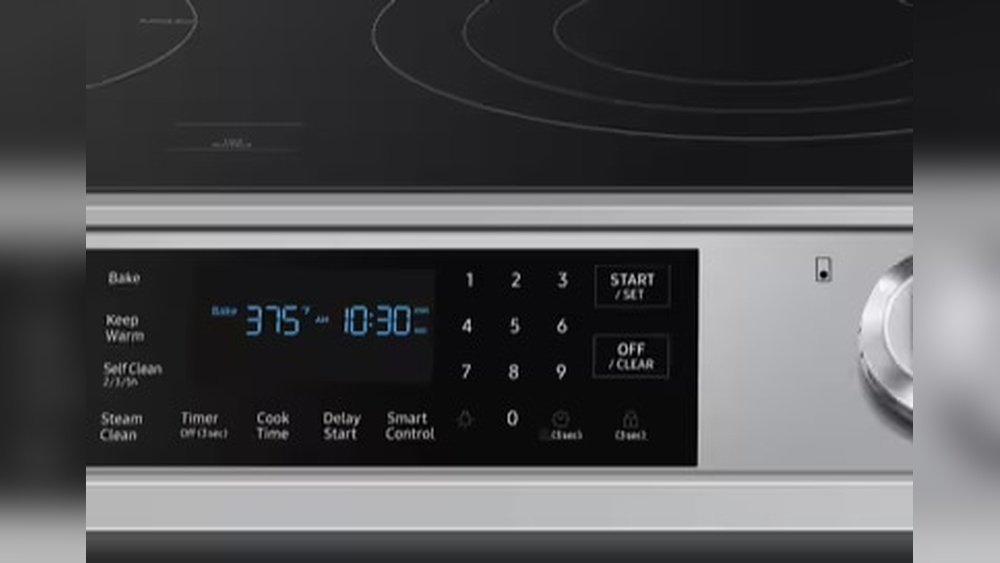
Setting the clock on your Samsung stove might seem like a small task, but it is surprisingly important. A correctly set clock helps with timed baking, delayed cooking features, and even some self-cleaning functions. If the time is wrong, recipes can go off track and you may find yourself frustrated with the results.
Whether you just installed a new Samsung range, recently lost power, or changed daylight saving time, knowing how to set the clock is a necessary kitchen skill. This guide will give you everything you need to get it right, covering different Samsung models, step-by-step instructions, troubleshooting, and answers to the most common questions.
Why Setting The Clock Matters
You may wonder why it is important to set the clock on your Samsung stove. The answer is about more than just knowing the time while you cook. Many modern Samsung stoves rely on the clock for features like delayed start, timed bake, and automatic oven shut-off. If your clock is not set, these features may not work, or worse, they might start at the wrong time.
For example, if you want to use the delayed start feature to have dinner ready when you get home, the oven needs to know the correct time. Timed cooking also depends on the clock, shutting the oven off after a set period.
Some self-cleaning cycles won’t even start unless the clock is set. In short, a correctly set clock keeps your kitchen running smoothly and safely.
Understanding Samsung Stove Clocks
Before you set the clock, it helps to know what type of clock your Samsung stove uses. Samsung stoves have evolved over the years, and their clocks have too. They can be digital or analog, and the steps to set them may differ. Most Samsung stoves from the past decade use digital clocks, but some older or basic models may have manual dials.
Types Of Samsung Stove Clocks
- Touchscreen digital clocks: Found on newer, high-end models, often with a large touch panel.
- Button-operated digital clocks: The most common type, using physical buttons for “Clock,” “+,” “-,” or number pads.
- Manual dial clocks: Rare, but found on some older or entry-level ranges.
Knowing which type you have will help you follow the correct steps.
Preparing To Set The Clock
Before you begin, make sure your stove is plugged in and has power. If your stove was recently installed, experienced a power outage, or has a blinking clock, it is ready to set. Some Samsung stoves automatically enter clock-setting mode after a reset, but most require you to press a specific button.
Safety Tips
- Do not set the clock while cooking: This can interrupt the oven’s operation.
- Keep the stove clear: Make sure buttons and the display are clean so you can read and press them easily.
- Read the manual: If you have your model’s manual, keep it nearby for quick reference.
Setting The Clock On Common Samsung Stove Models
Samsung stoves have different control panels, so your steps may be a bit different depending on your model. Below are instructions for the most common types. Find the one that matches your stove.
Using The “clock” Button (most Common Models)
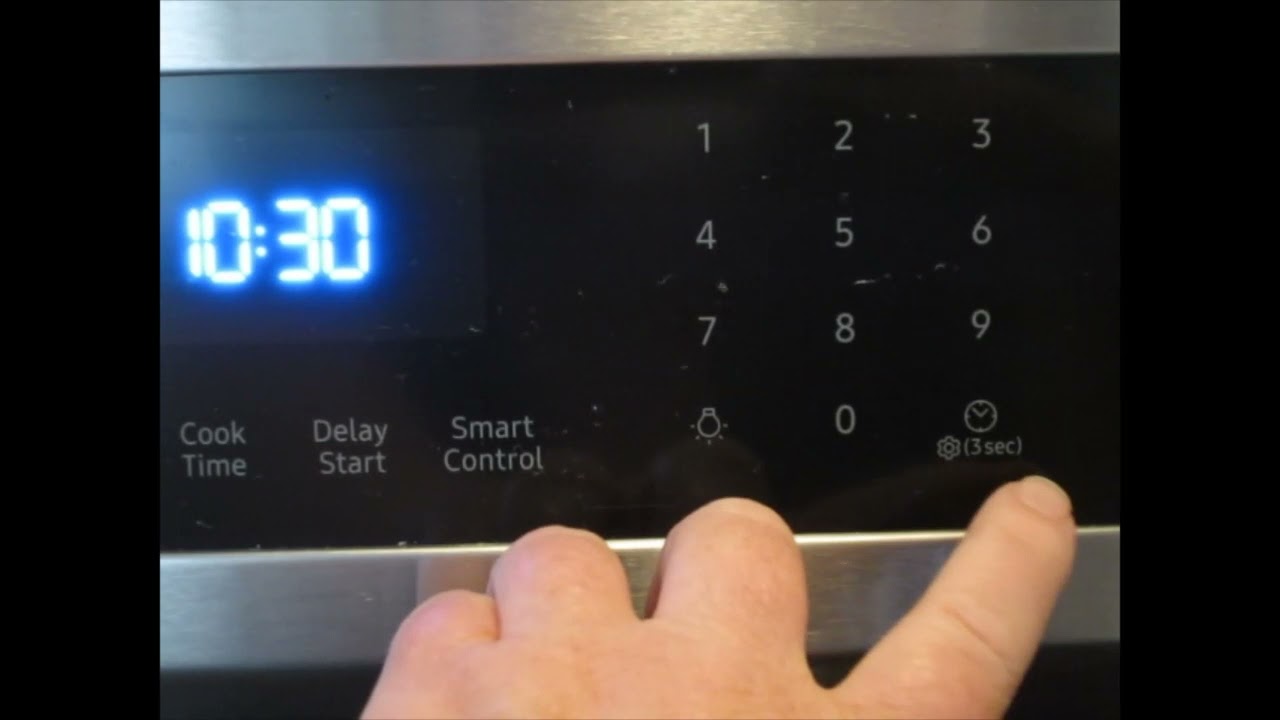
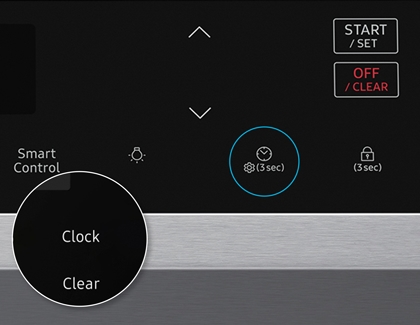
- Locate the Clock button: It may be labeled as Clock, Time, or have a small clock icon.
- Press the Clock button: Hold for 3 seconds until the display blinks or shows “SET.”
- Set the time: Use the + and – buttons, or a number pad, to enter the correct time.
- Choose AM or PM (if available): Some models require you to select AM or PM by pressing the Clock button again.
- Confirm: Press Clock or Start to save the new time.
Using A Touchscreen Control Panel
- Wake up the display: Tap the screen if it is off.
- Find Settings or Options: Look for a gear or menu icon.
- Select Clock: Tap Clock or Time from the list.
- Enter the time: Use the on-screen keypad.
- Confirm: Tap OK or Save.
Setting The Clock After A Power Outage
If your Samsung stove loses power, the clock may blink or display “12:00.” Simply follow the steps above for your model. If the display doesn’t respond, check your circuit breaker or outlet.
For Manual Dial Clocks
If you have a rare manual dial clock:
- Turn the dial: Rotate until the correct time lines up with the indicator.
- Release: Let go and the clock is set.
Manual clocks do not control timed features, but it’s still helpful for basic cooking.
Credit: www.youtube.com
Table: Comparison Of Common Samsung Stove Clock Interfaces
| Clock Type | How to Set | Common Models |
|---|---|---|
| Button-operated Digital | Press “Clock,” set with +/-, confirm | NE59M4320SS, NX58H5600SS |
| Touchscreen Digital | Menu > Settings > Clock | NX60T8751SS, NE63T8951SS |
| Manual Dial | Turn dial to set time | Older models, basic ranges |
Detailed Steps For Popular Samsung Stove Models
Let’s break down the steps for some of Samsung’s most popular ranges. If your model isn’t listed, the process is usually similar.
Samsung Ne59m4320ss (button Controls)
- Press Clock: The display will start blinking.
- Enter Time: Use number keys (e.g., 1-2-3-0 for 12:30).
- Confirm: Press Clock again or Start.
Samsung Nx58h5600ss (button Controls)
- Hold Clock: Hold for 3 seconds.
- Adjust Time: Use + or – buttons.
- Save: Press Start/Set.
Samsung Nx60t8751ss (touchscreen)
- Open Menu: Tap the gear icon.
- Select Clock: In the list of settings.
- Set Time: Enter using the on-screen number pad.
- Finish: Tap OK.
Older Models With Manual Dial
- Find the dial: Usually at the back of the control panel.
- Set time: Turn until the correct time shows.
Automatic And Smart Clock Setting Features
Some newer Samsung stoves have Wi-Fi or SmartThings integration. These can set the clock automatically using your smartphone or home network. If your stove supports this, set up the SmartThings app and link your range. The app can sync the time with your phone, making manual clock setting unnecessary.
How To Set The Clock With Smartthings
- Download the SmartThings app: Available for iOS and Android.
- Connect your stove: Follow the on-screen instructions.
- Sync the time: The stove will update to match your phone’s clock.
This is especially useful if you often lose power, as the clock will reset automatically.
Common Mistakes To Avoid
Many users run into problems when setting the clock. Here’s what to watch for:
- Pressing the wrong button: “Timer” is not the same as “Clock.” Setting the timer will not change the oven’s time.
- Not confirming the time: On most models, you must press Clock or Start after setting the time.
- Trying to set the clock during cooking: If the oven is running, the clock may not change.
- Skipping AM/PM: Some digital models require you to set this for accurate timing.
Table: Differences Between Timer And Clock Functions
| Function | Purpose | How to Set |
|---|---|---|
| Clock | Shows current time, controls timed cooking | Press “Clock” and set time |
| Timer | Counts down, beeps when done | Press “Timer,” set minutes/hours |
Troubleshooting: When The Clock Won’t Set
Sometimes, the clock does not respond. Here are common reasons and what you can do:
Power Or Display Problems
- Check power: Is the stove plugged in and the circuit breaker on?
- Display not working: If the display is blank, reset the breaker or check the outlet.
Buttons Not Responding
- Locked control panel: Some models lock the panel to prevent accidental changes. Look for a lock icon. Hold the “Lock” or “Options” button for 3-5 seconds to unlock.
- Stuck buttons: Wipe the control panel clean. Sometimes dirt or grease blocks buttons.
Software Glitches
- Reset the stove: Unplug for 1 minute, then plug back in.
- Try again: After a reset, the clock should blink and let you set the time.
Advanced Troubleshooting
If the above steps fail, your range may need a factory reset. This is usually done by unplugging for 10 minutes. If problems continue, contact Samsung support or visit their official help page for further guidance.
Tips For Daylight Saving Time
In the US, clocks move forward in spring and back in fall. Remember to update your Samsung stove clock each time. Some smart models can update the time automatically if connected to Wi-Fi. For manual and older models, follow the steps above.
Practical Tip
Setting the clock right after you change your wall clocks can help you remember. Try making it a habit twice a year to avoid confusion.
Table: Manual Vs. Smart Clock Setting
| Method | Pros | Cons |
|---|---|---|
| Manual Setting | Works on any model, no extra setup | Must reset after power loss, slower |
| SmartThings/Wi-Fi | Automatic updates, time syncs with phone | Requires app and Wi-Fi, not on all models |
Credit: www.samsung.com
Setting The Clock For Timed Cooking Features
If you want to use features like delayed start or timed bake, your clock must be set accurately. Here’s how these features work with the clock:
- Timed Bake: You set the oven to turn off after a certain time. The oven uses the clock to count down.
- Delayed Start: You set the start time. The oven waits until that time to begin.
If the clock is wrong, these features may start or end at the wrong time. Always check your clock before using advanced cooking modes.
What If My Samsung Stove Has No Clock Button?
Some Samsung stoves, especially new touch models, do not have a physical “Clock” button. Instead, look for a Menu or Settings button. The clock is usually in the first few options. If you can’t find it, check your user manual or the Samsung website for your model.
Real-world Examples
Consider this: You are baking bread that needs to rise and bake for exactly 45 minutes. If your clock is 10 minutes fast, you could take the bread out too soon, resulting in a dense loaf. Similarly, if you set a delayed start for dinner and the clock is wrong, you might come home to a cold oven. These small mistakes can ruin meals and waste ingredients.
Non-obvious Insights For Beginners
- Many Samsung stoves require the oven to be off when setting the clock. If your oven is running, cancel all cooking functions first. This is not always clear in the manual.
- Some control panels have a hidden “hold” function. You may need to press and hold the “Clock” or “Options” button for several seconds before the display will blink and let you set the time. Tapping quickly does nothing.
- If your stove beeps but doesn’t change the time, it could mean the panel is locked. Look for a small lock symbol or child lock indicator.

Credit: www.youtube.com
Step-by-step Example: Setting The Clock On A Samsung Nx58h9500ws
Let’s walk through a real setting process:
- Press and hold “Clock”: The display flashes.
- Enter the time: Use number keys (e.g., 0-7-1-5 for 7:15).
- Choose AM/PM: Press “Clock” again to toggle.
- Confirm: Press “Start.”
If you make a mistake, repeat the process. The oven will not accept invalid times (like 13:99). If you wait too long, the display will stop blinking and you’ll need to start over.
How Clock Settings Affect Oven Functions
A correctly set clock doesn’t just show the time. It controls:
- Timed cooking
- Delayed bake
- Automatic oven shut-off
- Self-clean cycles
If the clock is not set, these features may not work or may cause errors. Always set the clock after a power outage, cleaning, or installation.
When To Reset The Clock
- After power loss or outage
- When daylight saving time changes
- After unplugging the stove for repairs or cleaning
- If the display blinks or shows “12: 00”
Resetting the clock is quick and prevents mistakes with timed cooking.
Where To Find Your Model’s Clock Instructions
Every Samsung range comes with a user manual. If you lost yours, you can find a PDF version on Samsung’s official website. Enter your model number (found on the sticker inside the oven door) to get exact instructions. You can also check Samsung’s support site for help.
Advanced Features: 24-hour Vs. 12-hour Format
Some Samsung ranges let you choose between 12-hour (AM/PM) and 24-hour (military) time. This is helpful if you prefer seeing 14:00 instead of 2:00 PM. Change this in the Settings or Options menu. Remember, using the wrong format can confuse timed cooking features.
Cleaning The Control Panel For Accurate Setting
A sticky or greasy control panel can make buttons unresponsive. Use a soft, damp cloth (never spray cleaner directly on the panel) to keep it clean. Avoid abrasive cleaners, which can damage the display.
When To Call For Service
If you’ve tried all steps and your clock still won’t set, there may be a hardware problem. Contact Samsung support or a qualified appliance technician. Common issues include:
- Failed control board
- Broken display
- Stuck buttons from spills
Professional service can replace parts and restore full function.
Frequently Asked Questions
How Do I Set The Clock On A Samsung Stove If The Panel Is Locked?
If your Samsung stove’s control panel is locked, you need to unlock it before setting the clock. Look for a lock symbol or a button labeled “Lock” or “Options.” Hold this button for 3-5 seconds until the lock icon disappears. Once unlocked, follow the normal clock-setting steps for your model.
Why Does My Samsung Stove Clock Keep Resetting To 12:00?
A clock that keeps resetting to 12:00 usually means your stove is losing power. Check that it is plugged in firmly and your circuit breaker is not tripping. Frequent power outages or a faulty outlet can also cause this. If the problem continues, you may need to call an electrician or Samsung support.
Can I Set My Samsung Stove Clock To 24-hour Time?
Many Samsung stoves offer both 12-hour and 24-hour clock formats. You can change this in the Settings or Options menu. If your model doesn’t have this feature, it will use 12-hour time by default.
What Should I Do If None Of The Clock Buttons Work?
If none of the clock buttons respond, try these steps:
- Check if the control panel is locked.
- Unplug the stove for 1 minute, then plug back in.
- Make sure your stove has power.
If problems persist, the control panel may need repair.
Do All Samsung Stoves Set The Clock The Same Way?
No, clock setting can vary by model. Some use a physical button, others use a touchscreen or require you to access a menu. Always check your user manual or look up your specific model on Samsung’s website for the best instructions.
Setting your Samsung stove clock is a simple but important part of kitchen management. By following these steps, you keep your appliance running smoothly and make sure your meals turn out just right. If you ever run into trouble, most issues can be solved with a quick reset or a look at the official support resources.
With a little practice, you’ll find this task quick and stress-free, leaving you more time to focus on cooking.