Sealing your kitchen cabinets is one of the smartest ways to protect them from water, grease, and heat. Whether your cabinets are wood, painted, or laminated, a proper seal can keep them looking fresh for years. But many homeowners feel nervous about the process, unsure where to start or worried about making mistakes that could ruin the look.
The good news is, sealing cabinets is a task that can be done by anyone with patience, a few basic tools, and the right information.
Think of your kitchen cabinets as the foundation of your kitchen’s beauty and function. When they’re unprotected, daily cooking, cleaning, and even humidity can damage the surface. You might see fading, swelling, or sticky grime that’s hard to remove. Sealing creates a strong barrier against all these problems.
The right sealant also makes cleaning easier and can even boost your home’s value.
This guide will walk you through everything you need to know about sealing kitchen cabinets—from choosing the right sealant to step-by-step application, plus expert tips and answers to common questions. By the end, you’ll have the confidence to do the job yourself or know exactly what to ask a professional.
Why Sealing Kitchen Cabinets Is Essential
Kitchen cabinets face daily wear from moisture, food spills, and grease. Without a protective seal, wood can absorb water, paint can peel, and laminate can lose its shine. Over time, this leads to expensive repairs or replacements. Sealing acts as a shield, protecting your cabinets from:
- Moisture damage: Prevents swelling, warping, and mold growth.
- Stains and grease: Stops deep stains from food, sauces, and oils.
- Scratches and marks: Hardens the surface to resist minor scratches.
- Fading and discoloration: Guards against sunlight and heat exposure.
Many people miss one key point: sealing isn’t just for new cabinets. Even older cabinets benefit from resealing, especially if you’ve just refinished or painted them.
Different Types Of Kitchen Cabinet Materials
Understanding your cabinet material is crucial before sealing. Not every sealant works with every surface. Here’s a breakdown:
| Cabinet Material | Common Issues | Best Sealant Types |
|---|---|---|
| Solid Wood | Swelling, stains, scratches | Polyurethane, wax, oil-based sealers |
| Painted Wood | Peeling, chipping, moisture | Polycrylic, water-based polyurethane |
| Laminate | Peeling, dullness | Water-based polyurethane (light coats) |
| Veneer | Cracking, fading | Oil-based polyurethane, shellac |
If you’re not sure about your cabinet material, check inside a door or in an out-of-sight spot.
Types Of Sealants For Kitchen Cabinets
Choosing the right sealant is half the battle. The market offers many products, but not all are suitable for kitchens. Here are the main options:
Polyurethane
Polyurethane is popular for its durability and water resistance. It comes in oil-based and water-based formulas. Oil-based types give a warm, amber tone, while water-based dries clear and is less smelly. Water-based polyurethane is often better for light or painted cabinets.
Polycrylic
Polycrylic is a water-based sealant that dries quickly and stays clear. It’s ideal for painted cabinets, especially white or light colors, since it doesn’t yellow over time.
Shellac
Shellac is a natural sealer that gives a beautiful gloss and dries fast. However, it’s less resistant to heat and alcohol, so it’s best for low-traffic cabinets.
Wax
Wax offers a soft sheen and is easy to apply, but needs frequent reapplication. It’s often used on chalk-painted cabinets for a vintage look.
Varnish
Varnish provides strong protection and is often used on stained wood. It’s tougher than polycrylic but can yellow with age.
Oil-based Sealers
Linseed or tung oil can be used for a natural look, especially on open-grain woods. They penetrate deeply, but protection is less than with polyurethane.
Here’s a quick comparison:
| Sealant | Finish | Durability | Dries Clear? | Reapplication Needed? |
|---|---|---|---|---|
| Polyurethane | Gloss, satin, matte | Very High | Yes (water-based) | No |
| Polycrylic | Satin, matte | High | Yes | No |
| Shellac | High gloss | Medium | Yes | Yes (occasionally) |
| Wax | Soft sheen | Low | Yes | Yes (often) |
| Varnish | Gloss, satin | Very High | No | No |
Preparing Kitchen Cabinets For Sealing
Preparation is the step most people rush or skip, but it makes all the difference. Sealing over dirt, grease, or loose paint leads to poor results. Here’s what you need to do:
- Empty the Cabinets: Remove all food, dishes, and hardware like handles and knobs. This gives you full access to every surface.
- Clean Thoroughly: Use a degreaser or warm soapy water to scrub away grease, dust, and old food. Pay special attention to corners and around handles.
- Repair Damage: Fill any cracks, dents, or holes with wood filler. Let it dry, then sand smooth.
- Sand the Surface: Lightly sand with 220-grit sandpaper. This helps the sealant stick. For painted or laminated cabinets, a gentle scuff is enough.
- Remove Dust: Wipe with a tack cloth or damp microfiber cloth to remove all dust. Even tiny bits can cause rough spots.
- Tape Off Areas: Use painter’s tape to protect walls, counters, and hinges.
A non-obvious tip: Always check the weather. High humidity or cold temperatures can slow drying and cause cloudiness in the finish.
Tools And Materials Needed
Having the right tools ready speeds up the job and gives a professional result. For most kitchen cabinets, you’ll need:
- Quality paintbrushes (synthetic for water-based, natural for oil-based)
- Small foam rollers for flat surfaces
- Lint-free cloths or tack cloths
- Painter’s tape
- Sandpaper (220-grit for prep, 320-grit for between coats)
- Wood filler (if repairing)
- Degreaser or gentle cleaner
- The chosen sealant
One thing beginners miss: cheap brushes can leave bristles behind or cause streaks. Invest in a good brush for a smooth finish.
Step-by-step Guide To Sealing Kitchen Cabinets
Let’s walk through the actual process. While steps may vary slightly by sealant, the general process is similar.
1. Remove Cabinet Doors And Drawers
Unscrew doors and take out drawers for easier access. Label hardware and door locations with painter’s tape for easy reassembly.
2. Clean And Prep Surfaces
Double-check that all grease and dust are gone. Clean again if needed.
3. Sand And Wipe Down
Lightly sand all surfaces, including edges and corners. Wipe off all dust with a tack cloth.
4. Apply The First Coat Of Sealant
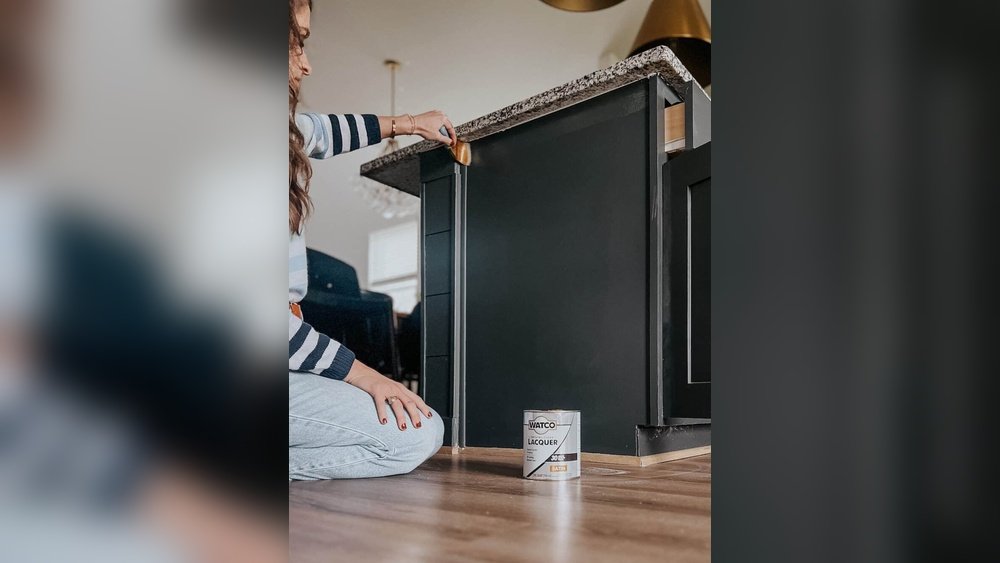
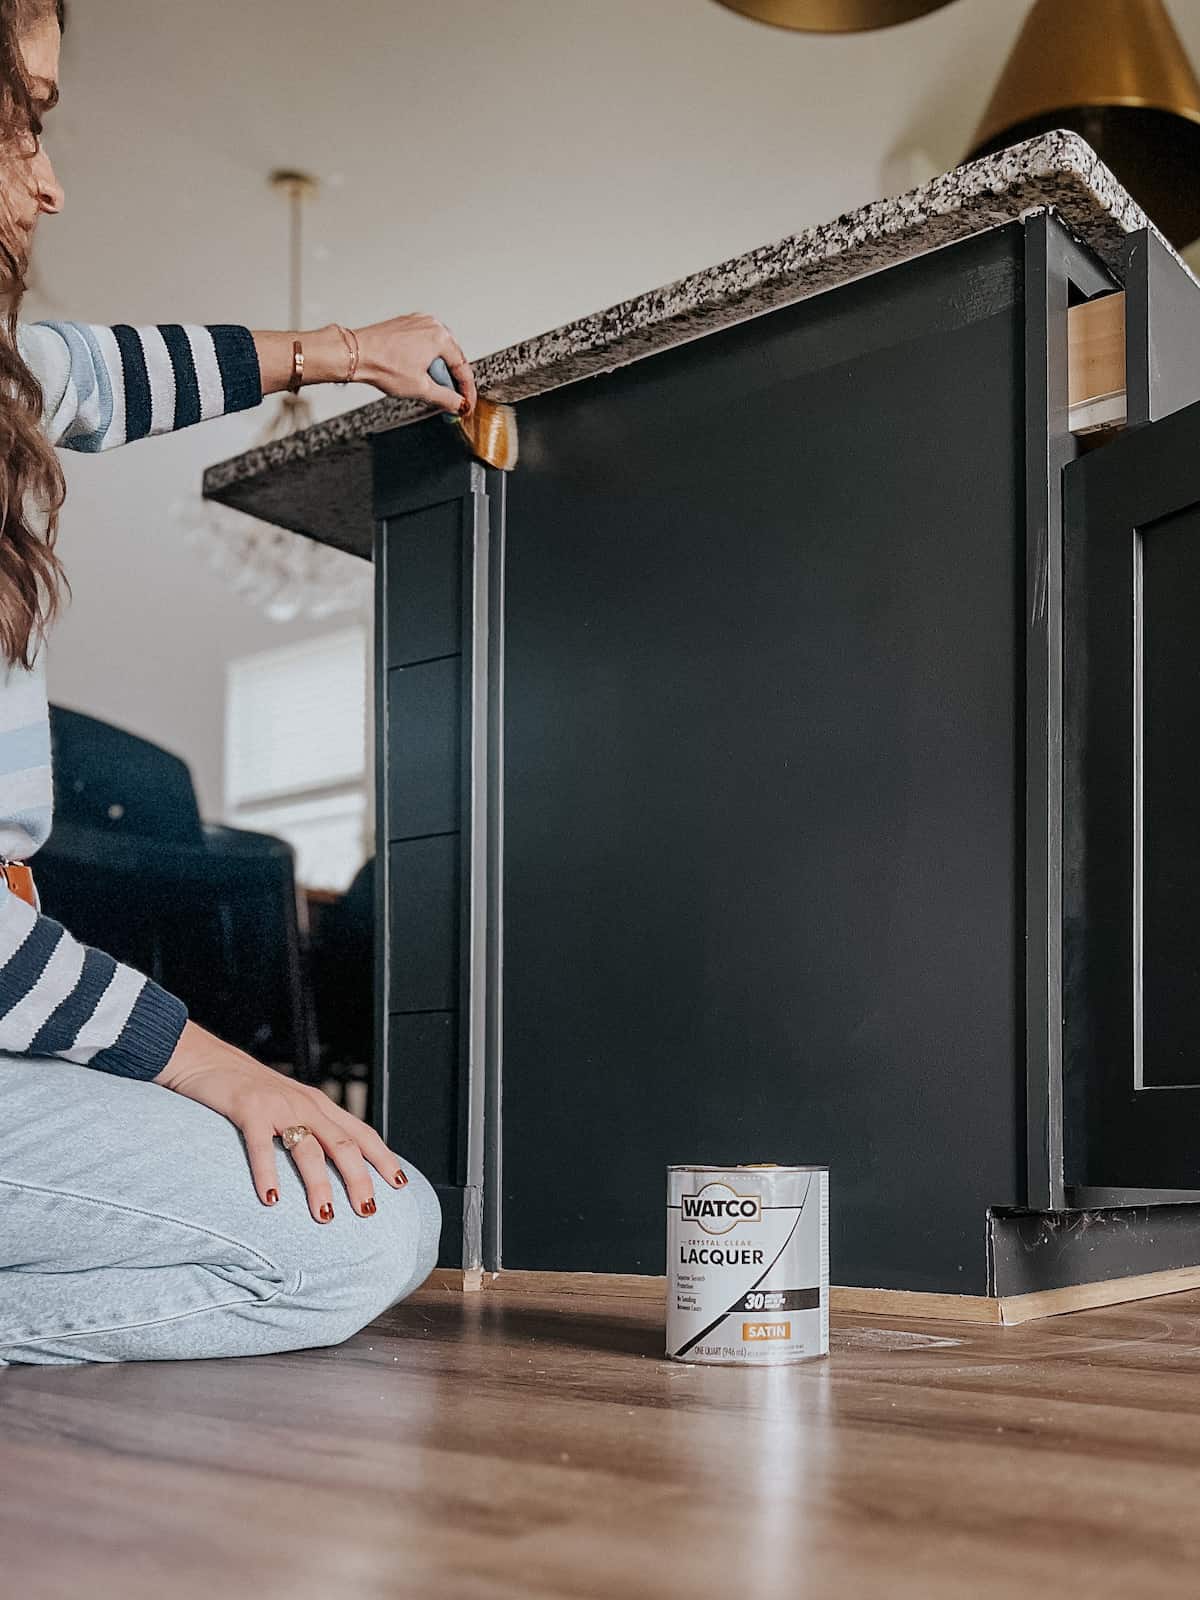
Stir your sealant well (don’t shake, as this causes bubbles). Using a quality brush or foam roller, apply a thin, even coat in the direction of the wood grain. Start with the backs of doors, then do the fronts.
5. Let It Dry
Check the label for drying time. Most water-based sealants dry in 2-4 hours, oil-based in 6-12 hours. Avoid touching or moving pieces until fully dry.
6. Sand Between Coats
Lightly sand the first coat with 320-grit sandpaper to remove any roughness. Wipe clean.
7. Apply Second (and Third) Coats
Repeat the process for at least two coats—three is ideal for kitchen cabinets. Each coat adds depth and strength. Sand lightly between each.
8. Let Cure Fully
After the final coat, let the cabinets cure for at least 48-72 hours before heavy use. Some sealants need up to a week to reach full hardness.
9. Reinstall Hardware And Doors
Once fully cured, replace hardware and reinstall doors and drawers.
A practical tip: Seal the undersides and edges of doors—these areas see lots of splashes and are often missed.

Credit: diy.stackexchange.com
Common Mistakes To Avoid
Even experienced DIYers can make errors. Here are the top mistakes and how to avoid them:
- Skipping Prep: Sealing over dirt or grease leads to peeling and weak protection.
- Rushing Drying Time: Not waiting between coats causes stickiness and fingerprints.
- Using the Wrong Sealant: Oil-based on white paint can yellow. Always match sealant to your cabinet and paint type.
- Thick Coats: Heavy coats dry slowly and can bubble or drip. Thin, even coats are best.
- Not Sealing All Sides: Unsealed edges let in moisture, leading to warping or peeling.
A less-known mistake: using old or expired sealant. Always check the date and do a test patch if unsure.
How Often Should You Reseal Kitchen Cabinets?
Resealing isn’t needed every year, but it depends on your kitchen’s use and cabinet material. On average:
- Solid wood cabinets: Every 3–5 years or after refinishing.
- Painted cabinets: Every 2–4 years, especially if cleaned often.
- Wax finishes: Every 6–12 months.
Signs it’s time to reseal include dullness, water not beading on the surface, or sticky spots that won’t clean off.
Caring For Sealed Kitchen Cabinets
Proper care extends the life of your seal. Here’s what to do:
- Wipe spills quickly with a soft cloth.
- Use mild soap, not harsh chemicals, for cleaning.
- Avoid scrubbing with steel wool or rough pads.
- Dry surfaces after cleaning to prevent water spots.
- Polish with a little mineral oil for extra shine (wood only).
A tip many miss: kitchen steam can soften some sealants over time. Run your range hood and keep the kitchen ventilated when cooking.
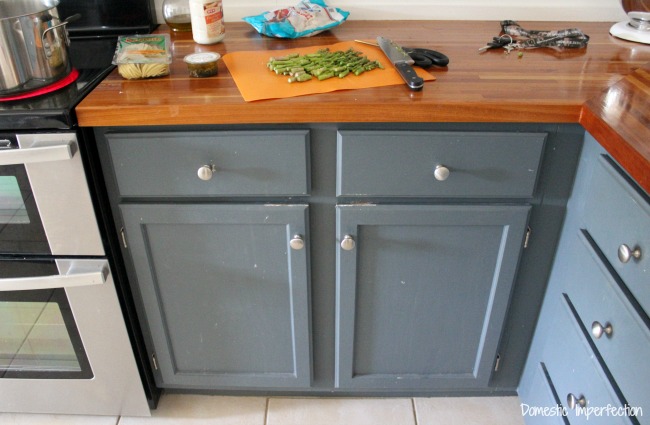
Special Considerations For Painted Cabinets
Painted cabinets need gentle handling. Polycrylic is usually the best sealant because it won’t yellow. Always test in a hidden spot first. For bright whites, avoid oil-based sealants.
Some paints claim to be self-sealing, but a topcoat gives extra protection. If your cabinets get daily use or are in a humid area, sealing is strongly recommended.
Sealing Kitchen Cabinets After Painting
If you’ve just painted your cabinets, let the paint cure fully (usually 7 days) before sealing. This prevents the sealant from trapping moisture or causing streaks. Lightly sand the paint before applying your first coat of sealant.
Can You Seal Laminate Cabinets?
Yes, but it’s trickier. Lightly scuff the surface with fine sandpaper, then use a water-based polyurethane in thin coats. Laminate won’t absorb sealant, so it sits on top. Avoid thick layers, which can peel.
Environmental And Safety Tips
Always work in a well-ventilated area. Some sealants have strong fumes—open windows and use fans if possible. Wear gloves and a mask if sensitive to smells or chemicals. Store unused sealant in a cool, dry place, tightly sealed.
For eco-friendly options, look for low-VOC (volatile organic compounds) water-based products. These are safer for your family and the environment.
Pros And Cons Of Diy Vs. Professional Cabinet Sealing
Here’s a quick look at whether to do it yourself or hire a pro.
| DIY | Professional |
|---|---|
| Cheaper Flexible timing Learn new skills |
Expert finish Fast turnaround No mess for you |
| Time-consuming Possible mistakes Needs patience |
Costs more Must schedule May need to leave kitchen unused |
If you have large or antique cabinets, or want a flawless finish, a professional may be worth the investment.
Real-world Example: Sealing An Oak Kitchen
Consider a homeowner with classic oak cabinets. After years of cooking, the finish is dull and water stains appear near the sink. Here’s what they did:
- Removed doors and hardware, labeled each piece.
- Cleaned with a mix of vinegar and water, then let dry.
- Filled small dents with wood putty.
- Sanded gently, wiped clean.
- Applied a water-based polyurethane with a foam roller in three thin coats, sanding lightly between each.
- Let cure for 72 hours before reinstalling.
The result? Water beads up, stains wipe off easily, and the wood grain looks rich and vibrant. The project cost under $100 in materials and took a weekend.
Advanced Tips For A Professional Finish
- Use a high-density foam roller for large, flat areas to avoid brush strokes.
- For deep-grain woods, brush sealant into the grain, then smooth out.
- In hot weather, work in small sections to avoid quick-drying streaks.
- Always sand lightly after each coat, even if the surface feels smooth.
- For a glass-like finish, use four very thin coats and sand with extra-fine (400 grit) paper before the last coat.
Most beginners focus only on visible surfaces. Sealing cabinet edges, undersides, and even the inside lip gives complete protection.
When Not To Seal
Some ultra-modern laminate or acrylic cabinets are designed to be low-maintenance and don’t need extra sealing. Check your manufacturer’s instructions before applying any product.
The Cost Of Sealing Kitchen Cabinets
Costs vary by kitchen size and product choice. On average:
- Materials for a small kitchen: $40–$90
- Materials for a large kitchen: $100–$200
- Professional sealing: $300–$1,000+
Saving tip: buying mid-range brushes and rollers gives a better finish than the cheapest supplies, without pro-level costs.
Credit: www.loveandrenovations.com
How Sealing Affects Home Value
Well-sealed, attractive cabinets can add to your home’s value. Buyers notice kitchens first, and cabinets in good condition signal a well-maintained house. According to the National Association of Realtors, minor kitchen upgrades have a strong return on investment—sometimes up to 80%.
Where To Learn More
For more in-depth guides on woodworking and finishes, check resources like This Old House, which offers expert advice and real-life examples.
Credit: wildfireinteriors.com
Frequently Asked Questions
How Long Does Cabinet Sealant Last?
Most high-quality sealants last 3–5 years with normal use. Areas near sinks or stoves may need more frequent touch-ups.
Can I Seal Cabinets Without Sanding?
Sanding is highly recommended for good adhesion. If you skip sanding, the sealant may not bond well and could peel.
What Is The Best Sealant For White Painted Cabinets?
Polycrylic is usually best because it dries clear and resists yellowing. Avoid oil-based sealants, which can cause discoloration.
How Do I Fix Cloudy Or Streaky Finishes?
Cloudiness often means moisture got trapped or coats were too thick. Lightly sand the area and apply a thin, even coat to fix.
Is Sealing Cabinets A Good Diy Project For Beginners?
Yes, with patience and careful prep, sealing cabinets is beginner-friendly. Start with a small area to build confidence before tackling the whole kitchen.
Sealing your kitchen cabinets is a practical way to protect your investment and keep your kitchen looking fresh. With the right tools, a good plan, and careful technique, you can achieve results that rival a professional—while saving money and learning a valuable skill.