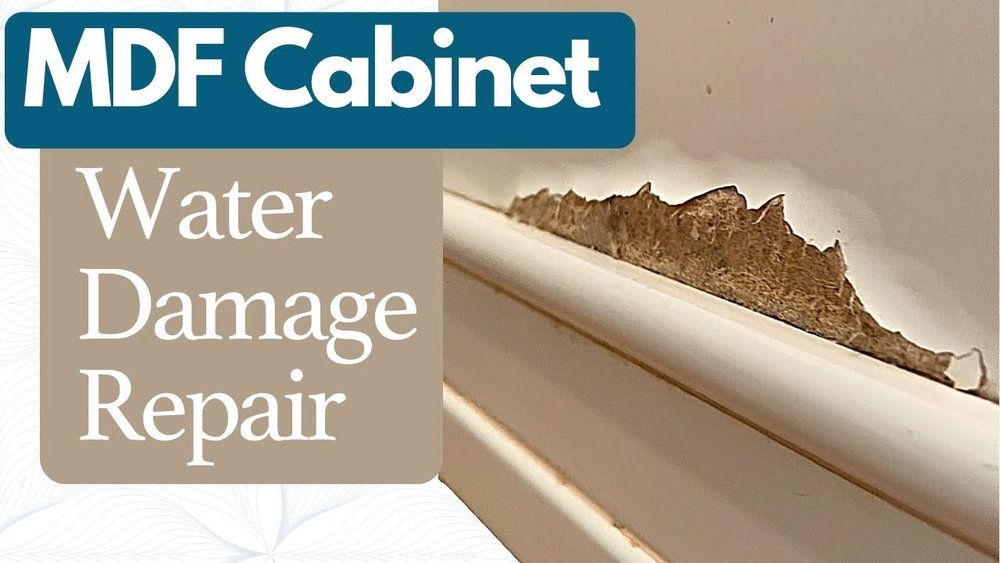
Water damage on kitchen or bathroom cabinets is a common problem, especially on the sides where water can seep in unnoticed. If you see bubbling, swelling, discoloration, or soft spots on your cabinet sides, you might feel frustrated and worried about costs. Good news: You can often repair water damaged cabinet sides yourself, saving money and restoring your cabinets to look almost new. In this guide, you’ll learn everything you need to know to fix cabinet sides affected by water, from identifying the problem to choosing the right materials, and step-by-step instructions for repair. You’ll also get expert advice on preventing future damage, tips that beginners often miss, and answers to common questions.
Understanding Water Damage On Cabinet Sides
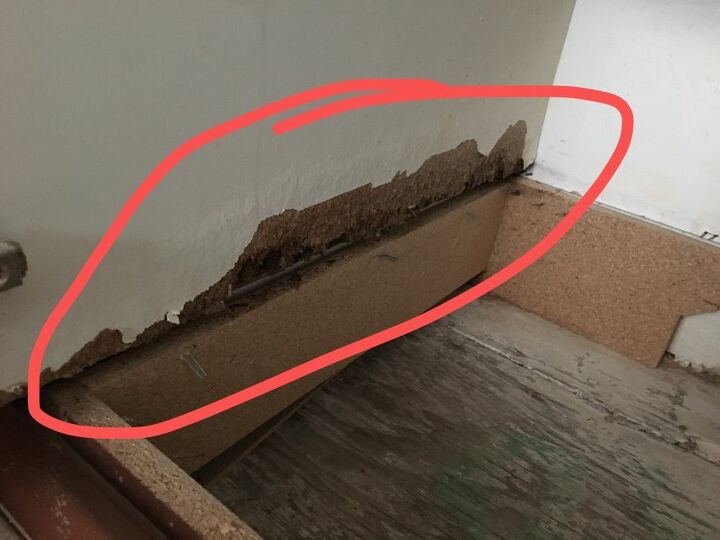
Water damage usually happens when cabinets are exposed to leaks, spills, or high humidity. The cabinet sides are vulnerable because they are often made of engineered wood, like particle board or medium density fiberboard (MDF), which absorbs water quickly. When water soaks into these materials, it causes:
- Swelling and warping
- Bubbling or peeling finish
- Discoloration
- Softness or crumbling
Many people think only the visible surface is damaged, but water often seeps deeper. If untreated, this damage can weaken the cabinet structure and allow mold to grow.
Why Cabinet Sides Are Prone To Water Damage
Cabinet sides are usually close to sinks, dishwashers, or bathrooms. They’re not always sealed well, so water can drip or seep into joints and corners. Unlike the cabinet doors, which are often made from solid wood, sides are more likely to be made from cheaper materials to save costs. This makes them more vulnerable.
Kitchens and bathrooms are high-traffic areas where water is always in use. Even a small splash from washing hands or doing dishes can slowly work its way into the cabinet sides. Over weeks or months, this repeated exposure is enough to break down the material, especially if the finish is scratched or the seams are not sealed.
Sometimes, water damage starts from behind, such as when plumbing connections under a sink develop a slow leak. By the time you see swelling or bubbling, the damage may already be several layers deep.
Signs You Need To Repair
Look for these signs:
- The finish is bubbling or peeling
- The side feels soft or spongy
- There is visible swelling, especially near the bottom
- Mold or mildew odor
- Screws or hinges are loose because the wood has softened
If you see two or more of these, your cabinet side needs attention.
It’s easy to overlook the early warning signs, but acting quickly makes repairs simpler and less expensive. For example, a small bubble in the finish may seem harmless, but if left alone, it can spread and allow more water to enter.
Mold or a musty odor is especially serious; it means the area has stayed damp for some time. If you notice rust on metal parts or green/black spots, suspect water damage even if the surface looks okay.
Tools And Materials Needed For Repair
To repair water damaged cabinet sides, you need the right tools and materials. Using the wrong ones can make the problem worse. Here’s what you’ll need:
- Screwdriver (for removing cabinet hardware)
- Utility knife (for cutting away damaged material)
- Sandpaper (medium and fine grit)
- Wood filler or epoxy putty
- Paint scraper
- Clamps (if you need to glue parts)
- Wood glue (water-resistant type)
- Primer (stain-blocking for water damage)
- Paint or finish (matching your cabinet)
- Protective gear (gloves, mask)
- Replacement panel (if damage is severe)
- Measuring tape
- Caulk (for sealing edges)
- Sponge and mild cleaner
- Brushes and rollers (for painting)
Additional Tools That Help
A moisture meter is handy for checking if wood is fully dry before repair. A putty knife can also be useful for spreading filler smoothly. For large or deep repairs, a small hand saw may help cut out the worst damaged material.
Choosing The Right Materials
Most cabinets use particle board or MDF. If your cabinet is solid wood, repairs are easier. For engineered wood, use epoxy-based wood filler for strength. If the damage is severe, you may need to replace the entire side panel.
Here’s a comparison of common cabinet side materials:
| Material | Water Resistance | Repair Difficulty | Cost |
|---|---|---|---|
| Solid Wood | Moderate | Easy | High |
| MDF | Low | Medium | Medium |
| Particle Board | Low | Hard | Low |
| Plywood | High | Easy | High |
Tip: Always match the repair material with your cabinet’s original material for best results.
Another detail: MDF and particle board often react badly to water, becoming crumbly and losing strength even after drying. Solid wood swells and may warp but doesn’t usually crumble. Plywood is the most forgiving—it resists swelling and is easy to repair with filler and paint.

Credit: www.oldpeg.com
Step-by-step Repair Process
Repairing water damaged cabinet sides takes patience, but it’s manageable. Here is a detailed process, suitable for most cabinet types.
Step 1: Assess The Damage
Carefully inspect the cabinet side. Is only the finish damaged, or is the wood underneath soft and crumbling? Tap gently with a screwdriver handle—if you hear a dull sound or feel softness, the damage is deeper.
Insight: Beginners often miss hidden moisture. Use a moisture meter if you have one, or press gently with your fingers; soft spots mean water has penetrated.
Also check for the edges of the damage—sometimes the visible area is much smaller than the real problem. If you spot dark stains or a musty smell, moisture may have traveled farther inside. It’s better to overestimate the repair area than to leave hidden wet spots.
Step 2: Remove Hardware And Clean The Area
Take off any handles, hinges, or decorative hardware near the damaged area. Clean the surface with a sponge and mild cleaner to remove dirt, grease, and mold.
Tip: Cleaning before repair helps filler and paint stick better.
If you see mold, wear a mask and gloves to avoid breathing spores. For stubborn grime, use a gentle scrub brush. A clean, dry surface is essential for the repair materials to bond well.
Step 3: Cut Away Damaged Material
Use a utility knife or paint scraper to remove swollen, bubbled, or loose material. If the damage is deep, cut back to solid, dry wood. Don’t try to repair over soft or rotten spots—they will keep deteriorating.
Non-obvious insight: Cutting away more than you think necessary is better than leaving hidden moisture. Most beginners undercut, causing future problems.
If the damaged area crosses a seam or joint, open it up slightly to check for hidden water. In some cases, you may need to remove a bit of the undamaged panel to ensure a strong, dry base for repairs.
Step 4: Dry The Area Completely
If any moisture remains, use a hair dryer, fan, or dehumidifier to dry the area. This can take several hours. Never apply filler to wet wood.
It’s easy to rush this step, but patience pays off. Check dryness by pressing a tissue against the area—if it stays dry after an hour, you’re ready to move on. For deep repairs, let the area dry overnight if possible.
Step 5: Sand Smooth
Sand the exposed area with medium-grit sandpaper, then finish with fine-grit. Remove dust with a damp cloth.
Sanding does more than smooth the surface—it opens up the wood’s pores so filler and primer can adhere better. For best results, sand a bit beyond the damaged area to feather the repair into the original surface.
Step 6: Fill The Damage
For small holes or gouges, apply wood filler or epoxy putty. For larger areas, use epoxy, which is stronger and water-resistant. Press the filler in firmly, shaping it to match the cabinet side. Let it dry fully (usually 24 hours).
Tip: If the damage is close to a seam or edge, reinforce with water-resistant wood glue and clamps.
For deep holes, apply filler in layers, letting each one dry before adding more. This prevents cracking and ensures a strong repair. Epoxy putties are especially good for rebuilding corners or thick edges—just shape them with a wet finger or putty knife.
Step 7: Sand Again
After the filler dries, sand smooth and feather the edges so the repair blends with the surrounding area.
Sanding between layers is important for a seamless look. Run your hand over the repair—if you feel a ridge or bump, sand more until the surface is flush.
Step 8: Prime And Paint
Apply a stain-blocking primer. This prevents water stains from bleeding through. Once dry, paint or finish to match your cabinet. Use a high-quality paint or varnish for durability.
Priming is essential—especially over epoxy or wood filler, which can absorb paint unevenly. For best results, use a brush for corners and a roller for flat sections. Two thin coats of paint look better than one thick coat.
Step 9: Seal The Edges
Apply caulk along seams or edges. This helps prevent future water intrusion.
Choose a paintable, mold-resistant caulk. Smooth it with a wet finger for a neat finish. Focus on areas near sinks, dishwashers, or anywhere water might drip.
Step 10: Reinstall Hardware
Once everything is dry and finished, put back any handles or hinges. Check for alignment.
If screws were loose before, fill their holes with a bit of epoxy or wood glue before reinstalling. This gives a firmer hold and prevents future loosening.
Repairing Severe Water Damage
Sometimes, the cabinet side is too damaged to repair with filler. In these cases, you need to replace the entire panel.
Severe damage includes wood that crumbles when pressed, mold growth you can’t remove, or panels warped beyond sanding. Replacement sounds hard, but is often just a matter of removing screws or nails and installing a new panel cut to size.
Removing And Replacing The Side Panel
- Measure the damaged panel carefully.
- Remove screws or nails holding the panel.
- Cut a new panel from matching material.
- Finish the new panel with primer and paint before installing.
- Attach the new panel with screws, glue, or nails.
- Seal all seams with caulk.
If you can’t find a perfect match for your cabinet material, consider using plywood—it’s strong and more water-resistant than MDF or particle board. Paint to match the rest of the cabinet.
Here’s a comparison of repair costs:
| Repair Type | Cost Range | Time Needed | Difficulty |
|---|---|---|---|
| Minor Fill & Paint | $25-$50 | 2-3 hours | Easy |
| Replace Panel | $60-$150 | 4-6 hours | Medium |
| Professional Repair | $200-$400 | 1 day | Hard |
Non-obvious insight: Most homeowners underestimate the cost of professional repairs. DIY is almost always cheaper and offers better control over the finish.
Preventing Future Water Damage
Repairing cabinet sides is only half the battle. Preventing future water damage is key to protecting your investment.
Improve Cabinet Sealing
Use water-resistant caulk along edges and seams, especially near sinks or dishwashers. Apply a clear sealant to the bottom edges.
For even better protection, use a brush-on polyurethane or acrylic sealer on the inside edges and backs of cabinet sides. This is a step many pros take and homeowners skip.
Fix Leaks Quickly
Check plumbing regularly. Fix leaks immediately, even small drips.
Put a towel or paper under pipes for a few days; if it gets wet, you have a leak. Even a tiny drip can cause big damage over time.
Control Humidity
Use a dehumidifier or exhaust fan in bathrooms and kitchens to reduce moisture in the air.
Leaving cabinet doors open after a spill helps air circulate and dry out the area. In humid climates, running fans regularly can make a big difference.
Clean Spills Promptly
Wipe up water spills right away. Don’t let water sit.
Even water from washing hands or rinsing vegetables can add up. Make it a habit to check around sinks and appliances for moisture, especially after heavy use.
Use Protective Mats
Place mats or trays under sinks and appliances to catch drips.
Flexible silicone mats are easy to clean and protect the base of your cabinets from water and cleaning chemicals.
Upgrade Materials
If you renovate, choose cabinets with plywood sides instead of particle board or MDF. Plywood is much more water-resistant.
Many new cabinets come with plastic feet or a small gap at the bottom to prevent water from wicking up. If you’re buying new, ask about these features.
Common Mistakes To Avoid
Many beginners make errors that can cause repeat damage or poor repairs.
- Skipping drying: If you don’t dry the area fully, new damage will appear.
- Using the wrong filler: Standard wood filler can dissolve if exposed to water; use epoxy-based for wet areas.
- Not priming: Without primer, paint will bubble or peel.
- Mismatching color: Always match paint and finish to your cabinet for a seamless look.
- Ignoring leaks: Repairing without fixing the leak means damage will return.
Another mistake: using interior-only paint. Always use a kitchen or bath-rated paint for best water resistance.

Credit: www.reddit.com
Expert Tips For A Professional Finish
- Feather your sanding: Blend the edges of the repair with the existing cabinet for an invisible fix.
- Use a high-quality brush: Cheap brushes leave streaks and bristles.
- Test paint in a hidden area: Make sure the color matches before painting the repair.
- Apply two coats of finish: This gives better protection and a smoother look.
For a truly seamless repair, lightly sand between coats of paint or varnish. In high-use areas, add a clear topcoat for extra durability.
When To Call A Professional
If the damage covers more than 30% of the cabinet side, or if you see mold deep inside, it’s best to call a professional. Mold can be hazardous and sometimes requires special treatment. Also, if the cabinet is part of a complex built-in unit, professional help may be needed for structural repairs.
Professionals have access to moisture meters, mold treatments, and specialty tools. If you have valuable or antique cabinets, a pro can match finishes and materials better than most DIYers.
Example: Real-life Cabinet Repair
Let’s look at a real-world example. Jane had water damage on her bathroom cabinet side, near the sink. The panel was swollen and peeling, and screws holding the drawer were loose. She followed these steps:
- Removed hardware and cleaned the area
- Cut away swollen material with a utility knife
- Dried the area for 4 hours using a fan
- Filled the hole with epoxy putty, then sanded smooth
- Applied primer, then two coats of paint
- Sealed edges with clear caulk
Total cost: $40. Time: 5 hours. Her cabinet looked almost new, and the repair lasted over two years.
Another example: Tom repaired a kitchen cabinet next to his dishwasher. He found the leak early, cut out only a small section, and used plywood and epoxy. His patch is still solid five years later. The key was drying thoroughly before filling and sealing.
Comparing Diy Vs Professional Repairs
Here’s a quick look at the pros and cons:
| Method | Cost | Quality | Time | Risks |
|---|---|---|---|---|
| DIY | Low | Good (if careful) | Medium | May need redo if mistakes |
| Professional | High | Excellent | Quick | Expensive |
Tip: For most homeowners, DIY is the best balance unless the damage is severe.
DIY repairs let you control every detail, from color to finish. For complex designs or custom cabinets, a pro ensures a perfect match, but you pay for that expertise.
How To Match Cabinet Finish After Repair
Matching paint or stain is tricky. Bring a sample to a paint store or use color-matching apps. Always test in a hidden area first. If your cabinet is stained wood, use gel stain for repairs—it blends better.
For painted cabinets, keep leftover paint for future touch-ups. For wood grain, use a small brush to mimic the pattern. If the sheen is off, try a satin or semi-gloss topcoat to unify the look.
Safety Considerations
When working with fillers, glue, or paint, always wear gloves and a mask. Some materials release fumes that can irritate lungs. Keep the area ventilated.
Dispose of old, moldy material in sealed bags. If you see black mold, consult a professional—some types can cause health problems.
Credit: www.hometalk.com
Environmental Impact Of Repair Choices
Choosing epoxy fillers and paints has environmental costs. Whenever possible, use water-based products. Replacing only the damaged part, not the whole cabinet, reduces waste.
Many hardware stores offer low-VOC or “green” fillers and paints. Small repairs keep cabinets out of landfills, making DIY a smart choice for the environment.
Long-term Maintenance
Check your cabinets every few months for signs of water damage. Touch up paint or caulk as needed. This routine maintenance can add years to your cabinets’ life.
Keep an eye on plumbing joints, caulking, and high-use areas. Quick action on small problems prevents big repairs later.
Additional Resources
For more details on cabinet materials and repair methods, visit Wikipedia’s Cabinetry page. It offers a deep look at wood types and construction.
Frequently Asked Questions
How Do I Know If My Cabinet Side Is Too Damaged To Repair?
Press gently; if the wood crumbles or your finger leaves a dent, the damage is deep. If more than a third of the panel is affected, replacement is better than repair.
Can I Use Regular Wood Filler For Water Damaged Cabinet Sides?
Standard wood filler is not water-resistant and can break down if exposed again. Epoxy-based filler is best for wet areas or kitchens.
How Long Does A Typical Repair Take?
Minor repairs take 2-3 hours, including drying and painting. Replacing a panel can take 4-6 hours. Always allow time for filler and paint to fully dry.
Is It Possible To Repair Laminate Cabinet Sides?
Yes, but laminate needs special care. Remove bubbled laminate, repair the substrate, then re-apply new laminate sheet with strong adhesive.
For best results, cut new laminate slightly larger, then trim after glue sets.
What Is The Best Way To Prevent Water Damage In Cabinets?
Seal all edges, fix leaks quickly, use protective mats, and keep humidity low. Upgrading to water-resistant materials helps long-term.
Fixing water damaged cabinet sides is not just about restoring appearance—it protects your home from deeper issues and saves money. With careful steps, the right materials, and regular maintenance, your cabinets can last for many years. Remember, patience and attention to detail are your best tools.