Removing the light cover from a Whirlpool oven may sound simple, but for many people, it’s a confusing and sometimes frustrating task. Oven lights help you see your food as it cooks, and when the bulb burns out, you need to replace it.
However, before you can do this, you must first remove the oven light cover—without breaking it or hurting yourself. If you are a non-native English speaker or someone new to home maintenance, this guide will walk you through every detail.
By the end, you’ll feel confident tackling this small but essential kitchen task.
Why You Need To Remove A Whirlpool Oven Light Cover
Whirlpool ovens are popular for their durability, but like all appliances, their parts need maintenance. The oven light is important for monitoring food, especially when baking or roasting. When the bulb stops working, you lose visibility inside your oven, which can impact your cooking results.
Removing the light cover is the first step toward replacing the bulb. Sometimes, you may also need to remove it for cleaning, especially if grease or food particles have accumulated. Many users are surprised to learn that ignoring a dirty or broken light cover can affect the oven’s efficiency and even cause odors.
Understanding Your Whirlpool Oven Light Cover
Before you start, it’s important to understand the design of Whirlpool oven light covers. Not all ovens are the same, and Whirlpool uses a few different styles.
Common Types Of Light Covers
1. Screw-on Glass Dome
The most common type, it usually sits at the back or side of the oven cavity and unscrews like a jar lid.
2. Clip-on Or Snap-in Cover
These covers use metal clips or a snap-in design.
3. Secured With A Retaining Wire
A metal wire or bracket holds the glass in place.
Knowing which type you have will help you use the right method and tools.
Where Is The Oven Light Cover Located?
For most Whirlpool ovens, the light cover is inside the oven cavity, usually on the back wall or sometimes on the side. It’s a small, rounded or oval glass or plastic cover that protects the light bulb from heat, moisture, and grease.
Tools And Materials You’ll Need
Having the right tools is half the job. Here’s what you should gather before you start:
- Oven mitts or heat-resistant gloves (for safety)
- Soft cloth or towel (to grip the cover and protect glass)
- Flat-head screwdriver (if clips or wires are present)
- Step stool (for built-in or wall ovens)
- Flashlight (if your kitchen is not well-lit)
- Owner’s manual (for model-specific information)
Some Whirlpool ovens may require only your hands, while others need a tool to gently pry or unscrew the cover. Never use excessive force—a stuck cover is often due to grease buildup, not a design flaw.
Safety First: Preparing Your Oven
Safety should always come first, especially when working with heat and glass. Here’s how to prepare:
1. Turn Off The Oven And Let It Cool.
Never try to remove the light cover when the oven is hot. Wait at least 30-60 minutes after use.
2. Unplug The Oven Or Switch Off The Circuit Breaker.
This step is crucial to avoid electric shock, especially if your hands touch the bulb socket.
3. Wear Gloves.
Glass covers can be slippery or have sharp edges. Gloves protect your hands and give you a better grip.
4. Clear The Oven Cavity.
Remove racks or trays for better access.
Non-obvious insight: Some people forget to check if the oven light is still hot. Even after the oven cools, the bulb and cover can stay warm for a long time. Test by touching the cover gently with the back of your finger.
Step-by-step Guide: Removing A Whirlpool Oven Light Cover
Let’s break down the process so you can work safely and efficiently.
Step 1: Identify Your Oven Light Cover Type
Look at your oven’s interior. Is the light cover round and screws off, or does it have metal clips? Knowing this helps you choose the right removal method.
Step 2: Grip The Cover Securely
If it’s a screw-on dome, use a soft cloth for extra grip. Place your hand firmly over the cover.
If it’s a clip-on design, locate the metal or plastic tabs holding it in place.
Step 3: Turn Or Release The Cover
- For screw-on covers, turn the cover counterclockwise (left) to loosen it.
- For clip-on covers, gently insert a flat-head screwdriver under the edge. Carefully pry the cover away from the wall.
- For covers with a retaining wire, look for the end of the wire. Gently pull or push it to release tension, then slide the wire out and remove the cover.
Non-obvious insight: If the cover is stuck, avoid using excessive force. Sometimes, a thin layer of grease or baked-on residue acts like glue. Use a damp cloth to wipe around the cover edge first.
Step 4: Remove The Cover
Once loosened, carefully pull the cover away from the oven wall. Hold it with both hands to avoid dropping and breaking it.
If you feel resistance, check for hidden clips or screws before pulling harder.
Step 5: Inspect And Clean
Take a moment to inspect the cover for cracks or dirt. Clean it with warm soapy water if needed and dry thoroughly.
Removing A Stuck Whirlpool Oven Light Cover
Sometimes, the light cover won’t budge, no matter how hard you try. Here’s what you can do:
Causes Of A Stuck Cover
- Grease buildup
- Heat expansion
- Mineral deposits (if you live in a hard water area)
Solutions
1. Apply Gentle Heat.
Use a hairdryer on low for a few seconds to slightly warm the cover. This can loosen grease or expand the glass slightly.
2. Use A Rubber Jar Opener.
These give extra grip without scratching the glass.
3. Try Penetrating Oil.
Apply a tiny amount (with a cotton swab) where the glass meets the metal. Wait a few minutes, then try again.
4. Alternate Twisting Directions.
Wiggle the cover gently back and forth to break the seal before turning fully.
Practical tip: Never use metal tools to pry glass covers, as they can chip or crack the glass.
What To Do If The Light Cover Breaks
Accidents happen. If the cover breaks during removal:
- Do not use the oven until all glass is cleaned up.
- Vacuum the inside to remove shards.
- Order a replacement using your oven’s model number.
- Never use the oven without a cover. The bulb is not heatproof and can shatter.
Cleaning And Maintaining Your Whirlpool Oven Light Cover
A clean light cover lets more light shine into your oven and prevents odors.
How To Clean
- Use warm soapy water and a non-abrasive sponge.
- Rinse and dry completely before reinstalling.
- For stubborn stains, soak in vinegar and water.
Extra tip: Clean the cover every few months or whenever you notice it looks cloudy.

Credit: www.youtube.com
How To Reinstall The Whirlpool Oven Light Cover
After you’ve replaced the bulb or cleaned the cover, you need to put it back correctly.
- Align the cover with the opening.
- For screw-on covers, turn it clockwise until snug. Do not overtighten.
- For clip-on covers, press gently until you hear or feel a click.
- For retaining wire types, place the cover, then fit the wire back into its groove.
Test the light after restoring power. If it doesn’t work, check the bulb installation and that the cover is seated properly.
Whirlpool Oven Light Cover Vs. Other Brands
Some people wonder if Whirlpool oven light covers are different from other brands. Here’s a quick comparison:
| Brand | Common Cover Type | Ease of Removal | Replacement Availability |
|---|---|---|---|
| Whirlpool | Screw-on, clip-on, wire-retained | Moderate | Widely available |
| GE | Screw-on, slide-in | Easy | Widely available |
| Samsung | Clip-on, secured with screws | Moderate | Available |
| LG | Screw-on, clip-on | Easy | Available |
As you can see, Whirlpool covers are similar to other brands but may be slightly more secure, which can make removal a bit more challenging.
Whirlpool Oven Light Cover: Replacement Options
If your cover is broken, lost, or too dirty to clean, it’s easy to find a replacement.
Finding The Right Part
- Check your oven’s model number. This is usually on a label inside the oven door or frame.
- Search for “Whirlpool oven light cover” plus your model number online or at an appliance parts store.
- Compare shape and size. Not all covers are universal, even among Whirlpool models.
Replacement Cost Comparison
Here’s what you can expect to pay for a new light cover:
| Source | Typical Price Range (USD) | Shipping Time |
|---|---|---|
| Official Whirlpool website | $20 – $45 | 3-7 days |
| Online appliance parts stores | $15 – $35 | 2-5 days |
| Local appliance repair shops | $20 – $40 | Same day |
| General marketplaces (Amazon, eBay) | $10 – $30 | 2-5 days |
Tip: Always read reviews to avoid buying low-quality or incorrect parts.
Common Mistakes To Avoid When Removing Oven Light Covers
Many people make the same errors when removing their oven light covers. Here’s how to avoid them:
1. Forgetting To Unplug The Oven
This is dangerous and can result in electric shock.
2. Trying To Remove The Cover While Hot
The glass can burn your hand or break from rapid temperature change.
3. Using Metal Tools Directly On Glass
This scratches or breaks the cover.
4. Applying Too Much Force
If it won’t turn, clean around the edge and try again.
5. Losing Track Of Small Parts
Some covers have tiny springs or clips—keep them safe during removal.
Pro insight: Document your process with photos as you go. This helps you reinstall everything correctly, especially if your oven is an uncommon model.
When To Call A Professional
While most people can remove and replace an oven light cover themselves, sometimes it’s best to get help:
- If the cover is cracked and pieces are stuck
- If you have a built-in oven and can’t access the light area safely
- If you have physical limitations that make the task risky
Professional appliance repair techs can usually replace the cover in minutes, and their visit may include a full oven safety check.
Whirlpool Oven Light Bulb Replacement: After Removing The Cover
Once the cover is off, you can change the bulb. Here’s a quick guide:
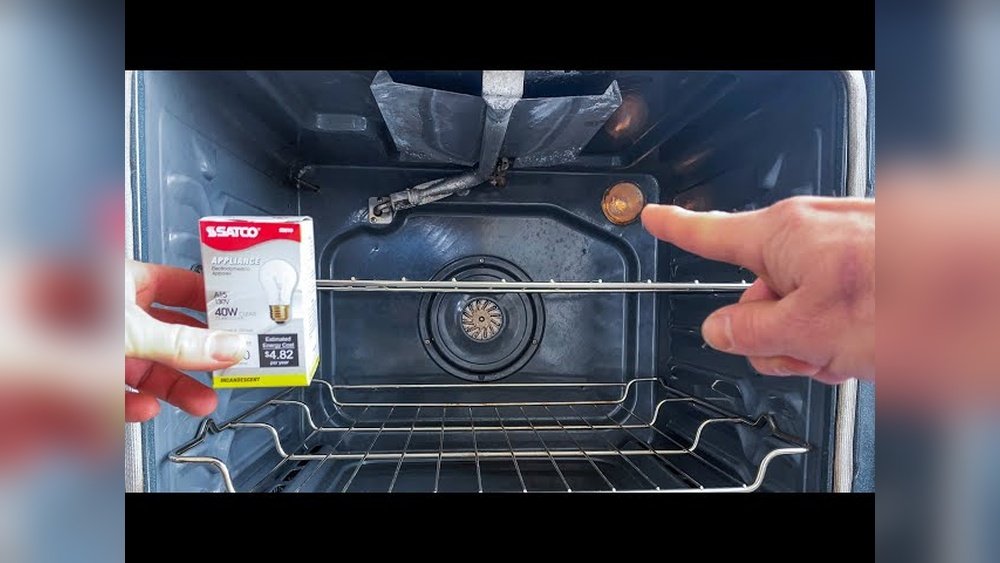
- Check the bulb type. Most Whirlpool ovens use a 40-watt appliance bulb, but always confirm in your manual.
- Wear gloves or use a cloth. Oil from your fingers can shorten the life of new bulbs.
- Twist the bulb counterclockwise to remove.
- Insert the new bulb and turn clockwise.
- Replace the cover and restore power.
Data point: According to Whirlpool, oven light bulbs last about 900-1200 hours. For most people, that’s 1-2 years of regular use.

Credit: www.reddit.com
Real-world Example: Removing A Whirlpool Oven Light Cover (model Wfe550s0hz)
Let’s say you have the popular Whirlpool model WFE550S0HZ. Here’s how the process works:
- Turn off and unplug the oven.
- Wear oven mitts for safety.
- Locate the glass dome at the back wall.
- Use a soft cloth, grip the cover, and turn it counterclockwise.
- If stuck, clean around the edges and try again.
- Remove, clean or replace the bulb, then reinstall.
This method works for most Whirlpool freestanding and slide-in models.
Environmental Impact: Why Care About Light Cover Maintenance?
Maintaining your oven light cover does more than just help you see your food. A clear, undamaged cover:
- Improves energy efficiency by letting you check food without opening the oven door, which saves heat.
- Reduces waste by extending the life of oven bulbs and covers.
- Prevents accidents from broken glass or electrical shorts.
Troubleshooting: Light Still Not Working After Cover Removal
If your oven light does not turn on after replacing the bulb and cover:
- Check the bulb is screwed in fully.
- Inspect the socket for corrosion or damage.
- Verify the oven is plugged in and the breaker is on.
- Try a different bulb to rule out a faulty replacement.
If none of these fixes work, the problem could be a wiring issue or faulty switch. In this case, consult a professional.
User Experiences: What Real Whirlpool Owners Say
Many Whirlpool oven owners share their experiences online. Here are a few insights from real users:
- “The cover was stuck tight. I used a rubber jar opener, and it came off easily.”
- “I broke my first cover by using a wrench—don’t do this! Gentle pressure is enough.”
- “I ordered a replacement from the official Whirlpool site, and it fit perfectly.”
Reading reviews and forums can help you avoid common mistakes and find solutions for your specific model.
Manufacturer Guidance And Online Resources
Always check your Whirlpool oven’s user manual for model-specific instructions. Manuals are available online if you lost yours.
For official guidance and troubleshooting, visit the Whirlpool Manuals & Literature page.
Frequently Asked Questions
How Do I Know Which Type Of Light Cover My Whirlpool Oven Has?
Check the shape and how the cover attaches. If it unscrews like a jar lid, it’s a screw-on type. If there are clips or a metal wire, it’s a clip-on or wire-retained cover. Your owner’s manual will also show diagrams.
Can I Use Any Oven Light Cover, Or Does It Have To Be Whirlpool?
Always use a cover designed for your specific Whirlpool model. Other covers may not fit or seal properly, which can cause heat loss or breakage.
Is It Safe To Run My Oven Without The Light Cover?
No, it’s not safe. The cover protects the bulb from heat, moisture, and grease. Running your oven without it can damage the bulb and expose you to electrical hazards.
What Should I Do If My Oven Light Cover Is Stuck And Won’t Turn?
Try cleaning around the cover edge, use a rubber jar opener for extra grip, and avoid using metal tools. If it still won’t move, a small amount of penetrating oil (used carefully) may help.
Where Can I Buy A Replacement Whirlpool Oven Light Cover?
You can buy replacements from the official Whirlpool website, appliance parts stores, or major online retailers. Always match your oven’s model number to get the correct part.
Replacing or removing a Whirlpool oven light cover is a simple task once you know the steps. With the right tools, a little patience, and careful attention, you can keep your oven working safely and efficiently for years to come. Whether you’re doing this for the first time or just need a refresher, following these tips will ensure you get the job done right—without stress or broken glass.

Credit: www.amazon.com