Anyone who owns a refrigerator with a built-in water dispenser knows how convenient it is to get cold, filtered water any time. But sometimes, you need to remove the water line from the refrigerator door. Maybe you’re moving, replacing the water filter, fixing a leak, or installing a new fridge.
Whatever your reason, the process may look simple but can become tricky if you miss a step. This guide will walk you through everything you need to know, from tools to safety, troubleshooting, and expert tips that most people overlook.
Why Remove The Water Line From Your Refrigerator Door?
Removing the water line isn’t just about repairs. There are several common reasons:
- Moving your refrigerator to a new home or location.
- Replacing or upgrading the refrigerator.
- Fixing leaks or water flow problems.
- Installing a new water filter or dispenser.
- Cleaning or unclogging the water line.
- Switching to a different water source or shutting off the supply.
People often try to “just pull it off,” but that can cause damage. Using the right method will save you money, time, and headaches.
Understanding Refrigerator Water Lines
The water line is a thin, flexible tube that connects your refrigerator to the main water supply. It allows water to flow to the ice maker and dispenser. Most modern fridges use plastic or copper lines, usually 1/4 inch in diameter.
There are two main connections:
- Back of the fridge: Where the water line meets the water inlet valve.
- Inside or near the door: Where the water line connects to the dispenser mechanism.
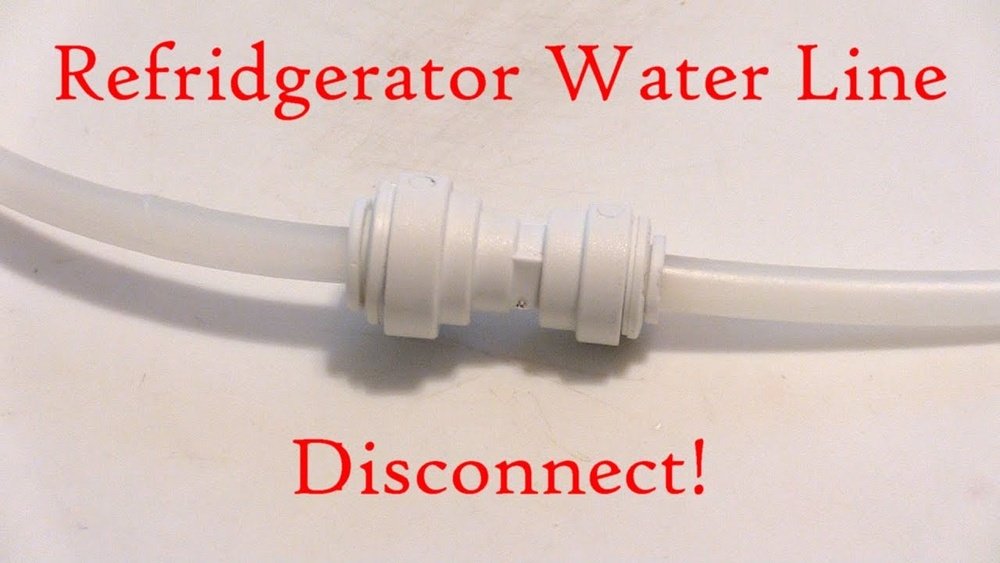
Some refrigerators use quick-connect fittings (push-to-connect), while others use compression nuts.
Common Water Line Materials
Here’s a quick comparison of the main types:
| Material | Durability | Flexibility | Cost | Common Issues |
|---|---|---|---|---|
| Plastic (Polyethylene) | Good | High | Low | Cracks over time |
| Copper | Excellent | Medium | Medium | Kinks, corrosion |
| Braided Stainless | Very High | Low | High | Less common leaks |
Most home refrigerators use plastic lines because they are easy to install and replace.
Tools And Supplies You’ll Need
Removing a water line is a DIY task, but you need the right tools for a smooth job. Gather these before you begin:
- Adjustable wrench or open-end wrench (1/2-inch or 7/16-inch)
- Slip-joint pliers (optional)
- Towel or small bucket (to catch drips)
- Flathead screwdriver (sometimes needed for panels)
- Utility knife (for trimming old tubing, if replacing)
- Flashlight (for visibility)
- Gloves (for safety)
- New water line (if you plan to replace it)
- Push-to-connect fittings (for quick-connect systems)
- Replacement O-ring (if the old one is worn)
Pro tip: Turn off the water supply and unplug the refrigerator before starting. Many beginners skip this, which can lead to leaks or even electric shock.
Safety Steps Before You Begin
Working with water lines is low-risk, but there are a few important safety steps:
- Shut off the water supply to the refrigerator. The valve is usually under the sink or in the basement.
- Unplug the refrigerator from the wall to avoid electrical hazards.
- Have towels and a bucket ready for any water left in the line.
- Wear gloves to protect your hands from sharp edges or cold water.
- Read your refrigerator manual. Some models have unique connectors or internal lines.
Never skip these steps. Even a small leak can damage your floor or cause mold. Electricity and water are a bad mix.
Step-by-step Guide: How To Remove The Water Line From Refrigerator Door
Let’s break down the process clearly so you can follow along, whether you’re a first-timer or have done some repairs before.
1. Locate The Water Line Connection
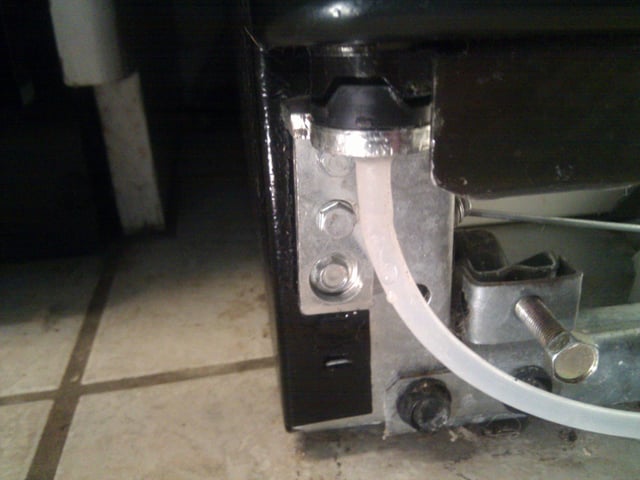
The water line usually enters the refrigerator at the bottom back. On many models, a separate line runs up into the freezer door to reach the dispenser.
- Move the fridge forward a few inches for access.
- Shine a flashlight to spot the water line.
- Look for a plastic or copper tube connected to a valve or fitting.
Beginner insight: Some fridges have a cover or panel over the water line. Remove it gently using a screwdriver if needed.
2. Turn Off The Water Supply
- Find the shut-off valve (usually near the wall or under the sink).
- Turn the valve clockwise until it stops.
- Try to dispense water from the fridge to release pressure and drain leftover water.
3. Unplug The Refrigerator
- Pull the power plug from the outlet.
- Wait 1-2 minutes before working, especially if you have an ice maker.
4. Detach The Water Line From The Back
- Place a towel or bucket under the connection.
- Compression nut: Use an adjustable wrench to loosen the nut. Hold the valve with one hand to prevent twisting the pipe.
- Push-to-connect fitting: Push the collar in, then pull the tubing out gently.
- If you see a little water, that’s normal.
Non-obvious tip: If the line is stuck, twist gently while pulling. Avoid yanking—it can break the fitting.
5. Remove The Kick Plate Or Access Panel (if Needed)
Some models require removing a small grill or panel at the bottom front or inside the door.
- Use a flathead screwdriver to pop off the kick plate.
- Keep screws in a cup so you don’t lose them.
6. Disconnect The Water Line From The Door
Modern fridges often run the water line through the door hinge.
- Locate the connection under the door or behind a small panel.
- For quick-connect fittings: Push the release ring in while pulling the tube out.
- For compression fittings: Use a wrench to loosen the nut.
Extra insight: Take a photo before you disconnect anything. This will help you reconnect later, especially if you’re replacing the line.
7. Remove The Water Line From The Door Channel
- Carefully pull the tubing out of the guide channel or through the hinge.
- If the tubing is stuck, wiggle it gently.
- For built-in or hidden lines, you may need to remove a door panel (see your manual).
8. Inspect And Clean The Area
- Check for leaks, cracks, or mineral buildup.
- Wipe down the area with a dry towel.
- If you see any mold or water damage, let it dry before reassembling.
Expert tip: If you notice a brittle or yellowed tube, consider replacing it. Old tubing is a common source of leaks.
9. Cap The Water Line (if Not Reconnecting)
If you’re not installing a new water line right away, cap the open end to prevent leaks or debris from entering.
- Use a plastic or brass cap (available at hardware stores).
- Tighten gently with a wrench, but don’t overtighten.
10. Reconnect Or Replace As Needed
If you’re installing a new line, reverse the steps above, making sure:
- Tubing is cut straight with a utility knife.
- Fittings are seated firmly.
- Water supply is turned back on slowly.
- Check for leaks before sliding the fridge back.
Troubleshooting Common Problems
Sometimes things don’t go as planned. Here’s how to solve common issues when removing a refrigerator water line:
Water Keeps Leaking
- Check if the water supply is fully off.
- Tighten the cap or fitting more.
- Inspect the tubing for cracks or tears.
Can’t Remove Tubing From Fitting
- Spray a tiny amount of water to lubricate.
- Use pliers gently—but don’t crush the tubing.
- For push-to-connect, push the collar in as you pull the tube.
Tubing Is Stuck In The Door
- Warm the area with a hair dryer for 1-2 minutes to soften plastic.
- Gently rock the tube side to side as you pull.
- Remove any visible screws or clips first.
New Line Leaks After Reconnecting
- Cut tubing end square (no angles).
- Ensure O-rings or washers are present and in good shape.
- Don’t overtighten; this can crack plastic fittings.
Door Panel Won’t Come Off
- Double-check for hidden screws under trim or seals.
- Consult the refrigerator manual or manufacturer’s website.
Hidden insight: Sometimes, an old line is glued or taped inside the door channel. Go slowly to avoid damaging the door insulation.
When Should You Call A Professional?
Most people can remove a water line with basic tools, but sometimes it’s smarter to call a plumber or appliance tech:
- If the line is buried inside the door and you can’t access it.
- If you see corrosion or rust around fittings.
- If the water valve under your sink is old, frozen, or leaks when turned.
- If you notice persistent leaks after reconnecting.
Professional help is also recommended for built-in refrigerators or if you’re not comfortable with electrical safety.
Mistakes Beginners Often Make
Even handy homeowners slip up. Here are mistakes to avoid:
- Forgetting to turn off the water supply—causes leaks and possible flooding.
- Pulling too hard on the tubing—can break the fitting or damage the refrigerator.
- Losing screws or small parts—use a cup to keep them together.
- Cutting tubing with scissors—always use a sharp utility knife for a clean edge.
- Not checking for leaks after reconnecting.
- Skipping safety gear—cuts and scrapes are common.
- Not taking photos before disassembly.
Avoid these, and your job will go much smoother.
Preventive Maintenance For Refrigerator Water Lines
Once you’ve removed or replaced the water line, a little care will keep things working well:
- Inspect water lines every 6 months for cracks, stiffness, or discoloration.
- Replace old plastic lines every 5 years, or sooner if you see damage.
- Clean the dispenser nozzle and drip tray regularly to prevent mold.
- Check for leaks after moving the fridge or making repairs.
- Flush the line (run water through) after reconnecting to remove debris.
- Keep the area behind the fridge clean to avoid dust and pests.
How Water Line Removal Differs By Refrigerator Brand
Not all refrigerators are built the same. Here’s a look at how the process can vary with popular brands:
| Brand | Water Line Location | Common Fittings | Unique Steps |
|---|---|---|---|
| Samsung | Bottom hinge, rear panel | Quick-connect, compression | Remove door hinge cover |
| LG | Lower back, inside hinge | Push-to-connect | May require removing door |
| Whirlpool | Back panel, kick plate | Compression | Check for hidden screws |
| GE | Rear, under door | Compression, quick-connect | Some models need door removal |
| Frigidaire | Back, through bottom | Push-to-connect | Panel removal often needed |
Always double-check your model’s manual. Some brands hide screws or use unique clips.

Credit: www.youtube.com
Environmental Impact: What To Do With Old Water Lines
Don’t just throw out old water lines. Here are some ways to dispose of them responsibly:
- Plastic tubing: Check if your city recycles polyethylene.
- Copper tubing: Can be recycled at most metal centers.
- Brass fittings: Separate and recycle if possible.
- Dispose of moldy or cracked lines in the trash if recycling isn’t an option.
Proper disposal helps reduce plastic waste. For more on recycling, see the EPA’s official recycling guide.
Real-world Example: Removing A Water Line From A Samsung Refrigerator
Let’s look at a real example to tie it all together:
- Model: Samsung French Door, 2020 model
- Issue: Water line leaking near the door hinge
Steps taken:
- Unplugged the fridge and shut off the water under the sink.
- Removed the hinge cover using a Phillips screwdriver.
- Pressed the quick-connect collar and pulled the tubing free.
- Used pliers to pull the tubing from the guide channel.
- Inspected the line—found a tiny split near the hinge.
- Replaced with new tubing, cut straight with a utility knife.
- Reconnected, turned water back on, and checked for leaks.
Result: No more leak, and water dispenser works like new.
Hidden insight: The old line had cracked from repeated door movement. Always check the area near hinges for wear.
Credit: diy.stackexchange.com
Cost Of Removing And Replacing A Refrigerator Water Line
How much does it cost if you do it yourself versus hiring a pro? Here’s a rough estimate:
| Task | DIY Cost | Pro Cost | Time Needed |
|---|---|---|---|
| Remove only | $0 – $5 (tools) | $75 – $150 | 15-30 minutes |
| Remove & replace line | $10 – $25 (parts + tools) | $100 – $200 | 30-60 minutes |
DIY is much cheaper, but only if you follow steps carefully to avoid damage.
Expert Tips For Success
- Buy extra tubing: It’s cheap, and mistakes happen.
- Label connections: Use masking tape to note where each tube goes.
- Flush new lines: Run at least 1 gallon of water through to remove plastic taste.
- Use only food-grade tubing for replacements.
- Check fitting compatibility: Some quick-connect brands are not universal.
- Keep the fridge level: After moving it, adjust the feet to prevent door sagging and leaks.
Frequently Asked Questions
How Often Should I Replace My Refrigerator Water Line?
You should replace plastic water lines every 5 years or sooner if you see cracks, stiffness, or discoloration. Copper lines can last longer but should be checked for corrosion.
Is It Safe To Use Tap Water For My Refrigerator Dispenser?
Yes, if your tap water is safe to drink. However, always use the built-in water filter and change it every 6 months. If you have hard water or taste issues, consider an external filter.
Can I Use Any Type Of Tubing As A Replacement Water Line?
No. Always use food-grade, refrigerator-approved tubing (usually polyethylene). Never use garden hose, vinyl, or non-food-grade lines.
What If I Can’t Find The Shut-off Valve?
Check under the kitchen sink, basement, or behind the fridge. If you still can’t find it, turn off the main water supply to your house, but be aware this stops all water flow.
Why Does My New Water Line Taste Or Smell Strange?
New plastic lines often have a “plastic” taste. Flush at least 1-2 gallons of water through the dispenser before drinking. If taste persists after a week, check for the correct tubing or a contaminated filter.
Final Thoughts
Removing a water line from a refrigerator door is a task anyone can handle with some care and the right tools. It’s not just about disconnecting a tube; it’s about following safe steps, understanding your fridge’s design, and avoiding common mistakes that lead to leaks or damage.
Take your time, keep parts organized, and always check for leaks before finishing. If you hit a snag or feel unsure, don’t hesitate to get expert help. With a little patience, you’ll have your refrigerator running smoothly—and leak-free—in no time.

Credit: www.samsung.com