If your Whirlpool refrigerator’s ice dispenser cover is cracked, dirty, or not working properly, you might want to remove it yourself. You don’t need to be an expert to handle this task, but you do need to follow some safe steps and understand your refrigerator’s design.
Removing the ice dispenser cover can help you clean inside, replace broken parts, or fix jams. But if you do it wrong, you can break important clips or damage the dispenser’s wiring.
In this guide, you will learn how to remove the ice dispenser cover on a Whirlpool refrigerator the right way. You’ll discover which tools to use, what to avoid, and how to put everything back together safely. The information here comes from appliance technicians, user manuals, and real-world experience.
You’ll also get helpful tips that most beginners miss, so you can avoid common mistakes and get the job done with confidence.
Why Remove The Ice Dispenser Cover?
The ice dispenser cover is the plastic or metal panel that you see on the front of your fridge’s ice and water dispenser. Many people think it’s just for looks, but it’s also there to protect the wiring, levers, and control boards inside.
There are a few reasons you might want to remove this cover:
- Deep cleaning: Ice and water can leave behind mineral deposits, mold, or sticky residue. Removing the cover lets you clean everything inside.
- Fixing jams: Ice can get stuck behind the cover or block the chute. Taking the cover off gives you access to remove jams.
- Replacing parts: If the lever, light, or button stops working, you might need to swap out a broken part behind the cover.
- Repairing wiring: Sometimes, wires inside the cover get loose or damaged and need fixing.
- Changing the look: Some people replace a scratched or yellowed cover to keep their fridge looking new.
No matter your reason, it’s important to understand how your specific Whirlpool model is built. Some covers just snap off, while others are held by hidden screws or have electrical connectors.
Tools And Materials You Will Need
Before you start, gather the tools and materials you’ll need. This saves time and prevents damage to your refrigerator.
- Small flat-head screwdriver: For gently prying open clips or panels.
- Phillips screwdriver: Some covers have screws inside or behind trim pieces.
- Plastic putty knife or trim removal tool: Helps pop off covers without scratching the fridge.
- Work gloves: Protects your hands from sharp edges.
- Towel or rag: For wiping up water or cleaning surfaces.
- Masking tape: Optional, to label wires or secure screws.
- Small bowl or bag: To keep screws and small parts safe.
- Flashlight: Makes it easier to see hidden clips or wiring.
Most Whirlpool refrigerators do not require special tools, but some newer models have unique fasteners. Always check your user manual for model-specific instructions.
Safety Precautions Before You Begin
Working on your refrigerator’s ice dispenser is safe if you take the right steps. But skipping safety can lead to electric shock or breaking expensive parts.
- Unplug the refrigerator: Always disconnect power before starting. If you can’t reach the plug, switch off the circuit breaker.
- Protect the floor: Place a towel under the dispenser area in case any water or ice falls out.
- Empty the ice bin: Remove any ice from the dispenser bin to prevent spills.
- Label wires: If you see wires behind the cover, use masking tape to label them for easy reassembly.
- Avoid using force: If something feels stuck, check for hidden screws or clips before pulling harder.
It’s also a good idea to take a photo of the dispenser before you start. This can help you remember how parts go back together.
Understanding Whirlpool Ice Dispenser Designs
Whirlpool makes many refrigerator models, and not all ice dispenser covers come off the same way. Here’s a quick overview of the main types:
| Dispenser Type | Cover Removal Method | Common Models |
|---|---|---|
| Snap-On Cover | Clips or tabs, pried off with a tool | WRF535, WRS325 |
| Screw-On Cover | Hidden screws, sometimes behind trim | ED5FH, WRS588 |
| Electronic Touchpad | Wiring harness, may need to unplug connectors | WRS555, GI6FARXX |
Not every Whirlpool fridge uses the same cover! Always check your model number (usually found inside the fridge or on the user manual) before starting.
Two beginner mistakes are:
- Not realizing some covers have a wiring harness that must be unplugged.
- Using metal tools on painted surfaces, causing scratches.

Credit: www.ifixit.com
Step-by-step Guide: Removing The Ice Dispenser Cover
The instructions below cover the most common Whirlpool refrigerator designs. Adjust as needed for your model.
1. Unplug And Prepare
- Find the refrigerator’s power cord and unplug it. If you can’t reach, turn off the kitchen circuit breaker.
- Remove the ice bin from inside the door if your dispenser has one.
- Lay a towel under the dispenser to catch drops or small screws.
2. Examine The Cover
- Look for screws or seams around the dispenser. Some covers have screws under a small trim piece or behind the drip tray.
- Use your flashlight to spot hidden fasteners or tabs.
3. Remove The Drip Tray And Trim (if Present)
- Most Whirlpool dispensers have a removable drip tray at the bottom. Pull it out by hand.
- If you see a trim piece around the dispenser, gently pry it off with a plastic tool. Avoid using metal to prevent damage.
4. Remove Screws Or Release Clips
- If you find screws, use a Phillips screwdriver to remove them. Put them in your bowl or bag.
- If the cover is held by clips, slide a plastic putty knife or flat-head screwdriver between the cover and fridge. Gently twist to release each clip. Start at the bottom and work up the sides.
- Do not force the cover. If it feels stuck, check for more screws or hidden tabs.
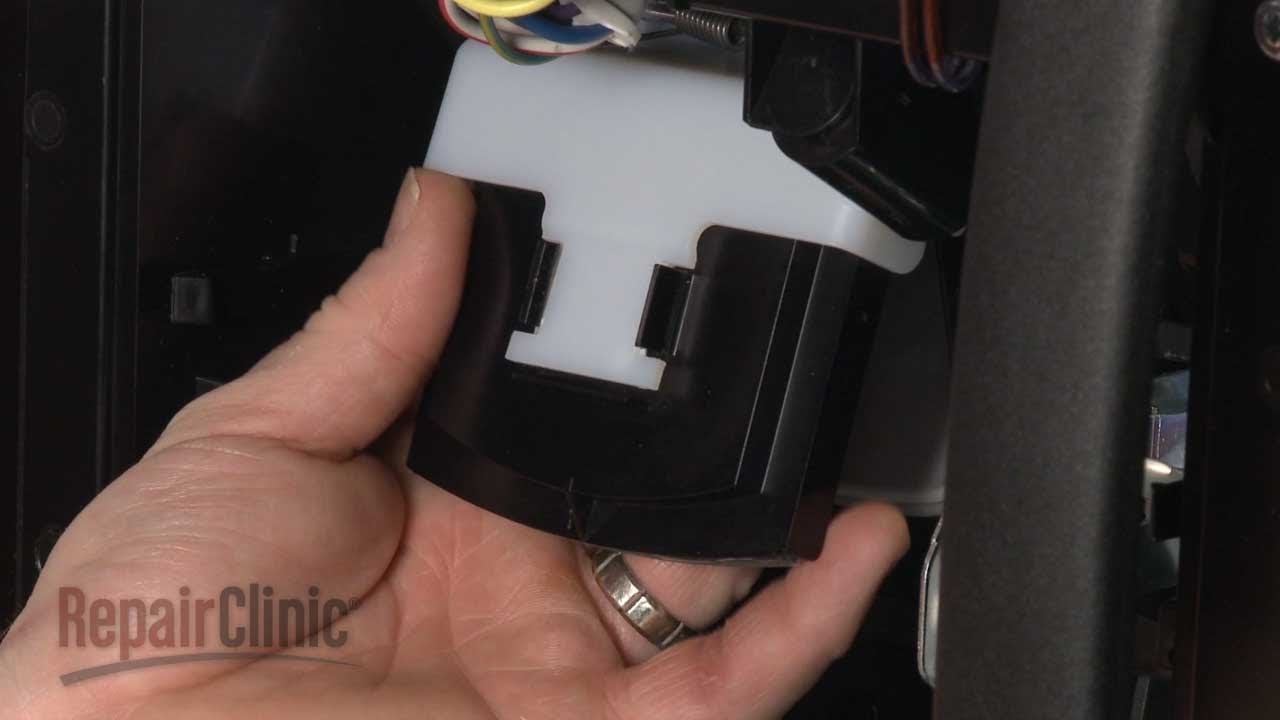
5. Disconnect Wiring (if Needed)
- Some electronic covers have a wiring harness attached to the back. Carefully pull the cover away until you see the wires.
- Note the connectors’ orientation or take a photo.
- Press the tab on each wiring connector and pull to disconnect.
6. Remove The Cover
- Once all screws and wires are removed, pull the cover away from the fridge. Be gentle to avoid bending or breaking plastic parts.
- Set the cover aside in a safe place.
7. Inspect And Clean
- With the cover off, inspect for mold, ice buildup, or broken parts. Clean with a towel and mild soap if needed.
- Check that no wires or springs have come loose.
The steps above work for most Whirlpool side-by-side and French door refrigerators. If your cover does not come off, stop and check your user manual or search for your exact model online.
What To Do After Removing The Cover
Once the cover is off, take the time to check everything inside. Here’s what to look for:
- Ice or water leaks: Wipe up any moisture and look for cracks in the ice chute.
- Dirty or sticky levers: Clean with a mild cleaner and dry thoroughly.
- Loose wires or connectors: Push them back into place or repair if damaged.
- Broken springs or clips: These control how the dispenser lever works. Replace if needed.
If you are replacing the cover or any internal part, make sure the new part matches your model number. Whirlpool parts can look similar but may not fit correctly.

Credit: www.reddit.com
Reinstalling The Ice Dispenser Cover
Putting the cover back is just as important as removing it. Here’s how to do it safely:
- Reconnect wiring: If you unplugged any connectors, match them to their correct sockets. Firmly press until they click.
- Position the cover: Align the cover with the dispenser opening. Check that no wires are pinched.
- Snap or screw the cover in place: If your cover uses clips, press gently until you hear them click. For screws, tighten them by hand. Do not overtighten—this can crack the plastic.
- Replace trim and drip tray: Snap the trim back on and slide the drip tray into place.
- Plug in the refrigerator: Restore power and test the dispenser to ensure everything works.
One non-obvious tip: Don’t forget to test both ice and water functions after reassembly. Sometimes, wiring for the light or paddle can get pinched and only show problems after everything is back together.
Troubleshooting Common Problems
Sometimes, removing or reinstalling the ice dispenser cover reveals other issues. Here’s how to handle common problems:
Cover Won’t Come Off
- Double-check for hidden screws behind the trim or inside the drip tray area.
- Try gently wiggling the cover from side to side—this can help release stubborn clips.
- If it still won’t come off, stop and look up a video for your specific model.
Cover Won’t Go Back On
- Make sure all wiring is out of the way and not pinched.
- Check that all clips are lined up before pressing.
- If screws won’t fit, you may have reversed the cover or missed a step.
Dispenser Not Working After Reassembly
- Unplug and recheck all wire connectors.
- Make sure the paddle or lever is not stuck.
- If the light or buttons do not work, check your circuit breaker.
When To Call A Professional
Some repairs are best left to an appliance technician. Call for help if:
- You see burnt or melted wires inside the dispenser.
- The control board is damaged or wet.
- The cover is cracked and you can’t find a replacement part.
- The dispenser leaks after you put the cover back on.
A professional can also diagnose more complex issues, such as faulty control boards or shorted wires.
Cost And Time Estimates
Removing the ice dispenser cover is a quick project for most people.
| Task | Estimated Time | Estimated Cost |
|---|---|---|
| Removing cover | 10-20 minutes | $0 (DIY) |
| Cleaning parts | 10-15 minutes | $0 |
| Replacing cover | 5-10 minutes | $25-$60 for new cover |
| Professional repair | 30-60 minutes | $75-$150 labor |
Most people can do this project with simple tools at home. But if you’re not comfortable, hiring a technician is a safe choice.
Tips For Keeping Your Ice Dispenser In Good Shape
Here are a few ways to avoid future problems with your ice dispenser cover:
- Clean regularly: Wipe down the cover and dispenser area every month to prevent buildup.
- Use gentle cleaners: Harsh chemicals can crack or cloud the plastic.
- Don’t force the lever: If ice jams, remove the bin and clear the blockage instead of pressing harder.
- Check for leaks: Moisture can cause mold behind the cover.
- Replace worn parts quickly: Don’t wait for a small crack to become a bigger problem.
Two insights most beginners miss:
- Even small cracks in the cover can let moisture or insects inside. Replace damaged covers quickly.
- Loose wiring can cause dispenser problems that look like mechanical failure. Always check wires before replacing expensive parts.
The Role Of Model Numbers And Manuals
Your Whirlpool refrigerator’s model number is your best friend. It’s usually found on a sticker inside the fridge or freezer, or on the door frame.
Why Does It Matter?
- Some covers look similar but have different clips or wiring.
- Manuals often include diagrams showing how the cover is attached.
If you don’t have your manual, you can usually download a PDF from Whirlpool’s official website. This can help you find diagrams and part numbers for your model.
Real-world Example: Removing The Cover On A Whirlpool Wrs325fdam
Let’s look at a popular side-by-side model, the Whirlpool WRS325FDAM.
Steps:
- Unplug the fridge and remove the ice bin.
- Pull out the drip tray under the dispenser.
- Use a flat plastic tool to gently pop the trim around the dispenser.
- Remove the two Phillips screws found behind the trim.
- Grasp the cover at the bottom and pull outward; it will release from the clips.
- Carefully disconnect the wiring harness.
- Clean inside and inspect for damage.
When reinstalling, reconnect the wires, align the cover, and press firmly to re-engage the clips. Replace the screws and trim, then plug the fridge back in.
This process works for many Whirlpool side-by-side refrigerators, but always double-check your model.
Mistakes To Avoid
Even careful people can make mistakes when removing an ice dispenser cover. Here’s what to watch out for:
- Forgetting to unplug the fridge: This can cause electric shock.
- Using metal tools on painted surfaces: Plastic tools are safer.
- Pulling too hard on the cover: You can break hidden clips.
- Losing screws: Always use a bowl or bag.
- Not labeling wires: If you disconnect more than one wire, label them.
If you make a mistake, don’t panic. Most covers and clips can be replaced, and Whirlpool parts are widely available.
Sourcing Replacement Parts
If your cover is cracked or missing, you’ll need a new one. Here’s how to get the right part:
- Find your refrigerator’s model number.
- Search for “Whirlpool [model number] ice dispenser cover” online or at a local appliance parts store.
- Compare the part visually to your old cover to make sure it matches.
Most parts cost $25-$60, depending on the model and whether you buy new or used.
For official Whirlpool parts, visit the Whirlpool Parts Website.
Frequently Asked Questions
How Often Should I Clean Behind The Ice Dispenser Cover?
It’s a good idea to clean behind the cover every 6 to 12 months, or if you notice mold, residue, or ice jams. Regular cleaning helps prevent odors and keeps the dispenser working smoothly.
Can I Remove The Ice Dispenser Cover Without Unplugging My Fridge?
No, always unplug your refrigerator before removing the dispenser cover. There are wires and sometimes small circuit boards behind the cover. Working with the power on can cause electric shock or short-circuit the dispenser.
What If I Break A Clip Or Tab When Removing The Cover?
If you break a plastic clip, you can sometimes use a small piece of double-sided tape or a dab of hot glue as a temporary fix. However, for long-term durability, it’s best to replace the cover or the broken part.
Why Does My Ice Dispenser Leak After I Put The Cover Back On?
Leaks are usually caused by a cover not seated correctly, a misaligned ice chute, or a pinched water line. Remove the cover and check that all parts are lined up and there are no cracks or gaps.
Is It Safe To Use A Universal Ice Dispenser Cover Instead Of A Whirlpool Part?
It’s always best to use a genuine Whirlpool part that matches your model number. Universal covers may not fit properly or may interfere with the dispenser’s wiring and function.
Removing the ice dispenser cover on your Whirlpool refrigerator is a simple job when you know the right steps. With a few tools and careful attention, you can clean, repair, or replace the cover and keep your fridge working like new.
Remember to work safely, use gentle tools, and keep track of your screws and wires. If you run into trouble, don’t hesitate to call a professional or check your model’s manual for extra help. Taking care of your ice dispenser now saves time and money later—and keeps your kitchen running smoothly.
Credit: www.youtube.com