Redoing oak cabinets can totally change the look and feel of your kitchen or bathroom. Many people think they need to replace their old oak cabinets to get a modern space, but that’s not true. With the right steps and a bit of time, you can make those solid cabinets look new and stylish again. This can save you thousands of dollars compared to buying new cabinets, and you get the satisfaction of doing it yourself.
Oak cabinets are strong and last for many years, but their classic grain and color can sometimes make a room feel dated. The good news is that oak takes paint, stain, and other finishes well, so you have many options.
Whether you want a bright white kitchen, a rich dark stain, or a trendy two-tone look, you can achieve it with the right techniques.
This guide will walk you through every stage of redoing oak cabinets. You’ll learn how to plan your project, pick the best materials, and avoid common mistakes. Along the way, you’ll get pro tips and insights that many beginners miss.
By the end, you’ll feel confident to tackle your own cabinet makeover and enjoy the results for years to come.
Why Redo Oak Cabinets Instead Of Replacing?
Many homeowners are surprised at how much money and time they can save by redoing their oak cabinets instead of replacing them. New cabinets are expensive—not just the price of the cabinets themselves, but also for labor, demolition, and installation. In fact, the average cost of a full kitchen cabinet replacement is between $8,000 and $20,000 in the US, depending on size and quality. In contrast, redoing your oak cabinets can often cost under $500–$1,500 if you do it yourself.
Besides cost, there are other reasons to keep your oak cabinets:
- Solid wood construction: Oak cabinets are usually made of real wood, which is strong and durable compared to many new cabinets made from particle board.
- Custom sizes: Your existing cabinets fit your space perfectly.
- Less waste: Redoing cabinets is an eco-friendly choice since you’re not sending old wood to the landfill.
Some people worry about the look of oak grain. While oak has a strong pattern, there are ways to minimize or highlight the grain depending on your style.
Planning Your Project
Redoing cabinets takes time and patience. A successful project starts with good planning.
Set Your Goal
Think about what you want your finished cabinets to look like. Do you want a painted look (white, gray, blue, etc.)? Or do you prefer a stained finish that shows the oak grain? Maybe you want to try a modern two-tone style with dark lowers and light uppers.
Budget And Timeline
List all the materials you’ll need, including:
- Paint or stain
- Primer
- Sandpaper
- Brushes or rollers
- Degreaser/cleaner
- New hardware (optional)
- Drop cloths and tape
Estimate your costs. For a medium kitchen (about 20 cabinet doors), expect to spend $200–$500 for basic supplies. If you hire a pro, labor can add $2,000–$5,000.
Plan for at least 4–7 days to complete the project. Painting takes longer than you might think because of drying time and the number of coats needed.
Take Before Photos
This may sound simple, but snapping a few pictures before you start can help you appreciate your hard work later.
Choosing The Right Finish
Oak cabinets can be finished in many ways. Each finish has its own look and maintenance needs.
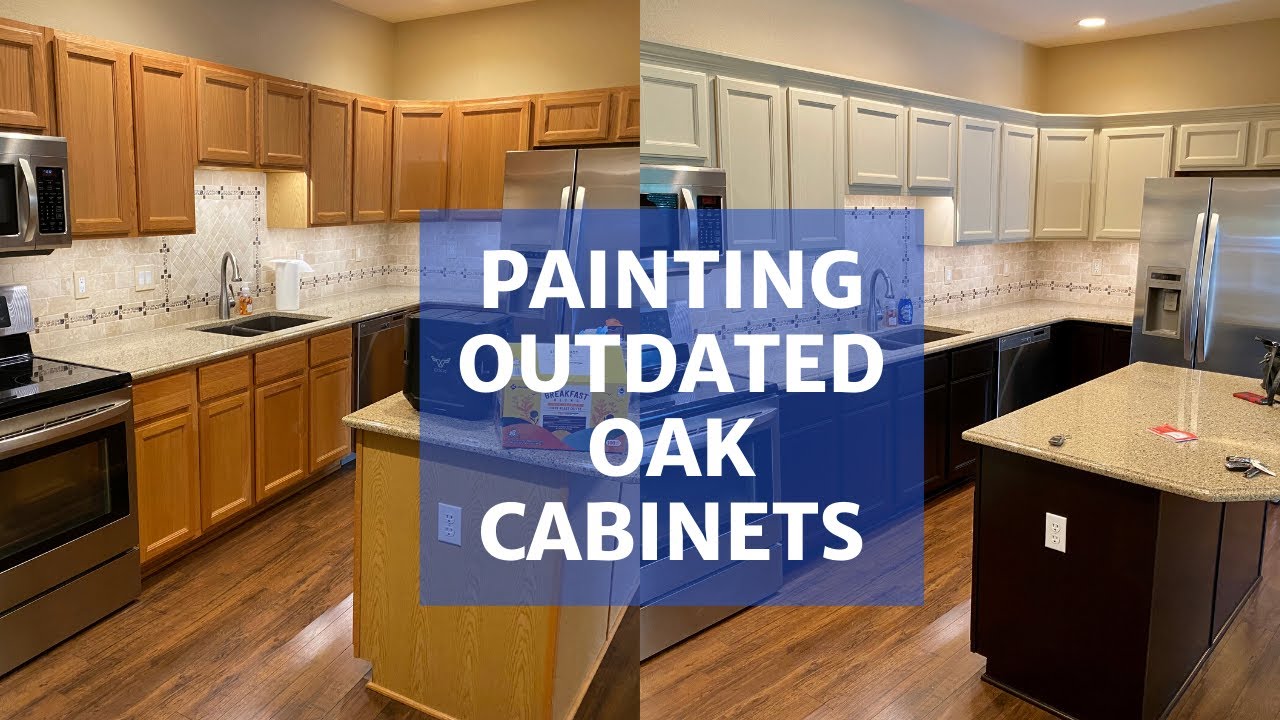
Painted Finish
Painting oak cabinets is a popular choice. You can cover the wood grain almost completely for a smooth, modern look. Whites and light grays are especially trendy right now.
Pros:
- Covers grain and color
- Many color choices
- Makes old cabinets look new
Cons:
- Takes more prep to hide grain
- Chips or scratches may show over time
Stained Finish
Staining brings out the natural beauty of oak. You can go darker or lighter, depending on the stain. Dark stains can make the grain less obvious, while light stains keep the wood bright.
Pros:
- Shows real wood character
- Durable and easy to touch up
Cons:
- Grain and color will always show through
- Fewer color options
Whitewashing Or Liming
This technique gives oak a washed-out, beachy look. It’s great if you want to keep some wood grain but lighten the color.
Two-tone
Painting base cabinets one color and wall cabinets another (such as navy blue lowers and white uppers) is a popular modern style.
Comparison Of Finish Types
Here’s a quick look at how finish types compare:
| Finish Type | Grain Shows? | Durability | Style |
|---|---|---|---|
| Paint | No (if well prepped) | Medium | Modern/Classic |
| Stain | Yes | High | Traditional/Rustic |
| Whitewash | Yes (subtle) | Medium | Coastal/Farmhouse |
Tools And Materials You Need
To get pro results, you need the right supplies. Skimping on tools is a common mistake.
Essential Supplies
- Cleaner/degreaser (like TSP substitute)
- Screwdriver (for removing hardware and doors)
- Sandpaper (120, 180, and 220 grit)
- Tack cloth
- Primer (stain-blocking, for painting)
- Paint or stain (high-quality, cabinet-grade)
- Brushes/rollers (foam or synthetic for smooth finish)
- Drop cloths and painter’s tape
- New hardware (optional but makes a big difference)
Optional Tools
- Paint sprayer (for a factory-smooth finish)
- Wood filler (for hiding grain or old holes)
- Putty knife
- Drill (if changing hardware)
Paint Vs. Stain: What To Look For
When buying paint, look for “enamel” or “cabinet/furniture paint.” These dry hard and resist chips. For stain, choose oil-based or water-based, depending on your comfort and ventilation.
Pro tip: Cheap brushes can leave streaks. Invest in a good synthetic brush for a smooth finish.
Preparing Oak Cabinets For Redoing
Prep work is the most important part of this project. Skipping steps leads to peeling paint or blotchy stain.
1. Remove Doors And Hardware
Take off all cabinet doors, drawer fronts, and knobs or pulls. Label each door (with tape inside the hinge hole) so you know where it goes later. This saves you hours during reassembly.
2. Clean Everything
Oak cabinets collect grease, especially near the stove. Use a strong degreaser or TSP substitute and scrub all surfaces. Rinse with water and let dry. If you skip this, paint or stain won’t stick well.
3. Sand The Surfaces
Lightly sand all surfaces with 120 or 150 grit sandpaper. For painting, sand again with 180 or 220 grit for extra smoothness. Wipe all dust away with a tack cloth.
If you want to hide the oak grain for a painted finish, fill the grain with wood filler or spackle, let it dry, and sand smooth. This step is often missed by beginners but makes a big difference.
4. Fill Holes And Dents
Use wood filler to fix any dings or holes. This is also when you should fill old hardware holes if you’re changing knobs or pulls.
5. Tape Off Surrounding Areas
Use painter’s tape to protect walls, counters, and floors.
6. Prime (for Painting)
A high-quality primer blocks stains and helps paint stick. Choose a “bonding” primer for oak. Apply one or two coats, letting each dry fully.
Prep Process Comparison
Here’s how prep steps differ for paint versus stain:
| Step | Painting | Staining |
|---|---|---|
| Remove doors/hardware | Yes | Yes |
| Clean thoroughly | Yes | Yes |
| Sand | 120, 180, 220 grit | 120, 180 grit |
| Fill grain (optional) | Yes | No |
| Prime | Yes | No |
How To Paint Oak Cabinets
Painting is the most popular way to update oak cabinets. Here’s how to do it right.
Step 1: Choose Paint
Go for a high-quality acrylic enamel paint or cabinet paint. Satin or semi-gloss finishes are easiest to clean.
Step 2: Apply Primer
After sanding and cleaning, apply a thin, even coat of bonding primer. Let it dry as the label recommends (often 24 hours). Lightly sand between coats for a super smooth finish.
Step 3: Fill The Grain (optional)
If you want a glass-smooth look, apply a grain filler after priming. Use a putty knife to spread it, then sand smooth.
Step 4: Paint Doors And Frames
Use a brush for corners and a foam roller for flat areas. Apply thin coats—thick paint can sag or show brush marks.
Paint the backs of doors first. When dry, flip and paint the fronts for best results.
Apply 2–3 coats, letting each dry fully and sanding lightly between coats.
Step 5: Let Cure
Don’t rush reassembly! Let the paint cure for at least 3–5 days for maximum hardness.
Step 6: Reinstall Hardware And Doors
Once fully dry, reinstall hardware and doors. Consider replacing old knobs and pulls for a fresh look.
Practical tip: Labeling and organizing your hardware in zip bags makes reassembly much easier.
How To Stain Oak Cabinets
If you love the look of natural wood, staining is the way to go.
Step 1: Remove Old Finish
After sanding and cleaning, use a chemical stripper if the old finish is thick or glossy. Wipe away all residue and sand again.
Step 2: Condition The Wood
Apply a wood conditioner before staining. Oak absorbs stain unevenly, so conditioner helps prevent blotchy spots.
Step 3: Apply Stain
Use a brush or clean rag to apply stain in the direction of the grain. Wipe off excess after a few minutes. Apply a second coat for a darker color.
Step 4: Protect With Clear Coat
Once the stain is dry (usually 24 hours), apply a clear polyurethane or water-based topcoat. This protects the finish from water and stains. Apply 2–3 coats, sanding lightly between each.
Step 5: Reassemble
Once the topcoat is fully cured, put your cabinets back together.
Non-obvious insight: You can mix stains to get a custom color, but always test on a scrap piece first.
Creative Finish Ideas
You don’t have to stop at just paint or stain. Here are some creative options:
- Glazing: Adds depth and highlights to painted cabinets. Brush on glaze, then wipe most off, leaving some in grooves.
- Distressing: Sand edges for a rustic, vintage look.
- Two-tone: Paint upper and lower cabinets different colors.
- Add Molding: Attach crown molding or trim for a high-end look.
- Replace Doors Only: Keep cabinet boxes, but buy new doors for a dramatic change.
- Open Shelving: Remove some doors for open shelves.
- Hardware Upgrade: New pulls or knobs can make a huge difference for little money.
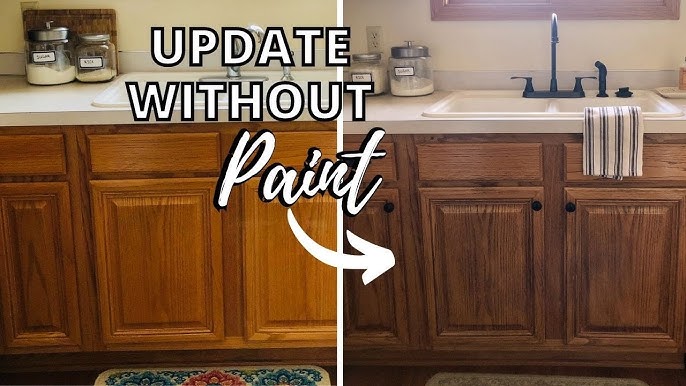
Credit: www.youtube.com
Common Mistakes To Avoid
Even careful DIYers make mistakes. Here’s what to watch out for:
- Skipping prep: Not cleaning or sanding leads to peeling paint.
- Cheap paint/brushes: Results in a streaky, sticky finish.
- Not labeling doors/hardware: Reassembly becomes a puzzle.
- Rushing dry time: Paint or stain that isn’t cured will scratch easily.
- Ignoring the grain: Oak grain will show unless you fill it—don’t skip this if you want a modern look.
Updating Hardware For A Modern Touch
Changing hardware is one of the easiest ways to modernize oak cabinets. Matte black, brushed gold, or satin nickel pulls instantly update the look. When choosing new hardware:
- Make sure the hole spacing matches, or be ready to fill and drill new holes.
- Consider bar pulls for a modern look, or classic knobs for a timeless style.
How To Maintain Redone Oak Cabinets
A new finish will last for years with good care.
- Wipe spills right away to avoid stains.
- Clean with a damp cloth and mild soap—no harsh chemicals.
- Check for chips or scratches and touch up as needed.
- Add felt pads to doors/drawers to prevent wear.
How Long Does It Take To Redo Oak Cabinets?
Most DIYers can finish the project in 4–7 days, but this depends on the number of cabinets and the drying time for your products. For example, oil-based paints and stains dry slower than water-based. Always read the label and don’t rush.
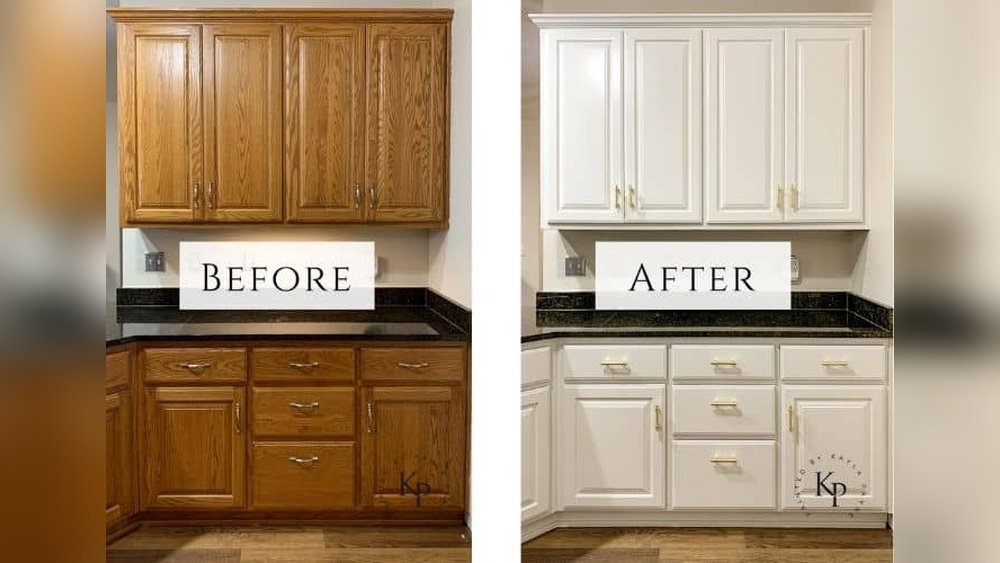
Real-life Example: Before And After
Jessica, a homeowner in Ohio, painted her 20-year-old oak cabinets white. She spent about $400 on supplies and did the work herself over two weekends. She filled the oak grain, used a bonding primer, and applied three coats of enamel paint. She also replaced the hardware with matte black pulls.
The transformation was dramatic—her kitchen looked brighter and larger. She said the most time-consuming part was prep work, but that made the finish smooth and durable. After two years, the paint still looked great, and the value of her home increased.
Cost Comparison: Redoing Vs. Replacing Oak Cabinets
To see the savings, compare the costs:
| Option | DIY Cost | Pro Cost | Time Needed |
|---|---|---|---|
| Redo (Paint or Stain) | $300–$1,500 | $2,500–$6,000 | 4–7 days |
| Replace Cabinets | N/A | $8,000–$20,000+ | 1–2 weeks |

Credit: averageinspired.com
Should You Hire A Pro Or Do It Yourself?
Most homeowners can redo their own oak cabinets with patience and the right tools. However, consider hiring a pro if:
- You want a spray finish (pros have better equipment)
- You don’t have time for prep and painting
- Your cabinets have water damage or structural problems
A pro can finish faster, but the cost is much higher.
Extra insight: Even if you hire out the painting, you can save money by removing doors and hardware yourself.
Tips For The Best Results
- Work in a dust-free area for the smoothest finish.
- Use a foam roller or sprayer for doors—brushes can leave marks.
- Don’t forget the cabinet boxes (frames)—paint or stain these for a seamless look.
- Start with a small project (like a bathroom cabinet) to practice before tackling the kitchen.
When Not To Redo Oak Cabinets
Sometimes, it makes sense to replace rather than redo:
- Cabinets are warped or water-damaged
- The layout doesn’t fit your needs
- You want to change the size or design completely
But if the cabinets are solid and the layout works, redoing is usually the smarter choice.
Environmental Benefits
By keeping your oak cabinets, you’re also helping the environment. Manufacturing new cabinets uses a lot of energy and resources. Plus, throwing away old wood adds to landfill waste. Redoing what you have is a greener choice.
Credit: www.youtube.com
Where To Get More Inspiration
There are many online galleries and forums where homeowners share their cabinet makeovers. One good source is Houzz, which has thousands of before-and-after photos.
Frequently Asked Questions
What Type Of Paint Is Best For Oak Cabinets?
Choose a high-quality acrylic enamel or cabinet paint. These are made to dry hard, resist chips, and stand up to scrubbing. Avoid regular wall paint—it won’t last on cabinets.
How Can I Hide The Oak Grain When Painting?
To get a smooth, modern look, use a grain filler or wood putty after sanding and before priming. Apply in thin layers, sand smooth, and prime well. This extra step is worth it for a flawless finish.
Can I Paint Cabinets Without Sanding?
Sanding is critical for paint to stick, especially on glossy or old finishes. Some products claim “no sanding,” but results are less durable. A light sanding (even with fine grit) makes a big difference.
How Long Does The New Finish Last?
With good prep and quality materials, painted or stained cabinets can last 5–10 years or more. Touch up chips right away to keep them looking fresh.
Is It Cheaper To Redo Or Replace Oak Cabinets?
Redoing (painting or staining) is almost always much cheaper—often one-tenth the cost of new cabinets. You also avoid the mess and hassle of demolition. For most solid oak cabinets, redoing is the best value.
Redoing oak cabinets isn’t a quick job, but the results are worth the effort. By following these steps, you can save money, update your space, and enjoy a custom look that fits your style. With careful prep and the right products, your “new” cabinets will look beautiful for years to come.