Painting unfinished kitchen cabinets is a popular DIY project for homeowners who want to transform their kitchens without the high cost of new cabinetry. When done right, painted cabinets can look just as beautiful as factory-finished ones, often adding value and personality to your home.
However, many people underestimate the process, thinking a quick coat of paint will do the job. The truth is, getting a smooth, durable finish on unfinished cabinets requires careful planning, attention to detail, and patience. If you’re new to DIY painting, this guide will walk you through every step, share practical insights, and help you avoid common mistakes so your kitchen can truly shine.
Why Paint Unfinished Kitchen Cabinets?
Unfinished cabinets offer a blank canvas. Since there’s no old paint or varnish to remove, you have more control over the final look. Painting them yourself can save thousands of dollars compared to hiring professionals or replacing cabinets. Plus, you can choose any color or finish that matches your style.
But painting is not just about looks. A well-done paint job also protects the wood from moisture, grease, and daily wear. This can extend the life of your cabinets for years. It’s also an eco-friendly choice since you’re reusing what you already have.
Planning And Preparation
Before opening a paint can, proper planning is crucial. Many DIYers skip this stage and regret it later. The quality of your prep work directly affects the final result.
Deciding On Paint Type And Finish
Not all paints are the same. For kitchen cabinets, you need a paint that stands up to heat, moisture, and frequent cleaning. Here’s how the main types compare:
| Paint Type | Durability | Ease of Use | Best For |
|---|---|---|---|
| Latex | Good | Easy | DIYers, low VOC |
| Acrylic | Very Good | Moderate | Durability, easy cleanup |
| Oil-based | Excellent | Harder | High-traffic kitchens |
| Chalk Paint | Fair | Very Easy | Distressed or matte look |
Satin and semi-gloss finishes are most common for kitchens because they’re easy to clean and resist stains. Flat paints, while stylish, show dirt and are harder to wipe.
Tools And Materials Checklist
Gathering the right supplies beforehand saves time. Here’s what you’ll need:
- Paint (enough for 2–3 coats)
- Primer (stain-blocking, suitable for wood)
- Sandpaper (120, 220, and 320 grit)
- Tack cloth or microfiber cloth
- Painter’s tape
- Drop cloths or old sheets
- Brushes (angled and detail)
- Small foam rollers
- Screwdriver (for hardware removal)
- Wood filler (for holes or imperfections)
- Degreaser or mild soap
- Clean water and sponges
- Paint tray and liners
- Respirator mask (recommended for oil-based products)
Cleaning And Degreasing Cabinets
Kitchen cabinets, even if new, can have dust, oils, or residue. This can prevent paint from sticking. Use a degreaser (like TSP substitute) or a mix of warm water and mild soap. Scrub every surface, including inside corners and edges.
Rinse with clean water and let dry fully.
Pro insight: Many beginners skip rinsing after cleaning, leaving soap residue that causes poor paint adhesion. Always rinse and dry thoroughly.
Removing Doors, Drawers, And Hardware
Take off all doors, drawers, and hardware (handles, hinges, screws). Number each door and drawer with painter’s tape so you can reassemble them in the right places later. This prevents confusion and uneven gaps.
Lay doors flat on a clean surface for painting. Painting them while hung often leads to drips and missed spots.
Filling Holes And Sanding
If you plan to change handles or pulls, fill old screw holes with wood filler. Once dry, sand smooth.
Sanding is key for a professional look. Start with 120-grit sandpaper to smooth rough wood and remove any splinters. Then use 220-grit for a finer finish. Wipe down with a tack cloth to remove dust.
Non-obvious tip: Sand the edges and corners well. Paint often peels from sharp corners if not sanded properly.
Priming: The Foundation Of A Lasting Finish
Primer helps paint stick and blocks stains. Unfinished cabinets, especially softwoods like pine, can bleed tannins through paint, causing yellow spots. A good primer stops this.
Choosing The Right Primer
Look for a high-quality, stain-blocking primer. Oil-based primers work best for tough stains, but water-based ones are easier to clean up and lower in fumes.
If your cabinets are made of MDF or particleboard, choose a primer that seals these materials to prevent swelling.
Applying Primer
Apply primer with a brush for corners and a foam roller for flat surfaces. Use thin, even coats to avoid drips. Let the first coat dry as per the instructions (usually 1–4 hours), then lightly sand with 220-grit sandpaper. Wipe off dust and add a second coat if needed.
Pro insight: Rushing primer drying is a common mistake. Paint on tacky primer peels easily. Always let each coat dry fully.
Painting: Techniques For A Smooth, Durable Surface
Now comes the fun part—adding color. Good technique makes the difference between a DIY look and a professional result.
Brushing Vs. Rolling Vs. Spraying
- Brushes are best for detail work, edges, and corners.
- Foam rollers provide smooth coverage on flat panels with fewer brush marks.
- Paint sprayers give the smoothest finish but require experience and good ventilation.
Most DIYers get excellent results by combining a brush for edges and a roller for large surfaces.
Applying The First Coat
Stir paint thoroughly—never shake, as this adds bubbles. Start with cabinet frames, using an angled brush for corners. Roll flat panels with a foam roller. Apply thin, even coats. Overloading the brush or roller causes drips and uneven texture.
Let the first coat dry (usually 4–8 hours, depending on paint type and humidity).
Light Sanding Between Coats
Once dry, lightly sand with 320-grit sandpaper. This removes dust nibs and helps the next coat stick. Wipe down with a tack cloth.
Non-obvious tip: Even premium paints can feel slightly rough after the first coat. Light sanding is what creates that factory-smooth finish.
Applying Additional Coats
Two coats are the minimum for full coverage. Three coats give the most durable, uniform color, especially for lighter shades or when painting over dark wood.
Repeat the process: paint, dry, sand, and wipe between coats.
Painting Cabinet Doors And Drawers
Paint doors and drawer fronts while they are flat to avoid drips. Paint the back sides first. Once dry, flip and paint the fronts.
Pro insight: Don’t rush flipping doors. If the back isn’t fully dry, you’ll get smudges. Allow extra drying time in humid weather.
Curing, Reassembly, And Final Touches
Curing Vs. Drying
Paint may feel dry to the touch in a few hours, but it takes longer to cure (harden fully). Full curing can take 7–30 days, depending on paint. Avoid heavy cleaning or replacing heavy items inside cabinets during this time.
Reinstalling Doors, Drawers, And Hardware
Once paint is cured, carefully reattach hardware and rehang doors and drawers. Use your numbered system to match pieces to their original spots. Check that doors close smoothly and gaps are even.
If you’re adding new hardware, drill pilot holes to prevent splitting the wood.
Caulking And Touch-ups
For a seamless look, use paintable caulk to fill small gaps between cabinets and walls or ceiling. Let the caulk dry, then touch up with paint as needed.
Cleaning Up
Clean brushes and rollers right after use. Latex and acrylic paints wash out with soap and water. Oil-based paints require mineral spirits.
Dispose of paint and solvents according to local rules—never pour them down the drain.
Common Mistakes And How To Avoid Them
- Skipping sanding: Even unfinished wood needs sanding for a smooth surface.
- Not cleaning properly: Grease and dust stop paint from sticking.
- Rushing drying times: Paint that hasn’t fully dried will smudge or peel.
- Using the wrong primer or paint: Kitchen environments need products made for moisture and scrubbing.
- Ignoring the environment: Humid, cold, or dusty spaces slow drying and cause flaws.
- Poor labeling: Not numbering doors and drawers creates confusion during reassembly.
- Thick coats: Multiple thin coats are better than one thick, drippy coat.

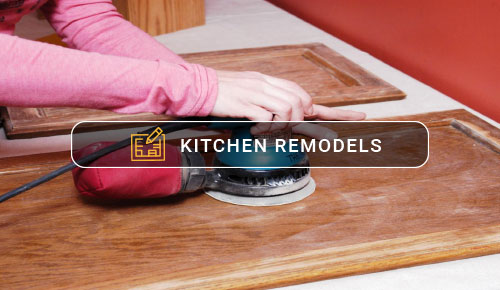
Credit: www.youtube.com
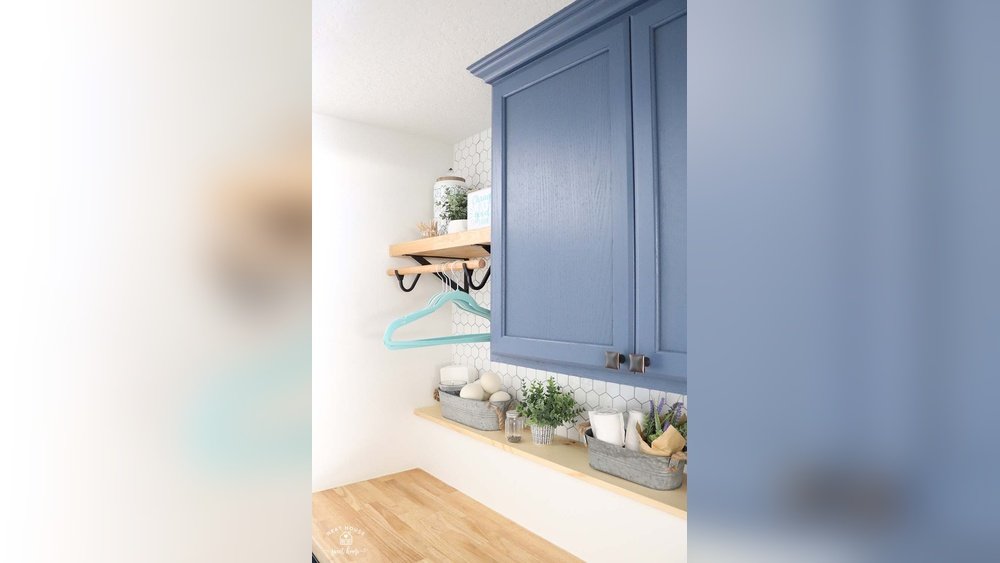
Choosing Paint Colors For Kitchen Cabinets
Picking the right color can change the whole feel of your kitchen. White and off-white are classic and make spaces look larger. Gray and navy are modern and stylish. Bold colors like green or yellow can add personality, but may not suit every home.
Here’s how different colors can affect your space:
| Color | Effect | Best For |
|---|---|---|
| White | Bright, clean, timeless | Small or dark kitchens |
| Gray | Modern, neutral, calming | Open layouts, paired with bold accents |
| Navy | Bold, elegant | Large kitchens with good light |
| Green | Fresh, unique | Eco-themed or rustic kitchens |
| Black | Chic, dramatic | Contrasting with light countertops |
Tip: Test color samples on a small area and view them in different lights before committing.
Should You Use A Topcoat Or Sealer?
A topcoat adds extra protection, especially for high-traffic kitchens. Water-based polyurethane is a popular choice because it doesn’t yellow over time. Avoid oil-based polyurethanes on light-colored paints, as they can discolor.
Apply the topcoat after the final paint layer is fully dry. Use a clean brush or foam roller. Two thin coats are better than one thick coat. Let each coat dry completely.
Some cabinet paints are self-sealing and don’t require a topcoat. Check the manufacturer’s instructions.
Credit: buildersupplyoutlet.com
Practical Tips For Best Results
- Work in a well-ventilated area to avoid fumes.
- Keep pets and children away from wet paint.
- Stir paint often to keep color consistent.
- Wear a respirator, especially with oil-based products.
- If using a sprayer, practice on scrap wood first.
Non-obvious tip: Painting cabinet sides and undersides can make the finish look truly custom, even if these areas are less visible.
Realistic Timeline For The Project
Many people underestimate how long cabinet painting takes. Here’s a typical timeline for a medium-sized kitchen:
| Stage | Time Needed |
|---|---|
| Preparation (cleaning, sanding, removing hardware) | 1–2 days |
| Priming (including drying time) | 1 day |
| Painting (multiple coats, drying, sanding) | 2–3 days |
| Curing and reassembly | 1–2 days |
| Full curing (before heavy use) | 7–30 days |
Planning for at least a week of limited kitchen use will help you avoid frustration.
When To Hire A Professional
DIY painting is rewarding, but not for everyone. If your cabinets have water damage, warped panels, or you want a flawless sprayed-on finish, consider hiring a pro. Professionals have tools and experience that reduce mistakes and speed up the process.
If your time is limited or you’re worried about making costly errors, a professional might be worth the investment.
Environmental And Health Considerations
Paint fumes can be harmful, especially oil-based ones. Always work in a well-ventilated area. Wear a respirator mask and gloves. Keep paint and solvents away from children and pets.
Choose low-VOC or zero-VOC paints when possible. They are better for indoor air quality and safer for your family.
Dispose of leftover paint and supplies responsibly. Many towns have collection days for hazardous waste.

Credit: www.neathousesweethome.com
Case Study: Diy Painted Cabinets Success
Sarah, a first-time DIYer, transformed her 1990s oak kitchen for under $300. She spent extra time on prep—sanding, cleaning, and labeling every piece. She used a high-quality acrylic paint in a soft gray and applied three thin coats, sanding lightly between each.
Sarah let the cabinets cure for two weeks before heavy use.
The result? Smooth, professional-looking cabinets that have held up for three years with no chipping. Her main advice: “Don’t rush. Prep is everything, and sanding between every coat is the secret.”
Resources For Further Guidance
You can find detailed step-by-step tutorials and community support at the This Old House website. It offers videos and expert advice on painting techniques, cabinet styles, and troubleshooting common issues.
Frequently Asked Questions
What Kind Of Paint Is Best For Unfinished Kitchen Cabinets?
The best paint for unfinished kitchen cabinets is a high-quality acrylic or latex paint with a semi-gloss or satin finish. These paints are durable, easy to clean, and resistant to moisture. Oil-based paints are even tougher but have more fumes and longer drying times.
Do I Need To Sand Unfinished Cabinets Before Painting?
Yes, sanding is essential even for unfinished wood. It smooths the surface, removes minor imperfections, and helps the primer and paint stick better. Skipping sanding often leads to rough finishes and peeling paint.
How Long Should I Wait Between Coats Of Paint?
Always follow the paint manufacturer’s instructions, but most paints require 4–8 hours between coats. In humid or cold weather, drying may take longer. Make sure each coat feels completely dry before sanding or painting again.
Is A Primer Necessary For Unfinished Cabinets?
Primer is strongly recommended. It blocks stains, seals the wood, and helps paint stick better. Skipping primer can result in uneven color, stains bleeding through, and a less durable finish.
Can I Use A Paint Sprayer For Cabinets?
Yes, a paint sprayer can give the smoothest, most even finish. However, sprayers require more setup, masking, and ventilation. Beginners should practice first on scrap pieces and follow safety precautions.
Painting unfinished kitchen cabinets is a rewarding project that can save money and refresh your kitchen’s look. With careful preparation, patience, and attention to detail, your efforts will pay off every time you step into your newly transformed kitchen.