
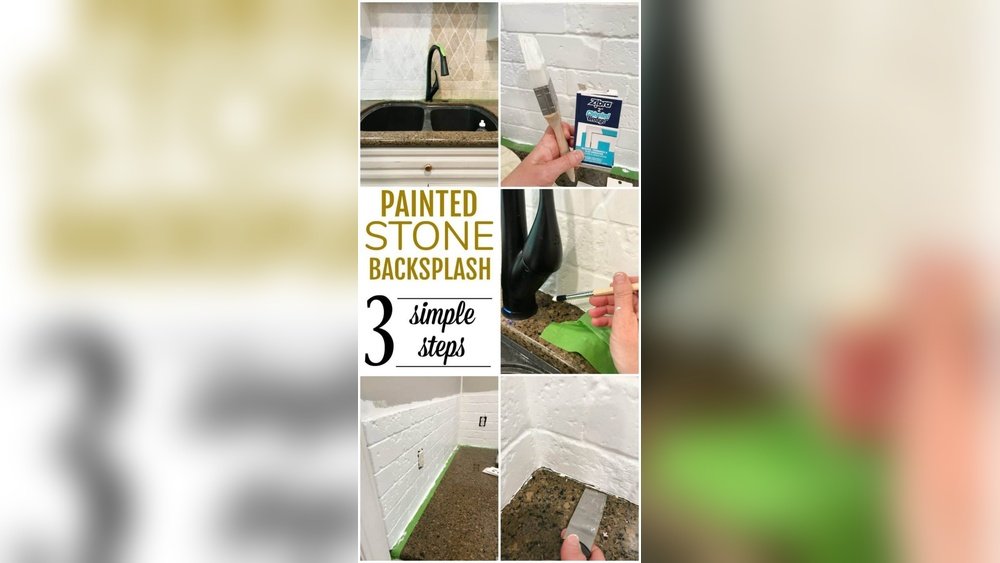
Painting a stone backsplash can completely change the look and feel of your kitchen or bathroom. Many homeowners love the natural beauty of stone, but sometimes the original color or finish does not match your vision. If you want a fresh look without removing and replacing the stone, painting is a smart and budget-friendly choice.
This process might seem tricky, but with the right steps and preparation, you can get a professional-looking finish that lasts for years.
Many people worry that paint will not stick to stone or that it will peel quickly. While stone is different from drywall or wood, you can paint it successfully if you know what to do. The secret is understanding the unique qualities of stone, choosing the right products, and following each step carefully.
In this guide, you will learn how to paint a stone backsplash from start to finish, including all tools, materials, and techniques. You will also discover tips that most beginners miss, helping you avoid common mistakes and get the best results.
Understanding Your Stone Backsplash
Before you start painting, it is important to know what kind of stone backsplash you have. Not all stone is the same. You might have natural stones like granite, marble, or slate, or manufactured stones like cultured stone or faux stone panels. Each type can react differently to paint.
Natural stone often has a rough, porous surface that can soak up paint. Some stones, like marble, are smoother and might need special preparation. Manufactured stone sometimes has a protective coating or sealant that needs to be removed first. If you are not sure, check with your builder or a stone supplier.
Knowing your stone type helps you pick the best cleaning method and primer.
One thing beginners often overlook is the grout lines between the stones. Grout is usually more porous than stone. Paint may soak in faster or look different on grout, so you need to plan for that.
Tools And Materials You Need
Painting a stone backsplash is easier with the right tools and materials. Here is a complete list:
- Mild detergent or stone-safe cleaner
- Scrub brush (nylon bristles, not metal)
- Painter’s tape
- Drop cloths or plastic sheeting
- Sandpaper (medium and fine grit)
- Deglosser (if stone is glossy or sealed)
- Vacuum or dust brush
- Primer (masonry or stone-specific)
- Quality paint (acrylic latex or masonry paint)
- Paintbrushes (angled and flat)
- Small foam rollers
- Paint tray
- Sealer (clear, non-yellowing, stone-safe)
- Safety gear (gloves, mask, goggles)
Some people try to skip special products like stone primer or sealer, but this can lead to peeling or staining later. Always use products designed for stone and masonry. Do not use regular wall paint or primer.
Planning Your Project
Taking time to plan will make your project smoother and help you avoid messes. Think about these points before starting:
- Pick your paint color and finish. Light colors can brighten a kitchen but show stains more easily. Dark colors hide stains but may make small spaces feel smaller.
- Test a small area first. Paint a hidden spot to see how the paint looks on your stone.
- Check the weather. Good ventilation helps paint cure. Avoid painting on very humid or rainy days.
- Set aside enough time. You will need to let surfaces dry between each step. The whole process usually takes 2–3 days.
Preparation Steps
Preparation is the most important part of painting stone. Skipping steps here can ruin your results.
Cleaning The Stone Surface
Stone backsplashes collect grease, dust, and grime, especially in kitchens. These can stop paint from sticking. Follow these steps:
- Mix mild detergent with warm water or use a stone-safe cleaner.
- Scrub the stone with a nylon brush. Pay special attention to corners and grout.
- Rinse with clean water and wipe dry with a lint-free cloth.
- Let the backsplash air-dry for at least 12 hours.
If you see mold or mildew, use a cleaner with bleach, but rinse very well. Any leftover soap or cleaner can cause paint to bubble.
Repairing Cracks And Gaps
Look for cracks or holes in the stone or grout. Fill them with masonry repair compound or stone filler. Smooth with a putty knife and let dry completely. Sand rough patches with medium-grit sandpaper until smooth.
Removing Old Sealant Or Gloss
If your stone feels shiny or slick, it may have a sealant. Paint will not stick to sealed surfaces. Use a deglosser or lightly sand the stone with medium-grit sandpaper. Vacuum up all dust.
Taping And Protecting Surroundings
Use painter’s tape to protect counters, cabinets, and walls around the backsplash. Cover counters with a drop cloth or plastic. This saves cleanup time and gives you sharp, clean paint lines.
Choosing The Right Primer And Paint
Not all paints and primers work on stone. For best results, use products made for masonry or stone.
Primer
A good masonry primer bonds to rough surfaces and helps paint stick. Some primers also seal the stone and prevent stains from bleeding through. If your stone is dark and you want a light color, use a primer that blocks stains and gives good coverage.
Look for these features:
- Alkali-resistant (for stone and mortar)
- Stain-blocking (for older stone)
- High-adhesion (for smooth or dense stone)
Paint
Choose 100% acrylic latex paint or masonry paint for lasting results. These paints are flexible and resist cracking. For kitchens, a semi-gloss or satin finish is easier to clean than flat paint.
Some people try to use spray paint for quick coverage. Spray paint often gives uneven results and does not last on stone. Stick with brush and roller application.
Sealer
A final clear sealer protects the painted surface. Make sure your sealer is non-yellowing and safe for use on painted stone. This step is especially important in kitchens and bathrooms.
Step-by-step Painting Process
Now, let’s break down the full process from start to finish.
1. Final Surface Check
Before you prime, check the stone for dust, grease, or loose pieces. Run your hand over the surface. If you feel any bumps or grit, clean again.
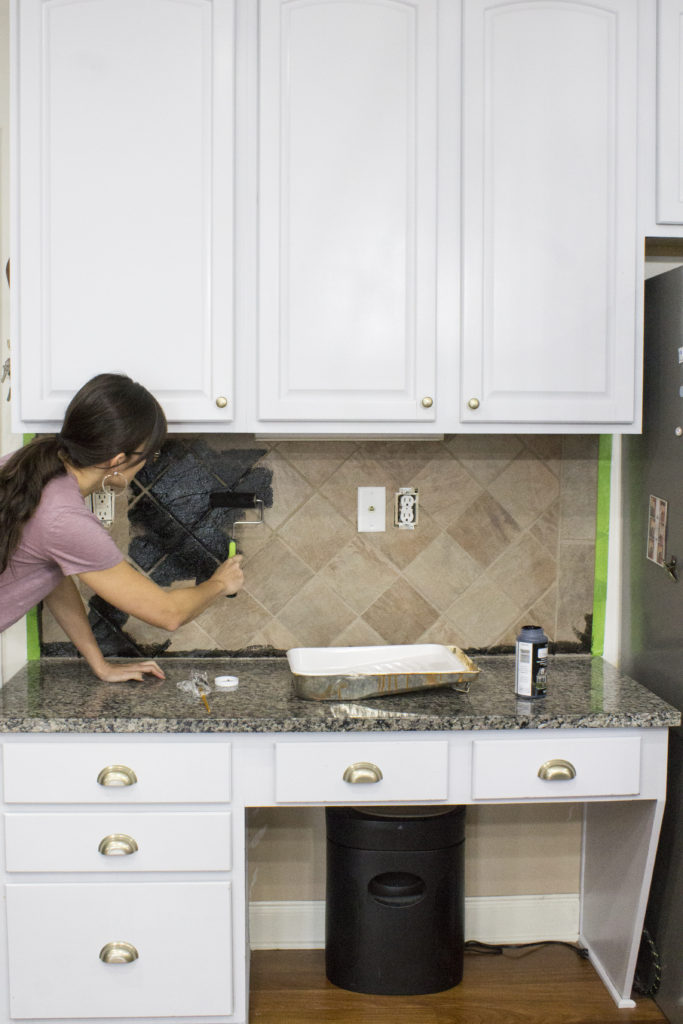
2. Priming The Stone
- Stir your masonry primer well.
- Pour some primer into a paint tray.
- Use an angled brush to cut in around the edges and grout lines.
- Roll primer onto the flat areas with a small foam roller.
- Apply primer thinly and evenly. Do not let it pool in cracks.
- Let dry as directed (usually 2–4 hours).
If your stone is very porous, you may need two coats. Let the first coat dry fully before adding the second.
3. Painting The Backsplash
- Stir the paint to mix evenly.
- Use the angled brush for corners, edges, and grout.
- Roll the paint on larger stone faces with a foam roller.
- Work in small sections to keep a wet edge.
- Let the first coat dry (usually 4–6 hours).
Check the coverage. Stone often needs two coats for even color. If the stone is dark and the paint is light, a third coat may be needed.
4. Painting Grout Lines
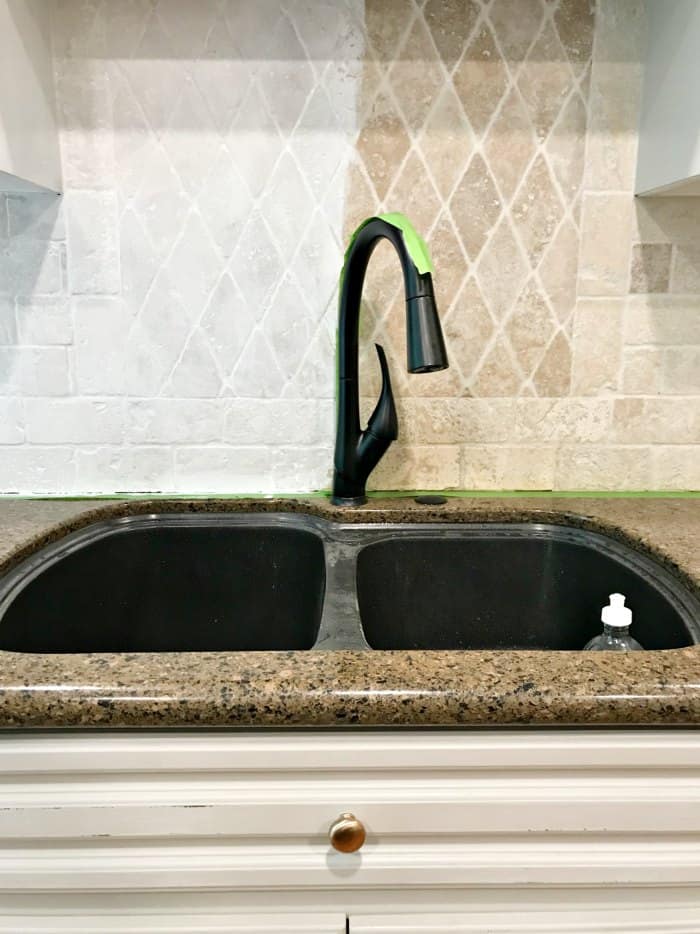
Grout often looks different from stone. If you want a uniform look, paint the grout with your brush before using the roller on stone. For a contrasting look, use painter’s tape to protect grout before painting the stone, or touch up grout color after the stone is painted.
5. Applying The Sealer
- Wait at least 24 hours after the last paint coat.
- Stir the stone-safe sealer (do not shake, to avoid bubbles).
- Use a clean brush or roller to apply a thin coat.
- Let dry as directed (usually 2–4 hours).
- For extra protection, apply a second sealer coat.
Sealer makes your painted backsplash easier to clean and protects against stains.
Credit: loveyourabode.com
Table: Primer And Paint Comparison For Stone Backsplashes
To help you choose, here’s a comparison of common primers and paints used for stone backsplashes.
| Product Type | Best For | Pros | Cons |
|---|---|---|---|
| Masonry Primer | Natural & manufactured stone | Strong bond, stain blocking | Longer drying time |
| All-purpose Primer | Lightly textured surfaces | Easy to find, quick dry | May not block stains or bond well |
| Acrylic Latex Paint | Most stone backsplashes | Durable, easy to clean | Needs primer for best results |
| Masonry Paint | Highly textured/porous stone | Flexible, resists cracking | Limited color choices |
Design Ideas And Color Choices
Painting your stone backsplash lets you personalize your kitchen or bathroom. Here are some popular ideas:
- Classic white or off-white: Brightens the space, works with any style.
- Soft gray: Modern and neutral, hides stains well.
- Bold colors: Navy, forest green, or black can create a dramatic feature wall.
- Two-tone: Paint stones one color and grout another for a custom look.
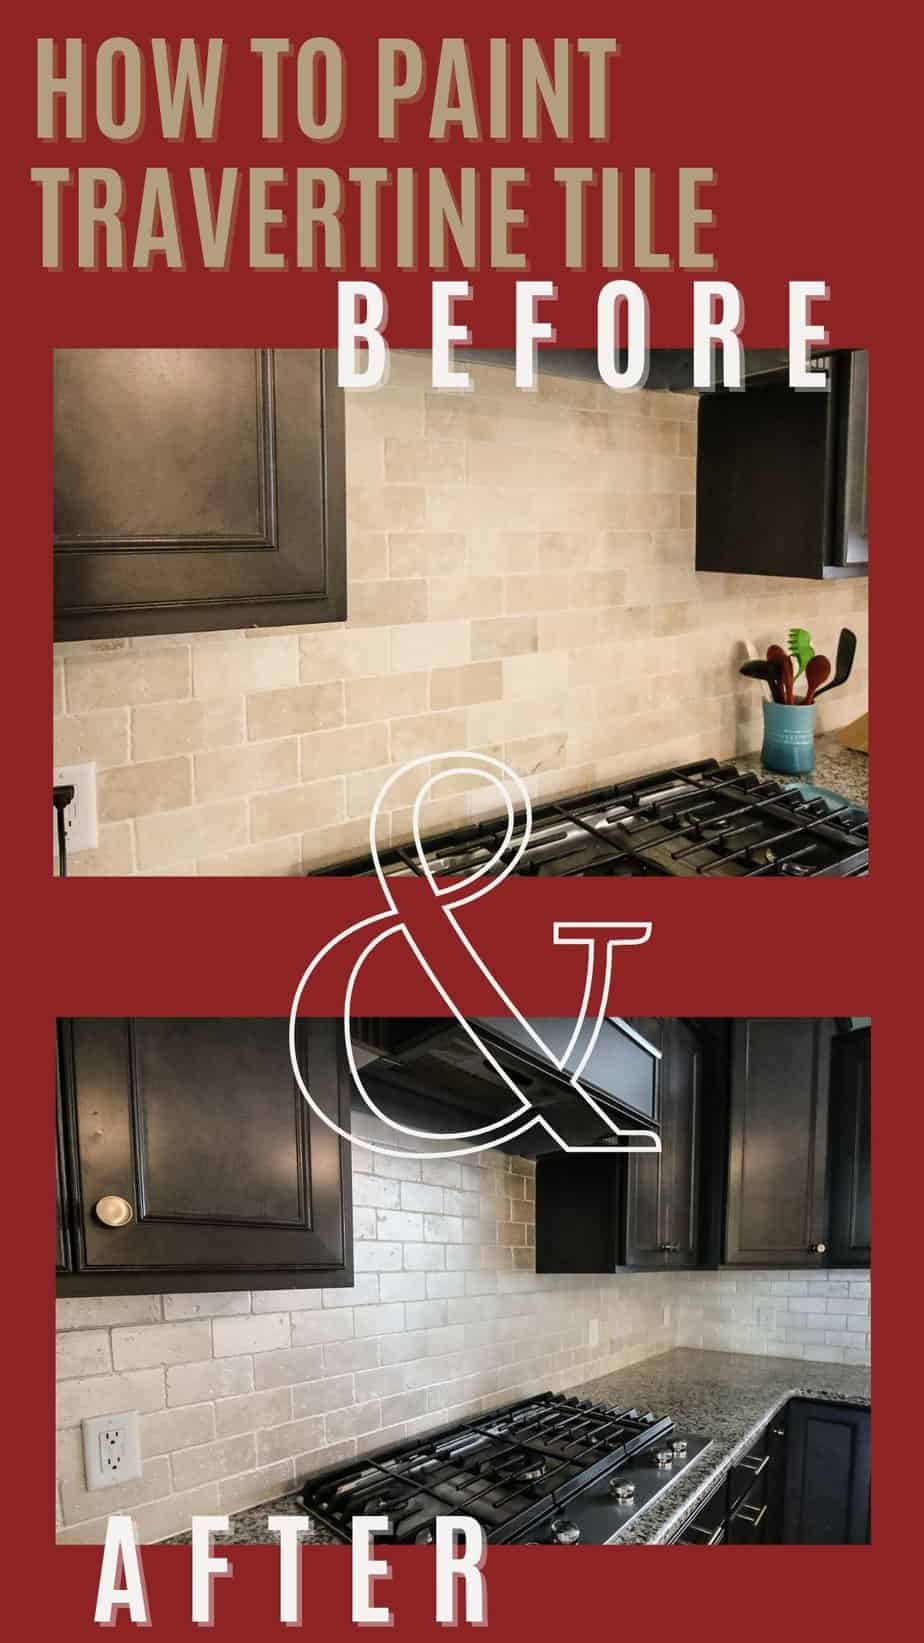
If you want a natural stone appearance, use a color wash technique. Thin your paint with water and dab on with a sponge. This lets some stone texture show through.
Credit: www.charlestoncrafted.com
Table: Paint Finish Comparison
Here’s a quick look at paint finish options:
| Finish | Look | Durability | Best For |
|---|---|---|---|
| Matte/Flat | Soft, non-reflective | Low | Low-traffic walls |
| Satin | Slight sheen | Good | Kitchen/bath backsplashes |
| Semi-gloss | Shiny | Excellent | High-moisture areas |
Most people prefer satin or semi-gloss for backsplashes, as they are easy to wipe clean.
Common Mistakes And How To Avoid Them
Many beginners make these mistakes:
- Skipping cleaning: Paint will not stick to greasy or dusty stone.
- Not using primer: Primer is essential for bonding and even color.
- Painting over wet stone: Moisture trapped under paint causes bubbling and peeling.
- Using wall paint: Regular wall paint does not last on stone.
- Rushing between coats: Always let primer and paint dry fully.
- Not sealing: Without a sealer, the paint can stain or wear off quickly.
One less obvious mistake is not checking for old sealers on manufactured stone. Many factory-made stones come pre-sealed and need special prep.
Caring For Your Painted Stone Backsplash
After painting, take care to keep your backsplash looking new:
- Clean gently: Use a soft sponge and mild soap. Avoid harsh chemicals.
- Wipe spills quickly: Paint protects stone, but stains can still soak in if left too long.
- Check for chips: Touch up any damage with leftover paint and sealer.
- Avoid abrasive cleaners: These can scratch the paint and sealer.
Painted stone can last for years if you follow these care tips. In high-use areas, plan to refresh the sealer every 2–3 years.
Real-life Example
Linda, a homeowner in Ohio, wanted to update her dark slate backsplash. She cleaned the stone with a vinegar solution, but the paint peeled after a few months. She learned that vinegar can damage stone and that she should have used a stone-safe cleaner and primer.
After repeating the process with the right products, her painted backsplash has lasted over three years with no problems.
This shows why choosing the right cleaner and primer makes a big difference. It is not just about the paint color, but also about the products you use and the steps you follow.
Table: Cost Breakdown For Diy Painted Stone Backsplash
Wondering about the cost? Here’s a sample breakdown for a typical 20-square-foot backsplash:
| Item | Estimated Cost (USD) |
|---|---|
| Stone-safe cleaner | $10 |
| Painter’s tape & drop cloths | $8 |
| Primer (quart) | $15 |
| Paint (quart) | $18 |
| Sealer (quart) | $20 |
| Brushes & rollers | $12 |
| Sandpaper & filler | $8 |
| Total | $91 |
Professional painting could cost $300–$600 for the same area. Doing it yourself saves money and gives you full control over the look.
Advanced Techniques For A Unique Look
If you want something more creative, try these ideas:
- Faux finish: Use a sponge or rag to dab on a second color. This creates a natural stone look.
- Stenciling: Add patterns or designs with a stencil and a contrasting paint color.
- Color wash: Thin your paint with water and brush lightly for a soft, cloudy effect.
- Highlighting texture: Use a dry brush with lighter paint to highlight raised areas.
These techniques are not just for artists. With practice and patience, anyone can add a stylish touch to their stone backsplash.
Safety Tips
Painting stone backsplashes is safe if you take basic precautions:
- Wear gloves and a mask when sanding or priming.
- Open windows or use fans for ventilation.
- Dispose of paint and cleaner safely.
- Keep children and pets away from the work area.
Some primers and sealers have strong odors. Always check the safety instructions on the label.
When To Call A Professional
While most people can paint a stone backsplash themselves, some situations need a pro:
- If your stone is very old or valuable (historic homes)
- If you have large cracks or water damage
- If you want a complex design or mural
Professionals have special tools and experience with tricky stone types. If you are unsure, get a quote before starting.
Credit: athomewiththebarkers.com
Where To Learn More
For more information about painting stone or choosing the right products, visit Family Handyman. They offer step-by-step guides and expert advice for DIY projects.
Frequently Asked Questions
How Long Does Painted Stone Backsplash Last?
With the right prep and sealer, a painted stone backsplash can last 5–7 years or more. High-traffic kitchens may need touch-ups sooner. The key is cleaning gently and resealing every few years.
Can I Paint Over A Dark Stone Backsplash With A Light Color?
Yes, but you may need extra primer and paint coats. Use a stain-blocking primer to prevent the dark color from bleeding through. Always test a small area first.
What Is The Best Paint For A Stone Backsplash?
The best paint is 100% acrylic latex or masonry paint. Both are durable and flexible. Avoid chalk paint or regular wall paint, as they do not last on stone.
Do I Need To Seal My Painted Backsplash?
Sealing is strongly recommended. A clear, non-yellowing sealer protects the paint from stains, water, and grease. It also makes cleaning easier.
Can I Use Spray Paint On Stone Backsplash?
Spray paint is not ideal for stone backsplashes. It can give uneven coverage and does not last as long as brush-on acrylic or masonry paint.
Painting a stone backsplash is a rewarding project that can update your home’s look for a fraction of the cost of new stone. By taking your time, using the right products, and following each step, you’ll enjoy a beautiful, lasting finish that reflects your style.