Opening a Ninja Blender lid sounds simple, but if you’ve ever struggled with a stuck lid or worried about breaking your blender, you’re not alone. Many people find that the lid on a Ninja Blender can be tricky, especially when blending thick mixtures or using the machine for the first time.
Knowing the right way to open the lid not only prevents damage to your blender but also keeps your kitchen safe and clean. This guide will show you exactly how to open a Ninja Blender lid, why it sometimes gets stuck, and what you can do to avoid common problems.
Understanding Your Ninja Blender Lid
The Ninja Blender lid is designed for safety. It creates a tight seal to keep ingredients inside, especially during high-speed blending. This seal is what sometimes makes the lid difficult to open. Most Ninja models use a locking mechanism with arrows or symbols to show whether the lid is secure or ready to open. This is to prevent the lid from coming off while the blender is running, which could cause spills or injuries.
Types Of Ninja Blender Lids
Ninja blenders come in several models, and the lids can be slightly different. Here are the main types:
- Classic Pitcher Lid: Used with full-size blenders like the Ninja Professional or Ninja Mega Kitchen System.
- Single-Serve Cup Lid: For Ninja personal blenders, usually with flip-top spouts.
- Food Processor Bowl Lid: Included in models with food processor attachments.
- Auto-iQ and Smart Lid: Advanced models have a smart lid with safety sensors and extra locking features.
Knowing your model and lid type helps when following the right steps to open it.
Why The Lid Is So Tight
The tight seal is important for blending safety, especially with hot or thick mixtures. When you blend, pressure can build up inside, pushing the lid against the container. Some Ninja models also have locking tabs or “click” mechanisms that need to be released before opening. If you try to force the lid off, you could break it or spill your drink.
Step-by-step: How To Open A Ninja Blender Lid
Now, let’s go through the exact steps for opening different types of Ninja Blender lids safely and easily.
For Classic Pitcher Lids
- Turn Off and Unplug: Always make sure the blender is turned off and unplugged before you touch the lid. This prevents accidents.
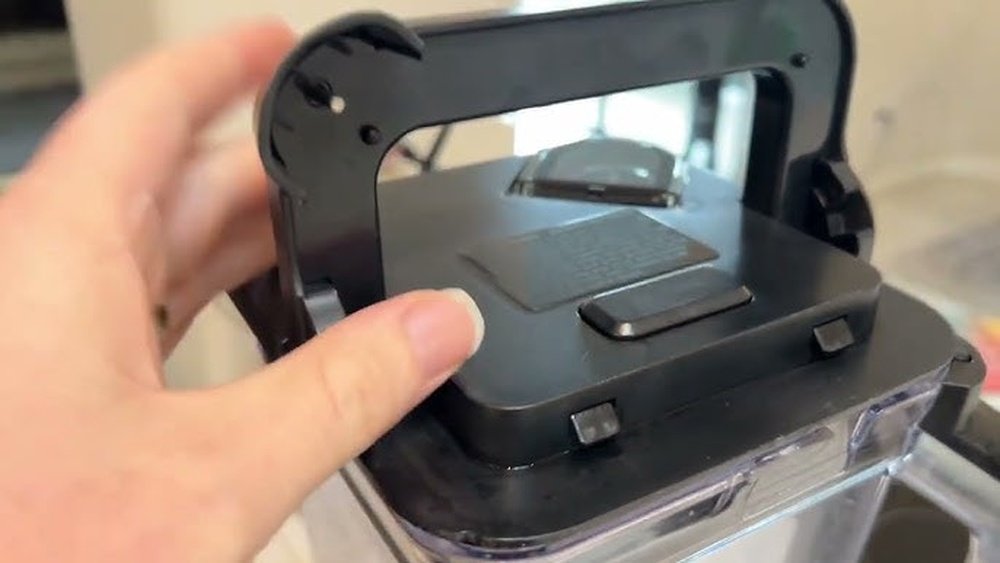
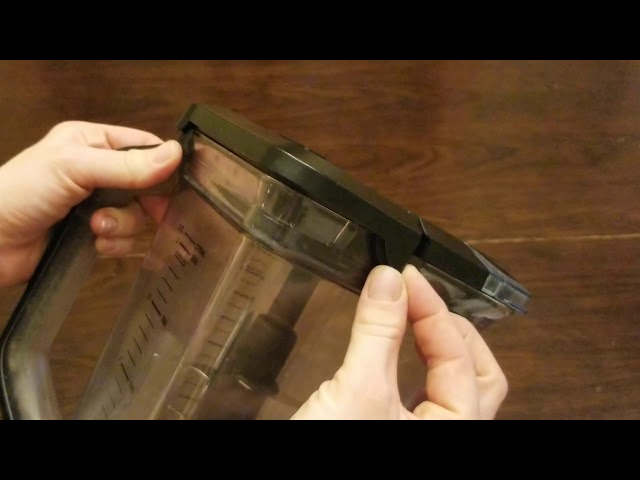
- Check the Locking Tabs: Look for arrows or “OPEN” signs on the lid. Most Ninja lids have a small handle or tab on one side.
- Press the Release Button: Some Ninja models have a release button. Press or slide this button while lifting the handle.
- Lift the Handle: Hold the pitcher with one hand. Use your other hand to lift the handle on the lid straight up. If it doesn’t move, do not force it.
- Rotate and Pull: If the lid has locking tabs, rotate the lid gently in the direction shown by the arrows (usually counterclockwise) before lifting it off.
- Remove Carefully: Once the locking mechanism is released, lift the lid straight up.
For Single-serve Cup Lids
- Unplug the Blender: Always unplug before handling.
- Hold the Cup Firmly: Grip the cup with one hand.
- Twist the Lid Counterclockwise: Most single-serve lids unscrew by turning them to the left. If it’s tight, use a towel for a better grip.
- Lift Off: Once loosened, lift the lid off gently.
For Food Processor Bowl Lids
- Stop and Unplug: Safety first.
- Release Locking Tabs: Look for the latch or button on the side.
- Press and Hold: Hold down the latch while lifting the lid.
- Lift the Lid: Remove the lid straight up.
For Smart Lids (auto-iq, Power Blender, Etc.)
- Power Off and Unplug: Never try to open while the machine is running.
- Locate the Locking Lever: Some smart lids have a lever or button.
- Press or Slide: Follow the model’s specific instructions, usually pressing down or sliding the lever.
- Wait for Click: You should hear or feel a “click” when the lock is released.
- Lift the Lid: Once unlocked, lift the lid using the handle.
Common Reasons Ninja Blender Lids Get Stuck
If your Ninja blender lid is hard to open, you’re not alone. Here are some main reasons:
- Pressure Buildup: Hot or thick mixtures can create suction, locking the lid in place.
- Food Debris: Bits of food stuck in the locking mechanism can prevent opening.
- Improper Sealing: Over-tightening or misaligning the lid can jam the lock.
- Sticky Gaskets: The rubber gasket (seal) under the lid can become sticky with use.
Pressure Buildup Example
Blending hot soups or thick smoothies can cause steam or pressure to build up inside the pitcher. When you try to open the lid, it feels like a vacuum is holding it shut. Wait a few minutes for the mixture to cool down or tap the side of the pitcher gently to release the seal.
Troubleshooting: What To Do If The Lid Won’t Open
Everyone gets stuck sometimes. Here’s how to handle it safely.
Step 1: Check The Safety Lock
Most Ninja blenders have a safety lock. Make sure the pitcher, cup, or bowl is fully seated on the base. If it’s not aligned, the lid may not release.
Step 2: Release Pressure
If you blended something hot, let it cool for 5–10 minutes. Sometimes lightly tapping the lid with a wooden spoon helps release the vacuum.
Step 3: Use A Towel For Better Grip
If your hands are wet or slippery, wrap a towel around the lid handle. This gives you better grip and leverage.
Step 4: Check For Food Debris
Turn the pitcher upside down and tap gently to remove any food stuck in the locking tabs or gasket.
Step 5: Try Warm Water
If the gasket is sticky, run warm (not hot) water over the lid for 1–2 minutes. This can loosen the seal.
Step 6: Don’t Use Tools
Never use knives, screwdrivers, or other tools to pry the lid open. This can break the plastic and void your warranty.
Key Safety Tips For Opening Ninja Blender Lids
Opening a Ninja Blender lid should always be safe and simple. Here are essential tips:
- Unplug Before Opening: Prevents accidents or the blender turning on unexpectedly.
- Avoid Overfilling: Leave space at the top to avoid pressure buildup.
- Don’t Force the Lid: If it won’t open, stop and troubleshoot.
- Release Pressure First: Especially after blending hot liquids.
- Inspect Gasket Regularly: Clean and check for damage to keep the lid working smoothly.
Step-by-step Cleaning After Opening
A clean lid opens more easily and keeps your blender in good shape.
1. Remove The Gasket
Most Ninja lids have a removable rubber gasket under the lid. Pull it out gently.
2. Wash With Soap And Water
Use warm, soapy water and a soft brush to clean the lid and gasket.
3. Rinse Thoroughly
Make sure no soap is left, as it can make the gasket slippery.
4. Dry Completely
Let the lid and gasket air dry before putting them back together.
5. Reassemble Carefully
Push the gasket back into its groove on the lid.
Table: Comparison Of Ninja Blender Lid Types And Opening Methods
Here’s a quick look at the main Ninja Blender lid types, their features, and how to open them:
| Lid Type | Common Models | Opening Mechanism | Special Notes |
|---|---|---|---|
| Classic Pitcher Lid | Ninja Professional, Mega Kitchen System | Lift handle, press release button (if present) | Look for “OPEN” arrow |
| Single-Serve Cup Lid | Ninja Nutri, Fit, Pro Personal | Twist counterclockwise | Use towel for grip if stuck |
| Food Processor Bowl Lid | Ninja Foodi, Mega System | Press latch, lift | Check for food debris |
| Smart Lid (Auto-iQ, Power) | Ninja Power Blender, Auto-iQ | Press or slide lever, lift after “click” | Advanced safety lock |
Advanced Tips For Opening Stubborn Ninja Blender Lids
Even after following the basic steps, some lids can be extra stubborn. Here are a few advanced tricks:
1. Tap The Sides
Gently tap the sides of the lid with a wooden spoon. This can help break the vacuum seal.
2. Run Under Warm Water
Hold the lid (not the electrical base!) Under warm water for a minute. The heat can help loosen sticky gaskets or seals.
3. Use A Rubber Jar Opener
If you have a jar opener or rubber grip, use it to turn the lid or handle. This adds extra friction without damaging the lid.
4. Alternate Lifting And Twisting
Try a gentle combination of twisting (as indicated by the arrows) and lifting. Don’t use too much force.
5. Let It Sit
If all else fails, let the blender sit for 10–15 minutes. Sometimes the pressure will drop on its own, making the lid easier to remove.

Credit: www.reddit.com
Table: Common Mistakes When Opening Ninja Blender Lids And How To Avoid Them
Below is a summary of mistakes people make and the best way to avoid them:
| Mistake | What Happens | How to Avoid |
|---|---|---|
| Forcing the lid open | Breaks the lid or pitcher | Use correct release method, never pry with tools |
| Opening while plugged in | Risk of injury or spills | Always unplug before opening |
| Overfilling the pitcher | Lid gets stuck from pressure | Fill only to maximum line |
| Ignoring gasket maintenance | Lid hard to open, leaks | Clean gasket regularly, replace if worn |
| Not aligning lid properly | Lid won’t open or close smoothly | Follow alignment arrows on lid and pitcher |
How To Keep The Ninja Blender Lid Easy To Open
Regular maintenance prevents problems and saves time.
Clean After Every Use
Don’t let food dry under the gasket or in the locking mechanism. Rinse and wash the lid and gasket right after use.
Check For Damage
Inspect the gasket and lid for cracks or tears. Replace damaged parts to prevent leaks and sticking.
Lubricate The Gasket (rarely Needed)
If the gasket feels dry or sticky, a very small amount of food-safe lubricant (like a drop of vegetable oil) can help. Wipe off any excess.
Store With Lid Off
If you won’t use your blender for a while, store it with the lid off. This prevents the gasket from sticking to the pitcher.
Credit: www.youtube.com
Table: Ninja Blender Lid Opening Troubleshooting Guide
This quick-reference table shows common lid problems and solutions:
| Problem | Likely Cause | Solution |
|---|---|---|
| Lid won’t budge after blending hot soup | Pressure buildup | Let cool, tap sides, try again |
| Clicks but won’t open | Misaligned locking tabs | Realign lid, rotate and lift |
| Lid is sticky or hard to twist | Dirty or dry gasket | Clean and lubricate gasket |
| Food stuck in lock | Debris blocking mechanism | Wash lid thoroughly, check under gasket |
| Lid damaged from forcing open | Using tools or too much force | Replace lid, follow proper opening steps |
Preventing Lid Problems: Proactive Steps
You can avoid most problems with your Ninja Blender lid by being proactive:
- Read the Manual: Each model is a bit different. Check the instructions for your exact blender.
- Use the Right Lid: Don’t mix and match lids from other models.
- Fill Properly: Never fill above the max line, especially with hot items.
- Secure the Lid: Make sure the lid is properly aligned and secured before blending.
- Release the Lock First: Always press or slide the release mechanism before lifting.
Non-obvious Insights For Easier Lid Removal
Here are a couple of tips even experienced users sometimes miss:
- Letting Pressure Out: If you’re blending hot soup, slightly loosen the lid (just a crack) after blending to release steam. Do this with a towel over the lid to avoid burns.
- Gasket Maintenance: Take the gasket out every week and soak it in warm, soapy water for 15–20 minutes. This prevents sticky buildup that makes opening harder.
What To Do If Your Lid Is Damaged
If you crack or warp your Ninja Blender lid, don’t try to fix it with glue or tape. Damaged lids can leak or fail during use. Always replace with an official Ninja part. You can find replacement lids on the Ninja website or from authorized sellers.
Using non-official parts can void your warranty and may not fit correctly.
Credit: www.reddit.com
When To Call Ninja Support
If you’ve tried everything and the lid still won’t open, or if you notice cracks or leaks, contact Ninja customer support. They can give you model-specific advice and help you get a replacement if needed. Keeping your model number handy will speed up the process.
Ninja Blender Lid Opening: Quick Reference Summary
- Always unplug before opening.
- Use the release mechanism (button, handle, or latch) specific to your model.
- Don’t force the lid. If stuck, check for pressure, debris, or gasket problems.
- Clean and maintain the lid and gasket regularly.
- Replace damaged lids with official parts.
For more information about Ninja Blender safety and care, visit the official Ninja Kitchen site.
Frequently Asked Questions
How Do I Open A Ninja Blender Lid If It’s Stuck?
If your Ninja Blender lid is stuck, wait a few minutes if you’ve blended something hot. Try tapping the lid gently or running it under warm water. Check for food debris in the locking mechanism. Never use tools to pry the lid open.
Why Does My Ninja Blender Lid Get So Tight?
The lid becomes tight due to pressure from blending hot or thick mixtures. The rubber gasket also creates a strong seal. To prevent this, avoid overfilling and let hot mixtures cool slightly before opening.
Can I Open The Lid While The Blender Is Running?
No, you should never try to open the lid while the blender is plugged in or running. This can cause spills, injuries, or damage to the blender. Always unplug first.
How Often Should I Clean The Ninja Blender Lid And Gasket?
Clean the lid and gasket after every use. Remove the gasket at least once a week for a deeper cleaning to prevent buildup and sticking.
What Should I Do If My Ninja Blender Lid Is Cracked?
If your lid is cracked, stop using it immediately. Order a replacement lid from the Ninja website or an authorized dealer. Do not try to repair it with glue or tape, as this can cause leaks and is unsafe.
Opening a Ninja Blender lid is easy with the right technique and regular maintenance. Following these steps keeps your blender working smoothly and your kitchen safe, whether you’re making smoothies, soups, or salsas.