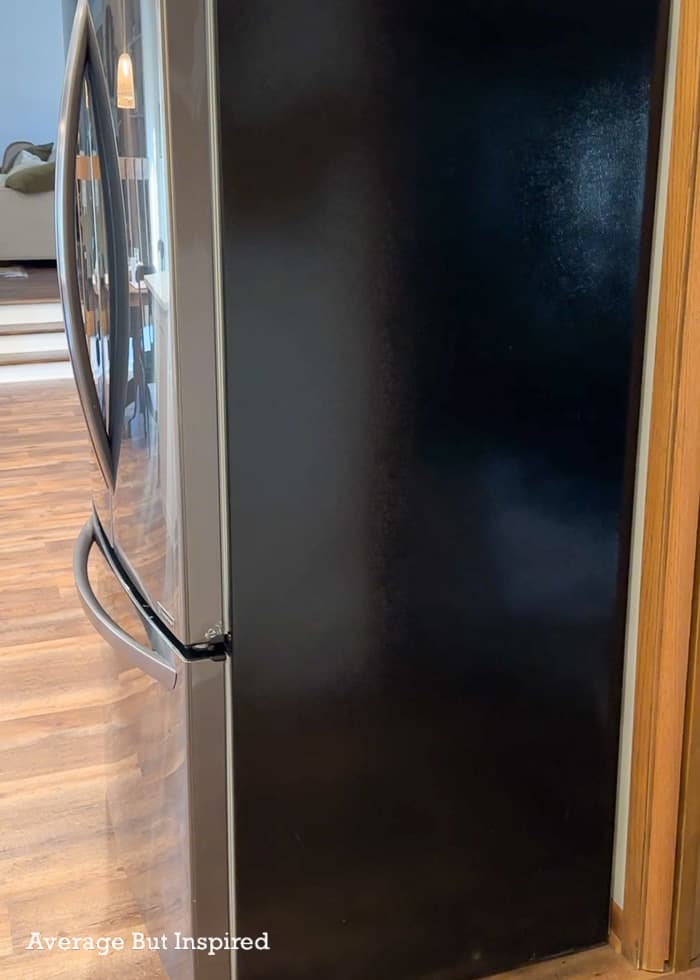
Every kitchen has its own personality, but sometimes, small details can disrupt the look you want. One of the most common annoyances is the exposed side of a refrigerator. Maybe your fridge stands at the end of a cabinet row, or it juts out into open space. That plain, metallic (or worse, dented) side can look out of place, collect dust, and even reduce your kitchen’s style. If you want a more polished, intentional feel, hiding the refrigerator’s exposed side is a smart move.
There’s no single solution. The right method depends on your kitchen layout, budget, DIY skills, and what you want to achieve: a seamless built-in look, extra storage, or just a quick fix. In this guide, you’ll find a complete range of strategies—from quick cover-ups to professional upgrades. You’ll learn what works, what doesn’t, and how to avoid common mistakes that can cost time and money.
Why Hide The Exposed Side Of A Refrigerator?
If you’re wondering whether this effort is really worth it, consider these key benefits:
- Aesthetics: The metal or plastic side often clashes with cabinets and countertops. Covering it makes the kitchen look custom, tidy, and more expensive.
- Protection: The exposed side can get scratched, dented, or dirty. Covering it helps keep the appliance in good shape.
- Better Use of Space: Some methods create storage, display, or even extra workspace.
- Resale Value: A finished kitchen is a big selling point. Buyers notice details like exposed appliances.
Many homeowners miss the fact that a fridge can look very different under various lighting. For example, stainless steel can reflect bright sunlight, emphasizing fingerprints and smudges. A covered side solves these small but annoying problems.
Assessing Your Refrigerator’s Placement
Before you hide anything, study how your fridge sits in the kitchen. Is the side exposed because it’s at the end of a cabinet run, or is it freestanding? Each situation requires a slightly different approach.
Common Fridge Placement Scenarios
| Placement | Visibility | Best Covering Methods |
|---|---|---|
| End of Cabinet Row | One side exposed | Panel, bookshelf, side cabinet |
| Freestanding (island style) | Both sides visible | Custom enclosure, panels, shelving |
| In Recessed Niche | Partial side exposed | Trim kit, paint, adhesive cover |
Not all fridges are the same depth or width. Modern “counter-depth” models are designed to sit nearly flush with cabinets, while older units may protrude more. Measure your fridge, the gap between it and walls or cabinets, and the clearance you have for doors to open.
This will help you choose a method that looks good and doesn’t block airflow.

Credit: www.youtube.com
Method 1: Install A Matching End Panel
One of the most effective ways to hide an exposed fridge side is a matching end panel. This is a panel—usually wood or laminate—installed to match your kitchen cabinets. It creates a built-in look and instantly makes the fridge feel part of the design.
How To Install An End Panel
- Measure Height and Depth: Measure from the floor to the top of your cabinets and from the wall to the front edge of the fridge.
- Choose Material: Most kitchen suppliers sell end panels to match popular cabinet finishes.
- Secure the Panel: Panels are usually attached to the cabinet beside the fridge and anchored to the floor or wall. Use screws and, if needed, corner brackets for stability.
- Seal the Edges: Use matching edge banding or trim for a seamless look.
Advantages And Drawbacks
| Pros | Cons |
|---|---|
| Seamless look, matches cabinets, durable | Requires tools, may need pro installation, adds cost |
Insight: Many people forget to check for electrical outlets or water lines along the side wall. Make sure access remains clear if you need to plug in or service your fridge.
Method 2: Add A Shallow Pantry Cabinet
If you have enough space, a shallow pantry cabinet next to the fridge works wonders. Not only does it hide the side, but it also provides extra storage for dry goods or kitchen items. These cabinets are available in widths as narrow as 9–12 inches, perfect for tight spots.
Steps For Adding A Pantry Cabinet
- Measure Available Space: Check the gap between your fridge and the wall or cabinet.
- Select Cabinet Style: Look for a tall, shallow unit that matches your other cabinets.
- Install Securely: Anchor the cabinet to the wall for safety, especially if you have children.
- Finish With Trim: Add crown or base molding for a built-in effect.
Example: In a galley kitchen, a narrow pull-out pantry can hold baking trays, spices, or cleaning supplies while fully hiding the refrigerator side.
Tip: Leave at least 1 inch of space between the fridge and the new cabinet to prevent heat buildup and ensure the door opens easily.
Method 3: Use A Custom Bookcase Or Open Shelving
If you prefer something more decorative, an open bookcase or set of shelves can cover the fridge side and add personality to your kitchen. Display cookbooks, plants, or jars for a homey touch.
Building And Installing Shelving
- Choose Material: Use wood, metal, or even painted MDF. Match your kitchen’s color scheme.
- Size to Fit: The shelves should cover the fridge side fully but not block ventilation.
- Attach Safely: Anchor the unit to wall studs for stability.
Non-Obvious Insight: Open shelving next to a fridge is also handy for “transitional” storage—like grocery bags, lunch boxes, or even keys—since it’s often near the main kitchen entry.
Drawback: Dust and kitchen grease can collect on open shelves, so be ready to clean regularly.
Method 4: Decorative Wall Treatments
Sometimes, the easiest solution is a visual one. Decorative wall treatments—like peel-and-stick wallpaper, chalkboard paint, or magnetic panels—can turn the fridge side into a feature instead of a flaw.
Popular Decorative Options
- Chalkboard Paint: Use the side as a message center for notes and reminders.
- Peel-and-Stick Wallpaper: Add patterns, colors, or even faux wood for a custom look.
- Magnetic Panels: Display photos, shopping lists, or artwork.
Example: A family with kids might love a chalkboard fridge side for doodles and menus.
Mistake to Avoid: Don’t use regular wallpaper—it won’t stick well and may peel from condensation. Always use products rated for appliance or metal surfaces.
Method 5: Apply Adhesive Vinyl Or Contact Paper
If you want a fast, low-cost way to hide an ugly fridge side, adhesive vinyl (sometimes called contact paper) works well. Modern products mimic stainless steel, wood grain, marble, or even chalkboard. They’re easy to apply and remove without damaging the appliance.
How To Apply Adhesive Vinyl
- Clean the Surface: Remove grease, dust, and fingerprints.
- Cut to Size: Measure carefully and cut the vinyl slightly larger than the surface.
- Apply Slowly: Peel backing a little at a time, smoothing out air bubbles with a credit card or squeegee.
- Trim Edges: Use a sharp utility knife for a neat finish.
Non-Obvious Insight: Good-quality vinyl is heat resistant and easy to wipe clean, making it more practical than paint for high-traffic kitchens.
Drawback: The finish may not be as durable as a real panel, especially in homes with kids or pets.
Method 6: Build A Custom Enclosure
If you’re renovating your kitchen or want a truly seamless look, a custom enclosure is the gold standard. This involves building walls or cabinetry around the fridge, so only the doors are visible. It’s common in high-end kitchens.
What’s Involved In A Custom Enclosure?
- Framing: Build side panels or a partial wall.
- Cabinetry: Use wood or MDF panels, painted or finished to match your kitchen.
- Ventilation: Leave space at the back, top, or sides for airflow.
- Professional Installation: Usually requires a carpenter or skilled DIYer.
Mistake to Avoid: Never block the fridge’s ventilation gaps. Overheating shortens the appliance’s life and can void your warranty.
Example: In an open-concept home, a custom enclosure can turn a basic fridge into a “built-in” focal point.

Credit: www.youtube.com
Method 7: Hang Curtains Or Sliding Panels
For renters or those who want a non-permanent solution, curtains or sliding panels are a creative option. You can use a ceiling-mounted track, tension rod, or even a sliding barn door.
Steps For Soft Or Sliding Covers
- Choose Material: Heavy fabric, bamboo, or lightweight wood.
- Install Track or Rod: Use self-adhesive hooks or brackets to avoid wall damage.
- Attach Panel or Curtain: Make sure it’s easy to slide out of the way for cleaning.
Tip: Choose a washable fabric that matches your kitchen style. For sliding panels, use lightweight materials so they don’t stress the mounting hardware.
Drawback: Curtains can collect dust and may look less polished in formal kitchens.
Method 8: Add A Rolling Cart Or Portable Storage
A rolling cart or portable shelf can sit next to the fridge, hiding the side and adding bonus storage. This is perfect for renters or people who want flexibility.
Choosing The Right Cart
- Height: Should match or be slightly lower than the fridge.
- Width: Wide enough to cover the exposed side but narrow enough for easy movement.
- Style: Metal, wood, or plastic, depending on kitchen decor.
Example: Use a metal utility cart for storing snacks, or a wooden baker’s rack for cookbooks and small appliances.
Non-Obvious Insight: A rolling cart can also serve as a temporary prep area when cooking for guests.
Method 9: Use Large Artwork Or Framed Panels
If you want to add personality, large artwork or a framed panel can turn the fridge side into a gallery wall. Choose lightweight frames or canvas prints for safety.
How To Hang Art On A Fridge Side
- Use Command Strips: Avoid nails or screws that could damage the surface.
- Arrange in a Grid: A series of smaller pieces can look as cohesive as one large piece.
- Choose Washable Art: Kitchens get greasy; pick surfaces you can wipe clean.
Mistake to Avoid: Heavy artwork can fall and damage the fridge or floor. Always use lightweight options.
Tip: Rotating seasonal art or kids’ drawings keeps the look fresh year-round.
Method 10: Install A Message Center Or Organizer
A message center transforms the fridge side into a functional part of your kitchen. Add a whiteboard, corkboard, calendar, or even hanging baskets for mail and keys.
Setting Up An Organizer
- Choose Components: Combine a whiteboard with hooks, bins, or a small shelf.
- Mount Securely: Use adhesive strips or magnetic backs.
- Keep It Tidy: Limit items to prevent clutter.
Example: Families can use this space for grocery lists, reminders, or kids’ schedules.
Non-Obvious Insight: Mounting a small basket for fresh fruit or onions keeps them handy—and off the counter.
Method 11: Paint The Fridge Side
A simple coat of paint can make the exposed side blend in or stand out, depending on your style. Appliance paint is designed to stick to metal and plastic and comes in many colors.
How To Paint A Fridge Side
- Clean and Sand: Remove any grease, then lightly sand for better adhesion.
- Tape Edges: Protect the front and nearby surfaces.
- Use Appliance Paint: Spray or brush on in thin coats, allowing to dry between layers.
- Cure Properly: Wait the recommended time before moving or touching.
Drawback: Paint can chip if scratched, so it’s best for low-traffic homes or as a temporary solution.
Tip: For a modern look, match the side to your wall color, making the fridge almost disappear.
Method 12: Hide With A Tall Plant Or Vertical Garden
A tall plant or indoor vertical garden can soften the look of an exposed fridge side and add a touch of nature to your kitchen.
Choosing Plants
- Low Light: Snake plant, pothos, or ZZ plant thrive indoors.
- Vertical Options: Wall-mounted planters create a living screen.
- Pot Size: Pick a pot that’s stable and easy to move for cleaning.
Example: A tall fiddle leaf fig or bamboo palm can cover the entire fridge side and purify the air.
Non-Obvious Insight: Plants near fridges can benefit from the extra humidity, but avoid placing leaves where they might block fridge vents.
Method 13: Install A Pegboard Or Tool Wall
A pegboard offers flexible storage for kitchen tools, pans, or even cleaning supplies. It’s practical for small kitchens where every inch counts.
Installing A Pegboard
- Cut to Size: Match the dimensions of the fridge side.
- Mount With Spacers: Leave a small gap behind the board so pegs fit easily.
- Hang Accessories: Use hooks, baskets, or shelves.
Tip: Paint the pegboard in a matching or accent color to blend in or pop.
Drawback: Pegboards can look busy, so keep items organized and avoid overcrowding.
Method 14: Use Mirror Or Reflective Panels
A mirror panel or mirrored acrylic sheet adds a modern touch and makes the kitchen feel larger by bouncing light around the room.
How To Apply Mirror Panels
- Cut to Size: Order a panel to fit the fridge side.
- Use Adhesive: Many panels come with peel-and-stick backing.
- Polish Regularly: Mirrors show fingerprints, so clean often.
Example: In a small apartment kitchen, a mirrored fridge side visually doubles the space.
Non-Obvious Insight: Mirrored surfaces show smudges quickly; choose frosted or tinted mirror for a softer effect.
Method 15: Build A Half-wall Or Partition
For open-concept homes, a half-wall or partition can screen the fridge from view while defining the kitchen area.
Building A Partition
- Choose Height: Waist-high or counter-high works best.
- Select Material: Drywall, wood slats, or glass panels are popular.
- Secure to Floor: Make sure the wall is stable and meets building codes if needed.
Example: A half-wall can double as a breakfast bar or extra counter space.
Mistake to Avoid: Don’t make the wall so high that it blocks airflow or natural light.
Method 16: Add Cabinet Or Drawer Fronts
Some fridges support panel-ready fronts, allowing you to add custom cabinet or drawer panels right onto the doors and sides.
Installing Custom Fronts
- Check Compatibility: Not all fridges are designed for panels.
- Order Panels: Match your cabinet finish and size exactly.
- Attach Securely: Follow the manufacturer’s instructions for mounting.
Example: High-end kitchens use this method for a “hidden” fridge.
Non-Obvious Insight: This method often works best when planned during a full kitchen remodel, as retrofitting can be tricky.
Credit: averageinspired.com
Method 17: Combine Multiple Methods
Sometimes, the best solution is a combination. For example, you could add a narrow pantry cabinet, then use peel-and-stick wallpaper on the remaining exposed surface. Or, use open shelving above and a rolling cart below.
Example: In a rental, use a magnetic panel for art and a tall plant in front for a stylish, flexible cover.
Tip: Make sure combined solutions don’t block airflow or make cleaning difficult.
What To Avoid When Hiding A Fridge Side
Even good ideas can go wrong. Here are common mistakes people make:
- Blocking Airflow: Fridges need space to vent heat. Don’t crowd the appliance.
- Using Flammable Materials: Avoid fabric or foam in direct contact with heat-producing surfaces.
- Permanent Damage: Renters should use non-permanent methods to avoid losing deposits.
- Overloading Shelving: Heavy shelves or carts can tip if not secured properly.
- Clashing Styles: Choose materials and colors that match your kitchen design.
Non-Obvious Insight: Check your fridge’s warranty before drilling or attaching anything. Some modifications may void coverage.
Budget And Diy Vs. Professional Solutions
Your budget and skill level affect which method is best. Here’s a quick comparison:
| Method | DIY-Friendly | Approximate Cost |
|---|---|---|
| Peel-and-Stick Vinyl | Very Easy | $10–$50 |
| End Panel | Moderate | $100–$300 |
| Custom Enclosure | Difficult | $500–$1500+ |
| Rolling Cart | Very Easy | $50–$200 |
| Paint | Easy | $15–$40 |
Tip: For major work (like custom enclosures), always consult a pro to ensure safety and the best results.
Maintenance And Cleaning
Whatever method you choose, plan for easy cleaning. Fridge sides can collect dust, grease, and spills.
- Panels and Cabinets: Wipe with a damp cloth.
- Vinyl/Wallpaper: Use a non-abrasive cleaner.
- Shelving: Remove and clean items regularly.
- Curtains or Fabric: Wash as needed.
- Plants: Dust leaves and check for water spills.
Non-Obvious Insight: Moving the fridge occasionally allows you to clean the floor and check for leaks.
When To Upgrade Your Refrigerator
If your fridge is old, inefficient, or doesn’t fit the space well, consider upgrading to a counter-depth or panel-ready model. These are designed to sit flush with cabinets and blend in naturally.
Example: New Energy Star-rated fridges use up to 15% less energy than older models, saving on utility bills and reducing your carbon footprint.
For more information on energy-efficient appliances, visit Energy Star.
Frequently Asked Questions
How Much Space Should I Leave Between The Fridge And A New Panel Or Cabinet?
Leave at least 1 inch between the fridge and any new panel, cabinet, or wall. This gap ensures proper air circulation, prevents overheating, and allows the doors to swing open fully.
Can I Use Regular Paint Or Wallpaper On My Fridge Side?
No, you should use appliance paint or peel-and-stick wallpaper made for metal or plastic surfaces. Regular paint may peel, and standard wallpaper won’t stick well due to moisture and temperature changes.
Will Adding A Panel Or Cabinet Void My Refrigerator’s Warranty?
It depends. Some manufacturers void the warranty if the fridge is modified or ventilation is blocked. Always check your fridge manual or call the company before making permanent changes.
What’s The Easiest Non-permanent Way To Cover A Fridge Side?
Adhesive vinyl, magnetic panels, or a rolling cart are the easiest, non-permanent options. They are affordable, require no tools, and are easy to remove if you move out or change your mind.
Can I Place A Plant Next To My Fridge?
Yes, but choose a plant that tolerates low light and occasional heat. Make sure it doesn’t block vents, and move it when cleaning or servicing the appliance.
—
A hidden fridge side can make your kitchen look organized, custom, and stylish. Whether you choose a quick fix or a major upgrade, the right method will add value and enjoyment to your home. Experiment with materials, colors, and storage solutions to find what works for your space—and don’t overlook the importance of airflow and maintenance.
With the tips above, you’ll never see your fridge as just an eyesore again.