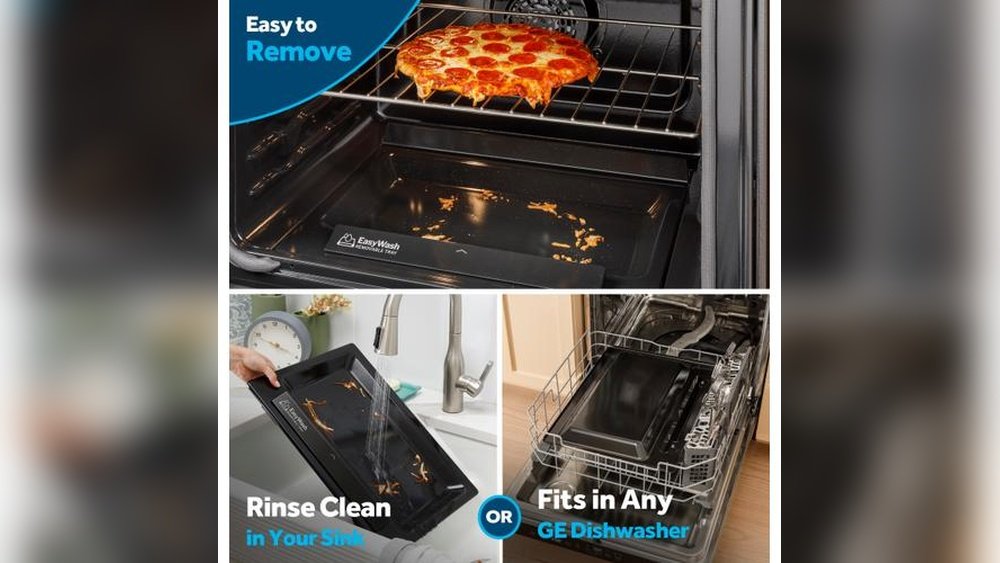
Making oven racks slide smoothly is a small detail that makes a big difference in your kitchen. When racks stick or squeak, it slows you down and can even be dangerous when moving heavy or hot dishes. Many people struggle with this issue, often thinking it is just normal wear and tear.
But it’s possible to restore your oven racks so they glide almost like new. This guide will show you everything you need to know, from understanding why racks get stuck to advanced tips for a professional-quality result.
You’ll discover effective cleaning methods, the best lubricants, and important safety checks. Along the way, you’ll also learn mistakes to avoid and insights only experienced home cooks and appliance technicians know. Whether you’re a busy parent, someone who loves to bake, or just want to make your kitchen safer and more pleasant, these steps will help your oven racks slide easier—and stay that way.
Why Oven Racks Stick
Oven racks are designed to move smoothly in and out. However, after months or years of use, they often begin to stick, squeak, or require extra force to move. Several factors contribute to this problem:
- Baked-on grease and food: Spills from roasting, baking, and broiling can drip onto racks and rails. Over time, these become tough, sticky layers.
- Rust and corrosion: Humidity and salt can cause metal racks and rails to rust, making surfaces rough and hard to slide.
- Warped racks or rails: Heavy dishes or uneven heat can slightly bend racks, making them misaligned.
- Lack of lubrication: Metal-on-metal friction increases if the original finish or lubricant wears off.
- Cleaning residue: Some oven cleaners leave a film that increases friction.
Understanding what causes the problem helps you fix it properly and prevent it from coming back.
Safety First: Preparing To Work On Your Oven
Before you start, safety is essential. Ovens are heavy, and racks can be sharp. Here’s how to get ready:
- Turn off power: Make sure the oven is off and cool. Unplug it or turn off the breaker if possible.
- Remove all racks: Take out every rack, even if only one is sticking. This gives you full access and prevents accidents.
- Wear gloves: Oven racks often have sharp edges or corners, and cleaning chemicals can be harsh.
- Protect your floor: Place old towels or newspapers under the oven area to catch drips or debris.
- Ventilate the area: If you’re using cleaning products, open windows or use fans.
These steps may seem simple, but skipping them can lead to cuts, burns, or chemical exposure.

Credit: www.shopsilica.com
Cleaning Oven Racks Thoroughly
Often, the main reason racks stick is simply built-up grime. A deep cleaning is the first and most important step.
Soak And Scrub Method
This is the classic method and works for most ovens.
- Fill a bathtub with hot water: Add enough to cover the racks.
- Mix in dish soap and baking soda: Use about 1/2 cup of dish soap and 1/2 cup of baking soda for a standard tub.
- Soak racks overnight: The long soak softens baked-on food and grease.
- Scrub with a non-scratch pad: Use a nylon scrubber or an old toothbrush for corners.
- Rinse and dry completely: Wipe with a clean towel and let air dry.
Baking Soda And Vinegar Paste
For heavy stains or small racks, make a paste:
- Mix 3 parts baking soda with 1 part water to make a thick paste.
- Spread on stubborn spots and let sit for 30 minutes.
- Spray or dab with white vinegar. It will fizz and help lift off debris.
- Scrub and rinse.
Avoiding Common Mistakes
- Do not use steel wool or harsh metal pads—they can scratch the racks and make them rust faster.
- Avoid leaving racks in water for more than 12 hours, as prolonged soaking can cause rust on some types.
- Never put racks in a self-cleaning oven cycle unless the manual says it’s safe—this can warp or discolor them.
Cleaning The Oven Rails And Sidewalls
If your racks are spotless but still stick, the problem may be with the oven rails or side tracks. Grease and burnt residue build up here too.
- Wipe rails with a degreaser: Spray a degreasing cleaner onto a cloth (not directly into the oven) and scrub the rails.
- Use a toothbrush for grooves: Rails sometimes have hard-to-reach corners. A toothbrush or cotton swab helps.
- Rinse with a damp cloth: Remove all cleaner residue before reinstalling racks.
This step is often skipped, but it’s critical for smooth sliding.
Choosing The Best Lubricant For Oven Racks
After cleaning, the right lubricant makes racks glide with almost no effort. But you must choose carefully. Not all lubricants are safe for high heat or food areas.
Here’s a comparison of the most popular lubricants:
| Lubricant | Heat Resistance | Food Safe? | Longevity | Notes |
|---|---|---|---|---|
| High-temperature silicone spray | Up to 500°F | Some brands only | Medium | Check label for food safety |
| Graphite powder | Excellent | Not food safe | Long | Messy; for outside contact points only |
| Petroleum jelly (Vaseline) | Up to 300°F | Yes | Short | Needs frequent reapplication |
| Cooking oil | Low | Yes | Short | Can become sticky or rancid |
| Oven rack lubricant (commercial) | Up to 600°F | Yes | Long | Best choice if available |
How To Apply Lubricant Correctly
- Dry the racks fully: Water can dilute lubricants and cause rust.
- Apply a thin layer: Use a small brush, cloth, or paper towel. Cover only the areas that contact the rails.
- Avoid rack tops: Never put lubricant where it can drip onto food or pans.
- Wipe off extra: Too much lubricant can drip or smoke at high heat.
If you use a commercial oven rack lubricant, always follow the instructions on the package. Some brands recommend applying after every deep cleaning.
Reinstalling The Oven Racks
Proper reinstallation makes a big difference in how racks slide. Here’s how to do it right:
- Check for warping: Place the rack on a flat surface. If it rocks, gently bend back into shape.
- Align with rails: Start with the rack level, so both sides enter the rails together.
- Slide in slowly: Push gently, feeling for any sticking points.
- Test movement: Slide the rack in and out several times. If it still sticks, remove and check for missed debris or misalignment.
If you notice repeated sticking in one spot, inspect the rails for dents or burnt spots. These can be smoothed with fine steel wool (followed by wiping with a damp cloth).
Preventing Future Sticking
Keeping racks sliding smoothly is easier than fixing them every few months. Here’s how to prevent problems:
- Wipe rails after spills: If anything overflows, clean it up as soon as the oven cools.
- Light lubrication every 2-3 months: A quick wipe with food-safe lubricant keeps things moving.
- Rotate racks: Swap rack positions occasionally. This spreads out wear and tear.
- Avoid heavy slamming: Close racks gently to prevent warping.
- Check for rust: If you see orange spots, treat them right away with a rust remover and apply a protective layer.
A simple maintenance schedule can make ovens last longer and work better.
When To Replace Oven Racks Or Rails
Sometimes, even the best cleaning and lubricating can’t fix the problem. Racks and rails do wear out or get damaged beyond repair.
Signs it’s time to replace:
- Deep rust or pitting: This weakens the rack and can cause breakage.
- Severe warping: If racks won’t sit flat, they may not be safe.
- Broken or missing rails: Racks need strong support to slide and hold pans.
- Coating flaking off: Some racks have a protective chrome or enamel layer. If this is gone, racks can rust quickly.
Replacement racks are available from most oven manufacturers. Always check your oven model number to get the right fit.
Credit: schaumburgspecialties.com
Professional Solutions And Upgrades
For those who want a premium solution or have ongoing problems, professional help or upgrades are available.
Factory Reconditioning
Some companies will re-chrome or refinish oven racks. This process removes all rust and restores the original smooth surface. It’s more expensive but can make old racks like new.
Aftermarket Slide Systems
There are upgrade kits that add ball-bearing slides or heavy-duty rails to older ovens. These give a smooth, drawer-like motion, and are popular in professional kitchens.
Service Technicians
If you suspect the problem is with the oven’s frame or built-in rails, a technician can check for hidden damage or alignment issues. For some high-end ovens, only certified repairs will keep the warranty valid.
Hidden Insights Most People Miss
Many people overlook these small but important details:
- Oven cleaners can damage racks: Strong chemical oven cleaners can pit or discolor racks, making them rough. Always rinse thoroughly after using these products.
- Humidity causes hidden rust: Even when not in use, moisture in the air can rust racks. Storing your oven with the door slightly open can help air out moisture after cleaning.
- Manufacturer’s advice matters: Some oven brands warn against lubricants, especially for self-cleaning models. Check your manual or the manufacturer’s website for any special instructions.

Credit: www.ebay.com
Comparing Common Lubricants: Performance Over Time
Many home cooks try different lubricants without knowing how they perform long-term. Here’s a look at how popular choices compare after repeated high-heat cycles:
| Lubricant | Initial Smoothness | After 10 Oven Uses | Residue Issues |
|---|---|---|---|
| Petroleum Jelly | Very Good | Fair (needs reapplying) | Can collect dust/crumbs |
| High-temp Silicone | Excellent | Good | Minimal |
| Cooking Oil | Good | Poor (gets sticky) | High—can burn |
| Commercial Oven Rack Lube | Excellent | Excellent | None |
The takeaway: while common items like cooking oil or petroleum jelly work for a quick fix, a specialty oven rack lubricant is best for long-lasting, smooth sliding without residue or odors.
Step-by-step: Making Oven Racks Slide Easier
Let’s summarize the most effective process. Follow each step carefully for the best results.
- Remove all racks and turn off power.
- Soak racks in hot, soapy water for at least 2 hours (overnight is best).
- Scrub racks with a nylon pad and rinse thoroughly.
- Clean oven rails with a degreaser and toothbrush, then wipe dry.
- Dry racks fully—even small water spots can cause rust.
- Apply a thin layer of food-safe lubricant to all sliding contact points.
- Reinstall racks carefully, checking alignment and testing movement.
- Wipe away any extra lubricant that could drip onto food.
- Repeat lubrication every few months or after heavy cleaning.
If racks still stick after this process, inspect for damage or consider replacement.
Real-life Example: Fixing A Stuck Rack
Imagine you have an oven rack that screeches and sticks every time you pull it out. You try cleaning with a sponge, but it doesn’t help. Here’s what really works:
- You remove the rack, soak it overnight with baking soda and dish soap, and scrub off black residue. Next, you clean the rails inside the oven with a toothbrush dipped in vinegar.
- After drying, you apply a thin layer of high-temperature silicone lubricant on the side edges (not the top or bottom).
- When you slide the rack back in, it moves smoothly and quietly. You notice that cooking and checking dishes is easier and safer.
- Six months later, you repeat the quick cleaning and lubrication, and the problem never returns.
This simple process can save you frustration and even prevent accidents in the kitchen.
Little-known Tips For Even Better Results
- Wax paper trick: After cleaning and drying, rub a sheet of wax paper along the rack edges. The wax leaves a light, food-safe coating that helps prevent sticking.
- Check for hidden screws or clips: Some ovens have removable side rails or guides. Taking these out allows for deeper cleaning and more thorough lubrication.
- Use a flashlight: Oven interiors are dark. A small flashlight helps you see stuck-on debris or rust you might miss.
- Mark the rack positions: If you have multiple racks at different heights, mark them with a small sticker. This helps you put them back in the same place and spot if one is always sticking.
What Not To Do
Some common mistakes can actually make the problem worse:
- Don’t use WD-40 or household lubricants: Most are not safe for food or high heat. They can create fumes and sticky residue.
- Never use vegetable oil long-term: It turns sticky and can even smoke or burn in the oven.
- Don’t force a stuck rack: This can bend or break the rails. Always remove, clean, and inspect before pushing harder.
How Often Should You Maintain Oven Racks?
Many people clean their oven racks only once a year. For best results, follow this schedule:
- Light cleaning: Wipe rails and rack edges every 1-2 months.
- Deep cleaning and lubrication: Every 3-6 months or after major spills.
- Check for damage: At least once a year.
This keeps your oven safe, efficient, and much easier to use.
The Science Behind Smooth Sliding
Sliding oven racks seems simple, but it’s all about reducing friction. When metal is clean and coated with the right lubricant, it glides easily. But any grit, rust, or burned food increases roughness, making movement harder. By cleaning and lubricating, you restore the smooth contact that allows racks to move with almost no effort.
Additional Resources
For more on oven maintenance and safety, check out the Consumer Reports Oven Maintenance Guide.
Frequently Asked Questions
How Do I Know If A Lubricant Is Food Safe?
Check the product label or manufacturer’s website for food contact approval. If it’s not listed, do not use it inside your oven. Specialized oven rack lubricants or high-quality silicone sprays often state “food safe” on the packaging.
Can I Leave Oven Racks In During The Self-clean Cycle?
Usually, it’s best to remove racks before running the self-cleaning cycle. The extreme heat can warp racks or damage their finish, making them more likely to stick. Some oven manuals allow it, but always check your specific model’s instructions.
What Should I Do If My Oven Racks Are Rusted?
Remove as much rust as possible with fine steel wool or a rust remover, then wash and dry racks. Apply a thin coat of food-safe lubricant. If rust is deep or racks are weakened, consider replacing them for safety.
Are There Any Alternatives To Commercial Oven Rack Lubricants?
Yes, you can use paraffin wax or wax paper as a temporary fix. Rubbing wax on the edges of racks provides a food-safe, heat-resistant coating. However, for best results and long-term use, a commercial lubricant is recommended.
Why Do My Oven Racks Stick After Cleaning?
Sometimes, cleaning leaves behind residue or water spots. Be sure racks are fully dry and all soap is rinsed off. Also, check the oven rails for hidden grime. A thin layer of the right lubricant usually solves the problem if cleaning alone does not.
Making oven racks slide easier is more than just a convenience—it improves safety, extends the life of your oven, and makes cooking more enjoyable. A little attention every few months keeps your kitchen running smoothly for years to come.