If you’ve ever opened your kitchen sink cabinet on a cold morning, you know that chilly blast of air. It’s not just uncomfortable—poor insulation under the kitchen sink can cause pipes to freeze, waste energy, and even damage your cabinet or stored items.
Insulating under your kitchen sink is one of those small home projects that makes a big difference, yet many people overlook it. Whether you live in a cold climate or just want to keep your kitchen more efficient, the right insulation helps protect your plumbing and improves comfort year-round.
You might think this is a job for only professionals, but most homeowners can do it with basic tools and a little guidance. It’s important to know which materials to use, how to prepare the area, and the best techniques for your specific type of cabinet and pipes.
This guide will walk you through everything you need to know, from understanding why insulation matters to choosing products, step-by-step installation, and smart troubleshooting tips. By the end, you’ll have all the knowledge to confidently insulate under your kitchen sink and avoid common mistakes that beginners often make.
Why Insulating Under The Kitchen Sink Matters
Many people don’t realize how much heat escapes through the kitchen sink area. Because cabinets are often on exterior walls, cold air from outside can easily sneak in. When temperatures drop, pipes under the sink are at risk of freezing, which can lead to expensive repairs or water damage.
Even in milder climates, insulation helps keep your kitchen more comfortable and prevents condensation that can cause mold or mildew.
There’s also an energy savings benefit. When you insulate under the kitchen sink, you help maintain the temperature inside your home, which means your heating and cooling systems don’t have to work as hard. According to the U. S. Department of Energy, insulating exposed pipes can reduce heat loss by up to 80%.
That’s real savings on your utility bills over time.
Another point people miss is noise reduction. Insulation can soften the sound of running water and garbage disposals, making your kitchen a quieter, more pleasant place to be.
Types Of Insulation Materials For Kitchen Sink Cabinets
Choosing the right insulation material is key to a successful project. Not all insulation is safe or effective for use under a kitchen sink. Here are the most common types, with their pros and cons:
| Material | Benefits | Drawbacks | Best Use |
|---|---|---|---|
| Foam Board | High R-value, rigid, moisture-resistant | Tricky to fit in tight spots | Cabinet walls, floor |
| Spray Foam | Fills gaps, air-tight, good for odd shapes | Messy, permanent, can damage pipes if misused | Small gaps, cracks |
| Fiberglass Batts | Affordable, easy to cut, widely available | Can absorb moisture, may irritate skin | Cabinet walls, but avoid direct water contact |
| Reflective Foil | Easy install, reflects heat, water-resistant | Lower R-value, doesn’t fill gaps well | Lining cabinet interior |
| Pipe Insulation (Foam or Rubber Tubes) | Easy to install, protects pipes, inexpensive | Doesn’t insulate cabinet itself | Directly on pipes |
Pro tip: Many homeowners use a mix of materials. For example, foam board for cabinet walls and pipe insulation for the plumbing. This layered approach provides the best protection.
Tools And Materials You’ll Need
Before you start, gather everything you’ll need so you don’t have to hunt for tools mid-project.
Basic tools:
- Utility knife or scissors
- Measuring tape
- Marker or pencil
- Safety gloves and goggles (especially with fiberglass or spray foam)
- Caulk gun (for sealing gaps)
- Screwdriver or drill (if removing cabinet shelves or doors)
Materials:
- Your chosen insulation (see previous section)
- Pipe insulation tubes (for plumbing)
- Expanding spray foam (for cracks)
- Construction adhesive or double-sided tape
- Weatherstripping (optional, for cabinet doors)
- Silicone caulk or sealant
Don’t forget cleaning supplies: rags, mild cleaner, and a small vacuum for dust or debris.
How To Prepare The Area
Proper preparation makes installation easier and ensures insulation sticks well and lasts longer.
- Empty the Cabinet: Take out all cleaning products, bins, and stored items.
- Clean Thoroughly: Wipe down the inside of the cabinet, including walls, floor, and around pipes. Remove dust, grease, and old adhesive.
- Check for Leaks: Look for any dripping pipes or water stains. Fix leaks before insulating. Moisture behind insulation can lead to mold.
- Dry the Area: Make sure the cabinet and pipes are completely dry. This step is often skipped, but wet surfaces can cause insulation to fail.
- Remove Obstacles: Take out shelves or paneling if possible, and unscrew clips or brackets in the way.
Insider tip: Use a flashlight to check for hidden moisture or cracks behind the pipes. Even small leaks should be fixed before you continue.

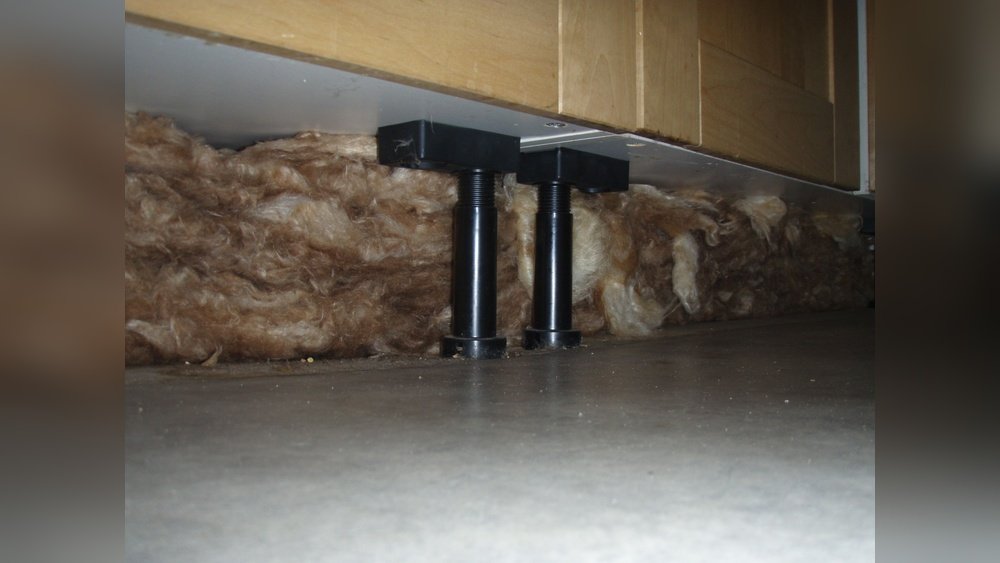
Credit: insulationgo.co.uk
Step-by-step Guide: Insulating Under The Kitchen Sink
1. Measure And Cut Insulation
Use your measuring tape to get the length and width of the cabinet floor, side walls, and back wall. Mark these measurements on your insulation material and cut carefully using a utility knife or scissors.
- Foam board: Cut to fit snugly inside the cabinet. A tight fit stops air leaks.
- Fiberglass batts: Wear gloves and a mask. Cut to size and handle gently.
- Reflective foil: Measure slightly larger than needed, as it compresses easily.
2. Attach Insulation To Cabinet Walls And Floor
Apply construction adhesive or double-sided tape to the back of the insulation. Press firmly onto the cabinet walls and floor. If using foam board, make sure edges are flush to avoid gaps.
For reflective foil: Staple or tape the foil, shiny side facing outward, to reflect heat away from cold surfaces.
Tip: Insulate all sides that face an exterior wall, as these lose the most heat.
3. Seal Gaps And Cracks
Use expanding spray foam to fill any cracks or holes where pipes enter the cabinet. Do not overfill—spray foam expands a lot as it dries. Wipe away excess before it hardens.
Apply silicone caulk around the edges of insulation and pipe entry points for an airtight seal.
4. Insulate Pipes
Slide foam or rubber pipe insulation tubes over both hot and cold water pipes. Make sure the insulation covers the entire length of exposed pipe under the sink. Use pre-slit tubes for easy installation.
If pipes are close to the wall, cut the tube lengthwise and wrap around. Secure with tape if needed.
Important: Many people insulate only the hot water pipe, but in cold climates, always insulate the cold water pipe too—it’s most at risk for freezing.
5. Add Extra Protection (optional)
For cabinets that get very cold, add a second layer of insulation or line the inside of cabinet doors with reflective foil or foam board. You can also apply weatherstripping around cabinet doors to block drafts.
Some homeowners place a small, low-wattage heater or heat tape in the cabinet during extreme cold spells. This is only for emergencies and should be used carefully to avoid fire risk.
6. Replace Items And Maintain
Put everything back into the cabinet, but avoid overcrowding. Blocked airflow can cause condensation. Regularly check your insulation for moisture or damage, especially after heavy rain or very cold weather.
Comparison: Popular Insulation Products For Kitchen Sink Areas
Many brands and products are available, but some are better suited for kitchen sink cabinets. Here’s a quick comparison of top options:
| Product | Type | R-Value/inch | Moisture Resistance | Notes |
|---|---|---|---|---|
| Owens Corning FOAMULAR | Foam Board | 5.0 | Excellent | Rigid, easy to cut |
| Great Stuff Gaps & Cracks | Spray Foam | ~7.0 (when cured) | Waterproof | Expands quickly, use carefully |
| Frost King Pipe Insulation | Foam Tube | 2.9-3.3 | Good | Best for pipes, not walls |
| Reflectix Reflective Insulation | Reflective Foil | Up to 1.1 | Excellent | Easy to install, low thickness |
| Johns Manville Fiberglass | Batts | Up to 3.5 | Can absorb water | Handle with gloves |
R-value measures how well insulation resists heat flow—the higher the number, the better.
Common Mistakes And How To Avoid Them
Many DIYers make small errors that reduce the effectiveness of their insulation or cause problems later. Here’s what to watch for:
- Not fixing leaks first. Insulation hides leaks, making problems worse over time. Always repair plumbing before you insulate.
- Leaving gaps or cracks. Even small openings let in cold air. Use spray foam and caulk for a tight seal.
- Using the wrong material. Don’t use regular wall insulation that absorbs water, as spills under the sink are common. Choose moisture-resistant products.
- Blocking access to plumbing. Make sure insulation can be removed or cut away for future repairs.
- Covering vents or electrical outlets. Never block ventilation or power sources in the cabinet.
- Overstuffing the cabinet. Too much insulation or stored items can trap moisture or block air circulation.
- Ignoring the cabinet doors. Cold drafts often enter through the doors—consider weatherstripping or adding insulation here too.
Insider insight: Many people forget to check the base of the cabinet, where cold air often enters. Insulate the floor and seal holes around water lines for best results.
Insulating Under Different Types Of Kitchen Sink Cabinets
Not all kitchen cabinets are built the same. Your approach might change based on your cabinet style or home setup.
Standard Base Cabinets
Most common in American homes, standard base cabinets are simple to insulate. Follow the main steps above. If the cabinet is on an exterior wall, focus extra attention there.
Corner Cabinets
Corner cabinets can be tricky due to awkward shapes. Cut insulation into smaller pieces and fit them around the bends. Use spray foam for tight corners.
Sink Cabinets With Pull-out Drawers
Remove the drawers and insulate the sides and back as usual. Use thinner insulation if space is tight. Pipe insulation is still a must.
Metal Cabinets
Metal conducts heat quickly, so insulation is even more important. Use foam board or reflective foil, both of which resist moisture and won’t react with metal.
Under-sink Areas In Apartments Or Mobile Homes
Space is often limited, and you might not be allowed to modify cabinets permanently. Choose removable products like pipe insulation tubes or stick-on reflective foil.
Tip: If you rent, ask your landlord before making changes, or use temporary insulation that can be removed later.
Advanced Tips For Tough Climates
If you live somewhere with extreme cold, or your pipes have frozen before, take extra precautions:
- Double up on insulation layers for both cabinet walls and pipes.
- Leave cabinet doors open on very cold nights to let warm air circulate.
- Install a battery-operated temperature sensor under the sink to monitor for freezing conditions.
- In severe cases, use electric heat tape on pipes (follow safety instructions closely).
- Consider adding a removable foam plug for the cabinet floor during winter.
Hidden risk: Many older homes have uninsulated walls behind kitchen cabinets. If you’re doing a major remodel, add insulation inside the wall cavity for the best protection.
How To Insulate Around Garbage Disposals And Dishwashers
Kitchen sinks often share space with other appliances. These spots need special care:
- Garbage disposals: Insulate around, not against, the unit to avoid overheating. Leave enough room for air to flow.
- Dishwasher side walls: Use thin foam or reflective insulation to avoid blocking access panels.
- Electrical wiring: Never cover wires or outlets with insulation. Cut around them and seal gaps with caulk.
Real-world example: One homeowner found that adding insulation around the garbage disposal reduced motor noise by 30% and made the kitchen quieter overall.
Credit: www.reddit.com
Maintenance And Long-term Care
Insulation is mostly a “set and forget” project, but regular checks help keep things working well.
- Inspect the cabinet every few months for signs of moisture, mold, or damage.
- If you spill water or cleaning products, dry the area and check the insulation for wet spots.
- Replace damaged or compressed insulation promptly.
- During very cold weather, check pipes daily if you’ve had freezing problems before.
Uncommon tip: If you move to a warmer climate, you might not need as much insulation. However, keeping pipes insulated still reduces condensation and saves energy.
Cost And Time Estimates
Most DIY under-sink insulation projects are affordable and fast, but costs vary based on materials and cabinet size.
| Material | Average Cost | Time to Install | Skill Level |
|---|---|---|---|
| Foam Board | $10–$25 | 1–2 hours | Beginner |
| Spray Foam | $5–$12 per can | 30–60 minutes | Beginner |
| Pipe Insulation | $3–$10 (per 6 ft) | 15–30 minutes | Beginner |
| Reflective Foil | $8–$20 per roll | 30–60 minutes | Beginner |
| Fiberglass Batts | $10–$20 per pack | 1–2 hours | Beginner |
Most homeowners finish the job in a single afternoon, with no special skills required. Always wear gloves and eye protection, especially when handling fiberglass or chemicals.
Real-life Example: A Quick Case Study
Anna, a homeowner in Minneapolis, noticed her pipes froze every winter. She spent about $40 on foam board, spray foam, and pipe insulation. After insulating under her kitchen sink, she saw no frozen pipes and felt less cold air in the kitchen.
Her heating bill dropped by about 7% over the winter. Anna says the project took less than two hours, and now she checks her cabinet every month for leaks and moisture. This simple weekend project saved her hundreds of dollars in potential repairs.
When To Call A Professional
Insulating under the kitchen sink is usually a DIY project, but there are times when it’s smart to call in a pro:
- If you find major leaks or water damage
- When pipes are corroded or need replacement
- In very old homes with asbestos or lead paint (never disturb these materials yourself)
- If you want to add insulation inside walls, which requires carpentry skills
A licensed plumber or handyman can also give advice on the best materials for your local climate.
For more details on pipe insulation and energy efficiency, you can visit the U.S. Department of Energy’s official page.

Credit: www.reddit.com
Frequently Asked Questions
How Thick Should Insulation Be Under The Kitchen Sink?
The ideal thickness depends on your climate and cabinet space. Generally, 1/2 to 1 inch of foam board or equivalent is enough for most homes. If space allows, a thicker layer provides better protection, especially in cold climates.
Can I Use Regular Wall Insulation Under My Sink?
You should avoid regular fiberglass wall insulation unless it is covered with a vapor barrier and kept dry. Kitchen sinks are prone to leaks and spills, so moisture-resistant insulation like foam board or reflective foil is safer.
Will Insulating Under The Kitchen Sink Stop Pipes From Freezing?
Good insulation greatly reduces the risk of frozen pipes, but it is not a 100% guarantee, especially in extreme cold. For best results, combine insulation with other steps like leaving cabinet doors open or using pipe heaters during very cold nights.
How Do I Remove Old Insulation From Under The Sink?
Wear gloves and a mask, especially if the old insulation is dusty or has mold. Use a utility knife to cut away foam or batts. Bag everything carefully and clean the area before adding new insulation.
Is Spray Foam Safe To Use Around Plumbing?
Yes, but use minimal expanding spray foam and avoid getting it on moving parts or inside pipe joints. Too much foam can make future repairs difficult, so use it only for gaps and cracks.
Insulating under your kitchen sink is a simple project with big benefits. With the right materials and careful installation, you’ll protect your pipes, save energy, and make your kitchen more comfortable for years to come.