Heating up leftover gravy on the stove seems simple, but doing it right can turn an average meal into a comforting, flavorful experience. For many, gravy is more than a sauce—it’s the heart of mashed potatoes, the finish to roasted meats, and a highlight at family gatherings. Yet, reheating can go wrong quickly: lumps, burnt spots, and broken textures are common mistakes. If you want smooth, hot, and delicious gravy every time, understanding the right techniques is essential. With a little guidance, anyone can master how to heat up gravy on the stove and bring back its original taste and texture.
Why Stovetop Is The Best Method For Reheating Gravy
Reheating gravy on the stove gives you control over temperature and texture. Unlike the microwave, which can create hot spots and overcook parts of the sauce, the stovetop lets you warm gravy gently and evenly. This method prevents separation, keeps flavors intact, and allows you to adjust the consistency if the gravy has thickened in the fridge.
The stovetop also makes it easy to add a splash of liquid, like broth or milk, if the gravy is too thick. Stirring frequently means you can catch problems early, such as sticking or burning. For anyone who cares about taste and presentation, the stovetop is the clear choice.
Preparing To Reheat Gravy On The Stove
Before you start, some preparation will help you avoid common pitfalls. Gravy is sensitive to heat, and small steps make a big difference.
Gather Your Tools And Ingredients
To heat up gravy properly, you’ll need:
- A saucepan or small pot (preferably nonstick or stainless steel)
- A whisk (balloon or flat works best) or a heatproof spoon
- The gravy (homemade or store-bought)
- Broth, water, or milk (for thinning if needed)
- Optional: Extra seasonings like salt and pepper
Check The Gravy
Cold gravy often looks thicker and sometimes has a layer of fat on top. This is normal. If the gravy contains chunks (like mushrooms or sausage), stir gently to mix before reheating.
Estimate The Quantity
The amount of gravy you have will determine how long it takes to reheat. Small amounts heat quickly; larger batches need more attention. For safety, always reheat at least to 165°F (74°C) before serving.
Step-by-step: How To Heat Up Gravy On The Stove
Here is a clear process to get hot, smooth, and tasty gravy every time.
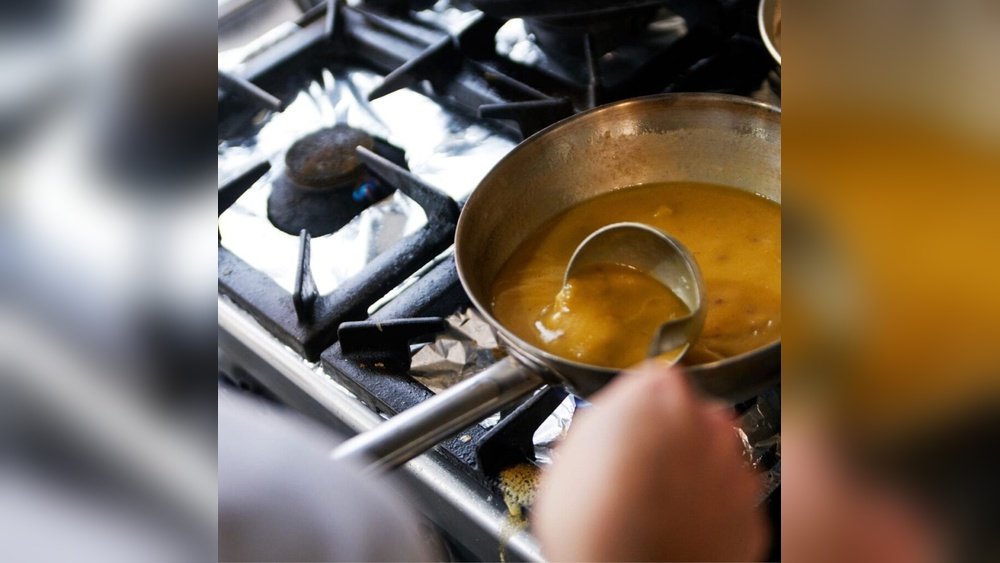
1. Place Gravy In A Saucepan
Choose a saucepan that fits the amount of gravy. Too large a pan can cause burning, while too small may overflow. Pour the cold or room-temperature gravy into the pan. Use a spatula to scrape all of it from the container.
2. Add Liquid If Needed
Gravy thickens as it cools. If it’s very stiff, add a little broth, water, or milk—about 1-2 tablespoons per cup of gravy. This helps thin it as it warms.
Pro Tip: Always add less liquid than you think you need; it’s easier to thin gravy than to thicken it again.
3. Start With Low To Medium Heat
Set your burner to low or medium-low. High heat can scorch the bottom or make the gravy split (separate into fat and solids). Slow heating gives you time to stir and adjust.
4. Stir Frequently
Use a whisk or spoon to stir the gravy constantly as it heats. This prevents lumps and burning. Scrape the bottom and sides to keep everything moving.
5. Watch For Simmering
As the gravy warms, it will become more fluid. When you see small bubbles at the edges (gentle simmer), lower the heat. Boiling can change the flavor and make the texture grainy.
6. Taste And Adjust
Once hot, taste the gravy. Add more liquid if too thick, or simmer a bit longer if too thin. Adjust seasoning with salt and pepper if needed.
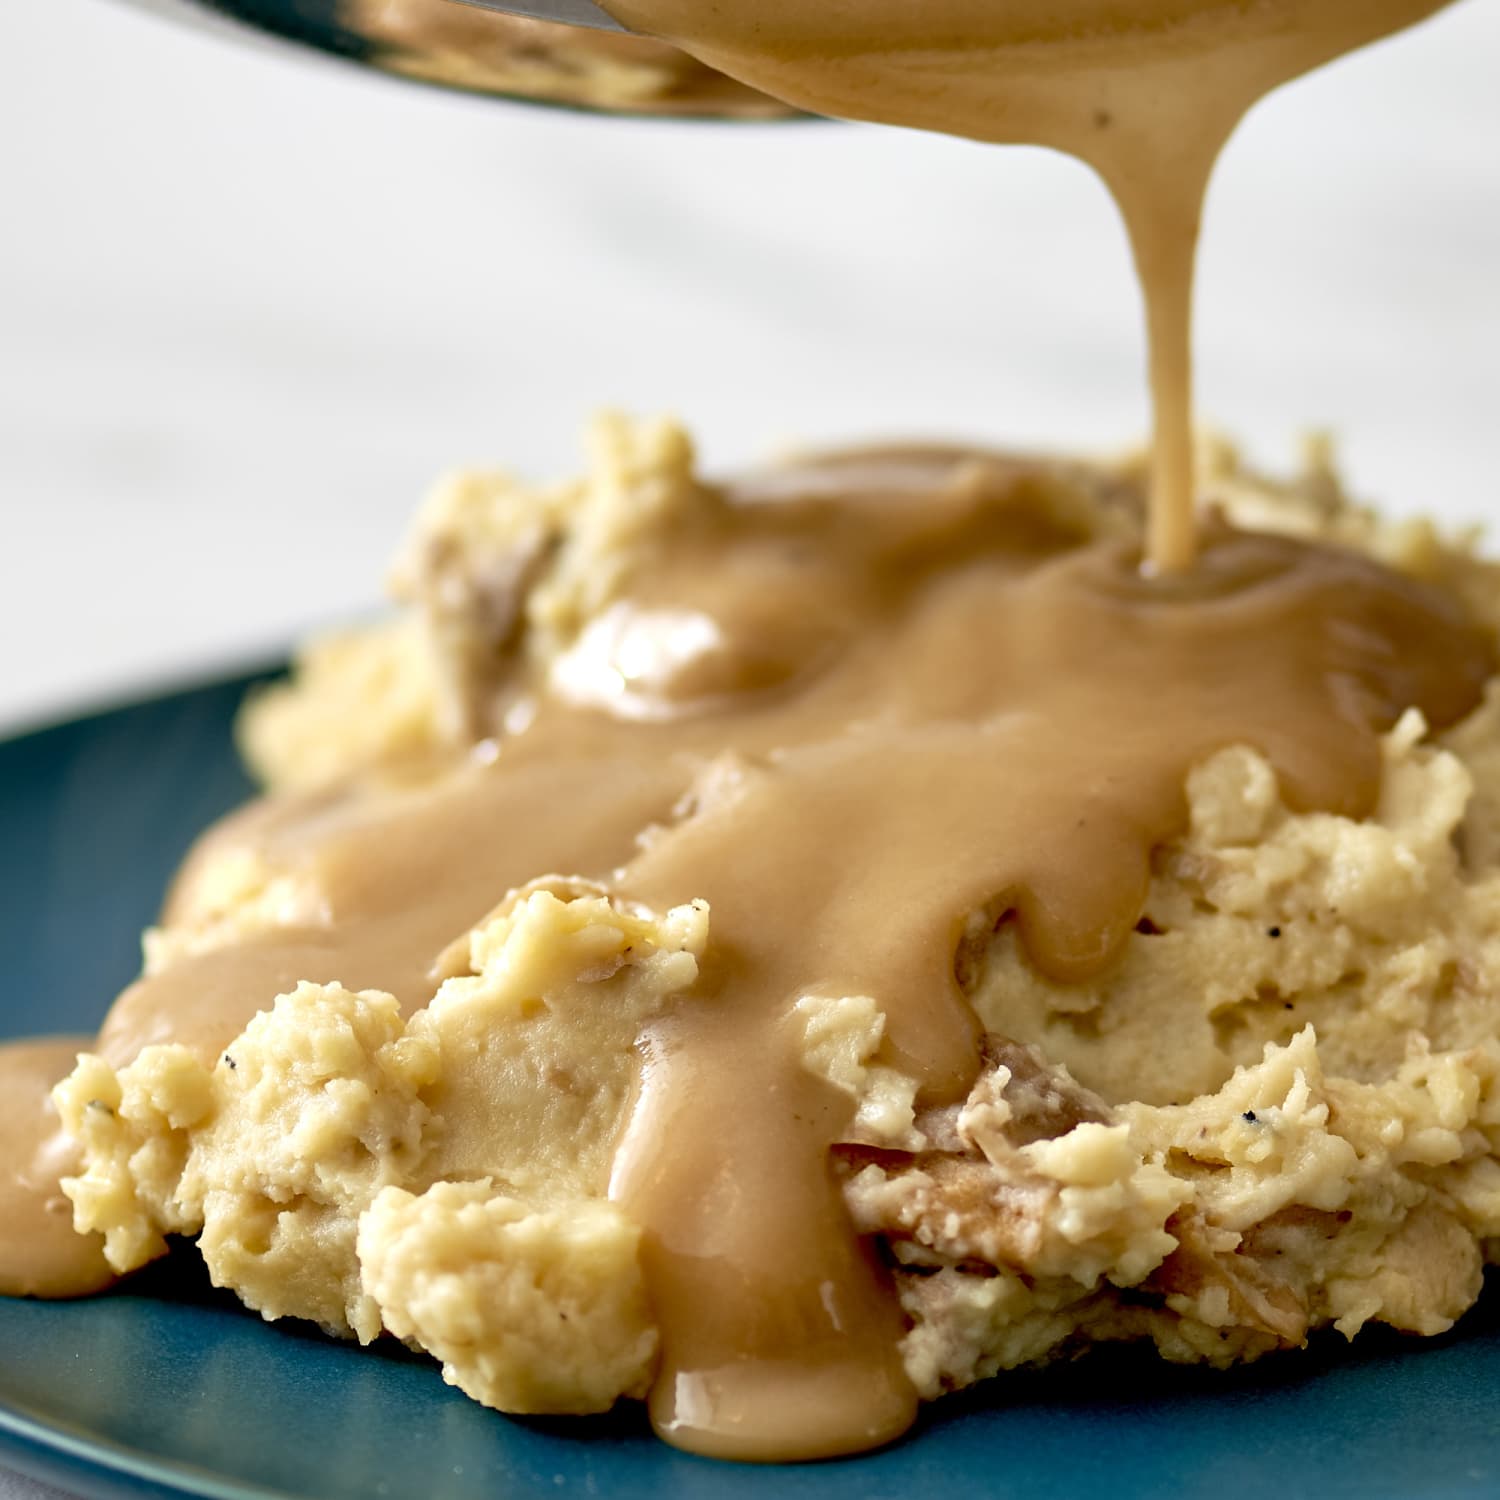
7. Serve Immediately
Transfer the hot gravy to a serving dish or pour directly over food. For best quality, use within 2 hours.
Comparing Stovetop Reheating To Other Methods
Some people use microwaves or even ovens to reheat gravy. Here’s a quick comparison of the main methods:
| Method | Time Needed | Texture Control | Flavor Quality |
|---|---|---|---|
| Stovetop | 3-10 minutes | Excellent | Preserved |
| Microwave | 1-3 minutes | Poor to Fair | May lose flavor |
| Oven | 15-25 minutes | Fair | Can dry out |
Stovetop is the gold standard for most home cooks. It balances speed, control, and quality.
Common Problems When Reheating Gravy (and How To Fix Them)
Gravy can be tricky. Here are common issues and what to do:
Lumpy Gravy
If your gravy turns lumpy while reheating:
- Use a whisk to break up lumps.
- If lumps remain, pour the gravy through a fine-mesh sieve or blend with an immersion blender.
Gravy Too Thick
Gravy often thickens in the fridge. To fix:
- Add warm broth, milk, or water a tablespoon at a time.
- Stir constantly as you add liquid to reach desired consistency.
Gravy Too Thin
If you added too much liquid:
- Simmer the gravy over low heat, stirring, until it thickens.
- For very thin gravy, mix 1 teaspoon of cornstarch with 2 teaspoons of cold water, then whisk into the simmering gravy.
Greasy Or Separated Gravy
If you see a layer of fat or the gravy splits:
- Whisk vigorously to re-emulsify.
- If it doesn’t combine, add a splash of warm broth while whisking.
Burnt Flavor
If part of the gravy burns on the bottom:
- Don’t scrape the burnt bits into the rest of the gravy.
- Pour unburnt gravy into a clean pan and reheat gently.
Tips For Best Results
Professional kitchens use tricks to keep gravy smooth and flavorful. Here are some insights:
- Heat Slowly: Rushing causes lumps and burnt spots.
- Whisk, Don’t Fork: A whisk gives a smooth, lump-free texture.
- Don’t Boil: Boiling can make gravy grainy and change flavors.
- Taste Often: Flavors can fade—adjust seasoning as needed.
- Use a Double Boiler: For ultra-gentle heating, set a bowl over simmering water.
- Add Fresh Herbs: Stir in chopped parsley or thyme just before serving for freshness.
- Strain for Perfection: For ultra-smooth gravy, pour through a fine sieve before serving.
How Long To Reheat Gravy On The Stove
The time needed depends on the amount:
- 1 cup or less: 3-5 minutes
- 2-3 cups: 6-8 minutes
- Large batches (4+ cups): 8-12 minutes
Always heat until steaming and at least 165°F (74°C). A food thermometer is helpful, especially for serving guests or in food service.
Safe Handling And Storage Of Gravy
Gravy can spoil quickly due to its moisture and fat content. For safety and best taste, follow these guidelines:
- Refrigerate leftovers within 2 hours of cooking.
- Store in an airtight container for up to 3 days.
- For longer storage, freeze in small portions.
- Reheat only once for best quality—repeated reheating can cause texture loss and increase bacteria risk.
- Discard gravy if it smells sour or looks separated with an off color.
Adjusting Gravy Flavor When Reheating
Sometimes leftover gravy tastes flat after chilling. You can improve flavor as you reheat:
- Add a splash of broth or stock for depth.
- Stir in a small amount of butter for richness.
- Season with freshly ground pepper or a pinch of salt.
- For cream gravies, a little cream or milk can refresh texture and taste.
- A dash of soy sauce or Worcestershire sauce can boost umami.
Remember, taste as you go—small changes make a big difference.
Special Cases: Different Types Of Gravy
Not all gravies are the same. Here’s how to handle the most common types:
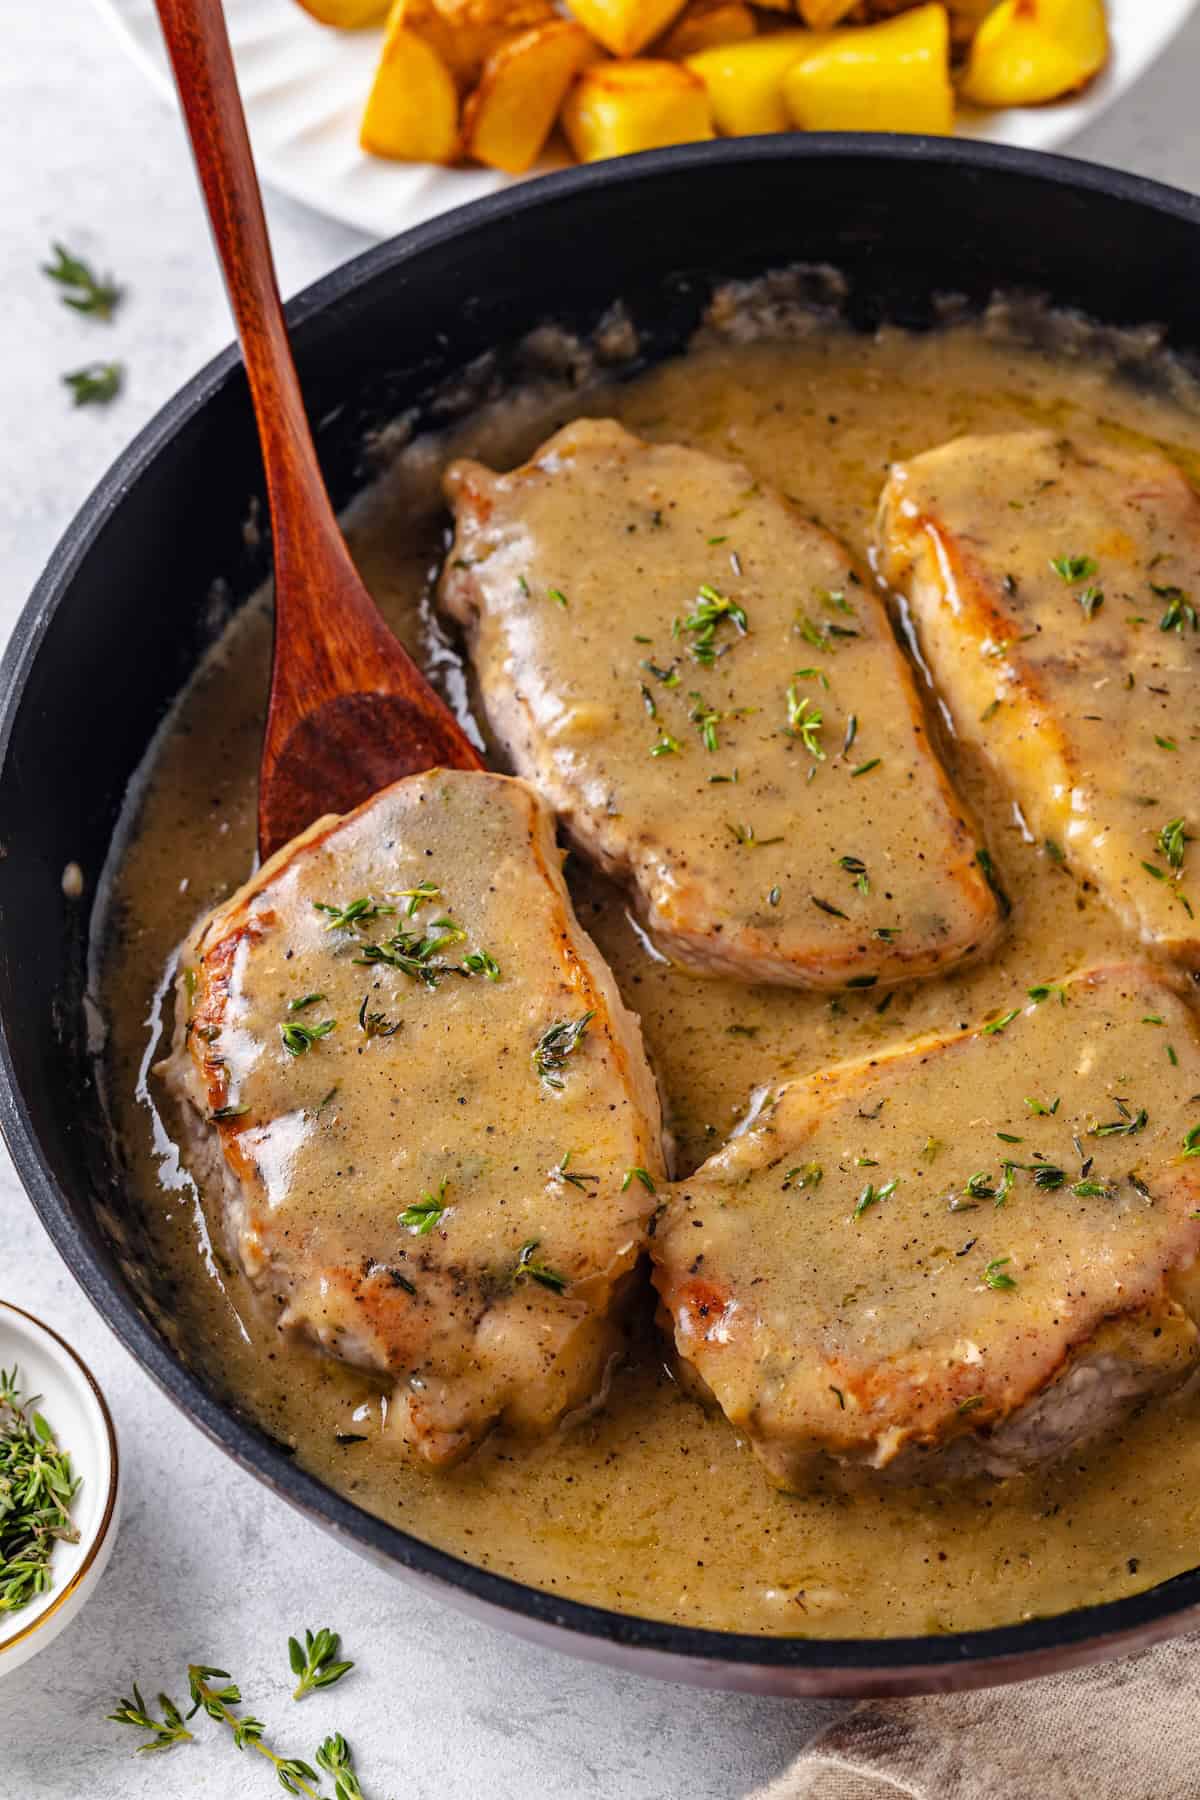
Meat-based Gravies (beef, Chicken, Turkey)
These are usually made with pan drippings and stock. They can separate when chilled. Stir well before heating and add a little stock as needed.
Cream Or Milk-based Gravies (sausage Gravy, Country Gravy)
These can scorch easily. Use very low heat and stir constantly. If the gravy curdles, whisk vigorously or blend.
Vegetarian Or Vegan Gravies
Gravies made with vegetable stock and plant-based thickeners (like cornstarch or flour) usually reheat well. If the gravy has a lot of starch, thin with water or broth and heat gently to avoid gumminess.
Commercial Jar Or Packet Gravy
These often contain stabilizers but can still thicken too much. Follow the same stovetop method, thinning as needed.
Credit: www.thekitchn.com
When To Discard Leftover Gravy
Food safety is important. Gravy should not be used if:
- It has been left at room temperature for more than 2 hours.
- It shows signs of spoilage: Sour smell, mold, or unusual color.
- It tastes “off” or different from when it was made.
Pro Insight: Reheating will not make spoiled gravy safe. Always trust your senses.
How To Keep Gravy Warm After Reheating
If you need to keep gravy hot for a buffet or family dinner:
- Use a thermos or insulated gravy boat for short-term holding.
- For longer periods, place the saucepan on a warm (not hot) burner and stir occasionally.
- You can also use a slow cooker set to “warm” or “low” to hold large amounts.
- Stir every 15-20 minutes to prevent a skin from forming.

Credit: pepperporch.com
Table: Common Liquids To Thin Gravy
Here’s a quick guide to the best liquids for thinning gravy, depending on the type:
| Gravy Type | Best Liquid to Add | Effect on Flavor |
|---|---|---|
| Beef Gravy | Beef broth or water | Rich, savory |
| Chicken or Turkey Gravy | Chicken broth or milk | Milder, creamy |
| Cream/Milk-Based Gravy | Milk or cream | Creamy, smooth |
| Vegetarian Gravy | Vegetable broth or water | Light, subtle |
Choose the liquid that matches your gravy for best results.
How To Reheat Frozen Gravy On The Stove
If you froze your gravy, here’s how to bring it back to life:
- Thaw Overnight: Place frozen gravy in the fridge for at least 8 hours.
- Transfer to Saucepan: Scrape thawed gravy into a saucepan.
- Heat Gently: Use low heat and stir often.
- Thin as Needed: Add broth, milk, or water to fix texture.
- Check for Separation: Whisk well if the gravy looks split. If it won’t come together, blend for a few seconds.
Frozen gravy sometimes has a slightly grainy texture. Whisking or blending helps restore smoothness.
Credit: www.familyfoodonthetable.com
Non-obvious Insights For Perfect Gravy Reheating
Many home cooks miss these subtle tips:
- Use a Silicone Spatula: This tool scrapes the sides and bottom clean, preventing sticking and burning—something a spoon can’t always do.
- Warm Your Serving Dish: Pouring hot gravy into a cold dish cools it quickly. Run the dish under hot water before use.
- Avoid Metal Whisks with Nonstick Pans: Metal can scratch. Use silicone or wood for nonstick cookware.
Quick Troubleshooting Chart
Here’s a handy reference for last-minute gravy problems:
| Problem | Cause | Solution |
|---|---|---|
| Lumpy | Heated too fast, not enough stirring | Whisk vigorously, strain, or blend |
| Too thick | Chilling, evaporation | Add broth/milk slowly, stir well |
| Separated | Too much fat, rapid heating | Whisk with warm liquid |
| Bland | Flavor faded in storage | Add salt, pepper, broth, or herbs |
| Burnt | High heat, no stirring | Transfer to clean pan, don’t scrape burnt parts |
Real-world Example: Holiday Dinner Rescue
Imagine you’re hosting Thanksgiving and the gravy is cold. Family is waiting, and you want everything perfect. Instead of microwaving and risking a curdled mess, you use the stovetop method. You gently reheat, whisking often and adding a bit of turkey stock.
The gravy is smooth, hot, and tastes as good as when you made it. This attention to detail makes your meal memorable.
When Gravy Can’t Be Saved
Sometimes, gravy is too far gone—burnt, badly separated, or spoiled. In that case, it’s best to start fresh. Keep a packet of instant gravy mix as a backup for emergencies. It’s not the same as homemade, but it ensures your meal isn’t ruined.
Gravy Reheating In Restaurants Vs Home Kitchens
Professional kitchens often use a steam table or double boiler to keep gravy hot all service. At home, these tools aren’t common. The stove gives you the best balance of control and convenience. If you host often, investing in a small double boiler or insulated server can make holiday meals easier.
For a more scientific explanation of how heat affects gravy texture and safety, see this Serious Eats guide.
Frequently Asked Questions
What’s The Best Way To Avoid Lumps When Reheating Gravy On The Stove?
The key is slow heating and constant stirring. Use a whisk, not a spoon, and add any extra liquid before the gravy gets hot. If lumps form, strain or blend for smoothness.
Can I Reheat Gravy Made With Cream Or Milk On The Stove?
Yes, but use very low heat and stir constantly. Milk-based gravies can scorch or curdle if overheated. If you see curdling, whisk vigorously or use an immersion blender.
How Many Times Can I Reheat Gravy Safely?
For food safety, only reheat gravy once. Each reheating increases the risk of bacteria. If you need to serve gravy multiple times, heat only what you need each time.
What If My Gravy Tastes Bland After Reheating?
Chilling can mute flavors. Add a bit of salt, pepper, or a splash of broth. Fresh herbs or a pinch of garlic powder can also refresh the taste.
Is It Safe To Reheat Gravy Left Out Overnight?
No. Discard gravy that has been left at room temperature for more than 2 hours. Harmful bacteria can grow quickly in gravy, even if it looks and smells fine.
Heating gravy on the stove is simple but requires care. With gentle heat, good tools, and a few chef secrets, you can always bring back the warmth and flavor of your favorite sauce. Whether it’s a holiday feast or a quick weekday meal, these steps ensure your gravy is a highlight, not an afterthought.