Dehydrating vegetables at home is a skill that brings big rewards. You get to save money, reduce waste, and always have tasty ingredients ready for soups, snacks, and more. While many people think you need special tools, your oven is all you need to start.
With some patience and the right method, even beginners can turn fresh produce into shelf-stable, nutritious food. This guide will show you how to dehydrate vegetables in the oven, step by step, and share tips to help you succeed from your first batch.
Why Dehydrate Vegetables?
Dehydrating vegetables means removing most of their water. This is one of the oldest ways to preserve food. But why do it yourself?
- Save money: Buy vegetables in bulk or on sale, then dry what you can’t eat right away.
- Reduce waste: If you have a garden or buy too much, dehydration keeps food from spoiling.
- Convenience: Dried veggies are lightweight and last a long time. They’re perfect for camping, hiking, or busy days.
- Control: You know exactly what’s in your food. No preservatives or extra salt unless you add them.
Many store-bought dried vegetables also cost much more than fresh. Doing it yourself means you can stock your pantry with a wide variety of ingredients at a fraction of the price.
How Dehydration Works
Vegetables are mostly water—sometimes as much as 90%. When you remove water, bacteria and mold can’t grow easily. The key is to dry food at a low heat, slowly, so it loses water but keeps flavor, color, and nutrition. Ovens are not as precise as dehydrators, but with some adjustments, they work well for most vegetables.
Choosing The Right Vegetables
Most vegetables can be dehydrated, but some work better than others. Freshness is key—start with the freshest produce you can find. Older, limp veggies will taste dull and may not dry evenly.
Here are vegetables that dehydrate well in a home oven:
- Carrots
- Peppers (bell, hot)
- Zucchini
- Tomatoes
- Green beans
- Onions
- Mushrooms
- Broccoli
- Cauliflower
- Spinach and leafy greens
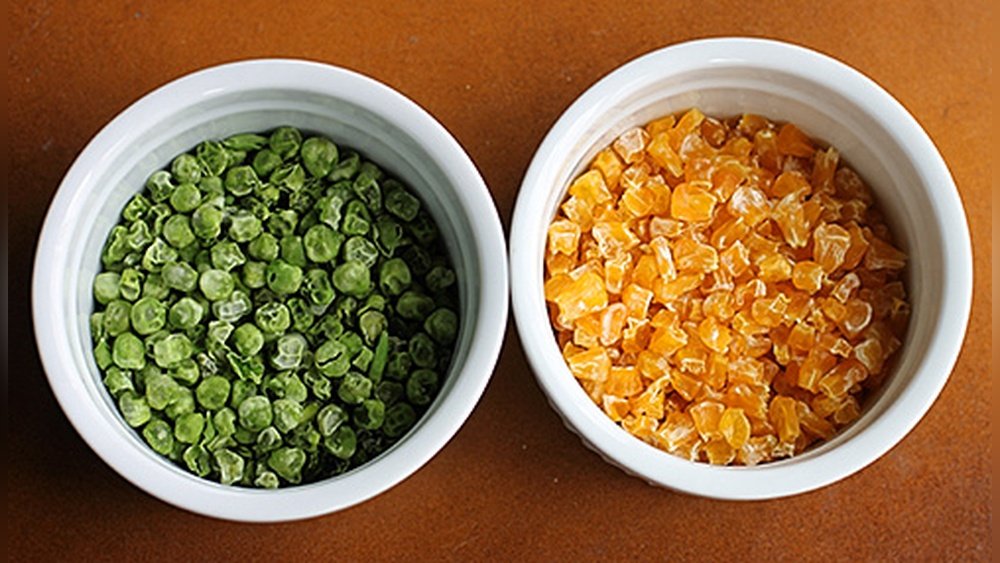
- Peas
- Corn (cooked or raw)
- Beets
- Potatoes and sweet potatoes
Some vegetables, like cucumbers or lettuce, don’t dehydrate well because they’re mostly water and lose texture. For the best results, avoid those.
Preparing Vegetables For Dehydration
Preparation before drying is just as important as the drying itself. It affects how your vegetables taste, look, and store.
Washing And Cleaning
Always wash vegetables well to remove dirt, bacteria, and pesticides. Use cold water and a brush for root vegetables like carrots or beets.
Peeling And Cutting
Most vegetables need to be peeled, especially if skins are tough or dirty. Cut vegetables into uniform slices so they dry at the same rate. For most types, slices 1/8 to 1/4 inch thick are ideal.
A mandoline or food processor helps make slices even. If you cut by hand, try your best to keep them the same size.
Blanching (when And Why)
Some vegetables need blanching before drying. Blanching means boiling the cut vegetables for a short time, then cooling them quickly in ice water. This step:
- Preserves color and flavor
- Helps destroy bacteria and enzymes
- Makes vegetables dry more evenly
Vegetables that benefit from blanching include:
- Broccoli
- Cauliflower
- Green beans
- Peas
- Carrots
- Corn
Leafy greens like spinach also do better if blanched for just 30 seconds.
To blanch: Boil water, add vegetables, cook for 2-3 minutes, then plunge into ice water. Drain well and pat dry.
Seasoning
You can add a little salt or your favorite spices before drying, but keep it light. Over-seasoning before dehydration can make flavors too strong.

Credit: www.aces.edu
Setting Up Your Oven For Dehydration
Most ovens don’t go as low as a dehydrator (which is 125–145°F / 52–63°C). But with the right steps, you can get close.
Temperature
Set your oven to the lowest setting, usually between 170°F and 200°F (77–93°C). If possible, use an oven thermometer to check the real temperature, as some ovens run hotter than their dials say.
If your oven’s lowest setting is higher than 200°F, prop the door open slightly with a wooden spoon. This lets heat escape and keeps the temperature down.
Air Circulation
Air movement is key to even drying. Ovens don’t have fans like dehydrators, so:
- Leave the door open a crack
- Place a fan near the oven (but not blowing directly inside) for better airflow
Trays And Liners
Use baking sheets lined with parchment paper or silicone mats. For better results, use wire racks placed on the baking sheets so air can move under the vegetables too.
Avoid stacking vegetables. Lay them in a single layer with space around each piece.
Oven Dehydration Setup Comparison
The right setup can make a big difference. Here’s how common options compare:
| Method | Pros | Cons |
|---|---|---|
| Baking sheet with parchment | Easy, most people have these | Less airflow on bottom, slower drying |
| Wire rack on sheet | Better airflow, more even drying | May need to flip pieces, cleanup |
| Directly on oven rack | Best airflow, fastest | Small pieces can fall, racks get messy |
Most people find a wire rack over a baking sheet is the best balance of airflow and convenience.
Step-by-step Guide: How To Dehydrate Vegetables In The Oven
Follow these steps for great results every time.
1. Prep The Vegetables
- Wash, peel, and slice vegetables into uniform pieces.
- Blanch if needed, then dry thoroughly with towels.
2. Arrange On Trays
- Line baking sheets with parchment or place wire racks on top.
- Lay vegetables in a single layer, not touching.
3. Preheat Oven
- Set to the lowest possible temperature (ideally 140–170°F).
- Place an oven thermometer inside to check the real temperature.
4. Dry In The Oven
- Put trays in the middle of the oven.
- Prop the oven door open with a wooden spoon for air flow.
- Every 30–60 minutes, rotate trays and flip vegetables for even drying.
5. Check For Doneness
Drying times vary by vegetable, slice thickness, and oven temperature. Most take 4 to 12 hours. Here’s a quick guide:
| Vegetable | Slice Thickness | Oven Temp | Approx. Time |
|---|---|---|---|
| Carrots | 1/8 inch | 150°F | 6–10 hours |
| Tomatoes | 1/4 inch | 170°F | 8–12 hours |
| Zucchini | 1/4 inch | 150°F | 5–8 hours |
| Mushrooms | 1/4 inch | 150°F | 4–7 hours |
| Peppers | 1/4 inch | 170°F | 8–10 hours |
| Spinach | Leaves | 150°F | 2–4 hours |
Vegetables are done when they are dry, brittle, or leathery (depending on type), with no moisture inside. If you’re not sure, cut a thick piece in half; if you see beads of moisture, dry longer.
6. Cool And Condition
Let vegetables cool completely before storing. For best quality, let them “condition” for 7–10 days:
- Place dried vegetables in a glass jar with a loose lid.
- Shake daily and check for condensation. If you see any, return to the oven to dry more.
- If no moisture appears, seal tightly and store.
Credit: gardening.usask.ca
Tips For The Best Results
Dehydrating in an oven is simple, but these tips can save you time and trouble:
- Uniform slicing matters: Thicker pieces take longer and may not dry fully.
- Don’t overcrowd: Crowded trays lead to uneven drying and mold risk.
- Rotate trays: Ovens have hot spots; switching trays top to bottom helps.
- Patience is key: Low and slow is better than rushing and burning.
- Test for dryness: Brittle is better than leathery for long-term storage.
- Record your process: Write down times and temperatures for each vegetable. This helps future batches.
- Avoid oily vegetables: Foods like eggplant or avocado can go rancid because of their fat content.
- Store quickly after cooling: Dried vegetables reabsorb moisture from the air if left out.
Storing Dehydrated Vegetables
Proper storage keeps your hard work safe from moisture, pests, and sunlight.
- Use airtight containers: Glass jars, vacuum-seal bags, or food-grade plastic.
- Store in a cool, dark place: Cupboards or pantries are best.
- Label containers: Write the vegetable and date.
- Check monthly: If you see moisture or mold, throw the batch away.
When well-dried and stored, most vegetables last 6 months to 1 year.
Storage Method Comparison
Here’s how popular storage options perform:
| Container Type | Best For | Drawbacks |
|---|---|---|
| Glass jars | Visibility, airtight seal | Breakable, heavier |
| Mylar bags | Long-term, light blocking | Not reusable, hard to reseal |
| Plastic containers | Lightweight, stackable | Can let in moisture over time |
| Vacuum seal bags | Maximum freshness | Need special equipment |
For most people, clean glass jars with tight lids are easiest.

Credit: www.seedtopantry.com
How To Use Dehydrated Vegetables
Dehydrated vegetables are very flexible. Here are some popular uses:
- Soups and stews: Add dried veggies directly; they rehydrate as they cook.
- Casseroles: Mix in for extra flavor and nutrition.
- Trail mix: Crunchy dried veggies make a healthy snack.
- Powder: Blend dried vegetables to make homemade seasoning powders.
- Rice and grains: Add for color and taste.
For cold dishes, soak dried vegetables in hot water for 15–30 minutes to rehydrate before using.
Common Mistakes And How To Avoid Them
It’s normal to make a few errors when starting out. Here are mistakes beginners often make:
- Drying too fast: High heat cooks, not dries, and can make veggies tough outside but wet inside.
- Skipping blanching: This can cause off-flavors and poor texture.
- Not checking for dryness: Even a little moisture can cause mold.
- Improper storage: Loose lids or humid rooms ruin dried food fast.
- Over-seasoning before drying: Flavors concentrate during dehydration; season lightly.
Non-obvious Insights For Oven Dehydration
Many guides miss these practical tips:
- Test your oven first. Not all ovens hold low heat well. Use a thermometer and run it empty for 1–2 hours to check consistency.
- Combine vegetables by drying time. Don’t put fast- and slow-drying vegetables together, or you’ll end up with some overdone and some underdone.
- Use the convection setting if you have it. Convection ovens circulate air and dry food more evenly and quickly.
- Don’t forget about humidity. High indoor humidity (like after rain) can slow drying and increase spoilage risk. Try to dehydrate on dry days.
Nutritional Value Of Dehydrated Vegetables
Dehydrating vegetables in the oven preserves most nutrients. Some vitamins, like vitamin C, are sensitive to heat and air, so expect a small loss. However, minerals, fiber, and most vitamins remain. Dried vegetables are still highly nutritious, especially compared to canned or highly processed foods.
Dehydrating at lower temperatures keeps more nutrients. That’s why using the lowest oven setting is important.
Cleaning Up After Dehydrating
Oven dehydration is low-mess, but some steps help avoid sticky racks and lingering odors:
- Wash trays, racks, and utensils right away. Dried vegetable bits get hard and tough to remove.
- Air out your oven. Some strong-smelling vegetables (like onions) can leave a scent. Leave the oven door open to air out, or bake a tray of baking soda for 30 minutes to absorb smells.
- Sweep or vacuum the area near the oven. Dehydrated flakes sometimes fall out.
Is Dehydration Safe For All Vegetables?
Most vegetables are safe to dehydrate, but you should avoid:
- Very oily vegetables (eggplant, avocado): They can spoil because fat doesn’t dry.
- Wild mushrooms: Only dry mushrooms you’re 100% sure are safe to eat.
- Unwashed produce: Bacteria can survive dehydration if the temperature isn’t high enough. Always wash and, if in doubt, blanch first.
For more on food safety, the National Center for Home Food Preservation is a trusted source.
Comparing Oven Dehydration To Other Methods
Oven drying is just one way to preserve vegetables. Here’s how it compares to other common methods:
- Dehydrator: Offers precise temperature control and better airflow. More efficient but requires buying a special device.
- Sun drying: Free and energy-efficient, but only works in hot, dry climates and takes days.
- Freeze drying: Preserves the most nutrients and texture but is expensive and not practical for most home kitchens.
Oven drying is the most accessible method for most people. It’s slightly less efficient than a dehydrator, but with care, the results are very good.
Frequently Asked Questions
How Do I Know When My Vegetables Are Fully Dehydrated?
Vegetables are done when they feel brittle (like carrots or green beans) or leathery (like tomatoes or peppers) with no visible moisture. Cut a thick piece in half; if you see moisture or feel softness, dry longer.
Can I Dehydrate Multiple Types Of Vegetables At Once?
You can, but it’s best to dry vegetables with similar drying times and sizes together. Mixing fast- and slow-drying vegetables can lead to uneven results. Always keep strong-smelling types (like onions) separate.
What Is The Best Way To Store Oven-dried Vegetables?
The best way is in airtight containers like glass jars or vacuum-sealed bags, kept in a cool, dark place. Proper storage keeps out moisture, light, and insects, and helps vegetables last up to one year.
Is It Possible To Dry Vegetables Without Blanching?
Some vegetables (like mushrooms, onions, and peppers) dry well without blanching. However, blanching is recommended for most other vegetables to preserve color, flavor, and texture and destroy bacteria and enzymes.
Why Do My Dried Vegetables Sometimes Turn Brown?
Browning can be caused by too high heat, not blanching, or exposure to air during storage. To keep color, blanch before drying, use the lowest oven temperature, and store in airtight containers away from light.
Dehydrating vegetables in the oven is a practical, rewarding skill. You’ll save money, eat healthier, and always have ingredients ready for your next meal. With a little practice, you’ll find your own rhythm and favorites. Enjoy exploring new recipes and flavors, and don’t be afraid to experiment—oven dehydration is as much art as science.