Covering the underside of kitchen cabinets may not be the first thing you think about when upgrading your home. But when you look closer, you notice—the bottom of cabinets is often visible, especially in open kitchens or when sitting at a breakfast bar.
Over time, this area can collect grease, dust, or show messy wires and unfinished wood. By taking the time to cover the underside, you not only make your kitchen look finished, but also protect it against damage, improve lighting, and even add storage.
Whether you’re a DIY beginner or a seasoned renovator, there are smart ways to approach this project, and the right solution depends on your needs and budget.
This guide will walk you through everything you need to know about how to cover the underside of cabinets. You’ll discover material options, installation steps, common mistakes, and creative ideas that go beyond basic wood panels. Along the way, you’ll learn practical tips that help you avoid rookie errors—like forgetting about venting or access to outlets—and how a finished cabinet underside can boost your kitchen’s comfort and value.
Why Cover The Underside Of Cabinets?
Many people overlook the cabinet’s underside. But there are real benefits to covering it well:
- Aesthetic improvement: Visible plywood edges, screw holes, and stains can make a kitchen look unfinished. A neat cover gives a clean, high-end appearance.
- Protects against moisture and grease: Kitchens see a lot of splashes and steam. An exposed underside absorbs moisture and traps grease, leading to staining or even mold.
- Easier cleaning: Smooth covers are simpler to wipe down than raw wood or particleboard.
- Hides wires and lighting: Many modern kitchens use under-cabinet lighting or have wires running underneath. Covers can make these invisible.
- Increases resale value: Small details like this can impress buyers and make your kitchen stand out.
- Prevents pests: Sealing gaps discourages insects or rodents from nesting.
Not every kitchen needs the same solution. Some people want a simple fix for dust, while others need heavy-duty options for high-traffic spaces. Knowing what you want helps you pick the right materials and methods.
Material Options For Covering Cabinet Undersides
Choosing the right material is key. It affects durability, looks, cost, and installation difficulty. Here are the main options:
1. Plywood Panels
Plywood is a popular choice for a reason. It’s strong, affordable, and easy to cut to size. Cabinet manufacturers often use plywood for structural parts, so it matches existing woodwork. You can paint, stain, or cover it with laminate for a seamless look.
- Pros: Affordable, easy to handle, paintable.
- Cons: Needs finishing (paint or sealer) to resist moisture.
2. Mdf (medium-density Fiberboard)
MDF is smoother than plywood and easy to paint, making it ideal for visible areas. It’s heavier, though, and doesn’t handle moisture as well.
- Pros: Very smooth surface, budget-friendly, paints well.
- Cons: Not moisture-resistant, heavy.
3. Finished Panel Boards
Some hardware stores sell pre-finished panels in white, black, or wood patterns. These save time and are wipe-clean, perfect for low-effort upgrades.
- Pros: Ready to install, easy to clean, consistent finish.
- Cons: Limited color choices, can chip if cut carelessly.
4. Decorative Laminates
Laminate sheets can be glued directly to plywood or MDF. They give a modern look and are highly water-resistant.
- Pros: Many colors and textures, resists stains, thin profile.
- Cons: Requires careful gluing, can peel if edges are not sealed.
5. Aluminum Or Metal Sheets
For a contemporary or industrial look, aluminum panels are a bold choice. They’re very durable, easy to clean, and reflect light well.
- Pros: Waterproof, easy to sanitize, stylish.
- Cons: Expensive, harder to cut, can dent.
6. Vinyl Or Pvc Panels
PVC is lightweight, waterproof, and affordable. It’s common in commercial kitchens or rental properties.
- Pros: Budget-friendly, resists water and stains, simple installation.
- Cons: Less attractive, can look cheap if not installed neatly.
7. Beadboard
Beadboard panels add a touch of traditional style. They’re great for country, cottage, or farmhouse kitchens.
- Pros: Decorative, easy to paint, adds texture.
- Cons: Takes more time to install, grooves can trap dirt.
8. Tile
Covering the underside with tile is rare, but possible for a unique look and ultra-easy cleaning.
- Pros: Extremely durable, custom designs.
- Cons: Labor-intensive, adds weight.
9. Paint Alone
If your cabinet underside is smooth and blemish-free, high-quality paint alone may do the trick, especially in areas that aren’t highly visible.
- Pros: Quick, cheapest option, easy to refresh.
- Cons: Doesn’t hide flaws, needs regular touch-ups.
Pro Insight: Beginners often choose the cheapest panel, but forget to check moisture resistance. Kitchens get steamy! Always seal edges and surfaces, or moisture will warp or swell your cover over time.
Credit: www.onegirlmanyideas.com
Measuring And Planning
Before you buy anything, measuring and planning will save you headaches:
- Measure cabinet depth and length: Use a tape measure to get the front-to-back depth and total run of your cabinets. Don’t forget to allow for any lighting fixtures, pipes, or brackets.
- Check for obstructions: Look for wires, under-cabinet lighting, or plumbing. Will your cover need cutouts for outlets or vents?
- Decide on overhang: Some people like the cover to align perfectly with the cabinet face. Others let it overhang slightly for a shadow line or to hide under-cabinet lights.
- Sketch a plan: Draw the cabinet run and mark where panels, seams, or screws will go. This helps you estimate material needs and avoid surprises.
Expert Tip: Always add 10% extra to your material order for mistakes and future repairs.
Tools And Supplies Needed
You don’t need a full workshop, but a few basic tools make the job easier:
- Tape measure
- Pencil
- Straightedge or level
- Circular saw or handsaw (for cutting panels)
- Drill and bits
- Screwdriver
- Stud finder (for heavy panels)
- Construction adhesive or finishing nails
- Caulk gun and paintable caulk
- Sandpaper or sanding block
- Paint and brushes (if finishing panels)
- Safety glasses and gloves
For metal or PVC panels, you may need tin snips or a fine-tooth saw.
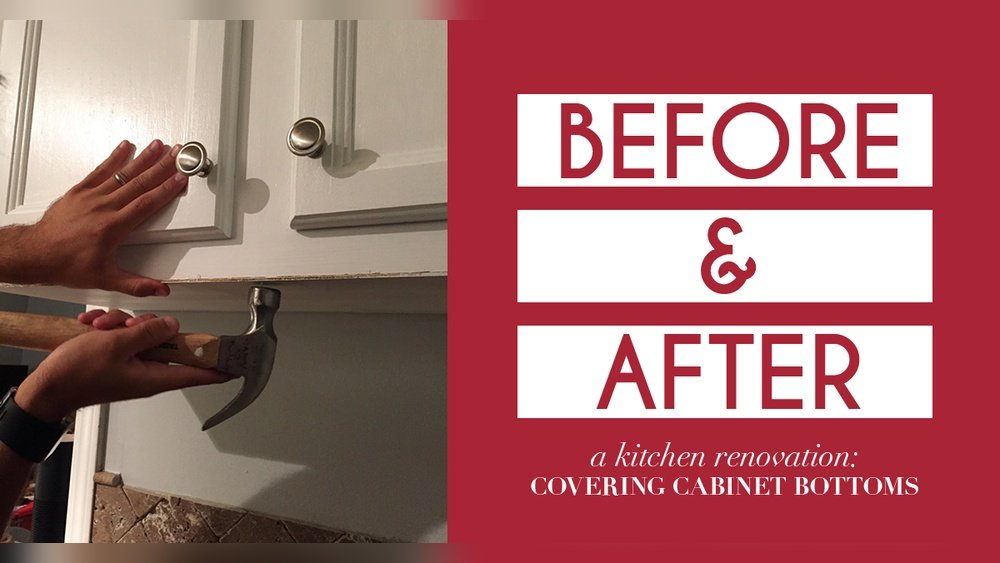
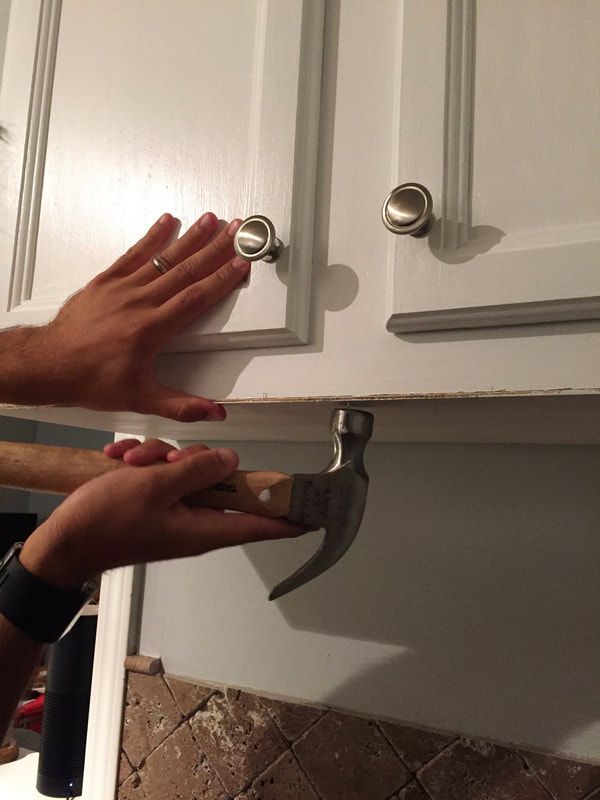
Step-by-step: How To Cover The Underside Of Cabinets
Covering the underside is a project most homeowners can do in a weekend. Here’s how:
1. Clean And Prep The Surface
Wipe down the underside with a degreaser and let it dry. Sand any rough spots. Remove nails or screws sticking out.
2. Mark Panel Placement
Hold your panel or cover material in place and mark where it will go. Note any cutouts for lighting, outlets, or pipes.
3. Cut Panels To Size
Transfer your measurements to the panel. Use a straightedge for clean lines and cut slowly for accuracy. If using laminate or finished panels, support the board to avoid chipping.
4. Dry Fit Panels
Hold the cut panel in place to ensure it fits. Trim as needed. For large cabinets, you may need to join two panels—line up the seam over a support or cabinet wall.
5. Secure Panels
There are two main ways:
- Adhesive: Run a bead of construction adhesive along the cabinet bottom, press the panel in place, and brace it until set.
- Nails or screws: Use short finishing nails or screws at the panel edges and into supports. For visible nails, use putty to fill holes.
If using both, adhesive holds while nails add strength. For metal or PVC panels, screws are best.
6. Seal Edges And Gaps
Use paintable caulk where the panel meets the cabinet frame or wall. This seals out moisture and gives a professional finish.
7. Paint Or Finish
If using raw wood, prime and paint or stain as desired. Finished panels usually need no extra work. Clean up dust and caulk lines for a crisp look.
8. Reinstall Lighting Or Accessories
If you removed under-cabinet lighting, reinstall it now. Check that wires are hidden and nothing is pinched.
Common Mistake: Forgetting about future access. If you cover outlets or lighting wires, make sure you can reach them for repairs. Removable panels or access holes can save headaches later.
Creative Finishing Ideas
You don’t have to stick to plain panels. Here are ways to make your cabinet underside a design feature:
- LED strip lighting: Install LED tape lights before covering. Use frosted panels for a soft glow.
- Painted accent color: Use a bold color on the underside for a surprise pop.
- Mirrored panels: Reflect light and make counters feel bigger.
- Chalkboard paint: Turn the underside into a spot for notes or recipes (fun in family kitchens).
- Textured wallpaper: Use washable, moisture-resistant wallpaper for a custom look.
- Wood slats or shiplap: Add warmth with thin strips of wood, installed side by side.
Table: Material Comparison For Cabinet Underside Covers
Here’s a quick look at how common materials compare:
| Material | Cost | Ease of Install | Moisture Resistance | Appearance |
|---|---|---|---|---|
| Plywood | Low | Easy | Good (if sealed) | Natural, paintable |
| MDF | Low | Easy | Fair | Smooth, paintable |
| Laminate | Medium | Medium | Excellent | Modern, varied |
| Metal | High | Hard | Excellent | Sleek, reflective |
| PVC | Low | Easy | Excellent | Plain, functional |
| Beadboard | Medium | Medium | Good (if painted) | Classic, textured |
Hiding Wires And Lighting
If you have under-cabinet lighting, you know the wires can look messy. Covering the underside is the perfect time to tidy up:
- Plan wire routes: Before installing panels, run wires neatly along the cabinet back or within a groove.
- Use wire clips or raceways: Secure wires so they don’t dangle. Plastic raceways can hide wires completely.
- Cut access holes: If you need to reach wires later, cut small holes covered by removable caps.
Advanced Tip: Consider wireless or battery-powered under-cabinet lights if rewiring is too complex.
Table: Typical Project Costs
Budgeting helps avoid surprises. Here’s an overview of what you might spend for a standard 10-foot cabinet run:
| Material | Panel Cost | Supplies | Total Estimate |
|---|---|---|---|
| Plywood | $25 – $40 | $10 – $15 | $35 – $55 |
| Laminate | $40 – $60 | $15 – $20 | $55 – $80 |
| Metal | $80 – $120 | $15 – $25 | $95 – $145 |
| PVC | $20 – $30 | $10 – $15 | $30 – $45 |
| Beadboard | $35 – $50 | $15 – $20 | $50 – $70 |
Labor is not included. If you hire a pro, expect to pay $150–$400 extra depending on complexity.
Mistakes To Avoid
Even simple projects can go wrong. Watch out for these common errors:
- Skipping surface prep: Dirt or grease means adhesives won’t stick, and paint will peel.
- Choosing the wrong material: MDF in a steamy kitchen will swell unless sealed.
- Ignoring lighting: Covering up lights or wires without a plan can cost more later.
- Not sealing edges: Water can get in and cause warping or mold.
- Visible seams: Poorly planned panel seams look messy. Stagger seams or cover with trim.
- Not allowing for access: Blocked outlets or vent covers can cause frustration.

Credit: www.deancabinetry.com
When To Hire A Professional
Most people can handle basic panels. But consider a pro if:
- Your kitchen has complex angles or lots of lighting.
- You’re using heavy materials (like metal or tile).
- You want a seamless, built-in look.
- You’re not comfortable with power tools or ladders.
Non-obvious Insight: Professionals can often source better-matched materials or integrate lighting and covers at the same time, saving you future hassle. Sometimes, it’s worth the extra cost for a flawless finish.
Maintenance And Cleaning
How you care for your new cabinet underside depends on the material:
- Painted wood: Wipe with a damp, soft cloth. Avoid abrasive cleaners.
- Laminate or PVC: Use mild soap and water. For grease, a little vinegar works well.
- Metal: Microfiber cloth and a non-acidic cleaner prevent streaks.
- Beadboard: Use a brush to clean grooves.
Check every few months for peeling, water stains, or loose panels. Early fixes prevent bigger problems later.
Sustainability And Eco-friendly Choices
If sustainability matters to you, there are greener options:
- FSC-certified plywood: Ensures wood is from responsibly managed forests.
- Low-VOC paints and adhesives: Reduce indoor air pollution.
- Recycled panels: Some brands offer panels made from recycled materials.
- Durable materials: A well-installed cover lasts years, reducing waste.
Unique Ideas From Real Homes
Sometimes, the best ideas come from seeing what others have done:
- A homeowner in Oregon used cork panels for a soft, natural look. Cork is mold-resistant and adds warmth.
- In a small apartment, one DIYer installed a magnetic metal panel to hold spice jars and utensils under the cabinet, adding both cover and storage.
- A designer in New York used LED-lit frosted acrylic panels, creating a glowing effect at night and a clean look during the day.
You’re only limited by your creativity. Always check that your chosen material is safe and practical for kitchen use.

Credit: diy.stackexchange.com
Table: At-a-glance Maintenance Guide
Here’s a quick reference for keeping your cabinet undersides looking their best:
| Material | Cleaning Method | Frequency | Special Care |
|---|---|---|---|
| Plywood (painted) | Damp cloth | Monthly | Touch up paint as needed |
| Laminate | Soap & water | Bi-weekly | Avoid abrasives |
| Metal | Microfiber | Monthly | Prevent scratches |
| PVC | Soap & water | Monthly | Avoid strong chemicals |
| Beadboard | Brush & damp cloth | Monthly | Clean grooves regularly |
Practical Tips For A Flawless Finish
- Paint edges before installation: This prevents missed spots and saves time.
- Use painter’s tape: Protects visible cabinet faces from glue or caulk.
- Install panels before new counters: You’ll have more room to work and can hide seams.
- Label wires and pipes: If you disconnect anything, tag it for easy reinstallation.
- Take photos before you cover: If you ever need to troubleshoot wiring, you’ll have a record.
When Not To Cover Cabinet Undersides
There are times when you might skip this project:
- If you plan to remove cabinets soon: Save the effort for your new kitchen.
- In very low-visibility areas: If no one sees under the cabinets, a quick coat of paint may be enough.
- If it blocks ventilation: Some appliances need open airflow. Don’t cover over vents without checking first.
Where To Find Quality Materials
You can find suitable panels and supplies at most home improvement stores. For specialty materials (like custom laminates or metal sheets), check with cabinet makers or online suppliers. For accurate, up-to-date product details and installation guides, the Home Depot website is a trusted resource: Home Depot Cabinet Panels.
Frequently Asked Questions
What’s The Best Material For Covering Cabinet Undersides In A Humid Kitchen?
Laminate or PVC panels are best for humid kitchens. Both resist moisture and are easy to clean. Avoid raw MDF, which can swell with steam.
Can I Install Under-cabinet Covers Myself, Or Do I Need A Professional?
Most covers can be installed by homeowners with basic tools. If your kitchen has complex wiring or heavy materials, hiring a professional ensures safety and a perfect finish.
How Do I Hide Under-cabinet Lighting Wires?
Run wires in straight lines along the cabinet’s back, secure with clips, and cover with your panel. For easy access, cut small holes or use removable covers where needed.
Will Covering Cabinet Undersides Affect Resale Value?
A neat, finished underside can boost your kitchen’s appeal and increase resale value. It shows attention to detail and quality. Poorly finished or damaged undersides can turn buyers off.
How Often Should I Clean And Check The Cabinet Underside?
Wipe down the area monthly and check for signs of water damage, loose panels, or pests. Quick cleaning keeps your kitchen healthy and attractive.
Covering the underside of your cabinets is a simple way to upgrade your kitchen’s look and function. With the right materials, good planning, and a bit of DIY effort, you’ll enjoy a cleaner, more beautiful kitchen for years to come.