
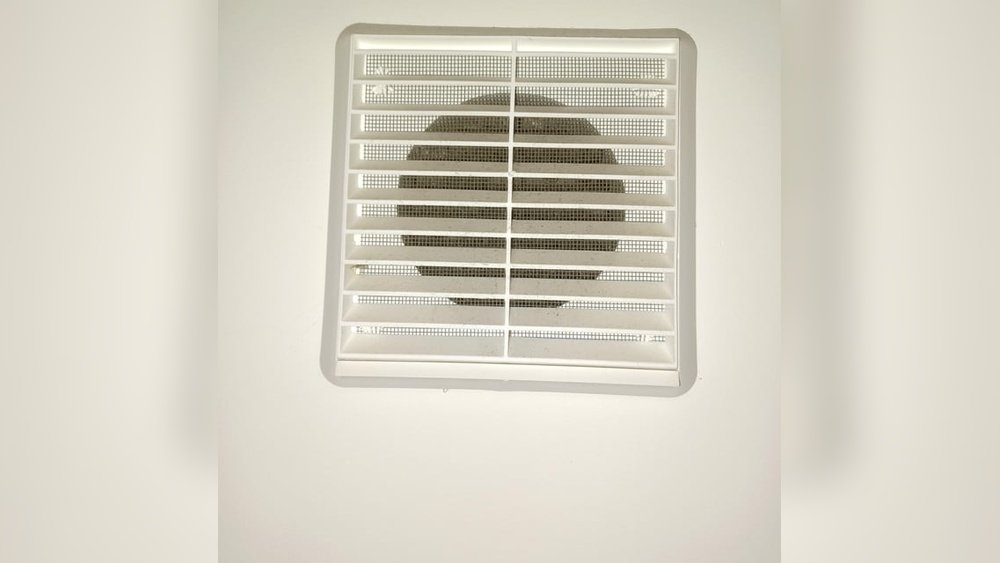
Closing a kitchen exhaust fan hole might sound simple, but it often requires more planning and care than many people expect. Maybe your old exhaust fan broke down, or you’ve switched to a different ventilation system. Perhaps you want to seal out drafts, insects, or just make your kitchen look better.
No matter your reason, closing that hole the right way is important for your home’s comfort, safety, and appearance.
Many people try a quick fix—covering the hole with cardboard or taping over it. But these shortcuts rarely last long. Moisture, air leaks, and even pests can find their way in. A well-closed exhaust fan hole helps keep your kitchen energy-efficient, prevents water damage, and keeps unwanted critters outside.
It also helps maintain fire safety by sealing any gaps between your kitchen and attic or wall spaces.
This guide walks you through every step of closing a kitchen exhaust fan hole. Whether your hole is in drywall, brick, tile, or wood, you’ll find clear advice here. You’ll learn about the tools you need, common mistakes to avoid, and even how to match the finish so the repair blends right in.
If you’re ready to stop looking at that empty hole and start making your kitchen feel whole again, read on.
Understanding The Kitchen Exhaust Fan Hole
Before you close anything, it’s important to know exactly what you’re working with. Kitchen exhaust fans come in different styles and are installed in various ways. Their holes can be in walls, ceilings, or even windows. The size, shape, and location of your hole affects the best way to close it.
Most kitchen exhaust fan holes are between 4 to 8 inches in diameter. Older homes might have square or rectangular vents, while newer ones usually have round holes. The hole may go through just drywall, or it might pass through brick, wood siding, or tile as well. Sometimes, ductwork is still inside the hole; other times, it’s already been removed.
Identifying your hole’s construction is key. For example, a hole through a brick wall needs a different approach than a hole through drywall. Take time to measure your hole and check what materials surround it. This early step helps you pick the right supplies and avoid surprises later.
Why Properly Closing The Hole Matters
Sealing an exhaust fan hole is about more than just looks. An open or poorly sealed hole can cause several problems:
- Energy loss – Heated or cooled air escapes, raising your energy bills.
- Pest entry – Small animals and insects love finding gaps to get indoors.
- Water leaks – Rain or condensation can seep in, damaging your walls.
- Fire safety – Unsealed holes can let smoke or fire spread faster.
- Noise – Outdoor sounds can travel right into your kitchen.
A well-done closure keeps your kitchen safe, comfortable, and efficient. It also protects your home’s value by preventing hidden damage.
Planning The Closure
Before you start, make a plan. Consider these questions:
- What is the size and shape of the hole?
- What materials surround the hole (drywall, brick, tile, etc. )?
- Is the hole on an inside or outside wall?
- Will you want to reinstall a fan later, or is this permanent?
Write down your answers. This helps you buy the right materials and tools. For example, sealing a hole in an outside wall usually needs extra insulation and waterproofing. If the hole is inside, focus more on air sealing and matching the wall finish.
Tools And Materials You Will Need
The right tools make the job easier and the result stronger. Here are the basics you’ll need for most kitchen exhaust fan hole closures:
- Measuring tape – To check hole size.
- Utility knife – For cutting drywall or insulation.
- Saw (hand saw or reciprocating saw) – For wood or tough materials.
- Screwdriver/drill – For attaching patches or supports.
- Putty knife – For spreading filler.
- Caulking gun – For sealant.
- Drywall patch or matching material – To fill the hole.
- Joint compound – For a smooth finish on walls.
- Sandpaper – For smoothing patches.
- Paint or matching surface finish – To blend the repair.
- Insulation – For outside walls or large holes.
- Caulk or spray foam – To seal gaps.
- Protective gear – Gloves, safety glasses, dust mask.
Depending on your wall type, you may need extras like metal mesh, exterior siding patches, or masonry filler.
Types Of Kitchen Exhaust Fan Holes And How To Approach Them
Different wall materials need different repair methods. Here’s how to handle the most common types.
Drywall
Drywall is the most common wall type in kitchens. If your fan was mounted in drywall, you’re in luck—this is usually the easiest to patch.
- Clean the hole – Remove any loose material or dust.
- Cut a patch – Use a piece of drywall slightly larger than the hole.
- Install support – For large holes, screw a wooden strip inside the hole for the patch to attach to.
- Attach the patch – Screw the drywall patch to the support.
- Tape the seams – Use drywall tape around the edges.
- Apply joint compound – Feather it out for a smooth look.
- Sand and repeat – Sand smooth, then add more compound if needed.
- Paint – Match your existing wall color.
Brick Or Masonry
If your exhaust fan vented through a brick or masonry wall, you’ll need more robust materials.
- Clean and prep – Remove any old mortar or debris.
- Insert insulation – Add fiberglass or foam insulation for energy efficiency.
- Install backing – Place a piece of metal lath or wire mesh inside the hole.
- Mix mortar – Prepare mortar according to package directions.
- Fill the hole – Apply mortar in layers, pressing firmly.
- Finish the surface – Match the brickwork or stucco pattern.
- Cure and paint – Allow to dry fully, then paint if desired.
Tile
Closing a hole in a tiled wall (like a kitchen backsplash) is trickier if you want the result to look seamless.
- Remove damaged tiles – Carefully pry out tiles around the hole.
- Patch the wall – Use drywall or cement board as needed.
- Install new tiles – Match the size, color, and pattern.
- Grout and seal – Fill joints with grout and seal for moisture protection.
Wood Siding
Exterior exhaust fan holes in wood siding require weatherproofing.
- Cut a wood patch – Match the siding thickness.
- Prime and paint – Paint the patch before installation to protect against moisture.
- Install insulation – Place insulation inside the hole.
- Fit the patch – Screw or nail the wood patch in place.
- Seal edges – Use exterior caulk to seal all gaps.
Step-by-step Guide: How To Close A Kitchen Exhaust Fan Hole
Let’s walk through the general process, focusing on a standard drywall repair (the most common scenario).
1. Remove The Old Fan And Ductwork
If the fan is still in place, turn off power to the area at your breaker box. Remove the fan and any attached ductwork. Unscrew brackets and carefully disconnect wires, capping them safely.
2. Clean And Inspect The Hole
Check for debris, mold, or moisture problems. If you see any signs of water damage, dry the area thoroughly before continuing. Look for electrical wires or pipes—move them safely out of the way.
3. Measure And Cut Your Patch
Use a measuring tape to get the exact size of the hole. Cut a piece of drywall, wood, or other material to fit. If the hole is large, cut your patch a little larger and trim as needed for a snug fit.
4. Install Backing Support
For holes larger than 6 inches, support is needed. Screw a wooden strip or furring strip inside the hole so that half sticks out. Your patch will attach to this backing.
5. Insert Insulation (if Needed)
If the hole leads to an outside wall, fill the space with insulation. This blocks drafts and keeps your kitchen comfortable. Use fiberglass batts or spray foam.
6. Attach The Patch
Screw or nail your patch to the backing support. Make sure it sits flush with the wall surface.
7. Tape, Mud, And Smooth
Apply drywall tape around the edges. Cover with joint compound, feathering it out to blend with the wall. Let dry, then sand smooth. Repeat as needed for a seamless finish.
8. Prime And Paint
Prime the patched area to seal it, then paint to match the rest of your wall. For exterior holes, use weatherproof paint.
9. Seal Gaps
Run a bead of caulk around the edges if you’re working on an outside wall or anywhere moisture could get in. This keeps your repair airtight and waterproof.
10. Inspect Your Work
Look for any cracks, gaps, or uneven spots. Make final touch-ups as needed. Once everything is dry, your kitchen is ready for use.

Credit: diy.stackexchange.com
Comparing Patch Materials: Drywall, Wood, And Metal
Choosing the right patch material is important. Here’s a comparison to help you pick:
| Material | Best For | Strength | Ease of Finishing | Cost |
|---|---|---|---|---|
| Drywall | Interior walls | Medium | Easy to blend | Low |
| Wood | Exterior siding | High | Harder to blend | Medium |
| Metal (mesh) | Large holes, extra support | Very high | Needs joint compound | Low |
Insulation And Air Sealing: Why They Matter
Many people forget about insulation when closing an exhaust fan hole, especially in outside walls. Skipping this step can create cold spots, increase energy bills, and lead to condensation or mold.
Use fiberglass insulation or spray foam for best results. Make sure the entire cavity is filled, but don’t pack it too tightly. For air sealing, run a bead of caulk or spray foam around the edges of your patch before adding the final wall finish.
Here’s how different insulation types compare for this task:
| Insulation Type | R-Value per Inch | Ease of Application | Best Use |
|---|---|---|---|
| Fiberglass batts | ~3.2 | Easy | Medium-large holes |
| Spray foam | ~6.0 | Medium | Small gaps, air sealing |
| Rigid foam board | ~5.0 | Harder to fit | Flat, wide holes |
Matching The Finish For A Seamless Look
A neat patch is only half the battle. The real test is whether the repair disappears into your kitchen. Here are some practical tips:
- Paint matching – Use leftover paint if you have it. If not, take a paint chip to your hardware store for a color match.
- Texture – If your wall has texture, use a sponge or brush to mimic the pattern while the joint compound is wet.
- Tile matching – Save extra tiles when you renovate. If you don’t have a match, consider using a decorative accent tile.
- Exterior siding – Prime and paint the patch before installation. This protects it and makes the repair less noticeable.
Most beginners forget about the wall’s texture, leading to a patch that stands out. Take a few extra minutes to blend the surface—it makes a big difference.
Common Mistakes And How To Avoid Them
Closing an exhaust fan hole isn’t complicated, but there are pitfalls. Here are mistakes beginners often make:
- Skipping insulation – This leaves a cold spot and wastes energy.
- Not using backing support – Large patches will crack or sag without support.
- Poor paint match – The repair draws attention instead of blending in.
- Ignoring moisture issues – Water can destroy your patch from behind.
- Rushing drying time – Joint compound and paint need time to set for a smooth finish.
Take your time, and don’t skip steps. If your patch feels loose or the finish looks off, fix it before moving on.
What To Do With The Old Ductwork
Sometimes, the exhaust fan’s duct is still in the wall or ceiling. It’s best to remove as much as possible, especially if it’s metal ducting. If removal isn’t possible, seal both ends with spray foam or a tight-fitting cap to prevent air leaks and pests. Always check for sharp edges, and wear gloves to protect your hands.
Weatherproofing Exterior Holes
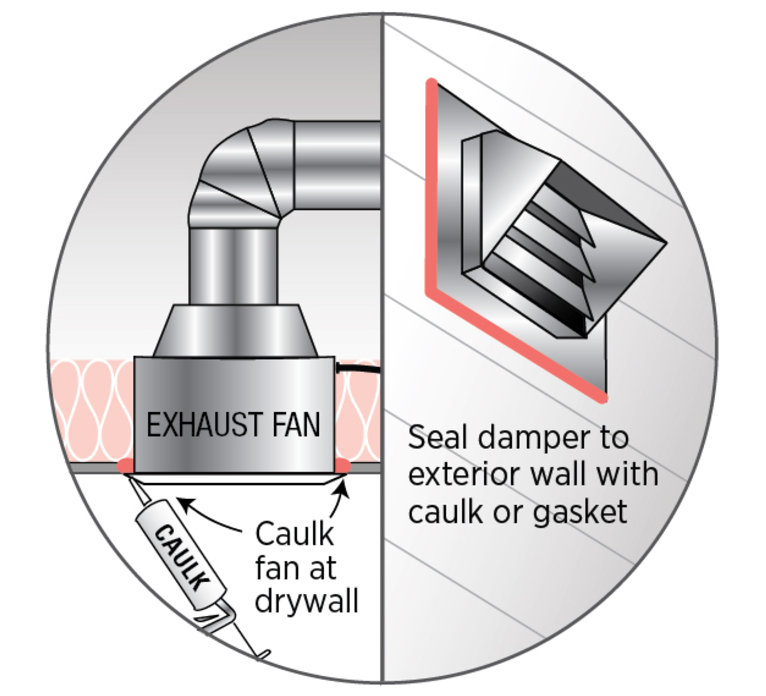
If your kitchen exhaust vented outdoors, you need to make the repair weatherproof. This includes:
- Using exterior-grade caulk around all edges.
- Priming and painting exterior patches.
- Siding or brick repairs should overlap existing material to shed water.
- Checking that no water can seep behind the patch.
For extra protection, add flashing tape behind the patch if possible. This prevents water from sneaking in during heavy rain.
Credit: www.nachi.org
Safety Precautions
Working with walls, insulation, and tools can be risky. Stay safe by following these tips:
- Turn off power – Shut off electricity if you’re near wires.
- Wear a mask – Insulation and drywall dust can irritate lungs.
- Use gloves – Protect your hands from sharp edges and chemicals.
- Ventilate – Open windows when using spray foam, caulk, or paint.
- Dispose of debris properly—old fans and ductwork may have sharp parts.
When To Call A Professional
While most homeowners can handle small to medium repairs, sometimes it’s best to call a pro:
- The hole is very large (over 12 inches).
- The wall is structural or load-bearing.
- There is mold, water, or electrical damage.
- Matching the finish is important for resale value.
A skilled contractor can close the hole quickly and make it invisible, but expect to pay between $200 and $600 depending on the complexity.
Environmental Considerations
Closing a kitchen exhaust fan hole is a chance to improve your home’s energy efficiency. Proper sealing keeps your heating and cooling costs lower. If you remove old ductwork, recycle the metal if possible. Use low-VOC paints and sealants to keep your indoor air clean.
Some people reuse the old fan or duct parts for other projects. If you do, make sure they’re cleaned and safe to use elsewhere.
How Long Does It Take?
A typical drywall patch takes 2–4 hours spread over a day or two, due to drying time between steps. Brick or tile repairs may take a full weekend. Plan for extra time if you need to buy materials or let paint cure.
Here’s a quick timeline:
| Step | Time Needed |
|---|---|
| Remove fan/clean hole | 30 minutes |
| Cut and fit patch | 30–60 minutes |
| Install, tape, mud | 1 hour |
| Drying and sanding | 2–12 hours |
| Painting/finishing | 1–2 hours |

Credit: www.youtube.com
Two Insights Most People Miss
- Backer support is crucial – Without a wood or metal strip behind the patch, even a small repair can crack or sag. Always add support for holes bigger than a few inches.
- Texture blending is as important as color – A smooth patch on a textured wall stands out just as much as a bad paint match. Invest time to replicate the wall’s texture for a truly invisible repair.
Useful Resources
For readers who want more technical details, check the Family Handyman guide on drywall patching. It offers step-by-step illustrations and advanced tips.
Frequently Asked Questions
How Do I Close A Kitchen Exhaust Fan Hole In Drywall?
First, remove any remaining fan or duct parts. Measure the hole and cut a drywall patch to fit. Install a wooden backing for support if needed. Attach the patch, tape the seams, and cover with joint compound. Sand smooth, then prime and paint to match your wall.
Can I Use Spray Foam Alone To Close The Hole?
Spray foam is great for air sealing and insulation, but it is not strong enough to act as a structural patch. Always use a solid material (drywall, wood, or metal) to fill the hole and rely on spray foam for sealing around the edges only.
What If My Kitchen Wall Is Tiled?
Remove tiles around the hole carefully. Patch the wall with drywall or cement board, then install new matching tiles. Grout and seal for a waterproof finish. If you can’t match the tiles, consider a decorative accent tile or a new tile pattern.
Is It Ok To Leave The Old Ductwork In The Wall?
It’s better to remove old ductwork if possible. If you can’t, seal both ends of the duct with spray foam or a tight-fitting cap to prevent air, pests, or moisture from moving through the duct.
How Can I Make The Patch Invisible?
The two most important factors are matching the wall’s texture and paint color. Use leftover paint or have it color-matched at a hardware store. For texture, use a sponge, brush, or specialty roller to blend the patch into the existing wall pattern before painting.
Closing a kitchen exhaust fan hole isn’t just about covering a gap—it’s about restoring your kitchen’s comfort, efficiency, and appearance. With careful planning, the right materials, and attention to detail, you can make the repair nearly invisible and protect your home for years to come.