Cleaning your panini maker the right way doesn’t just keep it looking good—it keeps your food tasting great and extends the life of your appliance. If you’ve ever noticed leftover cheese or crumbs burning on the plates, or your sandwiches sticking more than they used to, you’re not alone.
Many people struggle with getting their panini maker truly clean, especially if they’re unsure which cleaning methods are safe. But with a few simple steps, you can keep your grill fresh and ready for every meal.
In this guide, you’ll learn exactly how to clean a panini maker, from quick wipes after lunch to deep cleans when things get messy. You’ll discover the right tools to use, what cleaning mistakes to avoid, and tips for making your cleaning routine easier.
Whether your panini maker has removable plates or fixed ones, you’ll find detailed instructions to match your model. With a little care, your panini press can keep making crispy, delicious sandwiches for years to come.
Why Cleaning Your Panini Maker Matters
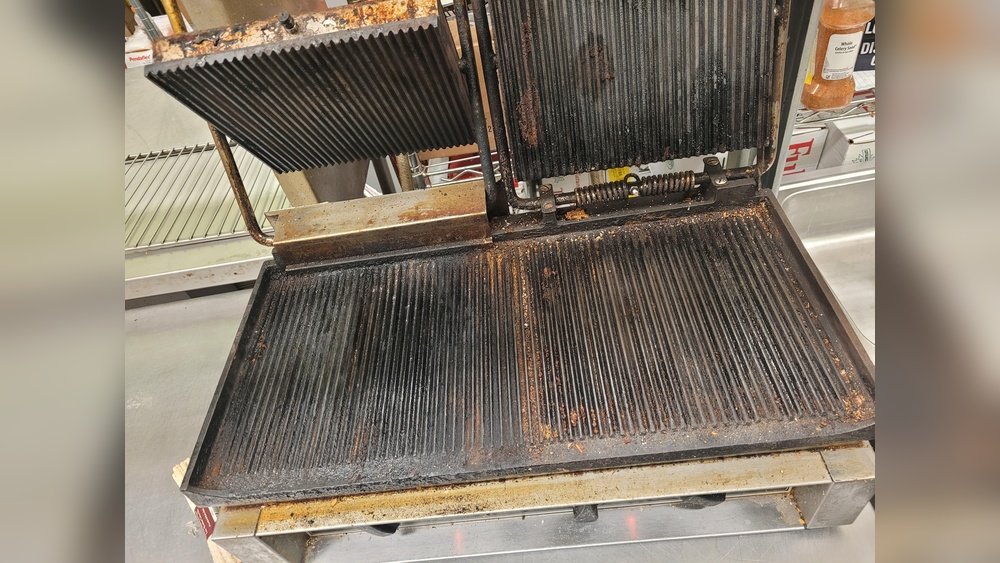
A panini maker is more than just a kitchen gadget—it’s a tool that touches your food directly. Over time, crumbs, melted cheese, oil, and even bacteria can build up on the cooking plates. If not cleaned regularly, these leftovers can burn, causing smoke and bad smells.
Even worse, they can make your next sandwich taste off or even unsafe.
Proper cleaning also helps your panini maker heat evenly. When old grease or food bits stick to the grill, they block heat transfer and can cause uneven browning. In the long run, failing to clean your panini maker can lead to damage or even shorten its lifespan.
Types Of Panini Makers And Cleaning Challenges
Not every panini maker is the same. The design impacts how you should clean it.
| Type | Removable Plates | Nonstick Surface | Cleaning Difficulty |
|---|---|---|---|
| Basic Electric Press | No | Usually | Medium |
| High-End Press | Yes | Usually | Easy |
| Stovetop Grill | Not Applicable | Sometimes | Medium |
| Commercial Model | Sometimes | Sometimes | Hard |
Removable plates make cleaning much easier because you can wash them in the sink. Fixed plates require more careful wiping and attention to avoid damaging electrical parts.
Nonstick coatings are common, but they need gentle cleaning to avoid scratching. Never use metal or harsh scrubbers.
Some panini makers also have drip trays for catching oil or crumbs. These usually slide out and can be washed separately.
What You Need Before You Start
Before you clean, gather a few tools and supplies. Having the right items nearby makes cleaning faster and safer.
- Soft sponge or non-abrasive cloth
- Small brush (old toothbrush works well)
- Dish soap
- Paper towels or clean kitchen towels
- Plastic or wooden spatula (for stubborn bits)
- Warm water
- White vinegar (for deep cleaning and odors)
- Baking soda (for tough stains)
- Cotton swabs (for small crevices)
- Mild disinfectant spray (optional)
Don’t use steel wool or abrasive cleaners—they can scratch the nonstick surface and damage your panini maker.
Step-by-step: How To Clean Your Panini Maker After Every Use
Cleaning your panini maker right after use is the easiest way to keep it in good shape. Here’s a simple routine to follow.
1. Unplug And Cool Down
Always unplug your panini maker before cleaning. Let it cool until it’s warm to the touch, but not completely cold. Warm plates make it easier to remove food residue.
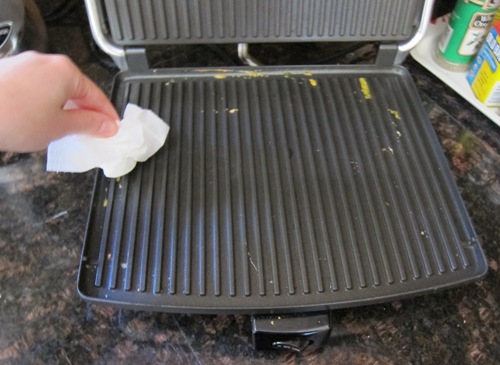
2. Wipe Away Loose Crumbs
Use a dry paper towel or soft cloth to gently sweep away crumbs and loose bits.
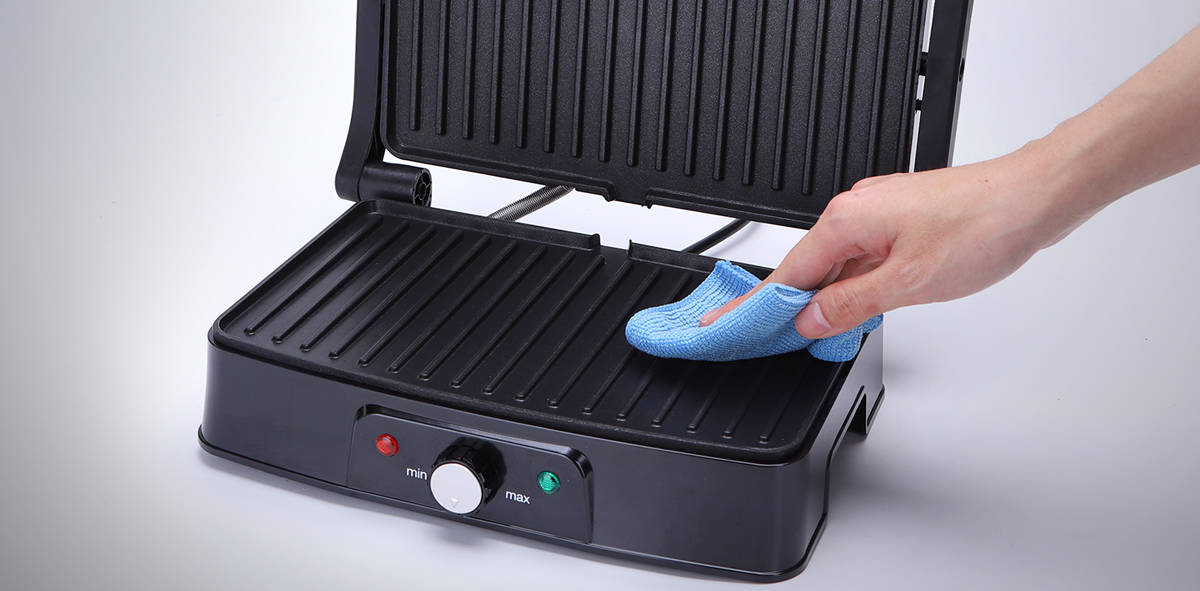
3. Clean The Cooking Plates
Dampen a sponge or cloth with warm water and a few drops of dish soap. Wipe down the plates, applying gentle pressure. For sticky or burnt-on bits, use a plastic spatula to lift them—never use metal.
4. Rinse And Wipe
Go over the plates again with a clean, damp cloth to remove soap residue. Make sure no water drips into the electrical parts.
5. Dry Completely
Use a dry towel or paper towel to remove any moisture. Leaving the plates wet can cause rust or damage.
6. Clean The Exterior
Wipe the outside of the panini maker with a damp cloth, especially the handle and buttons.
7. Empty And Wash The Drip Tray
If your model has a drip tray, slide it out and wash with warm, soapy water. Dry and replace.
This quick routine keeps your panini maker looking new and prevents sticky buildup.
Deep Cleaning: When And How To Do It
Even with regular cleaning, sometimes you need a deep clean. Burnt cheese, oily residue, or old smells can linger. Most panini makers need deep cleaning once a month, or whenever you notice stubborn stains.
How To Deep Clean Fixed Plate Panini Makers
1. Unplug And Cool
Make sure the appliance is unplugged and only slightly warm.
2. Lay Down Paper Towels
Place paper towels under the maker to catch drips.
3. Use A Baking Soda Paste
Mix a small amount of baking soda with water to create a thick paste. Apply to stubborn stains.
4. Let Sit, Then Scrub Gently
Leave the paste on stains for 5-10 minutes. Use a soft brush or sponge to scrub in a circular motion.
5. Wipe And Rinse
Remove the baking soda with a damp cloth. Repeat if needed.
6. Clean Small Crevices
Dip a cotton swab in vinegar and clean around hinges, corners, and hard-to-reach spots.
7. Final Rinse And Dry
Wipe again with a clean, damp cloth. Dry completely.
How To Deep Clean Removable Plate Models
1. Remove Plates Carefully
Wait for the plates to cool before removing them.
2. Soak In Warm, Soapy Water
Place the plates in the sink with mild dish soap. Let soak for 10-15 minutes.
3. Scrub And Rinse
Use a soft brush or sponge to scrub off residue. Rinse well.
4. Dry Thoroughly
Let air dry or wipe with a towel before putting back.
5. Clean The Base
While plates are soaking, wipe the base and outside of the panini maker with a damp cloth.
6. Reassemble
Once everything is dry, reattach the plates and drip tray.
Deep cleaning removes old grease and keeps your panini maker performing well.
Special Tips For Cleaning Nonstick Surfaces
Most panini makers use a nonstick coating on the cooking plates. This makes sandwiches easy to remove but requires gentle care.
- Never use metal utensils or scouring pads on nonstick surfaces.
- Use only mild dish soap—avoid harsh chemicals.
- If something is really stuck, soak a paper towel in warm water, lay it on the plate, and close the lid for 5 minutes. The steam will help loosen the debris.
- Always dry the surface completely to avoid water spots or rust.
If your nonstick coating gets scratched, food will stick more easily and cleaning gets much harder. Treat the plates gently to keep them in good shape.
Cleaning The Drip Tray And Exterior
Grease and crumbs often collect in the drip tray and on the exterior. Cleaning these parts is quick but important.
- Remove the tray after every use.
- Wash with warm, soapy water, then rinse and dry.
- Wipe down the sides, handle, and control knobs with a damp cloth.
- For stainless steel exteriors, use a bit of white vinegar to remove fingerprints and smudges.
Don’t forget the feet and underside—dust and crumbs can collect here too.
How To Remove Stubborn Stains And Burnt-on Food
Even with good habits, sometimes cheese or sauce gets really stuck. Here’s how to tackle the toughest messes:
1. Steam Clean Method
While the plates are still warm, place a damp paper towel or cloth between the plates and close the lid. The heat creates steam, which softens burnt food. After a few minutes, wipe away the loosened debris.
2. Baking Soda Paste
For tough stains, apply a paste of baking soda and water. Leave for 10 minutes, then gently scrub.
3. Vinegar Solution
Mix equal parts white vinegar and water. Dampen a cloth and wipe the surface. Vinegar cuts grease and removes odors.
4. Use A Toothbrush
An old toothbrush is great for cleaning grooves and textured plates.
Pro tip: Avoid soaking the entire panini maker in water, especially if the plates do not come off. Water can damage electrical parts.

Credit: www.wikihow.life
What To Avoid When Cleaning Your Panini Maker
A few common cleaning mistakes can ruin your panini maker or make it less safe. Avoid these pitfalls:
- Never immerse the whole appliance in water.
- Don’t use steel wool, metal scrapers, or abrasive sponges.
- Avoid harsh chemicals or bleach.
- Don’t reassemble the appliance while parts are still wet.
- Don’t use sharp knives to pry off stuck food.
One less-known mistake is forgetting to clean the hinges and the area around the heating element. Over time, grease can build up here and attract dirt or insects.
How Often Should You Clean Your Panini Maker?
Frequency depends on how often you use it, but here’s a good schedule:
| Cleaning Task | How Often | Why |
|---|---|---|
| Quick wipe-down | After every use | Prevents buildup, keeps plates nonstick |
| Deep clean | Monthly or as needed | Removes old grease, odors, stains |
| Clean drip tray | After every use | Prevents overflow, easy maintenance |
| Exterior cleaning | Weekly | Removes fingerprints, dust, and splashes |
| Check hinges/crevices | Monthly | Prevents grease buildup, improves safety |
If you use your panini maker daily, you might need to deep clean every two weeks.
Cleaning Panini Makers With Removable Vs. Fixed Plates
Not sure which type you have? Here’s how cleaning steps differ:
- Removable plates: Easiest to clean. Remove, soak, wash, and dry separately.
- Fixed plates: Clean in place, carefully avoiding water near electrical components.
- Hybrid models: Some have one removable and one fixed plate. Clean each as recommended.
If you’re choosing a new panini maker, models with removable plates are much easier to keep spotless.
How To Deodorize Your Panini Maker
Old food smells can linger, especially after making sandwiches with cheese, garlic, or onions. Here’s how to keep your appliance smelling fresh:
- Wipe plates with a cloth dampened in vinegar and water.
- Leave the lid open after cleaning to air out.
- For strong odors, sprinkle a little baking soda on the plates, leave for 10 minutes, then wipe off.
- Avoid using perfume or air fresheners, as these can leave a residue.
Regular deodorizing prevents cross-flavors between different sandwiches.
The Best Cleaning Products For Panini Makers
Most cleaning should be done with mild dish soap, but a few products can help with tough jobs.
- Microfiber cloths: Trap grease and crumbs without scratching.
- Soft-bristled brushes: Reach into grooves and textured plates.
- Baking soda and vinegar: Safe, natural cleaners for stains and odors.
- Non-abrasive sponge: Cleans without scratching nonstick surfaces.
Some people ask about using dishwasher tablets or sprays. Only use products approved for nonstick coatings and always rinse thoroughly.
Storage Tips To Keep Your Panini Maker Clean
How you store your panini maker affects its cleanliness. Follow these tips:
- Let it cool and dry completely before storing.
- Store with the lid slightly open to prevent moisture buildup and odors.
- If you keep it in a cupboard, wipe down the exterior before storing.
- Store removable plates separately if possible.
Avoid stacking heavy items on top of your panini maker—this can damage the lid or handles.
Common Mistakes Beginners Make
Even with the best intentions, beginners often make cleaning errors that can harm their panini maker:
- Forgetting to unplug before cleaning. This is a safety risk and can cause electric shock.
- Using too much water. Water can seep into electrical parts and cause malfunctions.
- Scrubbing too hard. Scratches on the nonstick surface make future cleaning harder.
- Not cleaning right after use. Waiting lets food harden and makes cleaning tougher.
- Ignoring the hinges and edges. These areas collect grease and crumbs.
- Reassembling while wet. Trapped moisture can cause mold or rust.
Non-obvious insight: The best time to clean is when the plates are still warm (not hot). Warmth softens residue, but isn’t dangerous to touch.
How To Extend The Life Of Your Panini Maker
A clean panini maker lasts longer and works better. Here’s how regular cleaning helps:
- Prevents food buildup, which can block heat and cause uneven cooking.
- Stops odors from transferring between different foods.
- Reduces the risk of electrical issues from trapped moisture or grease.
- Keeps the nonstick surface in good condition for easier sandwich release.
If you ever notice your panini maker is slow to heat up or smells odd, a deep clean usually helps.
Credit: thedaringkitchen.com
When To Replace Your Panini Maker
Even with perfect care, panini makers don’t last forever. Signs you might need a new one:
- Nonstick coating is badly scratched or peeling.
- Plates are cracked or warped.
- Heating is uneven or slow, even after cleaning.
- Electrical problems, such as flickering lights or power loss.
- Burnt smell that won’t go away.
Most home panini makers last 3-5 years with good care. If yours is older and struggles to clean or cook well, consider replacing it.
Safety Precautions When Cleaning
Cleaning a panini maker is safe if you follow these rules:
- Always unplug before cleaning.
- Never immerse the whole appliance in water.
- Let it cool enough to touch before cleaning.
- Keep water away from electrical parts, especially with fixed plates.
- Dry all parts thoroughly before reassembling or using again.
If you see sparks, smell burning, or notice anything unusual, stop using the appliance and have it checked by a professional.
Credit: www.melaniecooks.com
Other Uses For A Clean Panini Maker
A clean panini maker isn’t just for sandwiches. Some creative uses include:
- Grilling vegetables
- Cooking bacon or sausage
- Heating tortillas or flatbreads
- Making quesadillas
Just remember: always clean well between different foods to avoid mixing flavors or allergens.
If you’re looking for more creative panini recipes and tips, check out the official Cuisinart resource for inspiration.
Frequently Asked Questions
How Do I Clean A Panini Maker With Fixed (non-removable) Plates?
Unplug and let the appliance cool until warm. Wipe away crumbs with a dry cloth, then use a damp sponge with mild soap to clean the plates. For stubborn bits, apply a baking soda paste, let sit, then gently scrub.
Use minimal water to avoid electrical damage, and dry completely before storing.
Can I Put The Plates Of My Panini Maker In The Dishwasher?
If your model has removable, dishwasher-safe plates, you can clean them in the dishwasher. Check your user manual first. Never put non-removable plates or the main appliance in the dishwasher.
What Should I Do If My Panini Maker Smells Bad After Cleaning?
Wipe the plates with a vinegar and water solution, then let the appliance air out with the lid open. For strong odors, sprinkle baking soda on the plates, let sit for 10 minutes, then wipe away. Regular cleaning prevents most smells.
Is It Safe To Use Cooking Spray On My Panini Maker?
Most nonstick panini makers don’t need cooking spray and it can leave a sticky residue. If you want to use spray, apply a light coat to the bread or food, not directly to the plates.
How Can I Prevent Food From Sticking To My Panini Maker?
Always preheat the panini maker before adding food. Use a small amount of oil or butter on the bread, not the plates. Clean thoroughly after each use to prevent buildup, and avoid scratching the nonstick surface.
A well-cared-for panini maker is a pleasure to use. With regular cleaning and careful habits, you’ll enjoy crispy, tasty sandwiches for years. Don’t wait until mess builds up—just a few minutes after each use keeps your appliance in top shape.
If you’re ever unsure, check your model’s instructions for more details. Clean panini makers simply work better, taste better, and last longer.