Hardwood floors in the kitchen look beautiful and add value to a home, but keeping them safe from damage is a challenge. Kitchens are busy places with water, spills, food stains, and heavy foot traffic. Without the right care, hardwood can quickly lose its shine and even warp or crack.
Many people don’t realize how easy it is to ruin their kitchen floors—sometimes just one small mistake can lead to long-term problems.
This guide will show you how to protect hardwood floors in your kitchen, even if you have kids, pets, or a hectic lifestyle. You’ll learn practical strategies, what to avoid, and how to spot problems before they start. If you want your kitchen to stay both stylish and strong, you’ll find everything you need here.
Why Kitchens Are Hard On Hardwood Floors
Kitchens are different from other rooms with hardwood floors. In the kitchen, you deal with:
- Water spills from the sink, dishwasher, or fridge.
- Dropped food and oils that stain or make the floor slippery.
- High traffic as people cook, eat, and clean up.
- Heavy objects like pots, pans, and appliances that can scratch or dent.
Unlike bedrooms or living rooms, kitchen floors face these problems every day. Even a few months of neglect can lead to swelling, stains, and scratches that are hard to fix.
Choosing The Right Hardwood For Kitchens
Not all hardwood is the same. Some types handle moisture, dents, and stains better than others. If you’re installing or replacing kitchen floors, consider these factors:
Wood Species
Harder woods resist dents and scratches better. Examples include:
- Oak (red or white): Classic, tough, and widely available.
- Maple: Very hard and has a clean, modern look.
- Hickory: Even harder than oak, with a dramatic grain.
- Walnut: Softer than oak but hides scratches well due to its dark color.
Softer woods like pine or cherry are more likely to dent and scratch in kitchens.
Finish Type
How the floor is finished matters as much as the wood itself:
- Oil-based polyurethane: Creates a thick, glossy, and water-resistant layer. Good for kitchens but takes longer to cure.
- Water-based polyurethane: Dries quickly and is less smelly but may need more coats.
- Penetrating oils: Soak into the wood and look natural, but offer less protection from water and stains.
Factory-finished (pre-finished) floors often have tougher coatings than what you can apply at home. They may offer better protection in busy kitchens.
Solid Vs. Engineered Hardwood
- Solid hardwood: Made from one piece of wood. Can be sanded and refinished many times but is sensitive to moisture.
- Engineered hardwood: Has a thin layer of real wood on top of plywood or HDF. Handles moisture and temperature changes better than solid wood.
Engineered hardwood is often the better choice for kitchens, especially in humid climates or homes with lots of spills.
Best Practices For Everyday Protection
Keeping hardwood floors safe in the kitchen is about habits as much as materials. Here are the most important daily actions:
1. Clean Spills Immediately
Water and food spills can soak into wood, causing stains, swelling, or warping. As soon as something spills:
- Blot with a soft, dry cloth (not paper towels, which can scratch).
- Avoid rubbing, which can push liquid deeper.
- For sticky spills, use a slightly damp cloth, then dry the area completely.
Non-obvious insight: Even small drops of water left under appliances or mats can cause long-term damage. Check these areas often.
2. Sweep And Vacuum Regularly
Dirt, crumbs, and grit act like sandpaper under your feet, scratching the surface. To prevent this:
- Sweep daily with a soft-bristled broom.
- Vacuum at least twice a week using the hardwood setting (no beater bar).
- Clean under cabinets, appliances, and furniture where crumbs collect.
3. Use Proper Cleaning Products
Many common cleaners are too harsh for hardwood:
- Avoid ammonia, bleach, and vinegar (these can strip finish and dull wood).
- Use a pH-neutral hardwood floor cleaner. Check that it’s safe for your floor’s finish.
- Never use steam mops—steam forces moisture into the wood and can cause warping.
Non-obvious insight: Over-wetting the mop, even with water-based cleaners, is a common mistake. Always wring out the mop until it’s just damp.
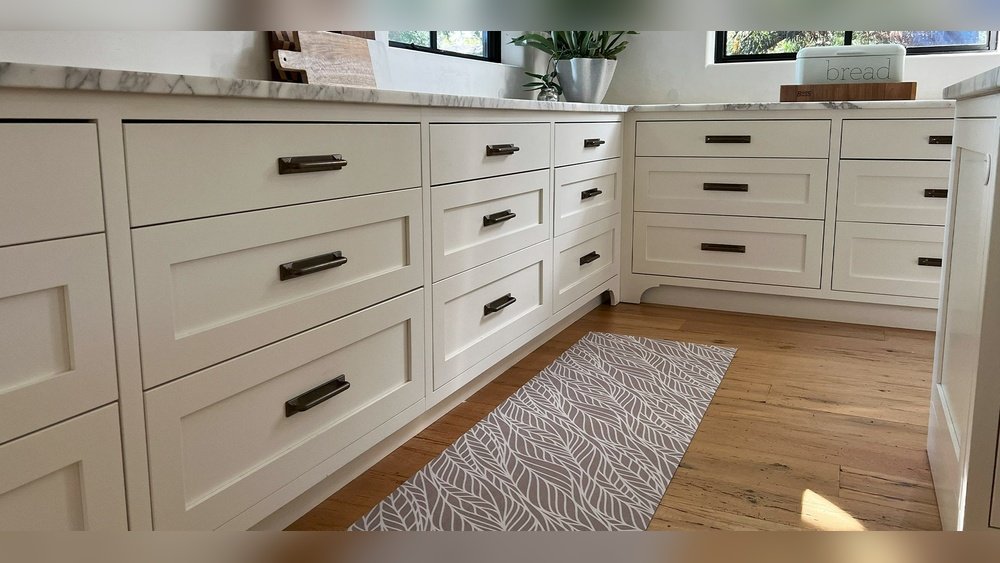
4. Place Mats And Rugs Strategically
You can protect high-risk spots with the right mats:
- In front of sink: Use a water-absorbent mat.
- Under stove and prep areas: Place washable kitchen rugs.
- Entry points: Use doormats to catch dirt and moisture.
Make sure mats have non-slip, breathable backings. Rubber or vinyl can trap moisture and discolor wood.
| Mat Location | Recommended Material | What to Avoid |
|---|---|---|
| Sink Area | Cotton, Microfiber | Plastic, Rubber |
| Entryways | Coir, Wool | Vinyl |
| Cooking Zone | Low-pile, Washable Rugs | Sticky or Non-breathable Pads |
5. Control Moisture And Humidity
Kitchens are humid from cooking, boiling water, and washing dishes. Too much moisture makes wood swell; too little dries it out and causes gaps.
- Use a range hood or exhaust fan when cooking.
- Wipe up condensation on windows or floors right away.
- Keep indoor humidity between 35–55%. Use a humidifier or dehumidifier if needed.
- Don’t leave wet towels or dishcloths on the floor.
6. Prevent Scratches And Dents
Kitchen floors face heavy pots, dropped knives, and moving chairs. Protect them by:
- Adding felt pads under chair and table legs.
- Using soft casters on kitchen carts or portable islands.
- Lifting, not dragging, heavy objects.
- Keeping pet nails trimmed.
You can also set up a “no shoes” rule in the kitchen, especially for high heels or sports cleats.
7. Recoat And Refinish As Needed
Even the best-kept floors need touch-ups over time.
- Recoating means adding a new top coat before the old one wears through. This keeps the finish strong and prevents deep scratches.
- Refinishing involves sanding down to bare wood and starting over. This is only needed every 7–10 years, or if there’s deep damage.
Regular recoating every 2–3 years in the kitchen can double the life of your floors.
How To Protect Hardwood Floors During Kitchen Renovations
Renovations are risky for wood floors—contractors, tools, and dust can do a lot of harm in a short time. To keep your floors safe:
- Cover floors with thick canvas drop cloths or rosin paper. Avoid plastic, which traps moisture.
- Tape seams with painter’s tape, not duct tape, to avoid sticky residue.
- Ban rolling carts with hard wheels unless you use protective mats.
- Sweep up debris daily—fine dust can scratch if walked on.
- Ask workers to wear soft-soled shoes and avoid dragging tools.
If you’re moving appliances, lift them with help or use an air sled, not by pushing. Even a fridge wheel can leave deep grooves.
Best Products To Protect Kitchen Hardwood Floors
There are many products on the market, but not all are safe or effective. Here’s a comparison of common protective items:
| Product | Purpose | Pros | Cons |
|---|---|---|---|
| Felt Pads | Chair/furniture legs | Cheap, easy to install | Wear out, need replacement |
| Rugs with Grippers | Entry, sink, stove areas | Absorb moisture, reduce slips | May trap dirt under rug |
| Polyurethane Finish | Surface protection | Strong water resistance | Needs proper application |
| Humidity Monitor | Air quality | Prevents swelling/shrinkage | Extra cost, needs batteries |
| Protective Mats | Under appliances | Shields from leaks | May slide if not secured |
Look for products certified as safe for hardwood. Some “universal” pads and cleaners can damage finish or leave sticky spots.
Mistakes To Avoid When Protecting Hardwood Floors In Kitchens
Many homeowners make small errors that cause big problems over time:
- Using wax on polyurethane floors: Wax can make the floor slippery and block future recoating.
- Ignoring small leaks: Even a tiny drip from the dishwasher or fridge can soak into the wood and cause mold or buckling.
- Cleaning with too much water: “Wet mopping” is the fastest way to destroy hardwood, especially near the sink.
- Letting dirt build up in corners: Corners and edges collect grit, which scratches the finish.
- Skipping felt pads or using hard plastic pads: These can create dents and ruin the finish.
If you’re unsure about a product or cleaner, check your floor’s warranty or ask the manufacturer before using it.

Credit: www.thehardwoodfloorcompany.ie
Seasonal Care For Kitchen Hardwood Floors
Hardwood expands in summer and shrinks in winter. Kitchens face extra challenges because of temperature swings and more moisture.
In Summer:
- Run the air conditioner or a dehumidifier to control humidity.
- Check for leaks from the fridge or ice maker as condensation increases.
- Open windows or use fans when cooking with lots of steam.
In Winter:
- Use a humidifier if the air is dry (below 35% humidity).
- Avoid letting snow, salt, or ice melt collect near entryways.
- Clean up wet footprints right away.
Tip: Place a tray or waterproof mat near the door to catch drips from boots and bags.
How To Handle Stains And Surface Damage
Even with good care, accidents happen. Here’s how to fix common problems:
Water Stains
- White rings: Usually just in the finish. Rub gently with a soft cloth and a little mineral oil.
- Dark spots: Water has soaked into the wood. Let dry fully, then try a paste of baking soda and water. If that fails, you may need to sand and refinish.
Scratches
- For shallow scratches, use a wood touch-up marker or crayon that matches your floor.
- For deep scratches, fill with wood filler, sand smooth, and apply finish.
Food And Grease Stains
- Wipe up immediately with a damp (not wet) cloth.
- For stubborn grease, use a mild dish soap solution—never harsh chemicals.
- Dry the area fully after cleaning.
Dents
- Place a damp cloth over the dent, then apply a warm (not hot) iron for a few seconds. The steam can help the wood fibers swell back. This works best on small dents.
If you are unsure, call a professional. DIY repairs can make things worse if not done carefully.
Comparing Hardwood Vs. Other Kitchen Flooring Options
Some people wonder if hardwood is worth the effort in kitchens compared to tile, vinyl, or laminate. Here’s a quick comparison:
| Flooring Type | Durability | Water Resistance | Repairability | Look & Feel |
|---|---|---|---|---|
| Hardwood | Good (with care) | Low | Can be refinished | Warm, classic |
| Tile | Excellent | High | Hard to repair | Cool, hard underfoot |
| Vinyl | Good | High | Replace sections | Soft, synthetic |
| Laminate | Fair | Medium | Hard to repair | Varies, can mimic wood |
Hardwood offers a unique, high-end look and can last for decades, but it needs more attention to stay looking good—especially in the kitchen.
Extra Tips For Long-lasting Kitchen Hardwood Floors
- Rotate rugs and mats every few months to avoid uneven fading.
- Set up a cleaning schedule—consistency matters more than deep cleaning once in a while.
- Inspect for leaks every month around sinks, dishwashers, and fridges.
- Limit sun exposure by using curtains or blinds to prevent fading.
- Keep sharp objects (like knives or heavy pans) away from counter edges to prevent them from falling.
If you have children or pets, create clear “zones” for eating and play to limit messes on the wood.

Credit: www.maisondepax.com
When To Call A Professional
DIY maintenance works for most people, but some problems need expert help:
- Buckling or cupping (boards lift or curve)
- Mold or musty smells under mats or near appliances
- Deep scratches or gouges over a large area
- White cloudy finish that doesn’t respond to cleaning
A flooring professional can diagnose the problem and recommend repair or refinishing. Acting early can save you thousands in replacement costs.
Frequently Asked Questions
What Is The Best Hardwood Finish For Kitchen Floors?
Oil-based polyurethane is often the best for kitchens because it creates a strong, water-resistant surface. Water-based polyurethanes are also good but may need more coats. Avoid wax-only finishes in kitchens—they don’t protect against water or stains.
Can I Use A Steam Mop On My Hardwood Kitchen Floor?
No, you should never use a steam mop on hardwood. The steam forces moisture deep into the wood, leading to warping and damage. Stick to a damp (not wet) mop and a cleaner made for hardwood floors.
How Do I Protect Hardwood Under Kitchen Appliances?
Place protective mats or trays under appliances like dishwashers and fridges to catch leaks. When moving appliances, use sliders or get help to lift them. Never drag appliances across the floor.
Is Engineered Hardwood Better Than Solid Hardwood For Kitchens?
Engineered hardwood is usually better for kitchens because it handles moisture and temperature changes better than solid wood. It is less likely to warp or swell if exposed to water.
What Should I Do If Water Sits On My Hardwood Floor Overnight?
Blot up the water right away, then dry the area with fans or a hair dryer on a cool setting. Check for swelling or discoloration. If the wood changes shape or color, call a professional as soon as possible.
If you want more details on wood flooring types and finishes, you can visit the National Wood Flooring Association.
Hardwood floors in your kitchen can stay beautiful for years with the right habits and products. Focus on cleaning spills fast, using gentle cleaners, and protecting high-risk areas. With a little daily care and smart prevention, you can enjoy the warmth and style of wood underfoot—without worry.
Credit: www.urbanfloor.com