Cleaning oven heating coils may seem like a small household task, but it can make a huge difference in your kitchen’s cleanliness, safety, and even the taste of your food. Over time, grease, food drips, and burnt particles build up on the coils, causing smoke, unpleasant smells, and even fire risks.
If you want your oven to work efficiently and last longer, learning how to clean oven heating coils the right way is essential. Many people avoid cleaning these parts because they seem hard to reach or delicate, but with the correct steps, products, and safety tips, this job becomes much easier—and safer—than you might think.
This guide gives you a clear, step-by-step process for cleaning oven heating coils. You’ll learn how to prepare, which products and tools work best, and how to clean both electric and gas oven coils. We’ll cover safety, common mistakes, and tips for regular maintenance to keep your kitchen in top shape.
If you’re new to this task, or if you’ve been frustrated by sticky grime in the past, you’ll find practical advice and solutions here. You’ll also discover what many beginners overlook, such as the risks of using the wrong cleaning agents and how a simple mistake can damage your oven.
By the end, you’ll feel confident handling this important kitchen chore.
Understanding Oven Heating Coils
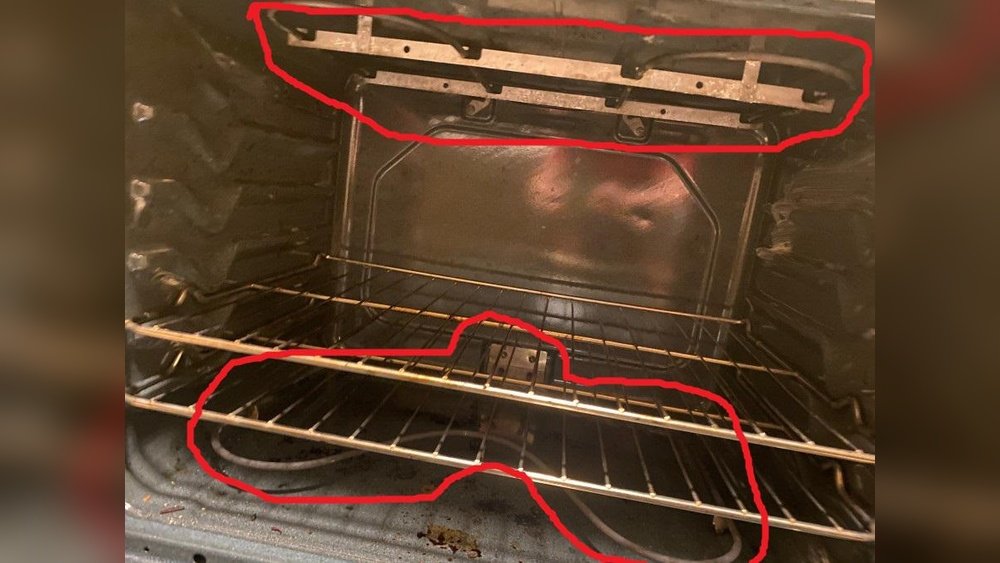
Before you start, it’s important to know what oven heating coils are and why they matter. These coils are the metal parts at the bottom and sometimes the top of your oven. When you turn on your oven, electricity heats the coils, which then heat the air inside. This is how your oven bakes and roasts your food.
There are usually two types:
- Bake element (bottom coil): Used for most cooking and baking.
- Broil element (top coil): Used for browning or broiling.
If food spills onto these coils, it can burn and create smoke or odors. Over time, heavy buildup can make your oven less efficient and even cause it to break down.
Gas Vs. Electric Oven Coils
Most modern ovens are either electric or gas. Electric ovens have visible coils, while gas ovens often have a hidden burner at the bottom. If you’re not sure, check your oven’s manual or look inside your oven.
Why Cleaning Oven Heating Coils Is Important
Regular cleaning of your oven’s heating coils is not just about looks. Here are some key reasons to keep them clean:
- Reduces Fire Risk: Grease and crumbs can catch fire if they build up on the coils.
- Improves Food Flavor: Old spills can produce smoke and odors that affect the taste of your meals.
- Increases Efficiency: Clean coils heat more evenly and use less energy.
- Extends Oven Life: Dirt and burnt food can wear out your oven faster.
- Prevents Smoke: Built-up grime often causes your oven to smoke, especially when preheating.
According to the National Fire Protection Association, cooking equipment is the leading cause of home fires, and many of these start with dirty ovens and stovetops. Keeping your oven clean is one of the simplest ways to avoid these risks.
Preparation: What You’ll Need
Before you start cleaning, gather everything you need. This saves time and helps you work safely. Here’s a simple checklist:
- Protective gloves: To shield your hands from chemicals and grime.
- Soft cloths or sponges: For wiping and scrubbing.
- Non-abrasive scrub brush or old toothbrush: To clean stubborn spots.
- Mild dish soap: Gentle on metal but effective on grease.
- Baking soda and vinegar: Natural cleaners that cut through grime.
- Spray bottle: For applying cleaning solution.
- Small bowl: For mixing pastes.
- Paper towels: For drying.
- Screwdriver: Only if your coils are removable.
- Tarp or old towel: To protect your kitchen floor.
Never use sharp tools or metal scouring pads, as these can scratch or damage the coils.
Choosing The Right Cleaning Products
Some oven cleaners are too harsh and can damage the heating coils. Stick to mild dish soap, baking soda, or vinegar. Avoid bleach, ammonia, and products with strong fumes unless your oven’s manufacturer says they’re safe.
Safety First: Essential Precautions
Cleaning oven coils safely is very important. Here’s what you must always do:
- Unplug the oven or turn off the gas supply before cleaning. This prevents electric shock or gas leaks.
- Let the oven cool completely. Hot coils can burn your skin.
- Work in a well-ventilated space to avoid breathing in fumes.
- Wear gloves and avoid touching your face or eyes.
- Check your oven manual to see if the coils are removable or if there are special cleaning rules.
- Never spray water or cleaner directly onto electrical connections.
Non-obvious insight: Many beginners forget to check if their oven is still hot, leading to burns. Always wait at least 30 minutes after turning it off. Also, some ovens have a “child lock” or a safety switch—make sure these are engaged before starting.
Step-by-step Guide: Cleaning Electric Oven Heating Coils
Cleaning electric oven coils is straightforward if you follow these steps. Take your time and don’t rush.
1. Unplug And Cool Down
First, unplug your oven from the wall socket. If your oven is hard-wired, turn off the power at the breaker. Wait until the coils are completely cool.
2. Remove Loose Debris
Wipe away any loose crumbs or food particles with a dry cloth or paper towel. This makes the wet cleaning step easier.
3. Remove The Coils (if Possible)
Most electric ovens allow you to gently lift and pull out the heating coils. If you’re unsure, check your manual. Never force them—if they don’t come out easily, clean them in place.
- Gently lift the coil and pull it toward you.
- Disconnect the coil from the socket (do not twist or bend).
- Lay the coil on a towel.
Non-obvious insight: Some ovens have a small screw or clip holding the coil in place. Use a screwdriver if needed, but keep all parts together for reassembly.
4. Apply The Cleaning Solution
For Light Cleaning:
- Mix a few drops of dish soap with warm water.
- Dip a cloth in the solution and wipe the coil.
For Heavy Buildup:
- Make a paste with baking soda and water (3 parts baking soda, 1 part water).
- Spread the paste on the coil and let it sit for 10–15 minutes.
- Spray vinegar over the paste. It will fizz and help break down grime.
5. Scrub Gently
Use a soft brush or an old toothbrush to scrub away sticky spots. Be gentle—scratching the coil can damage it.
6. Rinse And Dry
Wipe the coil with a clean, damp cloth to remove all cleaner and residue. Dry completely with a paper towel. Never leave the coil wet—moisture can cause electrical problems.
7. Reinstall And Test
Once the coils are dry, carefully reconnect them. Plug the oven back in and turn it on briefly to check that everything works.
Cleaning Oven Coils Without Removal
Sometimes, oven coils can’t be removed, or you may prefer not to. Here’s how to clean them in place:
- Place a towel under the oven to catch drips.
- Wipe coils with a damp, soapy cloth.
- For stubborn grime, use baking soda paste and let it sit.
- Scrub gently with a brush.
- Wipe with a clean, damp cloth.
- Dry with paper towels.
Never pour water directly onto the coils. This can damage the oven’s electrical system.
Special Instructions For Gas Oven Burners
Gas ovens do not have electric coils, but they have burners that need cleaning. Always turn off the gas supply before you start.
- Remove the oven racks.
- Wipe the burner area with a damp cloth.
- Use a toothbrush to clean around burner holes, where food often gets stuck.
- If the burner is removable, soak it in soapy water for 20 minutes.
- Rinse and dry completely before reinstalling.
- Never use harsh chemicals—they can damage the burner.
If you notice a yellow flame or uneven heating after cleaning, you may have blocked a burner hole. Use a small needle to clear it, or call a professional.
Cleaning The Area Around The Coils
Don’t forget to clean the area around the coils. Grease and crumbs often collect here.
- Wipe the oven floor and sides with warm, soapy water.
- For stuck-on stains, use a baking soda paste.
- Avoid getting water into any electrical parts.
Regular cleaning here prevents buildup from reaching the coils.
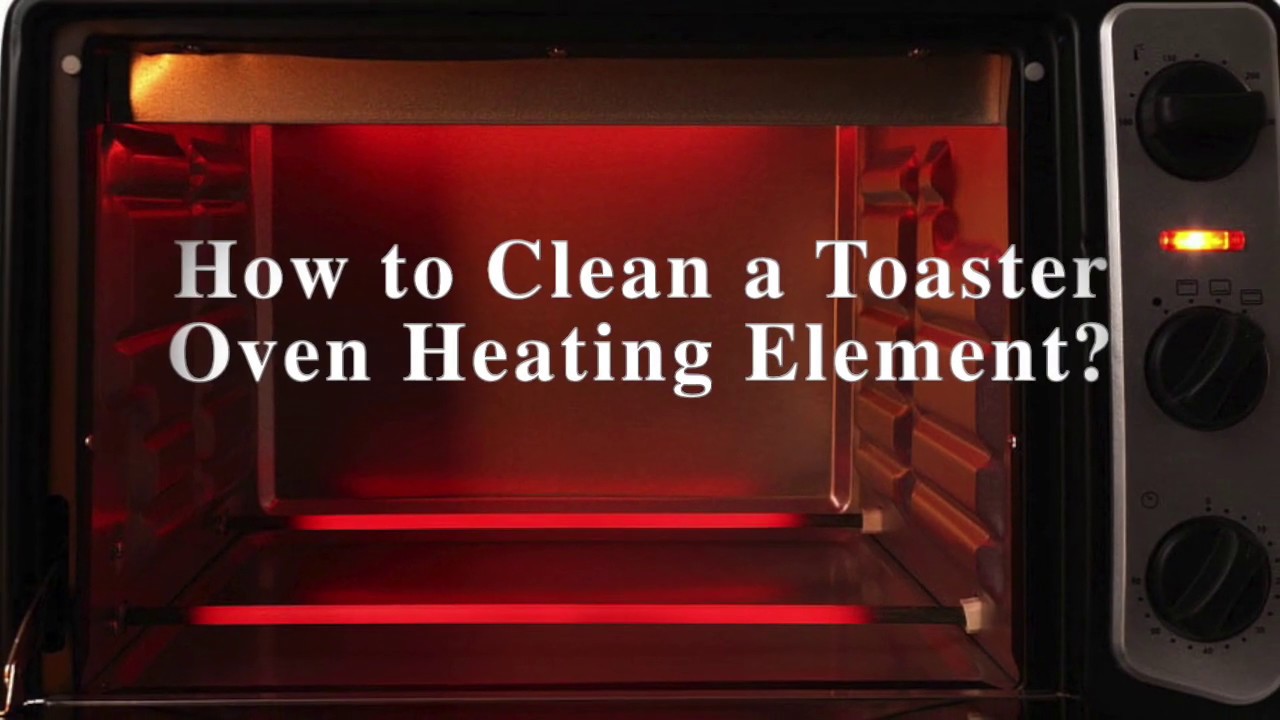
Credit: www.youtube.com
Comparing Cleaning Methods
Different cleaning methods work for different levels of grime. Here’s a quick comparison to help you choose:
| Cleaning Method | Best For | Time Needed | Safety |
|---|---|---|---|
| Dish Soap & Water | Light grease | 10–15 minutes | Very safe |
| Baking Soda & Vinegar | Moderate grime | 20–30 minutes | Safe, natural |
| Commercial Oven Cleaner | Heavy, burnt-on spills | 30–60 minutes | Check safety instructions |
For most people, dish soap or baking soda is enough and much safer than commercial cleaners.
How Often Should You Clean Heating Coils?
Regular cleaning keeps your oven efficient and safe. Here’s a simple guideline:
- Light oven use (1–2 times/week): Clean every 3–4 months.
- Regular use (3–5 times/week): Clean every 2 months.
- Heavy use (daily): Clean once a month, or after major spills.
If you bake often or roast greasy foods, check the coils more often.
Signs Your Oven Coils Need Cleaning
Don’t wait until your oven smokes! Look for these signs:
- Smoke when you preheat
- Burnt smell during baking
- Uneven cooking or browning
- Visible black or brown spots on the coils
- Food residue on or near the coils
If you notice any of these, it’s time to clean.
Mistakes To Avoid When Cleaning Oven Heating Coils
Many beginners make small errors that can cause big problems. Watch out for these common mistakes:
- Cleaning hot coils: Wait until they are fully cool to avoid burns.
- Using harsh chemicals: Some cleaners can damage the metal or create toxic fumes.
- Scrubbing with metal pads: This scratches the surface and may break the coil.
- Getting water into electrical parts: Only use damp (not wet) cloths.
- Not drying coils before use: Water can cause short circuits or electric shocks.
- Forcing coils out: If coils don’t come out easily, clean them in place.
Always read your oven’s manual before using any new cleaning method.
Maintenance Tips For Long-lasting Coils
A few simple habits can keep your heating coils in good shape for years:
- Wipe spills right away: Don’t let food bake onto the coils.
- Use oven liners: Place a liner or foil on the lower rack (never directly on the oven floor or coils) to catch drips.
- Avoid overloading: Heavy pans can bend the coils.
- Check for damage: If you see cracks or burns on the coil, replace it.
- Run the self-clean cycle (if available): Some ovens have a self-cleaning mode, but always check if it’s safe for the coils.
Comparing Electric And Gas Oven Coil Cleaning
Some key differences between cleaning electric and gas oven heating elements are worth noting:
| Feature | Electric Oven | Gas Oven |
|---|---|---|
| Type of Element | Exposed metal coil | Hidden burner |
| Cleaning Method | Wipe, mild cleaner | Damp cloth, toothbrush |
| Removal Possible | Often removable | Usually fixed |
| Common Problems | Burnt-on spills | Clogged holes |
Knowing your oven type helps you avoid mistakes and choose the right cleaning method.
When To Replace Oven Heating Coils
Even with regular cleaning, coils can wear out over time. Signs that it’s time to replace them include:
- Visible cracks or breaks in the coil
- Uneven heating (some areas stay cold)
- Sparking or electrical noises
- Frequent smoking even after cleaning
- Discoloration (blue or white patches)
Replacing a coil is usually easy and much cheaper than buying a new oven. Always buy the correct part for your oven’s model.
The Role Of Regular Oven Maintenance
Cleaning the coils is only one part of oven care. Regular maintenance can prevent big problems:
- Clean oven racks: Greasy racks can transfer dirt to the coils.
- Check door seals: Bad seals let heat (and smoke) escape.
- Vacuum crumbs: Use a small vacuum to clean under and behind the oven.
- Inspect wiring: If you see any damaged wires, call a professional.
According to the US Department of Energy, well-maintained ovens use up to 20% less energy, saving you money on your electric bill.

Credit: www.wikihow.com
Eco-friendly Cleaning Tips
If you prefer natural cleaning, baking soda and vinegar are your best friends. They cut through grease without harming the environment or your oven.
- Baking soda paste: Apply, let sit, and scrub gently.
- Vinegar spray: Cuts through odors and helps rinse away baking soda.
- Lemon juice: Freshens the oven and removes mild stains.
Avoid single-use wipes or harsh chemicals that can damage your oven and pollute your home.
Troubleshooting: If Your Oven Still Smokes
Sometimes, even after cleaning, your oven may still smoke. Try these steps:
- Check for hidden spills: Look under and behind the coils.
- Re-clean the coils: Use a baking soda paste for stubborn residue.
- Run the oven empty: Heat the oven to 400°F for 15 minutes to burn off any leftover cleaner.
- Inspect for coil damage: Replace if needed.
- Check the oven’s vent: Blocked vents can trap smoke.
If the problem continues, consult your oven’s manual or call a technician.
What Beginners Often Miss
Many people focus only on the visible parts of the coil, missing hidden grime under or behind them. Always check all sides of the coil for buildup. Another common oversight: reattaching coils before they are fully dry. Moisture trapped in the socket can cause electric shock or damage the oven.
Also, remember that coil cleaning is only part of oven care. Regularly cleaning the oven’s walls, racks, and door glass keeps your whole oven running smoothly and safely.
Professional Oven Cleaning: When To Call For Help
If you have heavy buildup, a very old oven, or you’re not comfortable with the steps above, a professional cleaning service can help. Professionals use special tools and know how to clean without damaging sensitive parts. While this costs more, it’s sometimes the safest choice, especially for commercial ovens or stubborn grime.
Typical cost: $100–$200 for a standard oven, depending on where you live.
Real-world Example: Oven Coil Cleaning Success
Consider the story of Linda, who bakes bread every week. She noticed her oven smoked and bread tasted burnt. After following the steps above—removing the coils, using a baking soda paste, and drying carefully—her oven stopped smoking, and her bread tasted fresh again. She now cleans her coils every two months and hasn’t had a problem since.
Useful Resources
For more detailed oven maintenance advice, visit the Wikipedia Oven Article for a deep dive into oven technology and cleaning tips.
Credit: www.reddit.com
Frequently Asked Questions
How Do I Know If My Oven Coils Are Safe To Clean?
Check your oven’s manual first. Most electric coils can be cleaned with mild soap or baking soda. If your manual says not to remove or clean the coils, follow those instructions to avoid damage.
Can I Use Oven Cleaner Spray On Heating Coils?
Most commercial oven cleaners are too harsh for coils and can cause damage or create toxic fumes. Use only mild cleaners or natural options like baking soda unless the oven’s manufacturer says otherwise.
What If I Can’t Remove The Coils?
Many ovens have fixed coils. In this case, clean them in place using a damp, soapy cloth and a baking soda paste for tough spots. Never force or bend the coils.
How Long Does It Take For Coils To Dry After Cleaning?
Let coils air dry for at least 30 minutes. You can speed up drying with a towel, but make sure no moisture remains before reconnecting or using the oven.
Why Does My Oven Smoke After Cleaning The Coils?
Leftover cleaner, moisture, or hidden grease can cause smoke. Run the oven empty at high heat for 15 minutes to burn off residues. If smoking continues, check for damaged coils or hidden spills.
Keeping your oven heating coils clean is a simple habit that pays off with better-tasting food, a safer kitchen, and a longer-lasting oven. With the right tools and a little care, anyone can master this essential kitchen skill.