If you love a good cup of coffee, your coffee maker is probably one of your most-used kitchen appliances. But over time, you may notice your coffee tastes odd, the machine is slower, or there’s white, chalky residue inside. This is often calcium buildup—also called limescale. It’s a problem for almost every coffee maker, whether it’s drip, single-serve, or espresso. Cleaning calcium buildup is not just about taste; it also protects your machine and extends its life. Let’s explore exactly how to tackle calcium buildup, why it happens, and the best ways to keep your coffee maker running smoothly.
Why Calcium Buildup Happens In Coffee Makers
Most tap water contains minerals like calcium and magnesium. When you heat water, these minerals leave deposits behind. Over time, these deposits build up, creating a hard, white film inside your coffee maker. This is especially common in areas with hard water (water with a high mineral content). The more you use your coffee maker, the more buildup you get.
Calcium buildup can cause several problems:
- Blocked water flow, making brewing slow or uneven
- Bitter or strange-tasting coffee
- Extra wear on your machine’s heating elements
- Shorter lifespan for your coffee maker
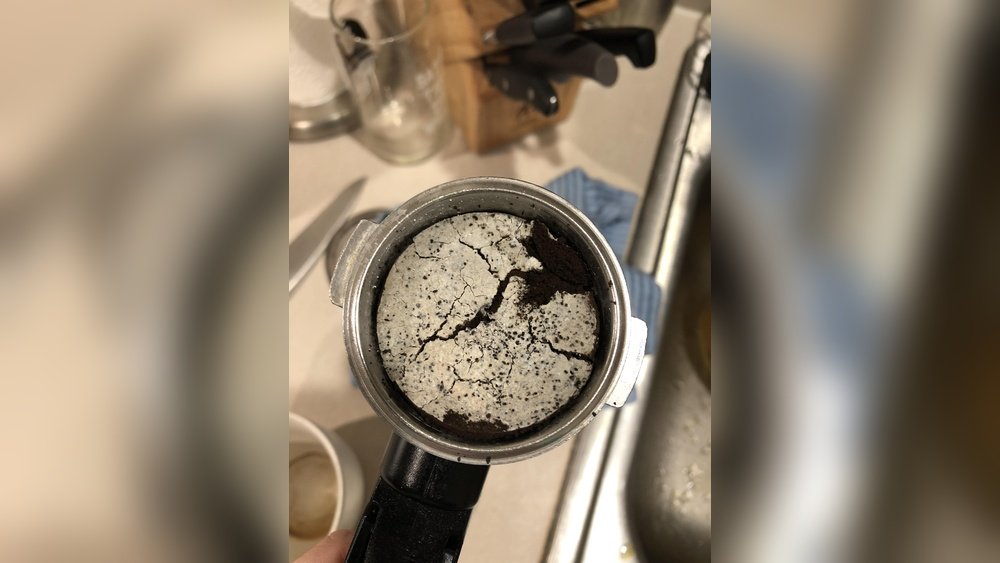
Many people don’t realize that even filtered water can have enough minerals to cause buildup. If you see white spots or chalky rings inside your coffee maker’s water reservoir or carafe, you likely have limescale.
Signs Your Coffee Maker Has Calcium Buildup
It’s not always easy to spot calcium buildup right away. Here are some signs to look for:
- Slower brewing time – Your machine takes longer than normal to brew a pot.
- Loud or unusual noises – You might hear gurgling or sputtering during brewing.
- White residue – Chalky spots appear inside the reservoir, carafe, or on removable parts.
- Bad taste – Coffee tastes bitter, metallic, or not as fresh.
- Water not reaching full temperature – Calcium on heating elements can prevent water from heating properly.
- Less coffee output – Your cup or carafe fills less than expected.
If you see any of these signs, it’s time for a cleaning.
How Often Should You Clean Calcium Buildup?
How often you need to clean depends on your water hardness and how much you use the machine. Here are some general guidelines:
- Soft water, light use: Every 3–4 months
- Hard water, daily use: Every 1–2 months
- Visible buildup or taste changes: Clean immediately
Some modern coffee makers have a cleaning light or alert. But don’t wait for the light—regular maintenance is key. If you’re unsure about your local water hardness, you can check with your utility company, or use a simple water hardness test strip (available online or in stores).
Essential Supplies For Cleaning Calcium Buildup
Before you start, gather these supplies:
- White vinegar (distilled) or a commercial descaling solution
- Water (preferably filtered or distilled for rinsing)
- Soft sponge or cloth
- Dish soap (mild)
- Toothbrush or soft brush for scrubbing small parts
- Measuring cup
- Paper towels or clean towels
Some coffee makers need special descaling products. Always check your machine’s manual for any manufacturer restrictions.

Credit: www.amazon.com
Step-by-step Guide: Cleaning Calcium Buildup With Vinegar
White vinegar is the most popular home remedy for calcium buildup. It’s cheap, safe, and effective. Here’s how to use it:
1. Empty And Prepare Your Coffee Maker
Remove any leftover coffee, used filters, or pods. Take out the carafe and wash it with soap and water.
2. Mix Vinegar And Water
Most coffee makers work well with a 1:1 ratio of white vinegar to water. For example, use 1 cup of vinegar and 1 cup of water. If the buildup is heavy, use more vinegar.
3. Pour The Mixture Into The Reservoir
Fill the water reservoir with the vinegar solution, up to the maximum fill line.
4. Start A Brew Cycle
Begin a brewing cycle as if you were making coffee (no filter or coffee grounds). Halfway through, pause the machine. Let the vinegar sit for 30–60 minutes. This soaking time helps break down stubborn calcium.
5. Complete The Brew Cycle
After soaking, restart the machine and finish the cycle. Discard the hot vinegar solution.
6. Rinse Thoroughly
Fill the reservoir with clean water and run at least 2–3 full brew cycles. This flushes out any vinegar taste and loosened minerals. Wash the carafe and any removable parts with soap and water.
7. Clean Exterior And Removable Parts
Wipe down the outside, lid, and removable pieces with a damp cloth or sponge. Use a toothbrush to scrub any tight spots with buildup.
8. Inspect And Repeat If Needed
If you still see white residue, repeat the vinegar process. Some machines with heavy buildup need several cycles.
Using Commercial Descaling Solutions
While vinegar works well, some manufacturers recommend commercial descalers. These products are made for removing calcium and limescale without damaging delicate parts or seals.
- Follow package instructions. Most require dissolving a measured amount in water.
- Fill the reservoir with the solution and run a brew cycle, pausing to let it soak if possible.
- Rinse with fresh water as you would with vinegar.
Commercial descalers tend to be less smelly than vinegar and may work faster on tough buildup. They’re especially useful for machines with aluminum parts, as vinegar can sometimes cause corrosion.
Cleaning Calcium Buildup In Different Types Of Coffee Makers
Every coffee maker is a little different. Here’s how to clean some of the most common types:
Drip Coffee Makers
These are the classic machines in most homes and offices. The vinegar method works perfectly here. Pay extra attention to the carafe and the filter basket, where minerals often collect. Scrub the shower head (where water comes out) with a toothbrush if possible.
Single-serve Machines (keurig, Nespresso)
For single-serve machines, use the same vinegar-water solution or a branded descaling pod. Run several brew cycles without a pod. Some machines have a descale mode—check your manual. Don’t forget to clean the needle or spout, which can clog easily.
Espresso Machines
Espresso makers often need special descalers. The internal pipes are small and can clog quickly. Always follow the manufacturer’s instructions. Clean the steam wand by running steam after every use and wiping it with a damp cloth.
French Press And Pour-over
These don’t have internal heating parts, but hard water can still leave marks. Soak the carafe or glass in vinegar, scrub, and rinse well.
Moka Pots And Percolators
Soak all parts in a vinegar solution, scrub inside tubes and spouts, then rinse. Avoid leaving vinegar in contact with aluminum for long periods.
Comparing Vinegar Vs. Commercial Descaler
Choosing between vinegar and commercial descaler depends on your machine, your preferences, and your budget. Here’s a direct comparison:
| Factor | White Vinegar | Commercial Descaler |
|---|---|---|
| Cost | Very low | Moderate to high |
| Smell | Strong vinegar odor | Mild or no odor |
| Effectiveness | Excellent for light to moderate buildup | Excellent for heavy buildup |
| Safety for machine | Not ideal for all metals (esp. aluminum) | Usually safe for all parts |
| Availability | Available everywhere | Specialty stores or online |
For most people, vinegar is a great first choice. If you use an expensive or specialty machine, or if your manual says not to use vinegar, pick a commercial descaler.

Credit: www.affresh.com
Alternative Methods To Remove Calcium Buildup
Vinegar and descalers are the most common, but there are other ways to tackle limescale:
- Lemon juice: Citric acid in lemon juice works like vinegar but smells better. Mix equal parts lemon juice and water, then follow the same steps as with vinegar. It’s gentler on some metals.
- Citric acid powder: Dissolve 1–2 tablespoons of citric acid in a full reservoir of water. Run a brew cycle and rinse thoroughly. Citric acid is available online and in some grocery stores.
- Baking soda: Not as effective for calcium buildup, but can help with odor and light cleaning. Mix 1/4 cup baking soda with 1 quart of water, run a cycle, and rinse.
Always check your coffee maker’s manual before using alternatives, as some methods may void warranties.
Preventing Calcium Buildup In The Future
Cleaning is important, but prevention makes your life easier. Here’s how to reduce calcium deposits:
- Use filtered or distilled water: This removes most minerals before they reach your machine.
- Empty water reservoir after each use: Standing water leaves more time for minerals to settle.
- Wipe and dry removable parts: After washing, dry the carafe, lid, and basket to stop hard water spots.
- Monthly quick rinse: Run plain water through the machine to flush out tiny deposits.
- Monitor for early signs: Don’t wait for major buildup. Clean at the first sign of residue or slow brewing.
Some people buy water softener pitchers or in-line filters for their coffee makers, especially in hard water areas.
How Hard Water Affects Coffee Taste And Machine Lifespan
The minerals in hard water don’t just cause buildup; they also change the way your coffee tastes. Calcium and magnesium can make coffee taste flat or bitter. If you use soft or distilled water, you may actually need to add a little mineral content for the best flavor.
But too much calcium leads to off-tastes and shorter machine life.
A study from the Specialty Coffee Association found that water quality is one of the biggest factors in coffee taste. Machines clogged with limescale often brew at lower temperatures, which makes coffee taste weak or sour.
Hard water also wears out heating elements, seals, and pumps faster. With regular cleaning, your machine will last longer and deliver better coffee every time.
What Happens If You Ignore Calcium Buildup?
It can be tempting to skip cleaning, especially if your coffee maker seems to be working fine. But here’s what can go wrong:
- Permanent damage to heating elements: Buildup acts like insulation, forcing parts to overheat.
- Clogged pipes and valves: Water can’t flow properly, leading to leaks or total failure.
- Higher energy use: The machine works harder to heat water through limescale.
- Health risks: Old deposits can harbor bacteria or mold.
- Worse coffee: Bitter, off-flavored coffee that wastes your favorite beans.
Sometimes, ignoring limescale voids your warranty. The cost of a replacement is much higher than regular cleaning.
Coffee Maker Maintenance Schedule For Best Results
A simple schedule helps you avoid buildup and keep your machine in top shape. Here’s a sample routine:
| Task | Frequency |
|---|---|
| Rinse carafe and removable parts | After every use |
| Wipe reservoir and exterior | Weekly |
| Descale (vinegar or commercial) | Every 1–3 months |
| Replace water filter (if equipped) | Every 2 months |
| Deep clean (disassemble as possible) | Every 6 months |
Stick to this routine and you’ll enjoy better coffee and a longer-lasting machine.
Common Mistakes When Cleaning Calcium Buildup
Even well-meaning coffee lovers can make mistakes that reduce cleaning effectiveness or harm their machines. Watch out for these:
Using Too Much Vinegar
More is not always better. Using pure vinegar instead of a diluted mix can damage rubber seals or leave a strong smell. Stick with a 1:1 mixture.
Not Rinsing Properly
If you don’t run enough clean water cycles after descaling, your coffee may taste like vinegar or chemicals. Always rinse at least twice, more if needed.
Skipping The Pause Step
Letting the vinegar or descaler sit in the machine helps dissolve stubborn buildup. If you run the cycle straight through, you’ll miss this benefit.
Ignoring The Manual
Some machines need special care or specific products. Not following the instructions can void warranties or cause damage.
Forgetting Small Parts
Needles, filter baskets, and spouts often trap minerals. Take these out and scrub them with a brush.
Waiting Too Long Between Cleanings
The longer you wait, the harder it is to remove buildup. Regular, gentle cleaning is easier than tackling a big mess.
Credit: nuvoh2o.com
Real-world Example: Cleaning A Heavily Scaled Coffee Maker
Let’s look at a real example. Anna, a busy office worker, used her drip coffee maker daily for two years without descaling. She noticed her coffee tasted bad, and brewing took twice as long.
Here’s what she did:
- Mixed 2 cups white vinegar with 2 cups water and poured it into the reservoir.
- Started the brew cycle, paused halfway, and let it soak for 45 minutes.
- Finished brewing, then repeated with a fresh vinegar mix.
- Scrubbed the carafe and filter basket with a toothbrush.
- Ran four full cycles of clean water to rinse.
It took two full cleaning cycles to remove all the buildup. Afterward, her machine brewed faster, coffee tasted better, and she saved money by not buying a new coffee maker.
When To Replace Versus Clean
Sometimes, cleaning is not enough. If you notice these problems even after deep cleaning, it may be time for a new machine:
- Leaking water or damaged seals
- Heating element won’t reach temperature
- Internal pipes completely clogged
- Plastic parts cracking or breaking
A quality coffee maker can last 5–10 years with good care, but only if you keep up with cleaning.
Environmental Impact: Vinegar Vs. Descaler
Many people wonder about the environmental impact of cleaning products. White vinegar is biodegradable and safe for most septic systems. Commercial descalers vary: some are eco-friendly, others contain harsher chemicals.
If you care about the environment, stick with vinegar, citric acid, or certified green descalers. Always dispose of cleaning water down the drain with plenty of fresh water to dilute any residue.
Extra Tips For Coffee Maker Care
- Store your coffee maker dry: If not used daily, leave the lid open to help parts dry out and prevent mold.
- Inspect the cord and plug: Look for wear or frayed wires to avoid electrical problems.
- Replace filters regularly: If your machine has a charcoal water filter, change it as often as the manual suggests.
- Avoid flavored or sugary additives: These can cause extra buildup or clog parts.
- Keep the machine in a cool, dry place: Excess humidity encourages mold and mineral deposits.
Frequently Asked Questions
What Is The Best Way To Remove Calcium Buildup From My Coffee Maker?
The best method is a 1:1 mix of white vinegar and water. Run it through a brew cycle, pause to soak, then rinse with fresh water. For machines with sensitive parts or heavy buildup, use a commercial descaler recommended by the manufacturer.
How Do I Know If My Coffee Maker Needs Descaling?
Look for signs like slower brewing, strange noises, white residue, or bad-tasting coffee. Some machines have a cleaning indicator light. If you live in a hard water area, regular descaling is a must.
Can I Use Lemon Juice Instead Of Vinegar For Cleaning?
Yes, lemon juice works because it contains citric acid, which breaks down calcium. Mix it with water just like vinegar. It smells better and is gentle on metals, but may cost more if you need a lot.
Is It Safe To Use Vinegar In All Coffee Makers?
Vinegar is safe for most coffee makers, but not all. Some machines (especially with aluminum parts) may be damaged by strong acids. Always read your manual or check the brand’s website for advice.
How Can I Reduce Calcium Buildup If I Have Hard Water?
Use filtered or distilled water when brewing, empty the reservoir after each use, and clean your machine every 1–2 months. Consider a water softener or an in-line filter for best results.
For more about water hardness and coffee, see the Wikipedia page on water hardness.
Keeping your coffee maker free from calcium buildup is simple, protects your investment, and gives you delicious coffee every day. With the right cleaning routine and a few smart habits, you’ll enjoy better brews and a machine that lasts for years.