Keeping a plastic grinder clean is more than just a matter of looking tidy. When you use a grinder for herbs, spices, or even coffee, residue builds up fast. Over time, this sticky buildup can slow the device, affect the flavor, and even lead to bacteria growth. Many people underestimate how dirty a grinder can get, and some even throw theirs away when it gets tough to turn. The truth is, cleaning a plastic grinder is simple, safe, and extends its lifespan. With the right methods and a bit of care, you’ll enjoy smoother grinding, fresher results, and fewer replacements.
This guide covers every angle. You’ll learn why cleaning matters, how often to do it, what supplies to use, and step-by-step cleaning methods. We’ll also look at common mistakes, special care tips, and what to do if your grinder is really dirty or stuck.
Whether you use your grinder daily or only once a month, you’ll find practical advice and expert insights to keep it in top shape.
Why Clean Your Plastic Grinder?
A lot of people only think about cleaning their grinder when it stops working well. But there are several good reasons to stay ahead:
- Better performance: Sticky residue makes grinding harder and less effective. Over time, you may notice that the grinder no longer turns smoothly or gets jammed, making it frustrating to use. Regular cleaning restores smooth movement.
- Fresher flavors: Old particles can mix with new material, changing the taste or smell. For coffee lovers, this means your fresh beans could pick up a musty taste from leftover herbs or spices. Even a small amount of old residue can overpower delicate flavors.
- Health safety: Damp residue can encourage mold or bacteria. If you live in a humid area, moisture can collect inside the grinder, especially if it’s left closed. This creates a perfect environment for bacteria or mold to grow—something you definitely don’t want in your food.
- Longer grinder life: Regular cleaning prevents cracks and wear from built-up gunk. When residue gets hard, it puts more stress on the plastic parts, which can lead to breaks or chips.
Non-obvious insight: If you notice an odd taste or a rough texture, it may be your grinder, not your herbs or coffee. Even plastic can absorb and transfer flavors if not cleaned regularly. Many people believe only metal or wood holds flavor, but plastic can easily pick up strong scents or oils, especially if left dirty for weeks.
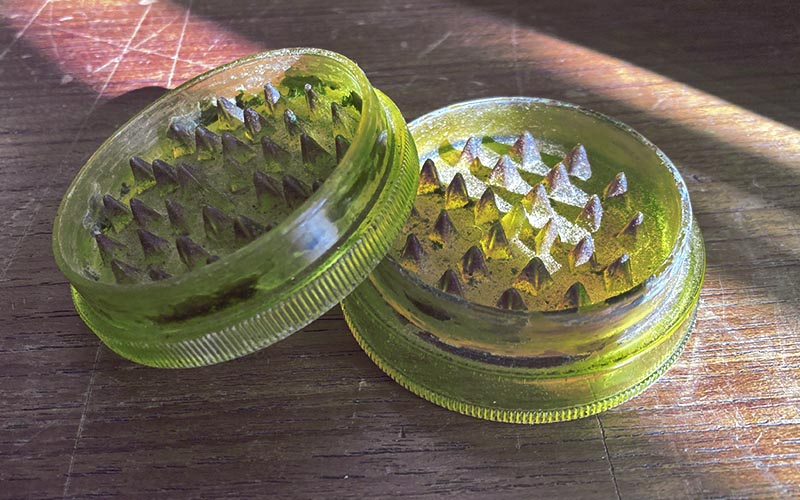
Another overlooked reason: Some herbs, like basil or cilantro, release oils that can stain or change the color of clear plastic grinders. Regular cleaning keeps your grinder looking clear and new.
How Often Should You Clean A Plastic Grinder?
The frequency depends on what you grind and how often you use it:
- Daily use (herbs or spices): Deep clean every 1-2 weeks; quick clean after each use. A fast brush and wipe after each use prevents buildup and makes deep cleaning much easier.
- Occasional use (monthly or less): Clean after every 2-3 uses. Even if you use it rarely, don’t let residue sit for months.
- Oily or sticky materials: Clean more often; these leave more residue. If you grind things like rosemary, thyme, or peppercorns, you’ll notice more oil and stickiness.
A quick visual check helps—if you see sticky buildup or the grinder feels stiff, it’s time for a clean. Remember, regular maintenance avoids big cleaning jobs later.
Non-obvious insight: Even if your grinder looks clean on the outside, small bits can hide under the teeth or inside grooves. If you’re unsure, twist the grinder a few times with nothing inside and check for resistance. If it doesn’t feel smooth, it’s probably time for a cleaning.
What You Need: Cleaning Supplies
You don’t need expensive products. Here’s what works best:
- Mild dish soap (avoid harsh chemicals). Dish soap is gentle and safe for most plastics, but always rinse well to remove any soap smell.
- Warm water
- Old toothbrush or small brush. The bristles get into tight spaces around the teeth and threads.
- Cotton swabs or toothpicks. Great for tiny crevices or corners.
- Paper towels or clean cloths. Microfiber cloths are especially good for drying.
- Small bowl or container
- Freezer (optional, for stuck residue)
- Isopropyl alcohol (optional, for tough grime—use only on non-painted plastic)
Non-obvious tip: Never use boiling water with plastic. It can warp or damage your grinder.
Another detail: If you want to avoid chemicals completely, you can also use baking soda as a gentle scrubbing powder. It helps remove stains and odors without scratching.
Preparing Your Grinder For Cleaning
Start by taking apart your grinder. Most plastic grinders come in two or three pieces—top, bottom, and sometimes a kief catcher. Remove any material inside. Tap the grinder over a paper towel to shake out loose bits.
If your grinder is very sticky:
- Place it in the freezer for 30–45 minutes. Cold makes residue brittle and easier to brush away.
- After freezing, gently tap and brush out as much as you can before washing.
Non-obvious insight: When removing the screen or kief catcher, do it over a clean surface. These parts are delicate and easy to drop or lose. Also, small pieces of herbs can be saved for later use.
Some grinders have a magnetic center. If yours does, check for any metal shavings or rust, especially if you’ve used water to clean it in the past.
Step-by-step: How To Clean A Plastic Grinder
Cleaning can be quick or deep, depending on how dirty your grinder is. Let’s break it down:
Quick Cleaning (for Light Use)
- Disassemble all parts.
- Use a dry brush or toothbrush to sweep out powder and residue.
- For stubborn bits, use a toothpick to scrape gently.
- Wipe with a damp cloth or paper towel.
- Reassemble and use as normal.
Quick cleaning is ideal if you use your grinder daily and don’t want to deep clean every time.
Advanced tip: For very fine powder, a can of compressed air can help blow out dust from tight spots. Just make sure to do this over a trash can or outside, as fine particles can get messy.
Deep Cleaning (for Heavy Buildup)
- Take apart all sections of the grinder.
- Brush out as much dry material as possible.
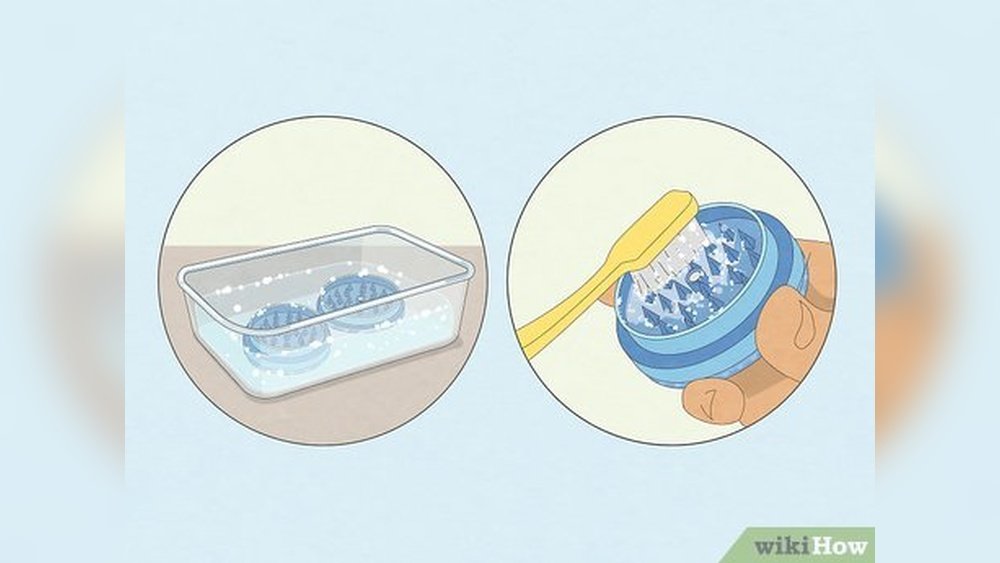
- Fill a bowl with warm, soapy water (a few drops of mild dish soap).
- Place all parts in the water. Let soak for 15–20 minutes.
- Use a toothbrush or small brush to scrub all surfaces, paying extra attention to the teeth and grooves.
- For tight spots, use cotton swabs or toothpicks.
- Rinse each part under running warm water.
- Dry thoroughly with a cloth or paper towel. Let air dry for 30 minutes before reassembling to prevent moisture buildup.
Non-obvious insight: Never rush drying. Water left in a plastic grinder can lead to mold, even if you don’t see it.
Extra tip: If you want to speed up drying, place the parts near a fan or in a sunny window, but avoid direct heat. Too much heat can warp plastic.
Extra Tough Cleaning (for Sticky Or Stuck Grinders)
Sometimes residue is so sticky that normal washing doesn’t work. Here’s what to do:
- Place the grinder in the freezer for at least 1 hour.
- Once cold, use a toothbrush and toothpick to remove as much as possible.
- If residue remains, soak the pieces in a mix of isopropyl alcohol and water (1: 1 ratio) for 10–15 minutes. (Only for unpainted or non-decorated plastic.)
- Scrub again, rinse with water, and dry well.
Be careful: Some plastics react badly to alcohol. Test a small area first.
Non-obvious insight: If your grinder has a strong smell even after cleaning, try leaving it open overnight in a well-ventilated space. Sometimes, fresh air is the best solution for lingering odors.
How To Clean A Grinder Screen Or Kief Catcher
Many plastic grinders come with a screen to catch fine material (kief). These screens clog easily.
- Remove the screen carefully if possible. Some are press-fit, others are screwed in.
- Tap gently to remove loose powder.
- Use a soft brush or paintbrush to sweep away fine particles.
- For heavy buildup, soak the screen in warm, soapy water, then brush gently.
- Dry completely before putting back.
Never use sharp objects on the screen—this can tear or warp the mesh.
Advanced tip: If the screen is especially clogged, you can use a soft-bristled toothbrush dipped in baking soda paste (baking soda plus a little water) to gently scrub. Rinse well afterward.
Credit: www.alibongo.co.uk
Cleaning Tips For Different Types Of Plastic Grinders
Not all plastic grinders are the same. Here’s how to adjust your cleaning based on the type:
Clear Acrylic Grinders
- Scratches easily—use soft brushes only. Avoid anything abrasive.
- Avoid alcohol or harsh cleaners; these can cloud the plastic. If you need to remove tough stains, use a paste of baking soda and water, but rub gently.
- Store away from direct sunlight, as UV can yellow or cloud clear plastic over time.
Colored Or Decorated Grinders
- Painted designs can fade with alcohol or strong scrubbing. Always hand wash and avoid soaking for long periods.
- Use only mild soap and water.
- If your grinder has stickers or decals, avoid soaking that area or gently clean around it.
Multi-chamber Grinders
- Clean each section separately.
- Watch for hidden residue under screens or in corners. Use a cotton swab to get into tight spaces.
- If possible, label each part during disassembly to make reassembly easier, especially if your grinder has many small pieces.
Non-obvious insight: Some plastic grinders have rubber gaskets or seals. Remove and clean these separately, and make sure they are completely dry before reinserting.
What Not To Do When Cleaning A Plastic Grinder
Mistakes can damage your grinder. Avoid these common errors:
- Don’t use boiling water: It can warp plastic.
- Don’t use sharp knives or metal picks: These scratch and weaken the material.
- Don’t soak for hours: Extended soaking can make plastic brittle.
- Don’t reassemble wet: Moisture causes mold and sticky buildup.
Non-obvious tip: Avoid citrus-based cleaners. These can react with some plastics and leave a sticky film.
Another thing to avoid: Don’t use dishwashing machines unless the grinder is labeled as dishwasher safe. Most home dishwashers get too hot and can melt or deform plastic parts.
Comparing Cleaning Methods: Pros And Cons
Choosing the right cleaning method depends on how dirty your grinder is and what materials you have.
| Method | Best For | Pros | Cons |
|---|---|---|---|
| Dry Brushing | Light residue, daily use | Fast, no drying time | Misses sticky spots |
| Soapy Water | Moderate dirt | Safe, easy, deep clean | Needs drying time |
| Isopropyl Alcohol | Heavy, sticky buildup | Removes tough grime | Can damage decorated plastic |
| Freezing | Stuck residue | Loosens sticky mess | Extra time needed |
Non-obvious insight: Mixing methods (for example, freezing before brushing, then using soapy water) can be much more effective than using just one method, especially on grinders that haven’t been cleaned in a long time.
How To Know If Your Grinder Needs Replacement
Sometimes cleaning isn’t enough. Here are signs your plastic grinder should be replaced:
- Cracks or chips in the plastic. These can trap dirt and bacteria and make the grinder unsafe.
- Teeth are broken or worn down. Without sharp teeth, grinding becomes slow and uneven.
- Grinder does not close tightly. This can cause leaks and spills.
- Persistent odors or stains after cleaning.
If you see these signs, it’s safer and more effective to get a new grinder.
Extra insight: If you notice white powder or flakes after cleaning, the plastic itself may be breaking down. This is a clear sign to replace, as ingesting plastic is unhealthy.
How To Keep Your Plastic Grinder Clean Longer
Regular cleaning is important, but you can also prevent buildup:
- Tap out all material after each use. This prevents compacted layers from forming.
- Store in a dry place; moisture leads to sticky buildup and can attract dust.
- Avoid grinding very wet or oily herbs. If you must, clean soon after.
- Use a soft brush every few days to sweep out particles.
- Clean screens before they clog.
Non-obvious tip: Lightly dust the teeth with a bit of dry rice powder before first use—this can reduce sticking. Some people also use cornstarch, but rice powder is less likely to clump.
Another useful habit: Keep your grinder in a small sealed bag or box when not in use. This keeps dust and kitchen grease away and helps it stay clean longer.
Cleaning A Plastic Grinder Vs. Metal Grinder: Key Differences
Many people own both plastic and metal grinders. Here’s how cleaning differs:
| Feature | Plastic Grinder | Metal Grinder |
|---|---|---|
| Heat Resistance | Low | High |
| Alcohol Safe | Sometimes (test first) | Almost always |
| Prone to Scratches | Yes | No |
| Rust Issues | No | Possible if not dried |
| Typical Lifespan | 1–2 years | 5+ years |
Non-obvious insight: Some metal grinders have a coating (like anodized aluminum). If scratched, these can react with acidic foods. With plastic, the main risk is scratching, which makes cleaning harder over time.

Credit: redeyemonkey.com
Troubleshooting Common Problems
Even with regular cleaning, you might run into problems. Here’s how to solve them:
Grinder Is Hard To Turn
- Check for sticky residue around the teeth. Even a thin layer can cause tightness.
- Freeze, then brush out debris.
- Apply a tiny amount of food-safe oil to the threads (wipe off excess). Coconut oil works well, but use very little and wipe thoroughly.
Bad Smells After Cleaning
- Soak in warm, soapy water with a spoonful of baking soda for 30 minutes. Baking soda neutralizes most smells.
- Air out completely before use.
Residue Won’t Come Off
- Try a second round of freezing and brushing.
- Use a toothpick for tight spots, but don’t force it.
- For stubborn stains, make a paste with baking soda and a few drops of water, rub gently, then rinse.
Grinder Feels Loose Or Wobbly
- Check for worn threads or cracks. If found, replace the grinder.
- Sometimes debris stuck in the threads makes it feel loose—clean threads with a cotton swab.
Non-obvious insight: If your grinder squeaks when turning, it’s often a sign of dryness or plastic-on-plastic friction. A tiny dab of food-safe oil on the outer threads can help, but never use too much.
Environmental Impact: Cleaning Vs. Replacing
Plastic grinders are cheap, but not eco-friendly. Regular cleaning keeps them out of landfills. A well-cared-for plastic grinder can last years—reducing plastic waste.
When you do replace a grinder, look for recycling options. Some communities accept #5 plastics. Clean the grinder before recycling.
For more on plastics and recycling, see the US Environmental Protection Agency.
Non-obvious insight: If your grinder is still usable but you want to upgrade, consider donating it to someone who can use it for crafts, spices, or non-food purposes.

Credit: www.smokecartel.com
Advanced Cleaning: Using Ultrasonic Cleaners
If you have access to an ultrasonic cleaner (often used for jewelry), this can be a powerful way to deep-clean a plastic grinder:
- Place disassembled parts in the cleaner with warm, soapy water.
- Run the cleaner for 3–5 minutes.
- Rinse and dry as usual.
Warning: Not all plastics are suitable. Test on a small section if unsure.
Non-obvious insight: Ultrasonic cleaners use sound waves to create tiny bubbles that remove dirt even from tiny cracks. This is especially helpful if you have a multi-chamber grinder with hard-to-reach places.
When To Use Each Cleaning Method
Choosing the right cleaning method saves time and keeps your grinder in good shape. Here’s a simple guide:
| Situation | Best Method | Frequency |
|---|---|---|
| Daily use, light residue | Dry brush and wipe | Every 1–2 days |
| Sticky or oily herbs | Soapy water soak | Weekly |
| Deep stains or odors | Baking soda soak | As needed |
| Hard-to-remove buildup | Freeze, then brush | As needed |
| Multi-chamber grinder | Disassemble, clean all parts | Monthly |
Non-obvious tip: Rotate between cleaning methods to match what you grind. For example, after grinding fresh basil, use a soapy water soak, but for dry herbs, a quick brush might be enough.
Do’s And Don’ts For Long-term Care
Do:
- Clean regularly to avoid hard cleaning jobs.
- Use only mild soap and water unless you’re sure plastic is alcohol-safe.
- Dry completely before reassembling.
- Store in a dry, clean place.
Don’t:
- Use harsh chemicals or abrasives.
- Force stuck parts open—freeze instead.
- Leave your grinder wet or dirty for long periods.
Non-obvious insight: Make a habit of cleaning your grinder at the same time you clean other kitchen tools. This way, it becomes a routine and you’re less likely to forget.
Real-world Example: Cleaning A Stubborn Grinder
Let’s say you have a grinder that’s hard to twist and coated in sticky residue. Here’s how you’d solve it:
- Freeze for 45 minutes.
- Tap out any loose material.
- Soak in warm, soapy water for 20 minutes.
- Scrub with a toothbrush, focusing on the teeth and threads.
- For leftover sticky spots, use a cotton swab with a drop of isopropyl alcohol (test plastic first).
- Rinse well, dry fully, and check for smell or residue before using.
With this method, even an old, tough grinder often feels brand new.
Extra tip: If the grinder still feels sticky after all these steps, leave it open to air out for a few hours. Sometimes, what remains is just a little moisture or odor that needs time to disappear.
Frequently Asked Questions
How Do I Know If My Plastic Grinder Is Dishwasher Safe?
Most plastic grinders are not dishwasher safe. The high heat can warp or melt plastic parts. Always check the manufacturer’s instructions. When in doubt, hand wash with warm, soapy water.
Non-obvious insight: If your grinder has a cloudy or warped appearance after a dishwasher cycle, it’s probably been heat-damaged. In this case, replace it to avoid plastic breakdown or contamination.
Can I Use Vinegar To Clean My Plastic Grinder?
Vinegar is safe for most plastics and helps remove odors. Mix equal parts vinegar and water, soak parts for 15 minutes, then scrub and rinse. Avoid if your grinder has metal parts, as vinegar can cause corrosion.
Tip: Rinse thoroughly after using vinegar, as the smell can linger if not washed out completely.
Is It Safe To Use Isopropyl Alcohol On All Plastic Grinders?
Not all plastics are alcohol safe. Alcohol can cloud, crack, or weaken some plastics. Test a small, hidden spot first. Never use on decorated, painted, or soft plastic grinders.
Non-obvious insight: For tough sticky spots, use a cotton swab with a little alcohol just on the affected area, rather than soaking the whole part.
How Can I Keep My Grinder From Getting Sticky?
Prevention is key. Clean regularly, avoid grinding very wet or oily herbs, and store your grinder in a dry place. You can also use a brush to remove residue after each use.
Another tip: Use a lint-free cloth to wipe the grinder after each use to remove oils before they harden.
What Should I Do If The Teeth In My Grinder Are Dull?
If teeth are dull or worn, grinding will be less effective. Unfortunately, you can’t sharpen plastic teeth. If cleaning doesn’t help, it’s time to replace the grinder.
Non-obvious insight: With very old grinders, dull teeth may also mean the plastic is starting to degrade or become brittle. This is a sign to upgrade for both performance and safety.
Keeping your plastic grinder clean doesn’t have to be a chore. With these methods, you’ll enjoy better performance, fresher results, and a longer-lasting tool. A little regular care saves time, money, and hassle—so make grinder cleaning part of your routine.