If your gas stove isn’t igniting properly, or you smell gas when you try to cook, the wiring could be the problem. Many people think only experts can fix a gas stove. But with the right guidance and safety steps, you can change the wire in your gas stove at home.
This article will show you how to do it safely and confidently, even if you’re not a professional. You’ll also learn what to check before starting, which tools you need, and important safety tips that most beginners overlook.
Understanding Gas Stove Wiring
A gas stove uses wires to connect the ignition system, knobs, and sometimes lights or timers. These wires carry electrical power to spark the burners and keep safety systems working. If any wire is damaged, your stove may stop working, or worse, become dangerous. Common signs of faulty wiring include clicking sounds without ignition, burners not lighting, or a mild electric shock when you touch the stove.
Most modern gas stoves have:
- Ignition wire (for sparking the burner)
- Power wire (main supply)
- Ground wire (safety ground)
- Sensor wires (for flame detection, in advanced models)
It’s important to identify which wire is faulty before replacing anything. Replacing the wrong wire can make things worse and is a waste of time.
When Should You Change The Wire?
You should consider changing the wire in your gas stove if:
- Burners won’t ignite even with clicking sound.
- Visible wire damage like burns, cuts, or melted insulation.
- Short-circuiting or tripped circuit breakers when using the stove.
- Unusual smells, especially burning or plastic.
- Spark plug not working or only some burners work.
If you see any of these signs, it’s safer to replace the wire rather than wait for a bigger problem.
Tools And Materials You Will Need
Changing a wire in a gas stove is simple if you have the right tools. Don’t start without gathering these items:
- Screwdrivers (Phillips and flathead)
- Wire cutter/stripper
- Multimeter (for checking voltage and continuity)
- Insulation tape
- Replacement wire (heat-resistant, suitable gauge)
- Protective gloves
- Flashlight
- Wrench (for some stove models)
- Cable ties (for neat wiring)
- User manual (for wiring diagram)
Using the wrong type of wire is a common mistake. Only use heat-resistant, copper wires rated for kitchen appliances. The user manual or label inside the stove usually lists the correct gauge and type.
Safety Precautions Before Starting
Gas stoves mix electricity and gas, so safety is your top priority. Here’s what you must do before you begin:
- Switch off the stove and unplug from the wall socket.
- Close the main gas valve to stop gas flow.
- Wait 5-10 minutes after turning off gas, to let any leftover gas escape.
- Work in a well-ventilated area. Open windows and doors.
- Keep a fire extinguisher nearby, rated for electrical and gas fires.
- Wear insulated gloves and avoid wet hands.
- Never use a flame to check for leaks later—only soapy water.
Missing any of these steps can cause electric shock, fire, or gas leaks. Take your time on safety.
Step-by-step Process: How To Change Wire In Gas Stove
Changing the wire in a gas stove involves several steps. Each step builds on the previous, so don’t rush. Here’s a full guide from start to finish.
1. Disconnect Power And Gas
Always unplug the stove before starting. If the plug is hard to reach, switch off the circuit breaker. Turn the gas valve to “off” and wait a few minutes to make sure all gas is gone.
2. Remove Stove Panels
Most stoves have a top cover or back panel you need to open. Check your user manual for panel locations. Use a screwdriver to remove screws and gently lift the panel. Keep screws in a small container—losing one can delay your work.
3. Locate The Faulty Wire
Look for wires that are burned, broken, or have melted insulation. Check where the wire connects—often at the igniter or to the power input. If you’re unsure, use a multimeter to check continuity. No beep means the wire is broken inside.
4. Take A Photo Or Draw A Diagram
Before removing any wires, take a clear photo of the connections with your phone. If you don’t have a camera, draw a simple diagram. This step is often forgotten, but it’s critical for reconnecting wires in the right order.
5. Remove The Damaged Wire
Use a screwdriver or pliers to disconnect the wire from both ends. Some wires have push connectors, while others are screwed in. Gently pull the wire out, avoiding force that could break other parts.
6. Prepare The Replacement Wire
Cut a new wire of the same length as the old one. Strip about 1/2 inch of insulation from each end with a wire stripper. If the wire runs close to hot surfaces, wrap extra insulation tape around it.
7. Install The New Wire
Connect one end of the wire to the first terminal and the other end to the second terminal. Push connectors should click into place; for screw terminals, tighten the screw firmly but not too much. Check the wire is not loose.
8. Secure And Organize Wires
Use cable ties to keep wires neat and away from moving parts or hot surfaces. Avoid sharp bends, which can weaken the wire over time. Good organization reduces the risk of future damage.
9. Reattach Stove Panels
Replace the panel and secure all screws. Double-check that no wires are pinched under the panel. A pinched wire is a fire risk.
10. Restore Power And Gas
Plug the stove back in and open the gas valve. Wait a moment, then test the burners one by one. If they all ignite and there’s no smell, you’ve done it right.
Common Mistakes And How To Avoid Them
Many beginners make mistakes that can damage the stove or create safety risks. Here are some common errors:
- Forgetting to turn off gas or power. Always double-check.
- Using non-heat-resistant wire. Ordinary wire melts near burners.
- Mixing up wire connections. Use photos or diagrams to avoid.
- Leaving wires loose. Loose wires can spark or break.
- Pinching wires when closing panels. Always check for clearance.
- Not checking for gas leaks after reassembly. Use soapy water, never a flame.
If you’re unsure at any point, stop and consult a professional. It’s better to be safe than sorry.

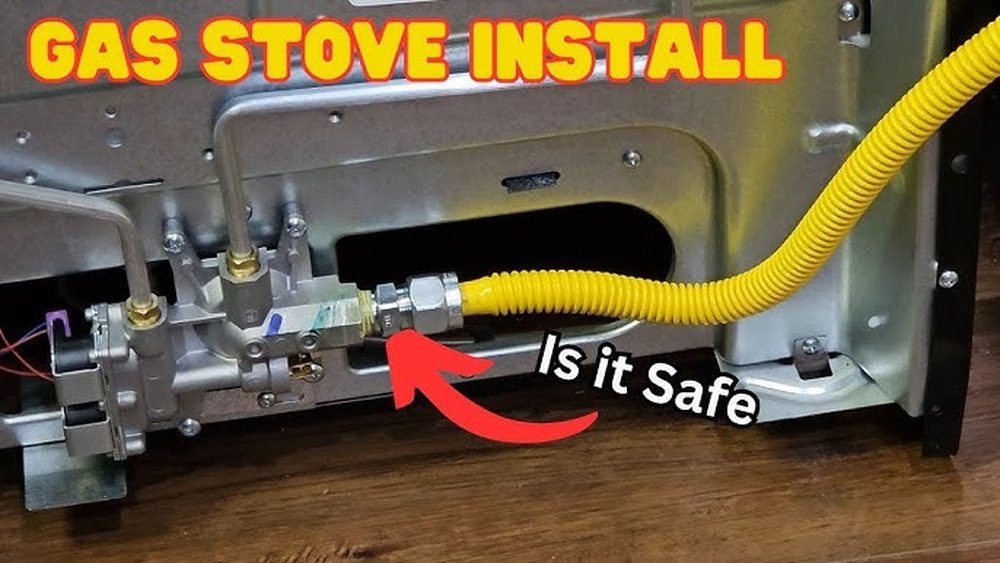
Credit: www.amazon.com
Choosing The Right Replacement Wire
Not all wires are equal. The wrong wire can cause fires, shocks, or stove failure. Here’s what to look for:
- Material: Only use copper wire. Aluminum is unsafe for kitchen appliances.
- Gauge: Check the user manual or original wire. Usually, 16 AWG or 18 AWG is used.
- Insulation: Must be high-temperature and flame-retardant.
- Length: Same as the wire you are replacing. Too long or too short creates problems.
- Color: Match the original wire color if possible for easier troubleshooting later.
If you can’t find the exact match, ask at a hardware store or look up your stove model online. Never guess.
Here’s a quick comparison of wire types for gas stoves:
| Wire Type | Heat Resistance | Common Usage | Safety Level |
|---|---|---|---|
| Copper, high-temp insulation | Up to 200°C | Ignition, power | Very Safe |
| Standard copper wire | 90°C | General electrical | Unsafe for stove |
| Aluminum wire | 80°C | Rare, not recommended | Unsafe |
How To Check Your Work
After changing the wire, you need to confirm the repair is safe and complete. Here’s how:
- Visual inspection: All wires secure, no exposed metal, no pinched wires.
- Check ignition: Turn on each burner. Look for strong, quick sparks.
- Sniff test: No burning smell or gas odor.
- Leak test: Mix soap and water, apply to gas connections, and look for bubbles.
- Test all functions: If your stove has timers, lights, or sensors, make sure they work.
If anything doesn’t work as expected, unplug the stove and check your connections again.
Troubleshooting: What If It Still Doesn’t Work?
Sometimes, changing the wire doesn’t solve the problem. Here’s what to check:
- Ignition module: If no burners work, the module may be faulty.
- Switches or knobs: Worn-out switches can stop ignition.
- Loose connections: Double-check all terminals.
- Multiple faulty wires: More than one wire may be damaged.
- Gas supply: Make sure gas is reaching the burners.
If you’ve checked all of these and the stove still fails, it’s time to call a technician. Some problems require special tools or knowledge.
Important Safety Regulations And Codes
Working on gas stoves is regulated in many countries. In the US, for example, the National Electrical Code (NEC) and local fire codes set rules for kitchen appliance wiring. Some areas require a licensed electrician for any gas or electric work in the kitchen.
Always check your local laws before starting. If you rent, you may need the landlord’s permission. Not following the rules can void your warranty or even your home insurance.
For more on appliance standards, see the National Electrical Code.

Credit: www.youtube.com
Useful Tips For A Safe And Lasting Repair
Here are some extra tips that can make your repair safer and last longer:
- Label wires before removing. Even simple labels help prevent mistakes.
- Replace old connectors if they look corroded or weak.
- Keep spare wire and connectors in your home for future repairs.
- Check all wires yearly for signs of wear.
- Never overload an extension cord if you use one for the stove.
- Keep children and pets away during repairs.
Many people forget to check the rest of the wires once they fix one. A single bad wire means others may soon fail.
Comparing Diy Vs. Professional Service
Changing a wire yourself saves money, but there are times when calling a professional is better.
| Aspect | DIY | Professional Service |
|---|---|---|
| Cost | Low (just parts) | High (parts + labor) |
| Time | 1-2 hours | 30 minutes – 1 hour |
| Skill Needed | Basic electrical, careful attention | Expert |
| Warranty Risk | Possible | Low |
| Safety | High if careful, risky if careless | Very high |
If your stove is under warranty or you’re not confident, choose a professional.
Signs That The Whole Stove Needs Replacement
Sometimes, changing the wire is not enough. If your stove has these problems, consider a full replacement:
- Frequent wire burns or melting, even after repair.
- Multiple part failures (igniter, switches, sensors).
- Very old model (over 15 years).
- Spare parts unavailable.
- Unusual noises or smells after several repairs.
A new stove is safer and more energy efficient. Don’t risk your home with repeated repairs on an unsafe appliance.
Real-world Example: A Simple Wire Change
Let’s look at a typical example. Sarah noticed her stove burner wouldn’t spark, even though the other burners worked. She unplugged the stove, opened the back panel, and found a blackened wire near the igniter. After taking a quick photo, she removed the damaged wire and bought a high-temp copper replacement.
She matched the length, connected both ends, and secured the wires. After reassembling and testing, all burners worked safely.
The key steps Sarah followed were:
- Turning off power and gas.
- Using proper tools and replacement wire.
- Checking her work before using the stove.
Small mistakes, like using normal wire, could have caused another failure or a fire.

Credit: www.amazon.com
How To Maintain Gas Stove Wiring
Prevention is better than repair. You can keep your gas stove wiring safe by:
- Checking wires every 6 months for burns, cracks, or looseness.
- Keeping the stove clean and free from grease near wiring.
- Not overloading electrical outlets.
- Avoiding water splashes near the wiring area.
- Getting regular service for older stoves.
A clean, well-maintained stove is less likely to need repairs and is much safer for your family.
Frequently Asked Questions
How Do I Know Which Wire To Replace In My Gas Stove?
Check for visible damage like burns, melted insulation, or broken strands. If you’re not sure, use a multimeter to test for continuity. No sound means the wire is broken. Always compare with the stove’s wiring diagram.
Can I Use Any Wire For My Gas Stove?
No. Only use heat-resistant, copper wires of the same gauge as the original. Using the wrong wire type can lead to fire or electric shock. Check your user manual or ask a hardware store for advice.
Is It Safe To Change The Wire Myself?
It’s safe if you follow all safety steps: unplug the stove, turn off gas, use the right tools, and check your work. If you feel unsure at any point, stop and call a professional. Safety should always come first.
What Should I Do If I Smell Gas After Changing The Wire?
Immediately turn off the gas supply and unplug the stove. Open windows for ventilation. Check all connections with soapy water for bubbles (never use a flame). If you still smell gas, call your gas company or a technician right away.
Does Changing The Wire Void My Stove’s Warranty?
Often, yes. Most manufacturers require a licensed technician for repairs during the warranty period. Check your warranty terms before doing any work yourself to avoid losing coverage.
Changing the wire in your gas stove doesn’t have to be difficult or dangerous. By following the steps above, using the right materials, and taking all safety precautions, you can restore your stove to safe working order. Remember: take your time, check your work, and don’t hesitate to call a professional if you have doubts. A safe kitchen is always worth the extra care.