
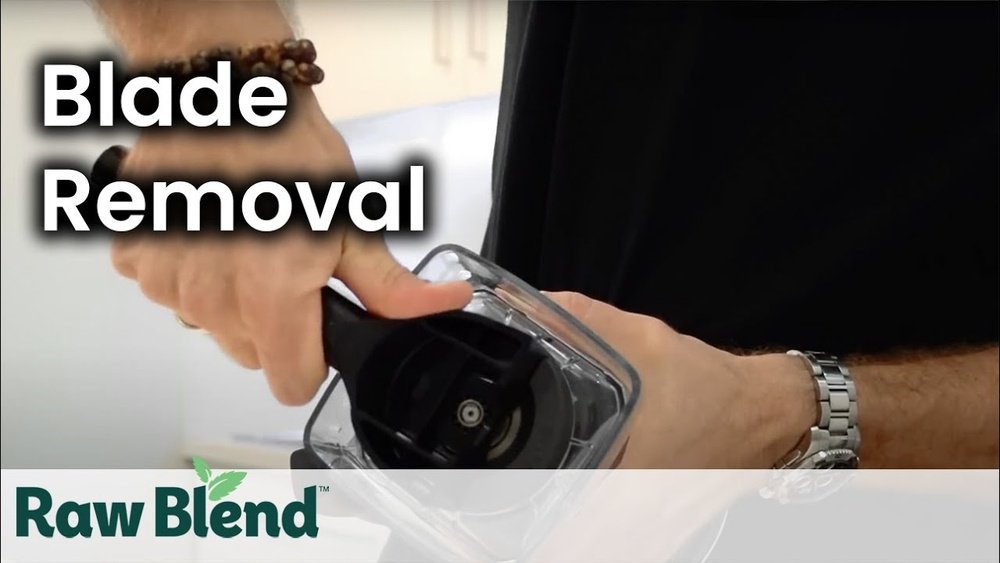
If you own a Vitamix blender, you know it’s a reliable tool for smoothies, soups, nut butters, and more. Over time, though, even this strong machine can need some care. One common issue is a dull or damaged blade. Changing the Vitamix blade is not an everyday task, but sometimes it’s necessary for performance, safety, and hygiene. If you’ve never done it before, don’t worry. This guide walks you step by step through the process, explains when and why you should replace your blade, and shares tips that most people overlook. By the end, you’ll feel confident about maintaining your Vitamix and keeping it in top shape.
Understanding Your Vitamix Blade
Before you start, it’s important to know what makes the Vitamix blade unique. These blades are not sharp like knives; instead, they are blunt and angled to crush ingredients by force. This design helps break down tough foods but keeps the blade safe to touch.
Most Vitamix containers have a fixed blade assembly. This means the blade is attached to a bearing housed in the bottom of the container. In some older or commercial models, the blade assembly can be removed more easily. For newer household models, changing the blade requires special steps and the right tools.
Why Is The Blade Important?
The blade’s condition affects:
- Blending performance: Dull or bent blades can leave chunks in your smoothie.
- Motor health: A stuck or damaged blade puts stress on the motor.
- Safety: Cracks, rust, or leaks around the blade can cause injury or contamination.
When Should You Change The Vitamix Blade?
Many users wonder, “How do I know if my blade needs changing?” Here are clear signs:
- Leaking from the bottom: If you see liquid under the blender after use, the bearing seal might be worn out.
- Blunt or bent blades: Over time, blending frozen fruits or ice can wear down the blade edges or bend them.
- Rust or discoloration: Metal blades should never rust. If they do, it’s time for a change.
- Grinding or squeaking noise: A healthy blade spins smoothly. Noise means the bearing is failing.
- Poor blending results: Ingredients are not breaking down fully, even after extra blending.
- Visible cracks in the assembly: Any cracks can lead to leaks and bacterial growth.
Insight: Many beginners wait for total failure, but changing the blade early protects your blender and your food.
Tools And Materials You’ll Need
Changing a Vitamix blade is not hard, but you need the right tools to avoid damaging your blender or hurting yourself. Here’s what you’ll need:
- Vitamix blade removal tool (also called a retainer nut wrench). This is made specifically for Vitamix containers.
- Replacement blade assembly. Make sure it matches your Vitamix model.
- Gloves for a good grip and to protect your hands.
- Soft cloth or towel to hold the container firmly.
- Mild soap and water for cleaning.
Important: Never use pliers, knives, or random tools. These can crack the container or strip the blade assembly.
Step-by-step Guide: How To Change Vitamix Blade
Changing the blade involves several careful steps. Follow these instructions to do it safely and correctly.
1. Unplug And Prepare
Safety comes first. Unplug your Vitamix blender from the wall. Remove the container from the base and set the base aside. Wash and dry your hands.
2. Remove The Container And Blade Assembly
- Place a towel on your work surface to prevent scratches.
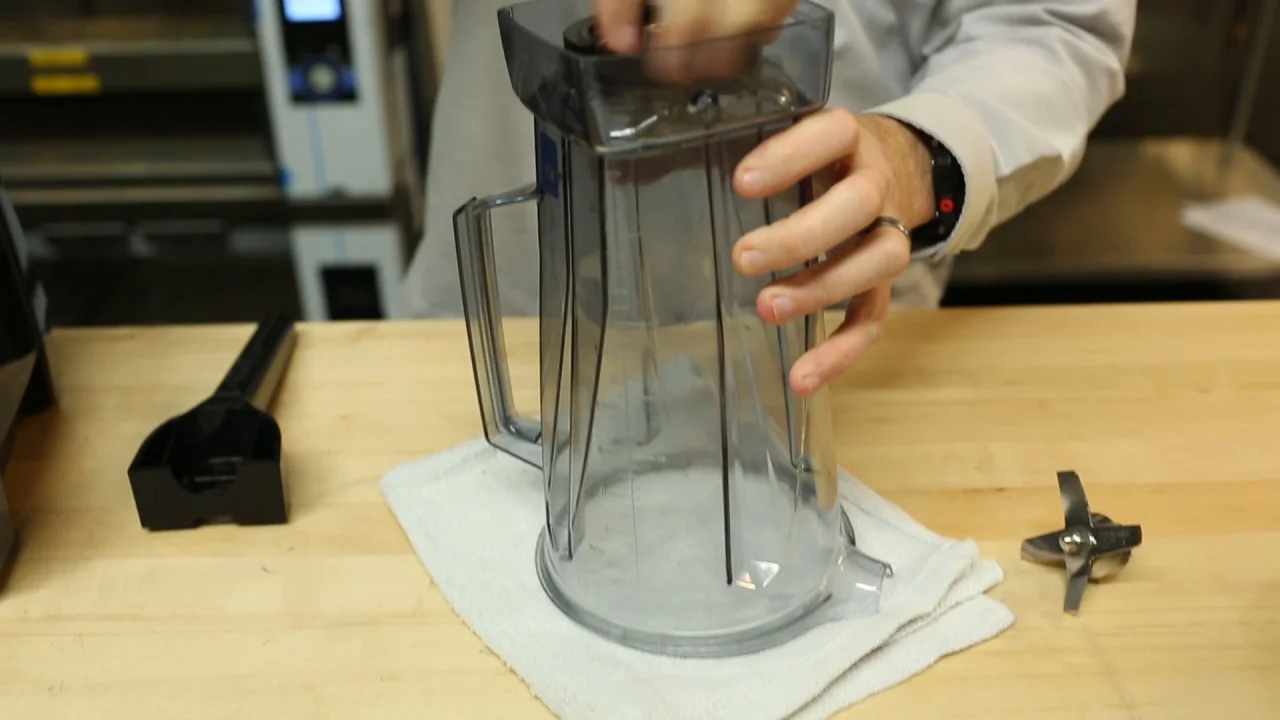
- Turn the container upside down. You’ll see a round metal retainer nut that holds the blade in place.
- Put on gloves for grip and protection.
3. Use The Vitamix Blade Removal Tool
- Fit the blade removal tool over the retainer nut.
- Hold the container steady with one hand.
- Turn the tool counterclockwise (to the left) to loosen the retainer nut.
- The nut may be tight, especially on old machines. Apply steady pressure but do not force it.
- When the nut is loose, lift it out. The blade assembly will come out with it.
Tip: If the retainer nut is stuck, soak the container bottom in warm soapy water for 20 minutes. This can loosen dried-on food or mineral buildup.
4. Remove And Clean The Old Blade Assembly
- Carefully pull out the blade assembly. The blades are not razor-sharp but can still hurt if handled carelessly.
- Check the container for cracks or damage.
- Clean the opening with soap and water.
5. Install The New Blade Assembly
- Insert the new blade assembly into the hole at the bottom of the container.
- Make sure the rubber gasket (if present) is seated correctly. Not all Vitamix containers use a separate gasket, but if yours does, it must sit flat and centered.
6. Secure The Blade
- Place the retainer nut back on the blade assembly.
- Use the removal tool to turn the nut clockwise (to the right) until snug. Do not overtighten.
- Wipe away any grease or fingerprints.
7. Test For Leaks
- Fill the container with 2 cups of water.
- Hold it over the sink and watch for leaks around the blade.
- If you see drips, remove the blade assembly and check the gasket or seating.
Pro insight: Many first-timers overtighten the retainer nut, cracking the plastic. Snug is enough—do not force it.
8. Reattach And Test
- Place the container back on the blender base.
- Blend water for 10 seconds to check for leaks or unusual noises.
- If all works smoothly, your Vitamix is ready for use.

Credit: www.reddit.com
Common Mistakes When Changing Vitamix Blades
Many people make errors that can damage their blender or cause leaks. Here’s what to avoid:
- Skipping the correct tool: Using pliers or wrenches instead of the Vitamix tool often cracks the container.
- Forgetting the gasket: If your model uses a gasket and you forget it, the container will leak.
- Overtightening: This is a top reason for container cracks.
- Not cleaning old residue: Food or mineral buildup can keep the new blade from sealing properly.
- Using the wrong blade assembly: Always check the model number. Vitamix has several container types, and not all blades fit all containers.
Example: Some Vitamix “Classic” containers use a 4-inch blade, while “Next Generation” or “Low Profile” containers use a wider 4-inch blade. Mixing them can cause leaks or poor blending.
Which Vitamix Models Allow Blade Replacement?
Not all Vitamix containers are made to have their blades changed by the user. Here’s a comparison of common Vitamix series:
| Model Series | Blade Replaceable? | Special Tools Needed |
|---|---|---|
| Classic (C-Series, G-Series) | Yes | Blade Removal Tool |
| Explorian | Yes | Blade Removal Tool |
| Ascent Series | No (Factory Only) | – |
| Personal (S-Series) | Yes (Blade in Lid) | Hand Removal |
| Commercial Models | Yes (Most) | Blade Removal Tool |
If you own an Ascent Series or a container with a wireless chip, do not try to change the blade yourself. These are factory-sealed for safety and to protect the electronics.
Where To Buy Replacement Vitamix Blades
Choosing the right replacement part is important. Here are tips for buying:
- Buy official parts: Only use genuine Vitamix blades or assemblies. Third-party parts often do not fit well and may void your warranty.
- Check the model number: This is on the bottom of the container or near the plug.
- Buy from trusted sources: Order from Vitamix’s official website, authorized dealers, or major retailers.
Example: The price for a genuine Vitamix blade assembly can range from $50 to $100, depending on the container type.
How To Tell If You Need To Replace The Container Instead
Sometimes, the problem isn’t the blade but the container itself. Here’s how to tell:
- Large cracks or chips in plastic: These cannot be fixed safely.
- Container is cloudy, even after cleaning: This means the plastic is worn.
- Persistent leaks after blade change: The container bottom may be warped.
- Broken handle or lid: If the handle is damaged, it can be unsafe to use.
In these cases, it’s better to replace the whole container. Using a damaged container can cause injury or damage the motor.
Cost Comparison: Replacing Blade Vs Container
Is it better to change the blade or buy a whole new container? Here’s a cost breakdown:
| Replacement Part | Average Cost | Pros | Cons |
|---|---|---|---|
| Blade Assembly | $50–$100 | Cheaper, easy to install, extends life | Does not fix container cracks or wear |
| Container + Blade | $130–$180 | All new parts, fixes leaks/cracks | Higher cost |
Tip: If your container is more than 5 years old and looks worn, replacing the whole container is usually the smarter long-term choice.
How To Care For Your New Vitamix Blade
A new blade will last for years if you take care of it. Here are key tips for maintenance:
- Clean right after use: Add water and a drop of dish soap, then blend on high for 30 seconds. Rinse well.
- Never put in the dishwasher: High heat can damage the bearings and seals.
- Don’t blend hot foods right away: Let hot soups cool for 1–2 minutes before blending. Sudden heat changes can stress the seal.
- Check for leaks monthly: Fill with water and look for drips underneath.
- Avoid blending hard, dry foods without liquid: Things like ice cubes, coffee beans, or grains can wear the blade faster if there’s no liquid to cushion the impact.
Non-obvious insight: Even with a new blade, using the tamper (the plastic stick that comes with most Vitamix blenders) helps reduce stress on the blade and motor. Push ingredients toward the blade so the motor does not have to work as hard.
Credit: primasupply.com
What To Do With Your Old Vitamix Blade
Don’t just throw your old blade in the trash. Here are some better options:
- Recycle: Most blade assemblies are made of stainless steel and can be recycled at a metal facility.
- Return to Vitamix: Some authorized dealers accept old parts for recycling.
- Creative reuse: Clean the old blade and use it as a kitchen tool for mixing paint or garden soil. Just make sure it’s safe and clean.
Safety note: Always wrap the old blade in thick paper or plastic before disposal to avoid injury.
Troubleshooting: If The New Blade Isn’t Working
Sometimes, after you change the blade, you might run into problems. Here’s how to fix them:
Problem: The Blender Leaks
- Check the gasket: Is it missing or out of place?
- Retighten the nut: If it’s loose, leaks will happen.
- Inspect the container: Look for cracks near the blade hole.
Problem: The Blade Doesn’t Spin
- Check for obstructions: Sometimes a piece of food or plastic gets stuck.
- Look at the drive socket: This is the black gear under the container. If it’s stripped, replace it.
- Try another container: If the problem continues, the issue might be with the base, not the blade.
Problem: Unusual Noise Or Smell
- Listen for grinding or squeaking: This means the bearing is not seated well.
- Smell for burning: Stop immediately—this can damage the motor.
If you can’t fix the problem, call Vitamix customer support. Never force the blender to run if something seems wrong.
How Often Should You Change The Vitamix Blade?
Most home users never need to change the blade unless there is a problem. But if you use your blender every day for smoothies, nut butters, or frozen drinks, check the blade assembly every 1–2 years.
Commercial users (smoothie shops, cafes) should check blades every 6 months and replace as needed.
Data point: According to Vitamix, the blade assembly can last up to 10 years with normal home use, but heavy use can shorten that lifespan.
Safety Tips For Changing Vitamix Blades
- Unplug the blender before starting.
- Wear gloves to protect your hands.
- Work on a non-slip surface.
- Do not use damaged parts.
- Test with water before blending food.
Vitamix Blade Types And Compatibility
Vitamix offers several blade types. Here’s a quick overview:
| Blade Type | Best For | Compatible Containers |
|---|---|---|
| Wet Blade | Smoothies, soups, general use | Standard containers |
| Dry Blade | Grinding grains, coffee, dough | Dry grains container |
| Personal Cup Blade | Single servings, S-Series | 20-oz personal cups |
| Low-Profile Blade | Large batches, G-Series | Low-profile 64-oz containers |
Always match the blade type to your container and intended use. Using a dry blade for wet blending, for example, can give poor results.
Signs Of A Worn Or Damaged Blade Bearing
The blade bearing is the part that lets the blade spin smoothly. If this wears out, you’ll notice:
- Blades wobble when spinning
- Grinding or squeaking noises
- Stiffness when turning by hand
- Leaks around the blade
Changing the whole blade assembly fixes these issues. If the problem returns soon after, your container may be warped and need replacing.

Credit: www.youtube.com
How To Prolong The Life Of Your Vitamix Blade
Here are expert tips for getting the most out of your new blade:
- Use enough liquid: Always add at least 1 cup of liquid when blending hard foods.
- Cut large items smaller: Don’t force whole apples or carrots into the blender—chop them first.
- Let frozen ingredients thaw a little: This eases the stress on the blade and motor.
- Don’t blend for too long: Most jobs are done in 30–60 seconds. Over-blending creates heat and can wear the blade.
- Store with the lid off: This helps the container dry and prevents mold around the blade.
Non-obvious insight: If you hear the motor “bog down” or slow, stop and stir. Pushing the motor too hard can damage both the blade and the drive socket.
When To Call A Professional
If you have an expensive or newer Vitamix, or if the container has a wireless chip, consider sending it to an authorized service center. Attempting repairs yourself may void the warranty.
Vitamix offers factory servicing for containers and blades. For more information, check the official Vitamix Service Page.
Frequently Asked Questions
How Do I Know Which Vitamix Blade Assembly To Buy?
Check your container’s model number and type (wet, dry, low-profile, personal cup). Only buy official Vitamix parts from trusted sellers to ensure a good fit and safe operation.
Can I Sharpen My Vitamix Blade Instead Of Replacing It?
No. Vitamix blades are intentionally blunt and not designed to be sharpened. Attempting to sharpen them can damage the blade and the container.
Is It Safe To Use A Vitamix With A Leaking Blade?
No. Leaks can cause electric shock, motor damage, or bacterial growth. Always fix leaks right away, either by tightening, replacing the blade, or changing the container.
How Long Does A Vitamix Blade Last?
With normal home use, a blade can last up to 10 years. Heavy daily use (nut butters, ice, frozen fruit) may require blade changes every 2–5 years.
Can I Change The Blade On An Ascent Series Vitamix Myself?
No. Ascent Series containers have factory-sealed blades. Changing them yourself may damage the container or void the warranty. Contact Vitamix for service.
Keeping your Vitamix in top condition does more than just improve blending—it keeps your kitchen safe and your recipes delicious. By knowing when and how to change your Vitamix blade, you’ll protect your investment and enjoy smooth, hassle-free blending for years to come.