Setting the correct time on your GE stove may seem like a small detail, but it plays a bigger role than you might think. The clock is not just for checking the time while you cook; it also helps with features like auto-bake, delayed start, and timer functions.
If the time is wrong, you can miss perfectly baked bread or an important reminder. Many people face trouble when daylight savings time arrives or after a power outage. A wrong clock can be frustrating and confusing, especially if you’re not sure how to adjust it.
In this guide, you’ll learn how to change the time on GE stove models, both old and new. We’ll cover the different types of GE stove clocks, step-by-step instructions for each, and what to do if you run into problems. Whether you have a touchpad, knob, or smart oven, this article will help you set your stove clock confidently and avoid common mistakes. Plus, you’ll find tips for keeping your clock accurate, solutions for common errors, and a handy FAQ at the end. Let’s get started on making your cooking routine smoother and stress-free.
Understanding Your Ge Stove Clock
Before you can change the time, it’s important to know what type of clock interface your GE stove has. GE has produced many stoves over the years, and they come with different clock designs. Each design requires a slightly different approach when setting the time.
Types Of Ge Stove Clocks
- Mechanical knob clocks: Older stoves often use a small dial or knob to set the clock. The knob might be labeled with “Clock” or just show the hours and minutes.
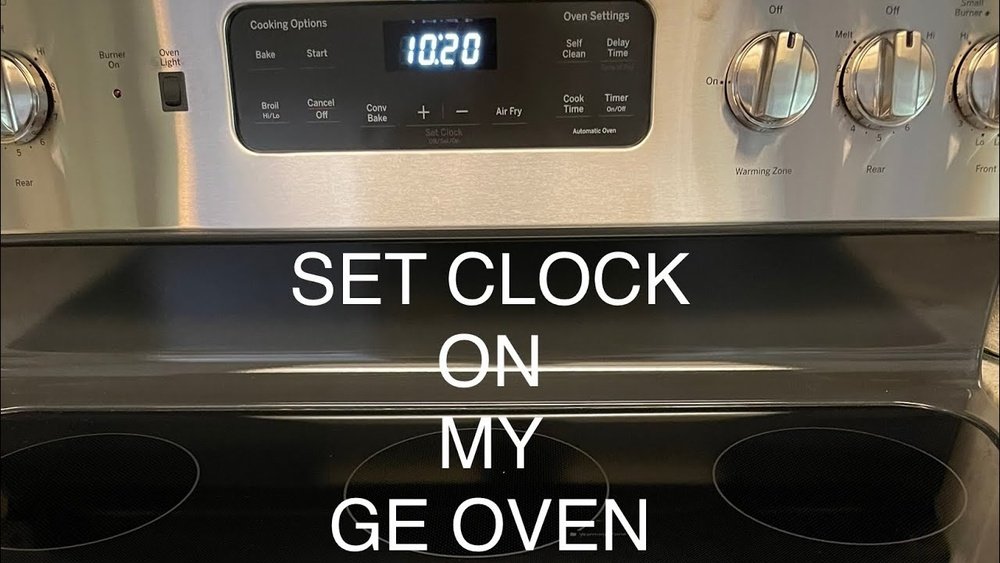
- Electronic touchpad clocks: Most modern GE stoves have a digital display with touch-sensitive buttons. These often include “Clock,” “Set Clock,” or “Time” buttons.
- Control dial with display: Some newer models use a rotating control dial paired with a digital display. You turn the dial to select the clock function.
- WiFi/smart oven clocks: The newest stoves may allow you to set the time through a smartphone app or by syncing with your home’s WiFi.
- Slide-in or free-standing range clocks: The interface may look different depending on whether your GE stove is a built-in or freestanding model.
Why Accurate Time Matters
- Timed cooking: Features like “Delay Start” or “Auto Off” depend on the correct clock time.
- Scheduled cleaning: Self-cleaning cycles need accurate timing to start and finish safely.
- Reminders and alarms: The timer function is only helpful if the clock is set right.
- Energy savings: Some ovens can be programmed to run at off-peak hours, saving you money.
A common mistake is assuming all GE stoves use the same method for changing the time. In reality, the process can be very different. Read your stove’s manual if you’re unsure, but this guide covers the most common methods.
How To Change The Time On Ge Stove: Step-by-step
Now, let’s walk through how to set the clock on different types of GE stoves. Find the description that matches your model, and follow the steps closely. If your stove is very old or very new, you may need to adjust the steps a little.
For Mechanical Knob Clocks
Many vintage GE stoves use a simple turning knob to set the time.
- Locate the clock knob. It’s usually in the center of the control panel and may say “Clock” or have a clock symbol.
- Push in the knob gently. On most models, you need to push the knob inward slightly.
- Turn the knob clockwise or counterclockwise until the correct time shows.
- Release the knob. The clock should now be set.
- Check for accuracy. Wait a minute and ensure the hands move.
Tip: Don’t force the knob. If it feels stuck, check for a lock switch or consult your manual.
For Electronic Touchpad Clocks (most Common)
If your stove has a digital display, these are the usual steps:
- Find the “Clock” or “Set Clock” button. It may also be labeled as “Time.”
- Press and hold the button for 3 seconds. The clock display should start blinking.
- Use the “+” and “-” buttons or arrow keys to adjust the hour. Some models require you to set the hour first, then the minutes.
- Press the button again to move to minutes, if needed.
- Adjust the minutes using the same buttons.
- Press “Start” or “Clock” again to confirm.
- Check the display to ensure the correct time is showing.
Non-obvious insight: Some touchpads require a double-press to enter clock setting mode. If the display doesn’t blink, try pressing the button twice quickly.
For Control Dial With Display
A few newer GE models use a control dial instead of buttons.
- Turn the dial to highlight the clock or time option on the display.
- Press the dial (it usually acts as a button too) to select.
- Rotate to set the hour, then press to confirm.
- Rotate to set the minutes, then press to confirm again.
- Check if AM/PM is displayed. Some models let you switch between AM and PM by turning the dial further.
Practical tip: If your stove has a “Home” or “Menu” button, use it to return to the main screen if you make a mistake.
For Wifi/smart Ge Ovens
If your stove connects to an app or WiFi, the process can be even easier:
- Open the GE Appliances app on your smartphone.
- Tap on your stove model in the app.
- Find the “Settings” or “Clock” option.
- Set the time using your phone’s keypad or time picker.
- Save or apply changes. The clock on your stove will update automatically.
Extra insight: Some smart stoves can sync the time with your home’s WiFi. If your clock is always wrong, check your WiFi settings or update the app.
For Slide-in And Free-standing Ranges
The steps for slide-in and free-standing stoves are often similar to electronic touchpads, but the buttons may be in a different place. Look for the “Clock” button, usually on the backguard or side panel.
- Press “Clock” or “Set Clock”.
- Adjust the time with “+” and “-” or arrow keys.
- Press “Start” or “Clock” again to save.
If your stove has no obvious clock button, check if the “Timer” button doubles as the clock-setting button (often found in older models).
Step-by-step Example: Setting Time On A Ge Jbs60 Model
Here is a real-world example for a popular stove, the GE JBS60 electric range.
- Press and hold the “9” and “0” buttons at the same time for three seconds.
- The display will blink. Use the “+” or “-” pads to set the hour.
- Press “Start” to move to minutes, then adjust.
- Press “Start” again to confirm.
- The clock will stop blinking and show the new time.
This method is typical for many mid-range GE stoves made after 2015.
Common Problems When Changing The Time
Changing the time should be easy, but sometimes things don’t go as planned. Here are some common issues and what you can do about them.
The Clock Won’t Change
- Buttons not responding: Make sure the stove is not in “Lock” mode. Look for a padlock symbol on the display.
- Power interruption: After a power outage, the clock may show “12:00” or blink. Set the clock again using the steps above.
- Old or faulty control board: If none of the buttons work, the control board may need repair.
The Display Is Blank
- No power: Check if the stove is plugged in and the outlet works.
- Fuse blown: Some stoves have a small fuse for the display. Check your manual for location and replacement steps.
- Display dimmed: Some models let you adjust the display brightness. Try increasing it if you can barely see the clock.
The Time Changes By Itself
- Power surges: Unstable electricity can reset the clock.
- WiFi sync errors: If your stove is connected to WiFi, make sure your router’s time is correct.
- Firmware bugs: Update your stove’s software if possible.
The Clock Is Always Fast Or Slow
- Manual clocks: Mechanical clocks can drift over time. Reset every few months.
- Digital clocks: If your clock loses time regularly, the internal battery may be failing (rare on newer models).
You Can’t Find The Clock Button
- Hidden functions: On some models, the clock set function is combined with another button, like “Timer” or “Bake.”
- Check your manual: If you’re stuck, search for your model’s manual on the GE Appliances website.

Credit: www.youtube.com
How To Keep Your Ge Stove Clock Accurate
Once you set the time, you want it to stay accurate. Here are tips for maintaining the correct time and avoiding future problems.
- Use a surge protector for your stove if you live in an area with frequent power outages.
- Update your stove’s firmware if you have a smart model. This can fix timing glitches.
- Adjust for daylight savings twice a year. Most GE stoves don’t update automatically.
- Check the clock regularly if your stove is over 10 years old.
- Keep your appliance clean. Grease and dust can cause buttons to stick or fail.
Beginner tip: Don’t wait for the clock to blink “12:00” before checking. Make it a habit to glance at your stove’s clock every week.
Special Features: Timed Cooking And Delay Start
Many people buy a GE stove for its timed cooking features. These functions won’t work right if the clock is set wrong.
How Timed Cooking Works
- Set the clock first. Features like “Start Time,” “End Time,” or “Delay Start” depend on the current time.
- Choose your function. For example, set “Bake” at 350°F, then press “Start Time.”
- Enter the time you want baking to start. The oven will wait until that time, then begin preheating and baking.
- The oven shuts off automatically after the set duration.
Common Mistakes
- Setting the wrong AM/PM. Some models don’t show AM/PM, so double-check the time.
- Not pressing “Start” after setting the time. The function won’t activate if you forget.
- Confusing timer and clock. The “Timer” function is a countdown, not a clock setting.
Practical insight: If you miss a step, most stoves beep or flash. Start over from the clock setting.
Daylight Savings: Adjusting Your Ge Stove
Most GE stoves do not adjust for daylight savings automatically. In the spring and fall, you’ll need to change the clock manually.
Steps For Daylight Savings
- Repeat the clock-setting steps above.
- Move the time forward or back one hour as needed.
- Check other timers. If you have scheduled cooking or reminders, update those as well.
Time-saving tip: Set a reminder on your phone to change your stove’s clock at the same time you change your other clocks.
What To Do After A Power Outage
A power outage resets most digital GE stove clocks to “12:00” or causes them to blink. Here’s what you should do:
- Wait for power to return fully before pressing any buttons.
- Set the clock using the instructions for your model.
- Check programmed events. Any delayed baking or cleaning cycles will need to be reprogrammed.
- Test the oven by starting a short bake cycle to make sure everything works.

Credit: www.abt.com
Comparing Different Ge Stove Clock Interfaces
Understanding how your stove’s clock interface works can save you time and frustration. Here’s a comparison of the main types:
| Clock Type | How to Set | Common Models | Pros | Cons |
|---|---|---|---|---|
| Mechanical Knob | Turn and push knob | Older GE ranges | Simple, reliable | No timed features, can drift |
| Electronic Touchpad | Press clock button, set with arrows | Most modern stoves | Accurate, many features | Confusing if label is unclear |
| Control Dial | Turn and press dial | High-end models | Quick to use | Dial can break if forced |
| WiFi/Smart | Set via app or auto-sync | Smart ranges | Very accurate, easy to update | Needs WiFi, software updates |
Ge Stove Clock Setting: Troubleshooting Guide
Even if you follow the steps, things can go wrong. Here’s a quick troubleshooting guide to help you solve common problems.
| Problem | Possible Cause | Solution |
|---|---|---|
| Buttons don’t work | Child lock on | Press and hold “Lock” or “Clear/Off” for 3 seconds |
| Display is blank | No power or blown fuse | Check outlet and fuse, call a technician if needed |
| Clock loses time | Power surges | Use surge protector, reset clock regularly |
| Can’t find clock button | Hidden in menu or combined with another button | Read the manual or try pressing “Timer” and “Bake” together |
| WiFi sync fails | App or router issue | Restart app, check WiFi settings |

Credit: www.abt.com
Advanced Tips For Ge Stove Owners
If you want to get the most out of your GE stove, consider these advanced tips:
- Set a backup timer on your phone or smart speaker for important meals.
- Change the clock battery in mechanical models every 2–3 years if your stove has one.
- Register your stove on the GE Appliances website to get firmware updates and troubleshooting help.
- Read the full manual for your specific model, available online, for hidden features or settings.
- Test the auto-off and timer functions after setting the clock to ensure they work correctly.
When To Call A Professional
Sometimes, the problem is bigger than a simple clock setting. Call a certified technician if:
- The display is permanently blank after you check the power.
- Buttons or touchpad are completely unresponsive.
- The clock resets every time you use the oven.
- You see error codes like “F2” or “F7” on the display.
A professional can diagnose control board issues, wiring problems, or replace faulty parts.
Where To Find Your Ge Stove Model Number
If you need help or want to look up your manual, you’ll need your model number. Here’s where to find it:
- Under the cooktop: Lift the lid or grates and look for a sticker.
- Inside the oven door: Open the door and check the frame.
- On the backguard: The rear panel above the controls often has a label.
- On the frame near the drawer: Pull out the bottom drawer and check the frame.
With your model number, you can visit the official GE Appliances Support site for manuals and support.
Frequently Asked Questions
How Do I Reset My Ge Stove Clock After A Power Outage?
After a power outage, your GE stove clock will usually blink or reset to “12:00.” Press the “Clock” or “Set Clock” button, use the arrow keys or dial to set the correct time, then press “Start” or “Clock” again to confirm. Make sure the stove has power and isn’t in “Lock” mode.
Why Does My Ge Stove Clock Keep Losing Time?
Frequent power surges, a failing control board, or a weak internal battery (in mechanical models) can cause the clock to lose time. Use a surge protector and reset the clock regularly. If the problem continues, contact a technician.
Can I Set The Clock On My Ge Stove Using My Phone?
Yes, if your stove is a smart model with WiFi, you can set the clock using the GE Appliances app. Open the app, select your stove, go to “Settings” or “Clock,” and adjust the time. Make sure your app and stove firmware are up to date.
How Do I Change Between 12-hour And 24-hour Time Format?
Some GE stove models allow you to switch between 12-hour and 24-hour formats. Press and hold the “Clock” button for 3–5 seconds, or check your manual for specific instructions. If your model doesn’t support this feature, you’ll be limited to the default format.
What Should I Do If My Stove Clock Buttons Are Stuck Or Broken?
If the buttons are stuck, try cleaning around them with a damp cloth (make sure the stove is off). If they remain unresponsive, the control panel may need repair or replacement. Contact GE support or a certified appliance repair service for help.
Setting the correct time on your GE stove is simple once you know the right steps for your model. An accurate clock makes cooking easier, keeps your kitchen running on schedule, and allows you to use all the advanced features your stove offers.
If you run into problems, use the troubleshooting tips above or consult your manual for more help. A few minutes spent now can save you hours of hassle later, letting you focus on what really matters—enjoying your time in the kitchen.