Replacing the floor under kitchen cabinets is a task many homeowners hope to avoid. But sometimes, it’s necessary. Water leaks, rot, or old flooring that just doesn’t match your style can force you to take action. Many people believe this job is too complex or expensive, but with the right approach, you can do it yourself and save a lot of money.
This guide will walk you through every step, from preparation to finishing touches, making the process less intimidating. With careful planning and the right tools, you can restore your kitchen’s foundation and give your space a fresh start.
Why Replace Floor Under Kitchen Cabinets?
Most kitchen renovations focus on surfaces you see—countertops, cabinet doors, or backsplash. But the floor under your cabinets is just as important. If your subfloor is damaged by water, pests, or age, it can lead to bigger problems like mold or structural weakness.
Replacing the floor underneath ensures your kitchen remains safe, stable, and durable.
A common beginner mistake is ignoring hidden damage. For example, you might only see damage at the surface, but rot or mold can spread under cabinets. Replacing only visible flooring may leave these problems unsolved, leading to more expensive repairs later.
Can You Replace Flooring Without Removing Cabinets?
This is a big question for many homeowners. The answer depends on your kitchen’s layout and the type of flooring. If your cabinets are installed *on top* of the old floor, you may have to remove them. But if your flooring runs up to, but not under, the cabinets, you can often change it without taking out cabinets.
Some types of floating floors—like laminate or vinyl planks—can be installed up to cabinet toe kicks. However, for tile or solid hardwood, it’s often best to remove at least the base cabinets. This allows for a more professional finish and avoids height differences.
Here’s a comparison of common flooring types and whether cabinet removal is usually required:
| Flooring Type | Cabinet Removal Needed? | Notes |
|---|---|---|
| Laminates / Floating Vinyl | No (usually) | Cut at toe kick, use quarter round trim |
| Tile | Yes (best) | Ensures level surface, prevents future cracks |
| Solid Hardwood | Sometimes | Depends on thickness and subfloor condition |
| Sheet Vinyl | No (usually) | Can be cut to fit, but seams may show |
If you want the most durable and professional result, removing base cabinets is recommended, especially if you have water damage or plan a full remodel.

Credit: www.bestlaminate.com
Tools And Materials You Will Need
Gathering the right tools and materials before you start saves time and frustration. Here’s what you need for most kitchen floor replacement projects:
- Safety gear: Gloves, safety glasses, dust mask
- Pry bar and hammer: For removing old flooring and subfloor
- Screwdrivers/drill: For removing cabinet screws
- Utility knife: For trimming flooring materials
- Tape measure and pencil: For accurate cuts
- Circular saw or oscillating tool: For cutting subfloor or new flooring
- Level: To check for even subfloor
- Flooring adhesive or fasteners: Depending on material
- Replacement subfloor (plywood or OSB): If subfloor is damaged
- New flooring material: Tile, vinyl, laminate, hardwood, etc.
- Underlayment: For floating floors
- Quarter round or shoe molding: To cover edges
- Shims: For leveling cabinets during reinstallation
- Vacuum and broom: To keep the area clean
Many beginners forget shims or quarter round, which are essential for a neat finish. Double-check your list before starting.
Planning Your Project
Planning is key for a smooth kitchen floor replacement. You don’t want to remove cabinets and discover a hidden water leak or rot you’re unprepared for.
Step 1: Inspect the damage. Use a flashlight to look under cabinets. Check for soft spots, mold, or discoloration. Probe with a screwdriver if needed.
Step 2: Measure your kitchen. Measure the full area, including under cabinets if you plan to remove them. Buy 10–15% more flooring material to allow for mistakes or future repairs.
Step 3: Plan for appliances and plumbing. Will you need to disconnect the sink, dishwasher, or stove? If so, plan to shut off water, gas, or electricity. Mark where each appliance and pipe goes for easy reinstallation.
Step 4: Schedule your time. Replacing floor under cabinets can take 2–3 days or more, depending on the room size, flooring type, and your experience. Plan meals or snacks ahead, as your kitchen will be out of use.
Step 5: Gather supplies. Order or buy all materials at least a week ahead, so you’re not delayed by missing items.
Step-by-step: How To Replace Floor Under Kitchen Cabinets
Let’s break down the process into clear steps. These instructions are for a full replacement, including removing base cabinets and old subfloor if damaged. If your subfloor is solid, you may skip those steps.
1. Prepare The Area
- Empty all cabinets and remove any items on countertops.
- Take out appliances like the fridge, stove, and dishwasher (if possible).
- Shut off water, gas, and electricity to the kitchen.
- Protect nearby rooms with plastic sheets to keep dust out.
2. Remove Baseboards And Toe Kicks
- Use a utility knife to score the caulk between the wall and baseboard.
- Gently pry off baseboards and toe kicks using a flat bar. Save them if you plan to reuse.
3. Take Out Base Cabinets
- Unscrew cabinets from the wall and each other. Label each cabinet for easier reinstallation.
- Get help to lift cabinets—base cabinets are heavy and awkward.
- If plumbing runs through cabinets, disconnect pipes carefully. Use towels to catch drips.
Non-obvious tip: Photograph plumbing and electrical connections for reference during reinstallation.
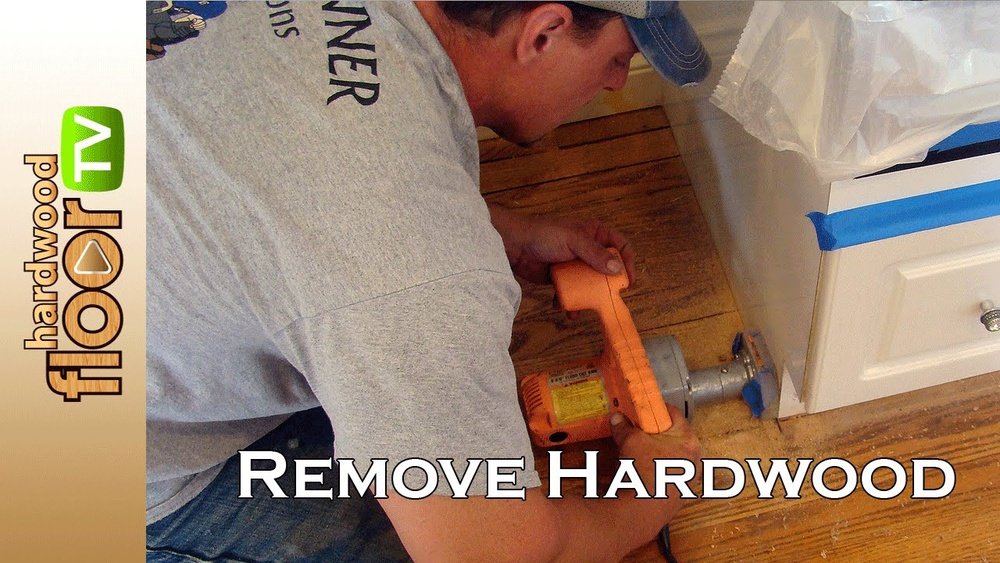
4. Remove Old Flooring
- For floating floors, lift planks or tiles starting from the edge.
- For nailed or glued floors, use a pry bar and hammer. Work slowly to avoid damaging the subfloor.
- Bag and remove all debris to keep the work area safe.
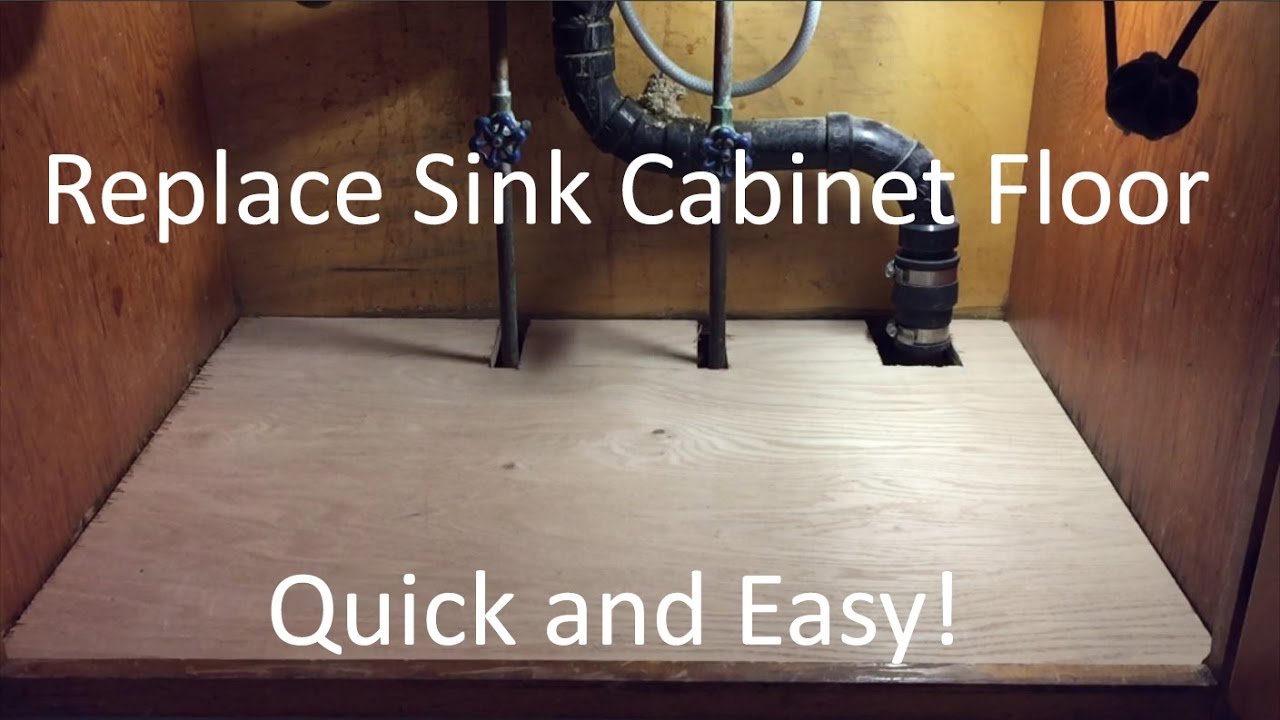
5. Inspect And Replace The Subfloor
- Check for soft spots, mold, or water stains.
- Use a screwdriver to test for rot; replace any damaged sections.
- Cut out bad areas using a circular saw set to the correct depth.
- Install new subfloor panels, making sure all seams are supported by joists.
- Screw panels down every 6–8 inches to prevent squeaks.
Common mistake: Forgetting to stagger seams in new subfloor panels. Always stagger seams for strength.
6. Level And Clean The Subfloor
- Use a level to check for high or low spots.
- Sand down high areas, and fill low spots with floor-leveling compound.
- Vacuum thoroughly to remove dust and debris.
7. Install New Flooring
The exact steps will depend on your flooring type:
- For tile: Lay backer board, tape seams, and thinset the tiles in place.
- For laminate or vinyl plank: Lay underlayment, then snap or glue planks together.
- For hardwood: Nail or staple boards down, leaving a small gap at the walls for expansion.
- For sheet vinyl: Cut carefully to fit, then glue in place.
Pro tip: Start laying flooring from the longest straight wall for the best look.
8. Reinstall Cabinets
- Use shims to level cabinets before screwing back to the wall.
- Reconnect plumbing and appliances.
- Check all doors and drawers for smooth operation.
Non-obvious insight: If your new floor is thicker than the old one, you may need to adjust the height of cabinets or appliances.
9. Finish Edges And Clean Up
- Reinstall or replace baseboards and toe kicks.
- Add quarter round or shoe molding to cover small gaps at the floor edge.
- Caulk gaps between trim and wall for a neat finish.
- Clean the new floor with a manufacturer-approved cleaner.
Your kitchen should now have a strong, attractive floor under both cabinets and appliances.
Dealing With Common Challenges
Replacing a kitchen floor is rarely straightforward. Here are some typical challenges and solutions:
Water Damage
If you find blackened wood or soft spots, you must remove all affected material, even if it means cutting wider. Mold can spread quickly and weaken the structure.
Uneven Subfloors
Some old homes have subfloors that slope or dip. Use self-leveling compound, but only after removing all loose debris. Don’t skip this—uneven subfloors can cause tiles to crack or planks to separate.
Plumbing And Wiring
Moving base cabinets often means dealing with pipes and wires. Label everything, and take photos before disconnecting. If you’re unsure, call a professional for help.
Matching Old And New Flooring
If you’re only replacing part of your kitchen floor, you may struggle to match new material with old. In these cases, consider replacing the entire kitchen or using a transition strip at the cabinet edge.
Appliance Height
A new floor can raise appliance height, making dishwashers or stoves not fit under counters. Check specs and adjust leveling feet before final installation.
Cost Breakdown
Many homeowners want to know what to expect in terms of cost. Here’s an average breakdown for a 10×12 foot kitchen:
| Item | Typical Cost | Notes |
|---|---|---|
| New Flooring Material | $400 – $1,200 | Depends on type (vinyl, tile, wood) |
| Subfloor Panels | $100 – $250 | For damaged areas only |
| Tools and Supplies | $100 – $300 | Includes rental costs |
| Cabinet Removal/Installation | $0 (DIY) – $600 (Pro) | Varies by skill level |
| Professional Labor | $1,500 – $4,000 | If hiring out all work |
DIY saves money but takes more time and effort.
How Long Will It Take?
Time depends on your skill and the kitchen’s condition:
- Removing cabinets: 2–4 hours
- Removing old flooring: 4–8 hours
- Subfloor repair: 2–6 hours
- Installing new flooring: 6–16 hours
- Reinstalling cabinets and appliances: 4–8 hours
Total: 18–40 Hours (2–5 Days For Most Homeowners)
Remember, drying time for leveling compound or tile mortar can add a day.
Safety Tips
- Turn off power and water before starting.
- Wear protective gear at all times.
- Lift with your legs, not your back, when moving cabinets.
- Open windows for ventilation, especially when using adhesives or cutting wood.
- Dispose of old material according to local codes, especially if you find mold or asbestos.
Mistakes To Avoid
- Skipping subfloor inspection: Always check for hidden damage.
- Rushing leveling: Take your time to get the subfloor flat and stable.
- Forgetting expansion gaps: Most floors need a small gap at the wall for movement.
- Not labeling parts: Cabinets, pipes, and wires should all be labeled for reassembly.
- Over-tightening cabinet screws: This can strip the wood or crack drywall.
- Using the wrong adhesive or fastener: Read manufacturer instructions for your floor type.
Credit: www.reddit.com
When To Call A Professional
Some situations are best left to pros:
- Extensive water or mold damage
- Suspected asbestos in old flooring or adhesives (common in homes built before 1980)
- Major plumbing or electrical changes
- Very large or complex kitchens
If you’re unsure, get a quote from a licensed contractor. Professional help can prevent costly mistakes.
Choosing The Best Flooring For Under Cabinets
Not all flooring is equal under cabinets. Here’s a quick comparison:
| Floor Type | Durability | Water Resistance | Ease of Installation |
|---|---|---|---|
| Luxury Vinyl Plank | High | Excellent | Easy |
| Porcelain Tile | Very High | Excellent | Moderate |
| Solid Hardwood | High | Poor | Challenging |
| Laminates | Medium | Good | Easy |
| Sheet Vinyl | Medium | Good | Easy |
For kitchens, luxury vinyl plank or porcelain tile are best for water resistance and durability.
Final Checklist Before You Finish
- All cabinets and appliances reinstalled and level?
- All water and electrical connections checked for leaks or issues?
- Floor cleaned and protected (no sharp debris left)?
- Baseboards, toe kicks, and trim replaced?
- Expansion gaps left at walls (for floating floors)?
- No tools or materials left behind?
Walking through your kitchen with this checklist ensures you haven’t missed anything.
Maintenance Tips For Your New Kitchen Floor
- Clean up spills quickly to avoid water damage.
- Use felt pads under cabinet and appliance feet to prevent scratches.
- Avoid harsh cleaners—use manufacturer-approved products.
- Check for leaks under the sink and dishwasher regularly.
- Re-caulk trim if cracks appear over time.
This keeps your floor strong and looking good for years.
Extra Tips And Insights
- Photograph wiring and plumbing before removal. This simple step can save hours during reinstallation.
- Rent a dolly to move heavy cabinets or appliances safely.
- Check your local building codes. Some areas require a permit for major kitchen work.
- Use painter’s tape to label and group cabinet hardware for easy assembly.
If you want more details on flooring types or installation, the Family Handyman website offers excellent guides.
Replacing floor under kitchen cabinets is a big project, but with careful preparation, the right tools, and attention to detail, you can achieve great results. The investment in time and effort pays off with a solid, beautiful kitchen foundation for many years.
Frequently Asked Questions
How Do I Know If My Subfloor Is Damaged?
Look for soft spots, sagging, or discoloration in the floor. If you can push a screwdriver into the wood easily, it’s damaged. Mold or a musty smell are also signs you need to replace the subfloor.
Can I Install New Flooring Over My Old Floor?
Sometimes, yes. If your old floor is flat, dry, and not too thick, you can lay new vinyl or laminate on top. Never install over loose, water-damaged, or uneven floors.
Do I Have To Remove Cabinets To Replace Kitchen Flooring?
Not always. If you’re using thin flooring like vinyl plank, you can often cut up to the toe kick. But for the most professional and long-lasting result—especially with tile or hardwood—it’s best to remove the base cabinets.
How Do I Keep My Cabinets Level After Reinstalling Them?
Use shims under the cabinets when reinstalling. Check with a level after tightening screws. Take your time—uneven cabinets can affect countertops and appliance fit.
What Should I Do If I Find Mold Under My Kitchen Floor?
Stop work, wear a mask, and remove all affected material. Clean the area with a mold-killing solution. For large areas or black mold, call a professional—mold can be hazardous to your health.
With careful steps and the right guidance, you can successfully replace the floor under your kitchen cabinets, improving both the look and function of your kitchen for years to come.
Credit: www.youtube.com