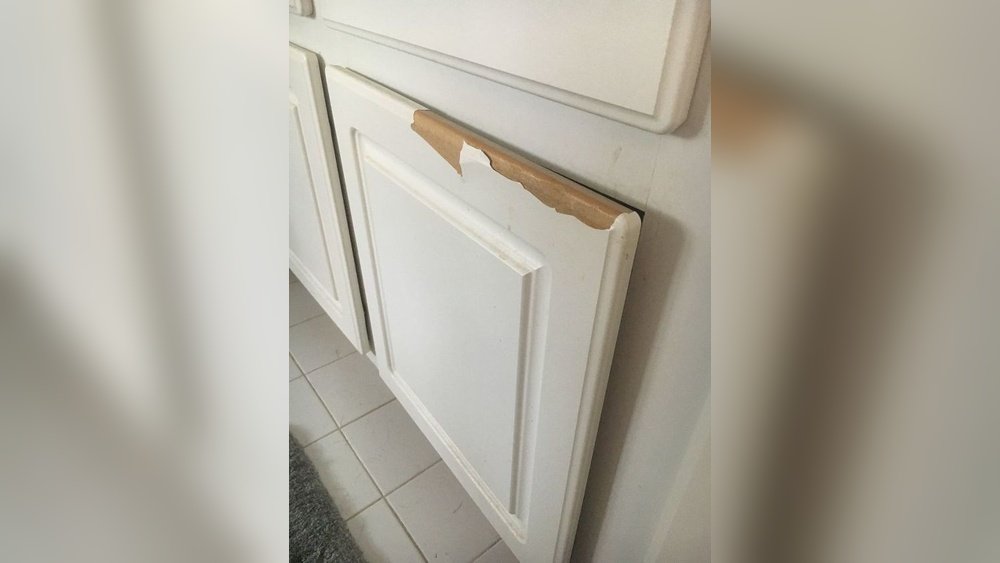
Repainting kitchen cabinets is one of the best ways to transform your kitchen without spending a fortune. But what happens when your cabinet paint starts to peel or chip? Peeling cabinets not only look unattractive, but they can also make your kitchen feel old and neglected. Many homeowners feel unsure about how to fix this problem. The good news is, with the right steps and some patience, you can restore your cabinets to look fresh and new again.
This guide will walk you through how to repaint peeling kitchen cabinets in detail. You’ll learn why paint peels, how to prepare your cabinets, what tools and materials you need, and how to achieve a smooth, lasting finish. Along the way, you’ll get practical tips, common mistakes to avoid, and answers to questions that many beginners have. Whether you want a bright white kitchen or a bold new color, repainting is within your reach—even if you’ve never done it before.
Why Kitchen Cabinet Paint Peels
Understanding why your cabinet paint peels helps you prevent future problems. Several factors cause paint to lose its grip:
- Moisture: Kitchens are full of steam, splashes, and spills. If water seeps into the wood or between paint layers, it weakens the bond and causes peeling.
- Poor Surface Prep: Paint sticks best to clean, dry, and slightly rough surfaces. Grease, dirt, or glossy finishes can prevent paint from bonding.
- Wrong Paint or Primer: Not all paints and primers are made for kitchens or wood. Using the wrong type leads to quicker peeling.
- Skipping Sanding: Smooth or shiny cabinet surfaces need sanding to help paint stick. Skipping this step is a common mistake.
- Temperature and Humidity: Painting in very hot, cold, or humid conditions can affect paint drying and adhesion.
Non-obvious Insight: Sometimes, peeling starts inside the cabinet doors or near the hinges—areas people often forget to check. Make sure to examine these spots before you begin.
Tools And Materials You’ll Need
Before you start, gather all the tools and supplies. This saves time and helps you work more efficiently.
| Tool/Material | Purpose | Recommended Option |
|---|---|---|
| Screwdriver | Remove doors and hardware | Phillips head |
| Drop cloths | Protect floors and counters | Canvas or plastic |
| Painter’s tape | Mask off areas you don’t want to paint | Blue painter’s tape |
| Degreaser | Clean off grease and grime | TSP substitute |
| Putty knife | Scrape off peeling paint | Flexible metal |
| Sandpaper | Smooth and roughen surfaces | 120- and 220-grit |
| Wood filler | Repair chips and holes | Stainable/paintable |
| Primer | Help paint adhere, block stains | Bonding, stain-blocking |
| Paint | Top color layer | Acrylic latex, cabinet enamel |
| Brushes and rollers | Apply paint evenly | Angled brush, foam roller |
| Respirator mask | Protect your lungs | N95 or better |
| Gloves | Protect your hands | Nitrile or latex |
Tip: Don’t use cheap brushes or rollers—they can leave marks or loose bristles in your paint.
Step-by-step Guide: How To Repaint Peeling Kitchen Cabinets
Let’s break down the process into clear, manageable steps. Each one is important for a durable, beautiful result.
1. Remove Cabinet Doors, Drawers, And Hardware
Start by taking off all the cabinet doors, drawers, handles, and hinges. Use a screwdriver for this task. Place the hardware and screws in labeled bags so you can find them later.
Why it matters: Painting cabinets in place leads to drips, missed spots, and a less professional look. Removing everything lets you paint flat surfaces and reach every corner.
2. Protect Surrounding Areas
Lay down drop cloths to cover your countertops, floors, and appliances. Use painter’s tape to mask off walls, backsplashes, and any area you don’t want painted.
Non-obvious Insight: Tape the inside edges of cabinet frames, not just the outside. This helps you get crisp, clean lines.
3. Clean All Surfaces
Kitchen cabinets collect grease and dirt. Use a degreaser or TSP substitute and a sponge to scrub every surface, including corners and grooves. Rinse with clean water and let dry completely.
Common mistake: Skipping this step. Even invisible grease can ruin paint adhesion.
4. Remove All Peeling Paint
With a putty knife, gently scrape off any loose, flaking, or bubbling paint. Don’t gouge the wood—just remove what comes off easily. If you find deep chips, sand down the edges to smooth them.
5. Sand The Surfaces
Sand every surface you plan to paint using 120-grit sandpaper. For very smooth or shiny cabinets, use a sanding block for better control. After roughing up the surface, switch to 220-grit for a finer finish.
- Sand in the direction of the wood grain for a smooth look.
- Wipe down with a tack cloth or damp rag to remove dust.
Pro tip: Pay extra attention to areas where you removed peeling paint. Smooth the edges so they blend with the rest of the cabinet.
6. Repair Damage
Inspect the cabinets for dents, holes, or deep gouges. Use wood filler to repair these spots. Apply with a putty knife, let dry, and sand smooth.
Example: Cabinets near the sink often have water damage around the base. Fill and sand these areas for a flawless finish.
7. Prime The Cabinets
Use a bonding primer made for kitchen cabinets. Apply with an angled brush in corners and a foam roller on flat surfaces. Allow to dry according to the manufacturer’s instructions.
Why primer is important:
- Blocks stains and odors.
- Seals repairs and prevents tannin bleed-through (especially on oak, cherry, or pine).
- Helps paint stick, reducing future peeling.
Non-obvious Insight: If your cabinets are very dark or stained, ask the paint store to tint your primer close to your final paint color. This makes covering easier and reduces the number of top coats needed.
8. Lightly Sand And Clean Again
After the primer dries, lightly sand with 220-grit sandpaper. This removes any drips or raised grain. Wipe off all dust with a tack cloth.
Common mistake: Skipping this light sanding. It’s key for a glass-smooth finish.
9. Apply The First Coat Of Paint
Use a high-quality paint made for cabinets—acrylic latex or cabinet enamel works well. Apply with an angled brush for details and a foam roller for flat areas. Work in thin, even coats to avoid drips and brush marks.
- Paint the backs of doors first, let dry, then paint the fronts.
- Let the first coat dry completely before moving to the next step.
10. Sand Lightly Between Coats
Once the first coat is dry, lightly sand again with 220-grit sandpaper. This helps the next coat stick and removes tiny imperfections.
11. Apply The Second (and Possibly Third) Coat
Apply a second thin coat of paint, following the same method. For dark colors or dramatic changes, a third coat may be needed. Let each coat dry fully before recoating.
Pro tip: Don’t rush. Letting paint cure between coats creates a stronger, more durable finish.
12. Let Paint Cure Fully
After the final coat, let the paint cure for several days (check your paint can for exact timing). Even when dry to the touch, paint can still be soft underneath.
Example: Cabinet doors can feel dry in a few hours, but full curing may take 7-14 days.
13. Reinstall Doors, Drawers, And Hardware
Once everything is fully cured, reinstall your doors, drawers, handles, and hinges. Tighten screws carefully and adjust doors so they hang evenly.
Tip: If you want a new look, now is the perfect time to update your hardware.
Choosing The Right Paint And Primer
Not every paint or primer will give you long-lasting results on kitchen cabinets. Here’s how to choose wisely:
| Paint/Primer Type | Best For | Key Feature |
|---|---|---|
| Acrylic Latex Paint | Most cabinets | Low VOC, easy clean-up |
| Cabinet Enamel | Heavy-use kitchens | Very hard, smooth finish |
| Oil-Based Paint | Super high durability | Strong odor, longer dry time |
| Bonding Primer | Laminate or glossy cabinets | Sticks to slick surfaces |
| Stain-Blocking Primer | Old wood, stained cabinets | Prevents discoloration |
Mistake to avoid: Using wall paint or regular latex on cabinets. These paints can peel much faster because they aren’t made for frequent cleaning or humidity.
How Long Does It Take To Repaint Peeling Cabinets?
The time required depends on your kitchen size, the amount of peeling, and drying times. Here’s an average breakdown:
- Prep and removal: 2-4 hours
- Cleaning and repair: 2-3 hours
- Priming and drying: 4-6 hours (plus overnight drying)
- Painting (2-3 coats): 6-10 hours total (including drying)
- Curing: 3-7 days (wait before heavy use)
Total project time: 2-4 days of active work, plus curing.
Tip: Plan to work in stages. You can do all the doors one day, then the cabinet frames the next.
Common Mistakes And How To Avoid Them
Many people make the same errors when repainting cabinets. Here’s what to watch out for:
- Not removing hardware: Leads to paint on handles and uneven coverage.
- Skipping cleaning or sanding: Causes new paint to peel quickly.
- Using the wrong primer: Some primers won’t stick to glossy or laminate surfaces.
- Rushing between coats: Paint that isn’t fully dry can wrinkle or peel later.
- Painting in high humidity: Slows drying and weakens adhesion.
- Not labeling parts: Makes reinstalling doors and drawers confusing.
Non-obvious Insight: Label each door and drawer with a number and where it goes (for example, “Upper Left 1”). Place a small piece of tape in the hinge hole to avoid painting over your label.
How To Maintain Painted Cabinets So They Don’t Peel Again
Proper care keeps your new paint looking fresh for years. Here’s how:
- Wipe up spills quickly: Don’t let water or grease sit.
- Use gentle cleaners: Avoid harsh chemicals or scrubbers.
- Open windows when cooking: Reduces steam and moisture.
- Check for chips: Touch up small spots right away before they spread.
- Install cabinet bumpers: Soft pads prevent doors from slamming and chipping.
Example: A quick wipe with a damp microfiber cloth once a week is usually enough to keep cabinets clean.
When To Call A Professional
Sometimes, repainting isn’t the best option. If your cabinets are warped, water-damaged, or the peeling is severe, it might be time to call a pro. Professionals can also handle spraying for a factory-like finish, which is hard to achieve with a brush and roller.
Cost: Professional cabinet painting ranges from $2,000 to $6,000 for an average kitchen, depending on your area and cabinet size. DIY saves money but takes more time and patience.
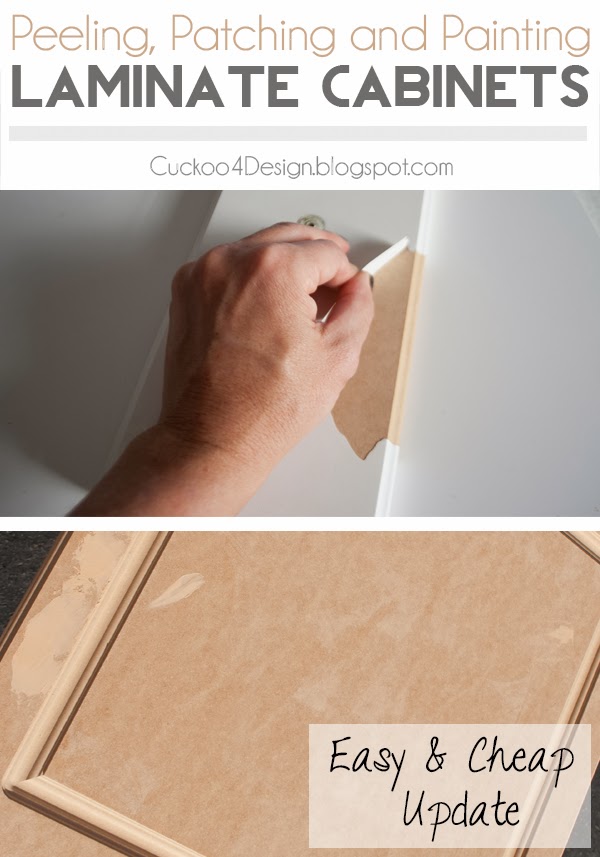
Credit: cuckoo4design.com
Real-world Examples: Results You Can Expect
Many homeowners see dramatic improvements after repainting. Here are a few examples:
- White transformation: A family with old oak cabinets removed the peeling varnish, primed, and painted with white cabinet enamel. Their kitchen looked larger and brighter, and the finish stayed strong for years.
- Bold color update: One homeowner chose navy blue for their island cabinets. They sanded, primed, and painted for a striking, modern look that didn’t peel, even with daily use.
- Vintage refresh: In a 1950s home, a couple carefully repaired and painted their original cabinets pale green. With the right prep and care, the paint lasted over five years without chipping.
Comparing Diy Vs. Hiring A Pro
Here’s a quick look at the pros and cons:
| DIY | Professional |
|---|---|
| Lower cost | Higher cost |
| Flexible timing | Faster completion |
| Learning experience | Expert finish |
| Labor-intensive | No effort required |
| Possible DIY mistakes | Warranty/guarantee |
If you have the time and are willing to learn, DIY is rewarding. For a perfect finish or if you lack the tools, a professional may be worth the investment.
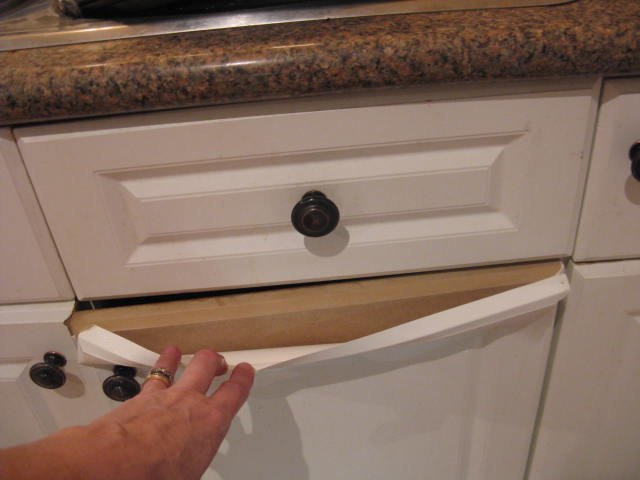
Credit: www.hometalk.com
Safety Tips
Painting involves chemicals and fine dust. Protect yourself with these steps:
- Wear a respirator mask while sanding and painting.
- Ventilate the area: Open windows and use fans.
- Wear gloves to protect your skin from chemicals and paint.
- Keep children and pets away from the work zone.
Extra tip: Some older cabinets may have lead paint, especially homes built before 1978. If you suspect this, have a lead test done before sanding.
What To Do If Paint Starts Peeling Again
Even with good prep, paint can sometimes peel in high-use spots. Here’s how to fix minor peeling:
- Scrape off loose paint.
- Sand the area smooth.
- Spot-prime the bare wood.
- Touch up with matching paint.
Tip: Save a small jar of your cabinet paint for future touch-ups.
Helpful Resources
For more details on paint types and safety, check out the EPA’s guide on lead paint safety.
Frequently Asked Questions
How Do I Know If I Need To Replace Or Just Repaint My Cabinets?
If your cabinets are structurally sound (no sagging, warping, or deep water damage), repainting is a good option. If the wood is soft, swollen, or falling apart, replacement may be better.
Can I Paint Over Laminate Or Mdf Cabinets?
Yes, but you must use a bonding primer designed for slick surfaces and sand the surface first. Paint won’t stick well without these steps.
How Long Will My Repainted Cabinets Last?
With proper prep and care, repainted cabinets can last 5-10 years or more before needing another refresh. High-traffic kitchens may need touch-ups sooner.
Is It Better To Spray Or Brush/roll Cabinets?
Spraying gives a super-smooth finish with no brush marks but requires special tools and skills. Brushing and rolling are easier for most DIYers and give great results if you use thin coats and sand between them.
What’s The Best Paint Sheen For Kitchen Cabinets?
Semi-gloss or satin are best for kitchen cabinets. They’re easy to clean, resist stains, and show fewer brush marks than high-gloss.
Repainting peeling kitchen cabinets takes effort, but the results are worth it. With careful prep, the right tools, and a little patience, you can restore your kitchen’s beauty—and enjoy it for years to come.

Credit: www.rethunkjunkbylaura.com