Sealing a pellet stove pipe might sound like a small detail, but it makes a big difference in keeping your home safe and warm. When you use a pellet stove, the pipe carries smoke and gases out of your house.
If the pipe isn’t sealed well, leaks can let dangerous fumes inside, waste heat, and even start a fire. Many people worry about this task, but with the right steps, you can seal your pellet stove pipe confidently—even if you’ve never done it before.
You may have heard advice from friends or read quick tips online, but there’s more to sealing a pellet stove pipe than applying some high-temperature caulk. This guide explains every part of the process, from understanding the materials to fixing common mistakes.
Whether you’re installing a new stove or improving an old one, you’ll learn how to seal your pellet stove pipe the right way.
Why Sealing Pellet Stove Pipe Matters
A well-sealed pellet stove pipe does more than just look tidy. It’s essential for safety and efficiency. Pellet stoves burn fuel at high temperatures, producing gases that must be vented outside. If those gases escape into your home, you risk carbon monoxide poisoning—a very real danger.
Even small leaks can reduce your stove’s performance, wasting pellets and raising heating costs.
You might think you can see or smell leaks, but often, you can’t. That’s why sealing is so important. Properly sealed pipes also stop smoke stains on your walls and ceilings and prevent drafty areas in your home. If you’ve ever noticed black marks around your vent or felt cold air near your stove, sealing your pipe could be the answer.
Tools And Materials You’ll Need
Before you start, gather the right tools and materials. Using the correct products saves time and helps your seal last longer.
Essential tools:
- Caulk gun: For applying sealant smoothly and evenly.
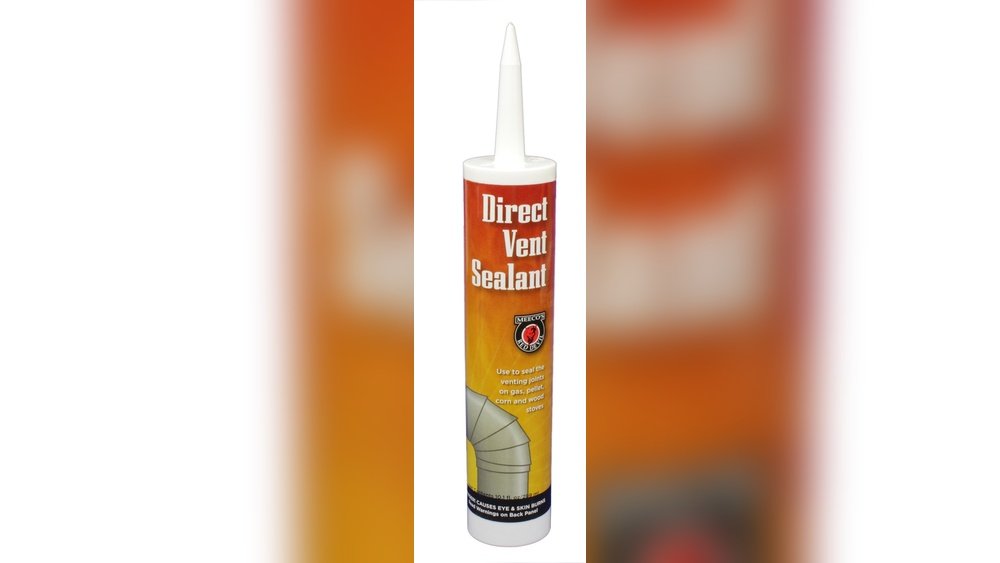
- High-temperature silicone sealant: Look for products rated for at least 500°F (260°C).
- Metal tape: Use only aluminum foil tape, not regular duct tape, for high heat.
- Putty knife or scraper: To clean off old sealant.
- Gloves and safety glasses: Protect your hands and eyes from sharp edges and chemicals.
- Wire brush or sandpaper: For preparing pipe surfaces.
- Vacuum or brush: To clear away dust and soot.
Optional but helpful:
- Flashlight: For checking hard-to-see spots.
- Shop towels or rags: For cleaning up.
- Measuring tape: Ensures correct placement of pipe sections.
Not all sealants are created equal. Use high-temperature silicone or furnace cement—regular caulk melts and fails under heat. For joints, aluminum tape rated for HVAC or flue use provides extra security.
Types Of Pellet Stove Pipe Joints
Pellet stove pipes are not just straight tubes. They have joints and connections that need careful sealing.
Common joints:
- Slip joints: One pipe end fits inside another. These need sealant inside and outside to prevent leaks.
- Snap-lock joints: Edges lock together with pressure. They’re common but may still leak if not sealed.
- Twist-lock joints: Turn and lock in place. Usually found in higher-quality pipes.
- Tee joints: Allow cleaning and direction changes—extra attention needed to seal all sides.
- Wall and ceiling thimbles: Where the pipe passes through, these must be tightly sealed to prevent air leaks and keep combustibles safe.
Each joint type may need a slightly different approach. For example, slip joints often benefit from both silicone sealant and metal tape, while twist-lock joints may need less sealant due to their tighter fit.
Preparing The Pipe And Area
Preparation is often overlooked but is critical for a good seal. Here’s how to get ready:
- Turn off the stove: Let it cool completely before starting. Never work on a hot pipe.
- Check for existing leaks: Look for smoke stains, black marks, or feel for drafts around joints.
- Clean the pipe: Use a wire brush or sandpaper to remove soot, ash, and old sealant. Wipe with a damp rag and let dry.
- Remove old sealant: Use a putty knife or scraper. Old, cracked, or loose sealant can prevent new material from sticking.
- Vacuum or sweep the area: Keep dust and debris away from your workspace.
Insider tip: Many beginners forget to clean the pipe. Even a little soot or grease can cause sealant to peel away in weeks.
Step-by-step: How To Seal Pellet Stove Pipe
Sealing a pellet stove pipe isn’t just one step. Each joint, seam, and transition should be sealed with care. Here’s how to do it:
1. Dry Fit All Pipe Sections
Before applying any sealant, assemble the pipe sections dry (without sealant) to check the fit. Make sure each connection slides together easily and aligns with the stove and vent exit. Mark the joints lightly with a pencil so you know where everything goes.
Why this matters: If you skip this, you might discover a misalignment after you’ve applied sticky sealant—frustrating and messy.
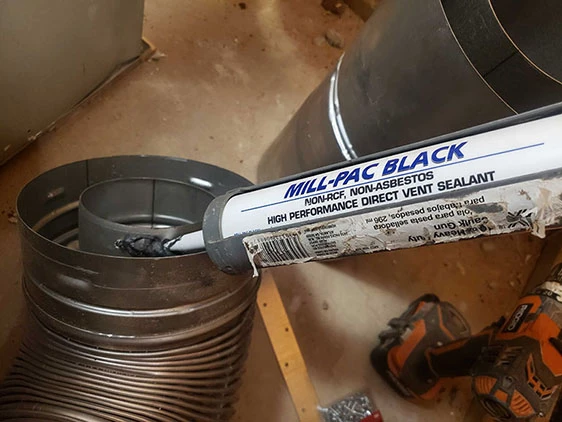
2. Apply High-temperature Sealant To Joints
For slip joints, run a bead of high-temperature silicone around the male end (the piece that goes inside). Spread it evenly with your finger or a gloved hand. Fit the pipe sections together, twisting slightly to spread the sealant.
For snap-lock or twist-lock joints, add sealant in the seam where the two pieces meet. Don’t overdo it—too much can squeeze out and look messy.
Non-obvious insight: Some people only seal the outside, but sealing the inside edge of the joint first adds much more protection.
3. Secure With Metal Tape
After assembling the pipe and letting the sealant set for 5-10 minutes, wrap aluminum foil tape around each joint. Overlap the tape by at least 1 inch for a strong seal. Press down firmly, smoothing out air bubbles.
Tip: Never use plastic duct tape. It will melt, shrink, and fail with heat, sometimes within days.
4. Seal Wall And Ceiling Thimbles
Where the pipe goes through walls or the ceiling, gaps can let in cold air or leak exhaust. Seal around these thimbles with high-temperature silicone. Fill any visible gaps between the pipe and the thimble, then smooth with a wet finger.
If you see a large gap, use fireproof insulation (not regular fiberglass) before sealing.
5. Check For Missed Spots
Shine a flashlight around all joints and seams. Look for missed gaps, pinholes, or areas where the sealant didn’t stick. Reapply as needed.
6. Allow Proper Cure Time
High-temperature silicone usually needs 24 hours to cure before you use the stove. Check the product label. Don’t rush—using the stove too soon can cause sealant to crack or bubble.
7. Test Your Work
Once cured, light a small fire in the stove and check all sealed joints for leaks. Look for smoke, use your hand to feel for escaping air, or try a smoke pencil (a tool that blows a thin stream of smoke) to check for drafts.
If you find leaks, let the pipe cool, reseal, and test again.
Common Mistakes And How To Avoid Them
Even careful DIYers can make mistakes. Here are some errors to watch out for:
- Using the wrong sealant: Only use high-temperature silicone or furnace cement rated for pellet stove exhaust.
- Skipping cleaning: Dirt, soot, or old sealant can cause new sealant to fail quickly.
- Too much sealant: Overdoing it can block the vent or make removal hard later.
- Not sealing every joint: Even small gaps can let in carbon monoxide.
- Using plastic tape: Never use standard duct tape. It’s not rated for heat.
- Forgetting cure time: Using the stove before the sealant cures ruins your work.
Credit: www.efireplacestore.com
How Often Should You Reseal?
Pellet stove pipes don’t need to be resealed every year, but you should check the seals at least once a season—preferably before heating season starts. Look for:
- Cracks or gaps in sealant
- Loose tape
- Smoke stains near joints
- Unexplained drafts
Reseal any area that looks worn or damaged. Pipes expand and contract as they heat and cool, so even a good seal can wear out over time.
Choosing The Right Sealant: What Really Matters
Not all sealants are equal. Here’s how the most common products compare:
| Sealant Type | Heat Resistance | Flexibility | Best For | Downsides |
|---|---|---|---|---|
| High-temp silicone | Up to 600°F (315°C) | Flexible | Most joints and seams | Needs full cure before heat |
| Furnace cement | Up to 2000°F (1093°C) | Brittle | High-heat areas, direct flame | Cracks if pipe moves |
| Aluminum tape | Up to 600°F (315°C) | Flexible | External seams | Can peel if surface isn’t clean |
Key insight: For most pellet stove pipes, high-temp silicone is best for joints, while aluminum tape adds an extra layer of protection outside. Furnace cement is usually only needed for wood stoves or where the pipe gets extremely hot.
Diy Or Hire A Pro?
Many homeowners can seal a pellet stove pipe themselves, but it’s not for everyone. Consider hiring a professional if:
- Your vent goes through multiple walls or floors
- You see rust, holes, or severe leaks
- The pipe is hard to reach, or you’re unsure about fire codes
Fun fact: According to the National Fire Protection Association, nearly 25% of pellet stove-related fires are due to poor installation or maintenance. Getting it right matters.
Comparing Pellet Stove Pipe Sealing To Other Stoves
How does sealing a pellet stove pipe compare to other types, like wood or gas stoves? Here’s a quick overview:
| Stove Type | Sealant Needed | Common Issues | Sealant Life |
|---|---|---|---|
| Pellet stove | High-temp silicone/tape | Leaks at joints | 2-5 years |
| Wood stove | Furnace cement | Cracks in cement | 1-3 years |
| Gas stove | High-temp silicone | Condensation leaks | 4-8 years |
Pellet stove pipes often need more attention because their venting is under pressure (forced exhaust), meaning leaks are more likely to push smoke into your home.
Advanced Tips For A Lasting Seal
If you want your seal to last as long as possible, try these advanced tips:
- Pre-heat the pipe: Warming the pipe slightly (not hot) before applying sealant helps it stick better, especially in cold weather.
- Double-check slope: Pellet stove pipes should slope upward, at least 1/4 inch per foot, to help exhaust gases flow out. A flat or downward slope can cause leaks and back pressure.
- Use a smoke pencil: These small devices can reveal leaks you might miss. They’re cheap and easy to use.
- Seal from the inside (if possible): Applying a thin layer of sealant inside the joint before assembly adds extra protection.
- Label your joints: Use a marker to number each pipe section before you take them apart for cleaning. This helps you reassemble them in the right order and maintain a good seal.
Safety Considerations
Never take shortcuts with pellet stove pipe safety. A poor seal can release carbon monoxide, which is invisible and odorless. Always have a carbon monoxide detector near your stove and check it regularly.
Fire safety tip: Keep combustibles (curtains, furniture, decorations) at least 36 inches from the pipe. Even with a good seal, the pipe can get very hot.
If you ever smell smoke or feel dizzy or sick while the stove is running, turn off the stove, open windows, and leave the house immediately. Call a professional before using the stove again.

Credit: www.reddit.com
Maintenance And Inspection
After you’ve sealed your pellet stove pipe, don’t forget to check it regularly. Every few months during heating season:
- Inspect all joints and seams for cracks or gaps.
- Check that the tape is still stuck and not peeling.
- Look for soot or ash near seams—this can be a sign of a leak.
- Clean the pipe interior at least once a year to prevent buildup that can damage seals.
Some homeowners use a simple checklist to stay on track:
- Visual inspection (monthly during use)
- Tape check (every 2-3 months)
- Full pipe cleaning (once a year)
- Reseal as needed
Maintenance keeps your system safe and efficient—and can save you money by burning pellets more cleanly.
Professional Codes And Standards
Pellet stove pipe sealing isn’t just about common sense; it’s also required by building codes. The NFPA 211 code covers installation of chimneys and vents. Some local building departments may have stricter rules.
Key points:
- Use only UL-listed pellet vent pipe.
- Maintain required clearances from combustibles.
- Seal all joints according to manufacturer’s instructions.
- Thimbles and wall pass-throughs must be properly sealed and insulated.
If you’re unsure, check with your local building department or see the NFPA 211 guidelines for more information.

Credit: www.amazon.com
Example: Sealing A Pellet Stove Pipe In A Real Home
Let’s walk through a real-world example. Jane owns a 1,500-square-foot home in upstate New York. Last winter, she noticed black stains on the wall near her pellet stove vent. She also smelled faint smoke when the stove ran on high.
Jane followed these steps:
- Turned off the stove and let it cool overnight.
- Removed the pipe and cleaned all joints with a wire brush and vacuum.
- Scraped off old, cracked sealant.
- Applied high-temp silicone to both the inside and outside of slip joints.
- Reassembled the pipe, twisting each joint to spread the sealant.
- Wrapped aluminum tape around each seam.
- Sealed around the wall thimble with silicone.
- Let everything cure for 24 hours.
- Lit a small fire and checked for leaks with a smoke pencil.
Result: No more stains, smoke smells, or drafts. Jane checks her seals every fall, and her pellet stove runs safely and efficiently.
Troubleshooting: When Things Go Wrong
If you’ve sealed your pipe but still have problems, try these solutions:
- Persistent leaks: Remove the pipe, clean, and reseal. Sometimes old soot or grease prevents a good bond.
- Sealant won’t stick: Make sure the pipe is clean, dry, and not too cold. Some sealants require temperatures above 40°F (4°C) to cure.
- Tape peels off: Clean surface with alcohol or a degreaser, let dry, and reapply.
- Smoke at the wall thimble: Check for hidden gaps behind the trim ring—seal all the way around.
- Strong smoke smell: Your vent may be clogged, causing back pressure. Clean the entire vent and check seals again.
If you still can’t find the problem, call a certified pellet stove technician. Never use a stove if you suspect a leak or unsafe condition.
Frequently Asked Questions
How Do I Know If My Pellet Stove Pipe Is Leaking?
Common signs of a leak include smoke stains near pipe joints, a smoky smell in your home, or feeling cold air drafts around the pipe. Sometimes, leaks are invisible. Using a smoke pencil or incense stick near joints can help you spot escaping air.
Can I Use Regular Caulk Or Duct Tape To Seal Pellet Stove Pipe?
No. Regular caulk and plastic duct tape cannot handle the high temperatures of a pellet stove. They will melt, shrink, or fail—often in just a few days. Always use high-temperature silicone and aluminum foil tape rated for HVAC and flue use.
How Long Does Pellet Stove Pipe Sealant Last?
Most high-temp silicone sealants last 2-5 years, depending on how often you use the stove and the quality of installation. Check your seals every year and reseal any area that looks cracked or worn.
Is It Safe To Seal The Inside Of The Pipe Joints?
Yes, it’s safe and often recommended to apply a thin bead of high-temp silicone inside the joint before assembly. This gives extra protection against leaks. However, don’t block the vent path or overfill the joint.
Should I Hire A Professional To Seal My Pellet Stove Pipe?
If your vent installation is complicated, if you’re unsure about fire codes, or if you find severe leaks or damage, it’s best to hire a pro. For most straight runs and basic joints, careful DIY sealing is safe and effective.
Sealing a pellet stove pipe takes some effort, but the payoff is a warmer, safer home and peace of mind all winter long. With these tips, you can do the job right and keep your family safe.