Removing the screen from your grinder may seem like a small task, but for many people it’s a confusing and sometimes frustrating job. Whether you use a grinder for herbs, spices, or tobacco, the screen—also called a pollen or kief screen—plays a key role. Over time, you might need to remove it for cleaning, replacement, or to collect more kief. But how do you take it out without damaging the grinder or screen? This guide will walk you through every step, explain the tools you need, and share tips that most beginners miss. By the end, you’ll know exactly how to remove the screen from your grinder safely and efficiently.
Why Grinders Have Screens
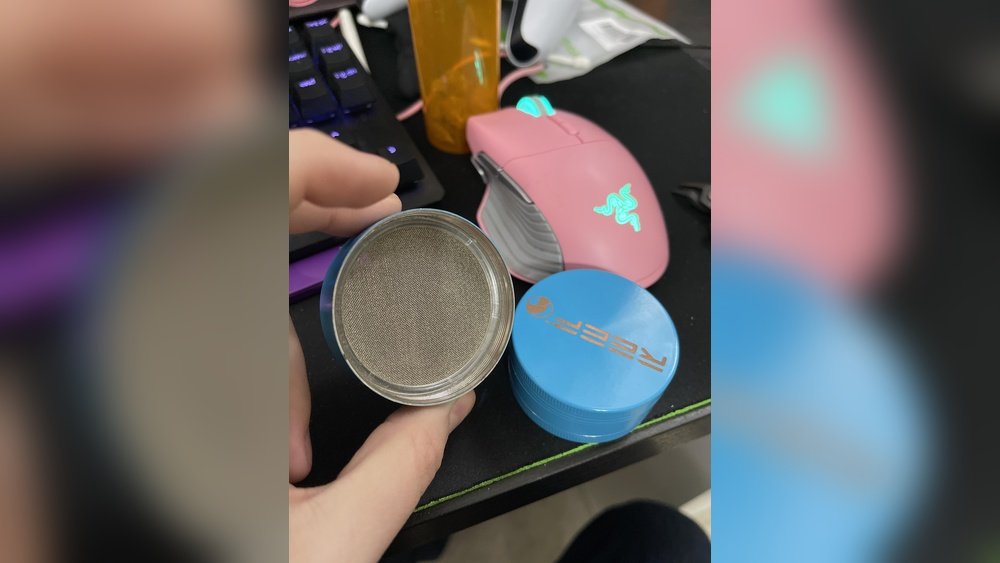
Most grinders come with a fine mesh screen in the lower chamber. Its main job is to filter the smallest particles—often called kief or pollen—while keeping larger pieces above. This makes your grinder more versatile and helps you collect potent material for later use.
But screens can become clogged, torn, or just not needed for your preferred use. Some people remove the screen to make cleaning easier or to allow more material to fall through. Understanding the purpose of the screen helps you decide if you really want to take it out, or if a deep clean might be enough.
Types Of Grinder Screens
Not all grinder screens are the same. Knowing which type you have will help you use the right method and tools to remove it.
| Screen Type | Material | Removal Difficulty |
|---|---|---|
| Press-Fit Screen | Stainless steel or brass mesh | Medium |
| Threaded Screen | Metal mesh, framed | Easy |
| Glued Screen | Fine mesh with adhesive | Hard |
| Magnetic Screen | Fine mesh with magnets | Very Easy |
Press-fit screens are pushed into place and held by friction. Threaded screens twist out, like a jar lid. Glued screens are attached with adhesive—these are rare and difficult to remove without damage. Magnetic screens simply lift out.
Credit: damp-e.com
Tools You Will Need
Before you begin, gather everything you need for the process. Having the right tools makes removal easier and reduces the risk of damaging your grinder.
- Small flathead screwdriver – For prying or lifting the screen.
- Needle-nose pliers – For gripping edges of the screen.
- Paper clip or toothpick – For loosening tight spots.
- Isopropyl alcohol – For cleaning sticky residue.
- Cotton swabs – For detailed cleaning.
- Soft brush – For removing fine particles.
- Towel or paper towels – To protect surfaces and catch spills.
- Rubber gloves – To protect your hands from sticky or sharp parts.
Some grinders require only your fingers, but others need careful prying or unscrewing. Choose tools that fit your grinder type.
Preparing Your Grinder
Preparation is often overlooked, but it makes the process much smoother and safer.
- Empty all material from your grinder. Remove any leftover herbs, spices, or tobacco.
- Disassemble the grinder fully. Take off the lid, separate the grinding chamber, and unscrew the bottom collection chamber.
- Clean off loose debris with a brush or cotton swab. This prevents dirt from getting into the threads or screen.
- If your grinder is sticky, soak it in isopropyl alcohol for 10-15 minutes. This loosens residue, making the screen easier to remove.
Taking time to prep your grinder prevents damage and keeps your hands clean during the process.
Step-by-step Removal Methods
The best way to remove the screen depends on the screen type and your grinder’s design. Below are detailed methods for each common screen type.
Press-fit Screen Removal
These screens are held by friction and a snug fit. They do not screw in or use magnets.
- Locate the edge: Look for a small gap or lip around the screen’s edge.
- Insert a flathead screwdriver or paper clip: Carefully wedge the tool under the edge. Work gently to avoid tearing the mesh.
- Work around the edge: Move the tool slowly around the screen. Apply gentle upward pressure.
- Lift slowly: Once part of the screen lifts, use needle-nose pliers to grip the edge. Pull evenly to avoid bending the frame.
- Remove completely: When the screen is loose all the way around, lift it out. If it’s stuck, use a few drops of alcohol to loosen sticky spots.
Tip: Don’t rush. Forcing the screen can warp or tear it, making reinstallation difficult.
Threaded Screen Removal
Threaded screens have a frame that screws into the grinder, like a jar lid.
- Find the notches or tabs: Look for cutouts or grooves along the screen’s edge.
- Grip the screen with your fingers or pliers: Turn counterclockwise to unscrew.
- Apply steady pressure: If the screen is stuck, try soaking in alcohol for a few minutes.
- Continue unscrewing: Once loosened, twist until the screen comes out fully.
Tip: If you can’t grip the edge well, wrap a rubber band around the frame for extra grip.
Glued Screen Removal
Glued screens are rare and usually found in cheap or novelty grinders.
- Apply isopropyl alcohol: Soak the screen area with alcohol to weaken the glue. Wait 10-20 minutes.
- Pry gently with a flathead screwdriver: Work slowly to avoid tearing the mesh.
- Peel up the edge: Once the glue weakens, lift the screen. If resistance remains, apply more alcohol and wait.
- Remove and clean: Once out, scrape off any remaining glue from the grinder.
Warning: Removing a glued screen often damages it. Replacement may be necessary.
Magnetic Screen Removal
These are the easiest to remove.
- Lift the screen with your fingers: Gently pull up on the magnetic frame.
- If stuck, use a toothpick: Slide under the edge and lift.
- Clean the area: Wipe away any dust or debris.
Tip: Magnetic screens are easy to reinsert after cleaning.
Troubleshooting Common Problems
Even with careful effort, you may run into issues. Here’s how to handle them.
Screen Won’t Budge
- Soak longer in alcohol: Sticky residue can glue the screen in place. Try a longer soak.
- Apply heat: Use a hairdryer (on low) to warm the metal. This can loosen stuck parts.
- Use a plastic tool: A guitar pick or plastic knife reduces the risk of tearing the mesh.
Screen Is Torn Or Damaged
- Order a replacement: Most grinder brands sell spare screens.
- DIY fix: In a pinch, cut a piece of fine mesh from a tea strainer to size. Fit it into place until you get a replacement.
- Be careful with sharp edges: Torn mesh can cut your fingers.
Grinder Threads Are Stripped
- Clean thoroughly: Sticky threads can feel stripped. Remove all debris with alcohol and a brush.
- Check for cross-threading: Make sure you’re screwing the screen in straight.
- If threads are ruined: Replacement may be the only option.
Screen Pops Out Unexpectedly
- Check for warping: If you bent the screen during removal, reshape gently with pliers.
- Reinsert carefully: Press-fit screens should fit snug. If loose, add a tiny piece of paper at the edge to hold it.

Credit: www.reddit.com
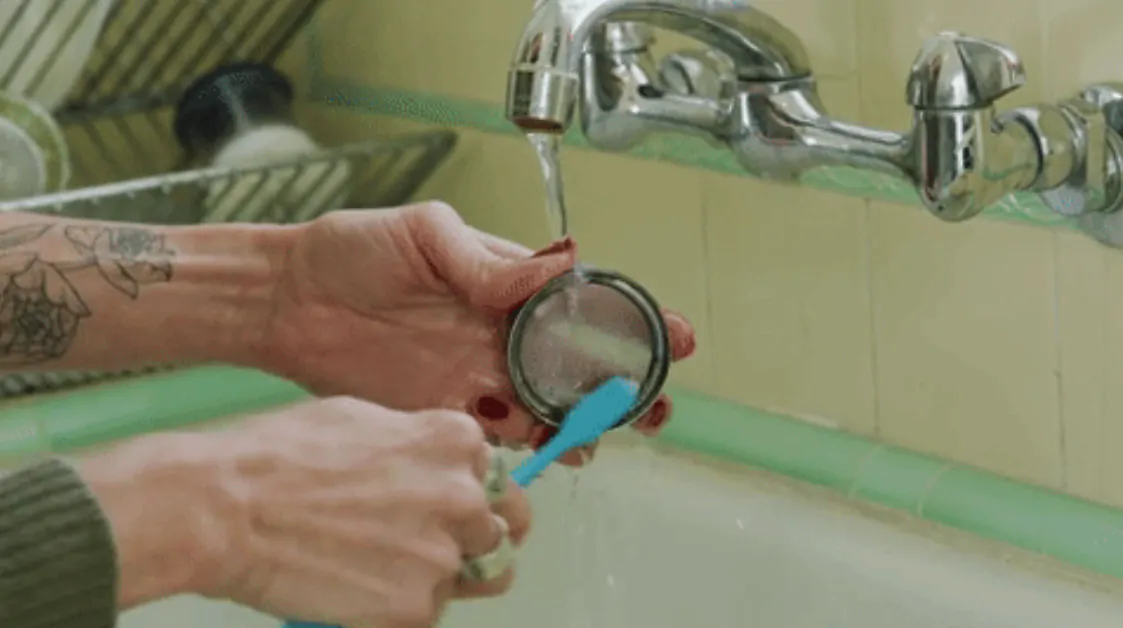
Cleaning The Screen And Grinder After Removal
Once the screen is out, it’s a perfect time for a deep clean. Residue and buildup affect both performance and taste.
- Soak parts in isopropyl alcohol for 20-30 minutes.
- Scrub with a toothbrush or soft brush to remove stuck particles.
- Rinse thoroughly with warm water to remove all alcohol.
- Dry completely before reassembly to avoid rust or mold.
Insight: Even small amounts of leftover moisture can lead to corrosion, especially in metal grinders.
Reinstalling Or Replacing The Screen
If you plan to reuse or replace the screen, follow these guidelines for best results.
For Press-fit Screens
- Align the screen properly: Make sure it sits flat and even.
- Press gently around the edge: Use your fingers or a rounded tool to seat the screen.
- Check for gaps: Gaps allow material to fall through. Reseat if necessary.
For Threaded Screens
- Clean threads before reinstalling: Prevents cross-threading and ensures a tight fit.
- Screw in gently: Avoid over-tightening, which can strip the threads.
For Magnetic Screens
- Set the screen in place: The magnets should hold it securely.
- Test by tapping gently: It should not shift or rattle.
For Glued Screens
- Use a food-safe adhesive: If you must glue a new screen, use a minimal amount and let it dry completely before use.
Non-obvious insight: Some users skip the screen entirely for a larger collection chamber, but this also means you lose kief collection. Decide based on your usage preference.
Safety Tips And Common Mistakes
Many first-timers damage their grinder or hurt themselves. Avoid these mistakes:
- Never use sharp knives: They can slip and cut you or scratch the grinder.
- Don’t force the screen: Forcing leads to bent mesh or broken frames.
- Clean off all alcohol: Leftover alcohol can affect taste or even be harmful if not evaporated.
- Wear gloves: Sticky residue is hard to wash off skin and can irritate some people.
Pro tip: Take photos before disassembly. This helps you remember how parts fit together, especially with complex grinders.
When Should You Remove The Screen?
You don’t always need to remove the screen. Here are reasons when it makes sense:
- Screen is clogged and cleaning in place isn’t enough.
- Kief buildup is blocking airflow or collection.
- Screen is damaged and needs replacement.
- You want to use the grinder without a screen for larger particle collection.
If none of these apply, regular brushing and gentle cleaning may be enough.
How Grinder Screen Removal Affects Performance
Removing the screen changes how your grinder works:
| With Screen | Without Screen |
|---|---|
| Keeps pollen/kief separate | All material falls to bottom chamber |
| Better flavor for some uses | Less flavor separation |
| Extra cleaning step | Easier to clean |
| Can get clogged over time | No clogging from fine particles |
Think about your goals before deciding to remove the screen permanently.
What To Do With The Screen After Removal
If your screen is still in good shape, you can:
- Clean and store it for future use.
- Use it as a sieve for other herbs or spices in the kitchen.
- Share with a friend who needs a replacement.
If it’s damaged or rusty, recycle the metal if possible.

Credit: www.reddit.com
The Cost Of Replacement Screens
Replacement screens are usually inexpensive. Most brands sell packs of 2-5 screens for $5–$15. Some specialty grinders use custom sizes, which may cost more.
Tip: Always measure your grinder’s diameter before ordering a replacement. A screen that’s too big or too small won’t fit properly.
Comparing Grinder Brands And Screen Designs
Different grinder brands use different screen attachment methods. Here are a few popular examples:
| Brand | Screen Attachment | Ease of Removal |
|---|---|---|
| Santa Cruz Shredder | Threaded | Easy |
| Space Case | Press-fit | Medium |
| SharpStone | Press-fit or Threaded | Medium–Easy |
| Kannastör | Magnetic | Very Easy |
| Generic/No Brand | Glued | Hard |
Knowing your grinder’s brand and model can help you find specific guides or replacement parts. For more details on grinder types, visit the Herb Grinder Wikipedia page.
Real-world Examples And Experiences
Many users have shared their experiences with removing grinder screens. Here are a few lessons learned:
- “I tried using a knife and ended up tearing the mesh. Next time, I used a guitar pick and it popped right out.”
- “Alcohol soak was key. My screen wouldn’t move, but after a 30-minute soak, it slid out with no trouble.”
- “Lost the tiny retaining ring for my press-fit screen. Now I use a cut piece from a tea strainer—works fine until I get a real replacement.”
Insight: Small household items like guitar picks, bobby pins, or tweezers can work in a pinch, but always be careful with sharp or metal tools.
Maintaining Your Grinder For Longevity
Removing and cleaning the screen is part of good grinder maintenance. To keep your grinder working well:
- Clean regularly: Every few weeks, take apart your grinder and remove all debris.
- Don’t overload: Grinding too much material at once can force particles into the screen and threads.
- Store dry: Moisture can lead to rust, especially in cheaper grinders.
- Oil threads: A tiny drop of food-grade mineral oil can keep threads turning smoothly.
These steps will help your grinder last for years.
Frequently Asked Questions
How Often Should I Remove And Clean My Grinder Screen?
For regular users, clean your grinder screen every 2–4 weeks. If you notice clogging or poor performance, clean sooner. Occasional users can clean every few months.
Can I Use My Grinder Without The Screen?
Yes, you can. Removing the screen allows all material to fall into the bottom chamber. You lose kief separation but gain a larger collection area and easier cleaning.
What Should I Do If The Screen Is Stuck And Won’t Come Out?
Soak the grinder in isopropyl alcohol to loosen residue. Try warming the grinder gently with a hairdryer. Use plastic tools to avoid tearing the mesh. If it still won’t move, consider if the screen is glued.
Where Can I Buy Replacement Screens For My Grinder?
Check the manufacturer’s website or online stores like Amazon. Measure your grinder’s diameter to ensure a proper fit. Some kitchen supply stores sell fine mesh screens that can be trimmed as a substitute.
Is It Safe To Use Alcohol To Clean My Grinder And Screen?
Yes, isopropyl alcohol is safe and effective for cleaning metal grinders and screens. Make sure to rinse thoroughly with water and let all parts dry completely before reassembly or use.
Removing the screen from your grinder is a straightforward task with the right tools and steps. Take your time, use gentle force, and clean all parts for the best results. With this guide, you can confidently remove, clean, and reinstall your grinder screen—keeping your device in top shape for years to come.