Setting a timer on your GE oven might seem easy at first glance, but many owners miss some important details that can make daily cooking much easier. Whether you’re baking bread, roasting chicken, or simply warming up leftovers, knowing how to use your oven’s timer is a small skill that saves time and prevents mistakes. This guide gives you everything you need to confidently set, adjust, and troubleshoot the timer on your GE oven, with plenty of practical examples and insights that go beyond the basics.
Why does the timer matter? For many, it’s about convenience. But for anyone who’s ever burned a meal or undercooked a cake, the timer is a silent kitchen helper, keeping your schedule and your food on track. In this article, you’ll learn not only the step-by-step process for setting a timer but also how different GE oven models work, what features you might not know about, and how to fix common issues.
You’ll even find tips that many users overlook—like when and why to use the oven timer instead of a standard kitchen timer.
Understanding The Ge Oven Timer
Before you start pressing buttons, it helps to know what the oven timer actually does. Most GE ovens have two time functions: a kitchen timer and a cook timer.
- The kitchen timer acts like an alarm clock. It counts down and beeps when time is up, but it doesn’t turn the oven on or off.
- The cook timer (sometimes called “Bake Timer” or “Timed Bake”) actually controls the oven. It turns the oven off automatically when the set cooking time ends.
Not every GE oven has both options. Older or basic models may only offer a simple kitchen timer, while newer models often include both. The functions are usually accessed through the control panel, which might be digital (with a display and buttons) or analog (with dials).
How The Timer Benefits You
- Prevents overcooking and undercooking – especially for recipes that need precise timing.
- Multitasking – you can do other things without constantly checking the clock.
- Safety – automatic shut-off reduces the risk of burning food or leaving the oven on.
Many users don’t realize that setting the wrong timer (for example, using the kitchen timer when you want the oven to turn off) can lead to mistakes. Always check which timer you’re using.
Types Of Ge Oven Timers
GE ovens come in a variety of styles and models. Knowing which type you have is key to using the timer correctly.
Digital Control Panel
Most modern GE ovens have a digital control panel. These usually include:
- An LED or LCD display
- Touchpad buttons for setting time, temperature, and functions
- Separate buttons for “Timer,” “Cook Time,” and sometimes “Start Time”
Analog Control (dial) Models
Older or more basic models use mechanical dials. These may have:
- A simple twist timer
- No digital display
- Limited or no automatic cook timer
Smart Ovens
Some recent GE ovens are Wi-Fi enabled and can be controlled with an app. The timer functions may be accessible from your smartphone or tablet.
Double Ovens
If you have a double oven, there may be separate timers for each cavity, or a shared timer that you need to assign.
Table: Common Ge Oven Timer Types
| Oven Type | Timer Features | Example Models |
|---|---|---|
| Digital Panel | Kitchen & Cook Timer, Delay Start | JB655, JTS500 |
| Analog Dial | Manual Timer Only | JGBS10, JGBS30 |
| Smart Oven | App Control, Voice Integration | PVD28, Profile Series |
| Double Oven | Separate/Shared Timer | JTD5000, PK7500 |
Tip: Your oven’s user manual lists the timer features for your exact model. If you don’t have the manual, search for your model number on the GE Appliances website.
How To Set The Timer On A Ge Oven: Step-by-step
The basic process is similar for most digital GE ovens, but always check your own control panel.
Setting The Kitchen Timer (countdown Alarm)
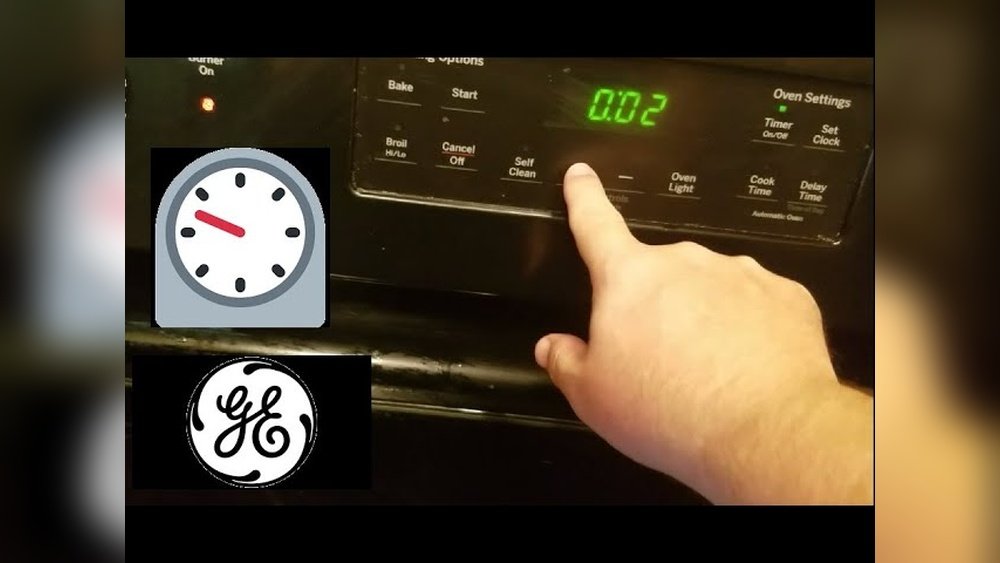
- Locate the “Timer” or “Kitchen Timer” button on your oven control panel.
- Press “Timer” once. The display will blink or show “0: 00.”
- Enter your desired time using the number pads or “+” and “–” buttons. (For example, for 30 minutes, press “3” “0” “0” or use “+” until you reach 30: 00.)
- Press “Start” or “Timer” again to activate. The countdown will begin.
- Wait for the beep. When the time is up, your oven will beep or buzz. The oven will NOT turn off automatically.
- To cancel before time is up, press “Timer” or “Clear/Off.”
Setting The Cook Timer (automatic Oven Shut-off)
- Press “Cook Time” or “Timed Bake.” The display will show “0: 00.”
- Enter your cooking time (for example, 45 minutes).
- Press “Start” or “Bake.” The oven will begin heating (if not already on).
- The oven will cook for the set time and then turn off automatically.
- A beep will sound when time is finished.
Important: On some models, you need to set the oven temperature and cooking function (like Bake, Broil, Convection) BEFORE setting the cook timer.
Example: Baking With Cook Timer
Suppose you want to bake a lasagna for 60 minutes at 375°F.
- Press “Bake.”
- Set temperature to 375°F.
- Press “Cook Time.”
- Enter “6000” (for 60: 00 minutes).
- Press “Start.”
- The oven heats up, cooks for 60 minutes, then shuts off and beeps.
Setting A Delayed Start (optional)
Some GE ovens offer Delay Start, which begins cooking at a future time.
- Press “Bake” and set the temperature.
- Press “Cook Time” and enter the cooking time.
- Press “Delay Start” and enter the start time.
- Press “Start.” The oven will wait and then begin cooking at your chosen time.
Warning: Use Delay Start only for foods that are safe to sit at room temperature (not meat or dairy).
Using The Timer On Analog Models
If your oven has a dial timer:
- Turn the timer dial to the desired time.
- The timer will tick down and ring when finished.
- No automatic oven shut-off.
Using The Timer With Smart Ge Ovens
If you have a smart GE oven:
- Open the GE Appliances app on your phone.
- Select your oven.
- Choose “Set Timer” or “Cook Time.”
- Enter time and confirm.
- You can monitor and adjust the timer remotely.
Some smart ovens also allow voice commands through Alexa or Google Assistant.
Practical Tips For Using Your Ge Oven Timer
Knowing how to set the timer is just the start. Here are some expert tips many users miss:
1. Always Double-check Timer Mode
It’s easy to set the kitchen timer when you meant to set the cook timer. The kitchen timer won’t turn the oven off, which can lead to burnt food.
2. Set A Timer For Preheating
Many recipes start counting cook time only after preheating. Set a short kitchen timer as a reminder to insert food once the oven beeps.
3. Use Multiple Timers For Complex Meals
If your oven has only one timer, supplement with a phone or smart speaker timer. This is helpful when preparing several dishes with different cooking times.
4. Don’t Rely On The Timer For Food Safety
The timer is a tool, but oven temperatures can vary. Always check doneness with a thermometer, especially for meats.
5. Clean The Control Panel Regularly
Dirt or grease can make buttons sticky or unresponsive. Use a soft cloth and mild cleaner, but avoid spraying directly on the controls.
6. Practice “dry Runs”
If you’re new to using the timer, try a test run with water in a baking dish. This lets you practice without wasting food.
7. Know The Sound
Some GE ovens beep loudly, others are quiet. If you’re hard of hearing, consider setting a backup timer on your phone.

Credit: www.youtube.com
Troubleshooting Common Ge Oven Timer Issues
Even the best ovens have quirks. Here’s how to fix timer problems that often confuse users.
Timer Won’t Start Or Respond
- Check for Lock Mode: Many digital ovens have a “Control Lock” feature. If active, buttons won’t work. Look for a “Lock” symbol or message. Hold “Lock” or “Clear/Off” for 3–5 seconds to unlock.
- Power Cycle: Unplug the oven (or turn off the breaker) for 1 minute, then restore power.
- Sticky Buttons: Clean the panel as described above.
- Check for Error Codes: If the display shows an error, consult your manual.
Timer Doesn’t Beep
- Volume Setting: Some GE ovens allow you to adjust or mute the timer volume. Check your manual or settings menu.
- Speaker Fault: If you never hear a beep, the speaker may be broken. Contact a technician.
Timer Resets Or Turns Off Unexpectedly
- Power Surges: Brief power loss can reset the timer.
- Child Lock: See if child lock is active.
- Faulty Control Board: If the timer stops randomly, a control board issue may be to blame.
Oven Doesn’t Turn Off After Timer Ends
- Wrong Timer Used: Remember, the kitchen timer is just an alarm. Only the cook timer shuts off the oven.
- Model Limitations: Some models don’t support auto shut-off. Check your manual.
Timer Display Malfunction
- Dim or Flickering Display: Check for loose connections or power issues.
- Partial Numbers: The display may be failing. You may need professional repair.
Table: Common Timer Problems And Solutions
| Problem | Possible Cause | Solution |
|---|---|---|
| Timer not starting | Control lock active | Hold “Lock” or “Clear/Off” to unlock |
| No beep | Volume muted | Adjust settings menu |
| Oven stays on | Used kitchen timer | Use cook timer for auto shut-off |
| Display not working | Power issue | Check connections, call tech if needed |
Advanced Timer Features On Modern Ge Ovens
If your oven is less than 10 years old, you may have features that can make life even easier.
Delay Start
As covered earlier, Delay Start lets you schedule cooking for a later time. This is handy if you want dinner ready when you get home.
Sabbath Mode
Some models offer Sabbath Mode, which disables the timer and auto shut-off for religious observance. This prevents the oven from turning off on its own.
Multiple Timers
High-end or smart models let you set two or more timers at once. This is ideal for double ovens or multi-course meals.
App Control And Notifications
With Wi-Fi models, you can:
- Set and monitor timers from your phone
- Receive alerts when food is done
- Integrate with smart home devices
Voice Control
If your oven works with Alexa or Google Assistant, you can say:
- “Alexa, set GE oven timer for 20 minutes.”
- “Hey Google, start cook timer on oven.”
Note: Not all ovens support voice commands, so check your owner’s manual.
What To Do If You Lose The Manual
Many users lose their oven’s user manual, which can make timer settings confusing. Good news: GE provides manuals online.
- Visit the GE Appliances support site.
- Enter your model number (usually on a sticker inside the oven door).
- Download the manual in PDF format.
This is the best way to find timer instructions for your exact model. If you need more help, the GE Appliances support team is also available.
For more detailed information, you can check the official GE Appliances support page: GE Appliances Support.
Common Mistakes When Using The Ge Oven Timer
Even after learning the basics, some mistakes are easy to make. Here are two less obvious problems that beginners often face:
1. Confusing Kitchen Timer With Cook Timer
As mentioned earlier, setting the kitchen timer does not affect the oven’s heating. If you walk away expecting the oven to turn off, your food can burn. Always double-check which timer you’re setting.
2. Not Factoring In Preheat Time
Many recipes list total cook time, but if you start the timer before the oven is fully preheated, your food might be undercooked. Wait for the “preheat” beep, then set the cook timer.
3. Relying Only On The Timer For Complex Recipes
For dishes like soufflés, roasts, or bread, factors like oven hot spots and door opening can change cooking time. Use the timer as a guide, but check your food near the end.
4. Forgetting To Cancel The Timer
Leaving a timer running after removing food can cause confusion later, especially if you start a new dish. Always clear the timer before starting another recipe.
Credit: www.kochsappliances.com
Timer Comparison: Ge Vs Other Oven Brands
How does the GE oven timer compare to other brands like Whirlpool, Samsung, or LG? Here’s a quick look.
| Brand | Timer Types | App/Smart Features | Unique Features |
|---|---|---|---|
| GE | Kitchen, Cook, Delay Start | Yes (Wi-Fi models) | Sabbath Mode, Voice Control |
| Whirlpool | Kitchen, Cook, Delay Start | Yes (some models) | Steam Clean Timer |
| Samsung | Kitchen, Cook, Delay Start | Yes (SmartThings) | Air Fry Timer |
| LG | Kitchen, Cook, Delay Start | Yes (ThinQ) | Multiple Timers |
GE timers are reliable and easy to use, but some competitors offer more advanced smart features. Still, for basic and advanced needs, GE ovens cover all essential timer functions.
Extra Tips For Busy Households
If you cook for a large family or host guests often, these strategies can help:
- Label timers: If you use multiple timers (oven, phone, microwave), label each so you don’t confuse them.
- Set a backup timer: For important dishes, set a second reminder on your phone or watch.
- Record favorite settings: Keep a note of your most-used timer settings for quick reference.
Credit: www.reliableparts.com
Maintenance: Keeping Your Timer Accurate
Regular maintenance helps your timer function properly.
- Check display brightness: If the panel is dim, replace the oven’s light or have it serviced.
- Test the timer monthly: Set a short timer and see if it works as expected.
- Update firmware: For smart ovens, update software to fix bugs or add features.
If your timer is consistently off, call a certified GE technician.
Frequently Asked Questions
Why Doesn’t My Ge Oven Turn Off After The Timer Ends?
Most likely, you set the kitchen timer instead of the cook timer. The kitchen timer is just an alarm and will not turn off the oven. To automatically shut off the oven, use the “Cook Time” function. If your model doesn’t have a cook timer, you’ll need to turn the oven off manually.
Can I Set Two Timers At Once On My Ge Oven?
Some newer GE ovens, especially double oven or smart models, allow you to set two timers (one for each oven or an additional kitchen timer). Older models usually have only one timer. Check your user manual to see if your oven supports multiple timers.
How Do I Adjust The Timer Volume On My Ge Oven?
On many digital GE ovens, you can change the timer volume in the settings or options menu. Look for “Sound,” “Volume,” or “Tone” settings. If your oven does not have this option, the volume is fixed. For more details, consult your model’s manual.
Is It Safe To Use Delay Start With Perishable Foods?
No, it is not safe to use Delay Start for raw meats, dairy, or eggs. These foods can spoil if left at room temperature for too long. Only use Delay Start for foods that are safe to sit out, like bread dough or casseroles without perishable ingredients.
Where Can I Find My Ge Oven’s Model Number?
The model number is usually on a sticker or plate inside the oven door, on the frame, or sometimes on the back of the oven. Open the door and look around the edges. Once you have the model number, you can find your manual or order parts from the GE Appliances website.
Mastering your GE oven timer is a small investment with big rewards. From preventing kitchen disasters to freeing up your time, it’s a tool that every home cook should know well. With the practical steps, troubleshooting tips, and advanced strategies in this guide, you’re now ready to use your oven timer like a pro—whether you’re baking for the holidays or just getting dinner on the table.