
Drying fresh rosemary at home can seem like a small kitchen task, but it brings surprising rewards. If you love cooking with herbs, you know that fresh rosemary adds a wonderful aroma and flavor to many dishes. But fresh herbs do not last long in the fridge. Drying rosemary in the oven is a smart way to preserve its taste, save money, and always have a supply ready. This method is fast, safe, and does not require special equipment.
People often buy dried herbs from the store, but the quality can vary, and store-bought rosemary sometimes tastes weak. Home-dried rosemary is much more flavorful, and you know exactly where it came from. When you dry your own, you keep the best oils and aromas.
Also, you can dry as much or as little as you need, which is perfect for small kitchens or gardeners with extra rosemary.
In this guide, you will learn everything about oven-drying rosemary—from picking the best sprigs, preparing them, setting the right oven temperature, to storing and using your dried herb. You will also discover tips and compare oven drying to other methods.
Whether you are a beginner or want to improve your herb-drying skills, this article covers every step clearly. By the end, you will feel confident to dry rosemary in your oven and enjoy its benefits all year.
Why Dry Rosemary In The Oven?
Oven drying is popular for good reasons. It is fast, reliable, and works in most kitchens. Unlike air drying, which can take days and needs special conditions, oven drying is finished in about an hour. This means you can dry rosemary even on busy days or when you need herbs quickly for a recipe.
Another advantage is food safety. Oven heat kills most mold spores and bacteria, so your dried rosemary will keep longer without spoiling. This is important if you live in a humid climate, where air drying can be risky. Oven drying also lets you control the process better. You can check the herbs often and stop when they are perfectly crisp, not overdone.
Some people worry that oven drying will destroy the flavor. In fact, if you use a low temperature and watch closely, oven-dried rosemary keeps almost all its oils and aroma. The key is patience and gentle heat.
What You Need To Dry Rosemary In The Oven
Drying rosemary is simple, and you don’t need expensive tools. Here is what you should gather before starting:
- Fresh rosemary sprigs (from your garden or store)
- Oven (gas or electric, with good temperature control)
- Baking sheet (preferably rimmed, to prevent herbs from falling off)
- Parchment paper or a wire rack (optional, for easier cleanup)
- Sharp scissors or garden shears (for harvesting)
- Airtight container (for storage, such as a glass jar or tin)
- Oven mitts (for safety)
Choosing The Best Rosemary
For the best dried herb, start with high-quality rosemary. Look for:
- Fresh, green leaves: Avoid yellow, brown, or wilted sprigs.
- Strong aroma: The scent should be piney and sharp.
- No signs of pests or disease: Check the underside of leaves.
- Young growth: Tender stems and soft leaves dry better.
If harvesting from your garden, pick rosemary in the late morning, after the dew has dried but before the heat of the day. This is when the oils are highest.
Step-by-step Guide: How To Dry Fresh Rosemary In The Oven
Drying rosemary in the oven is easy, but the details matter. Follow these steps for the best results.
1. Wash And Dry The Rosemary
Rinse the rosemary sprigs under cool running water to remove dirt and insects. Shake off extra water and lay the sprigs on a clean kitchen towel. Pat them dry gently. It’s important to remove as much water as possible, or the rosemary will steam in the oven instead of drying.
Let the sprigs air-dry for 15–30 minutes on the towel. Even a little leftover moisture can cause uneven drying.
Tip: Never skip washing, even if your rosemary looks clean. Dust and tiny bugs can hide in the leaves.
2. Prepare The Oven
Set your oven to the lowest possible temperature. Most ovens go down to 170°F (77°C), but some can go lower. If your oven only starts at 200°F (93°C), prop the door open slightly with a wooden spoon to reduce heat buildup. This helps the herbs dry gently without burning.
Why low heat? Rosemary contains delicate oils that give it flavor. High heat can destroy these, leaving you with bland, brittle leaves.
3. Arrange The Rosemary Sprigs
Line your baking sheet with parchment paper, or place a wire rack on top. Spread the rosemary sprigs in a single layer, with space between them. Do not pile them up. Good air flow is important for even drying.
Alternative: If you have lots of rosemary, you can tie small bundles with kitchen string and lay them flat.
4. Dry The Rosemary In The Oven
Place the baking sheet on the middle rack. Set a timer for 30 minutes, then check the herbs. You may need to turn the sprigs over for even drying.
Continue drying for another 15–30 minutes, checking every 10–15 minutes. The total drying time is usually 45–60 minutes. Drier climates or thinner sprigs may finish faster. Thicker, woodier rosemary can take longer.
You know the rosemary is ready when:
- The leaves are crisp and break easily when rubbed
- The color is still green (not brown or black)
- The aroma is strong
If you see the rosemary turning brown, your oven may be too hot. Remove it right away to prevent burning.
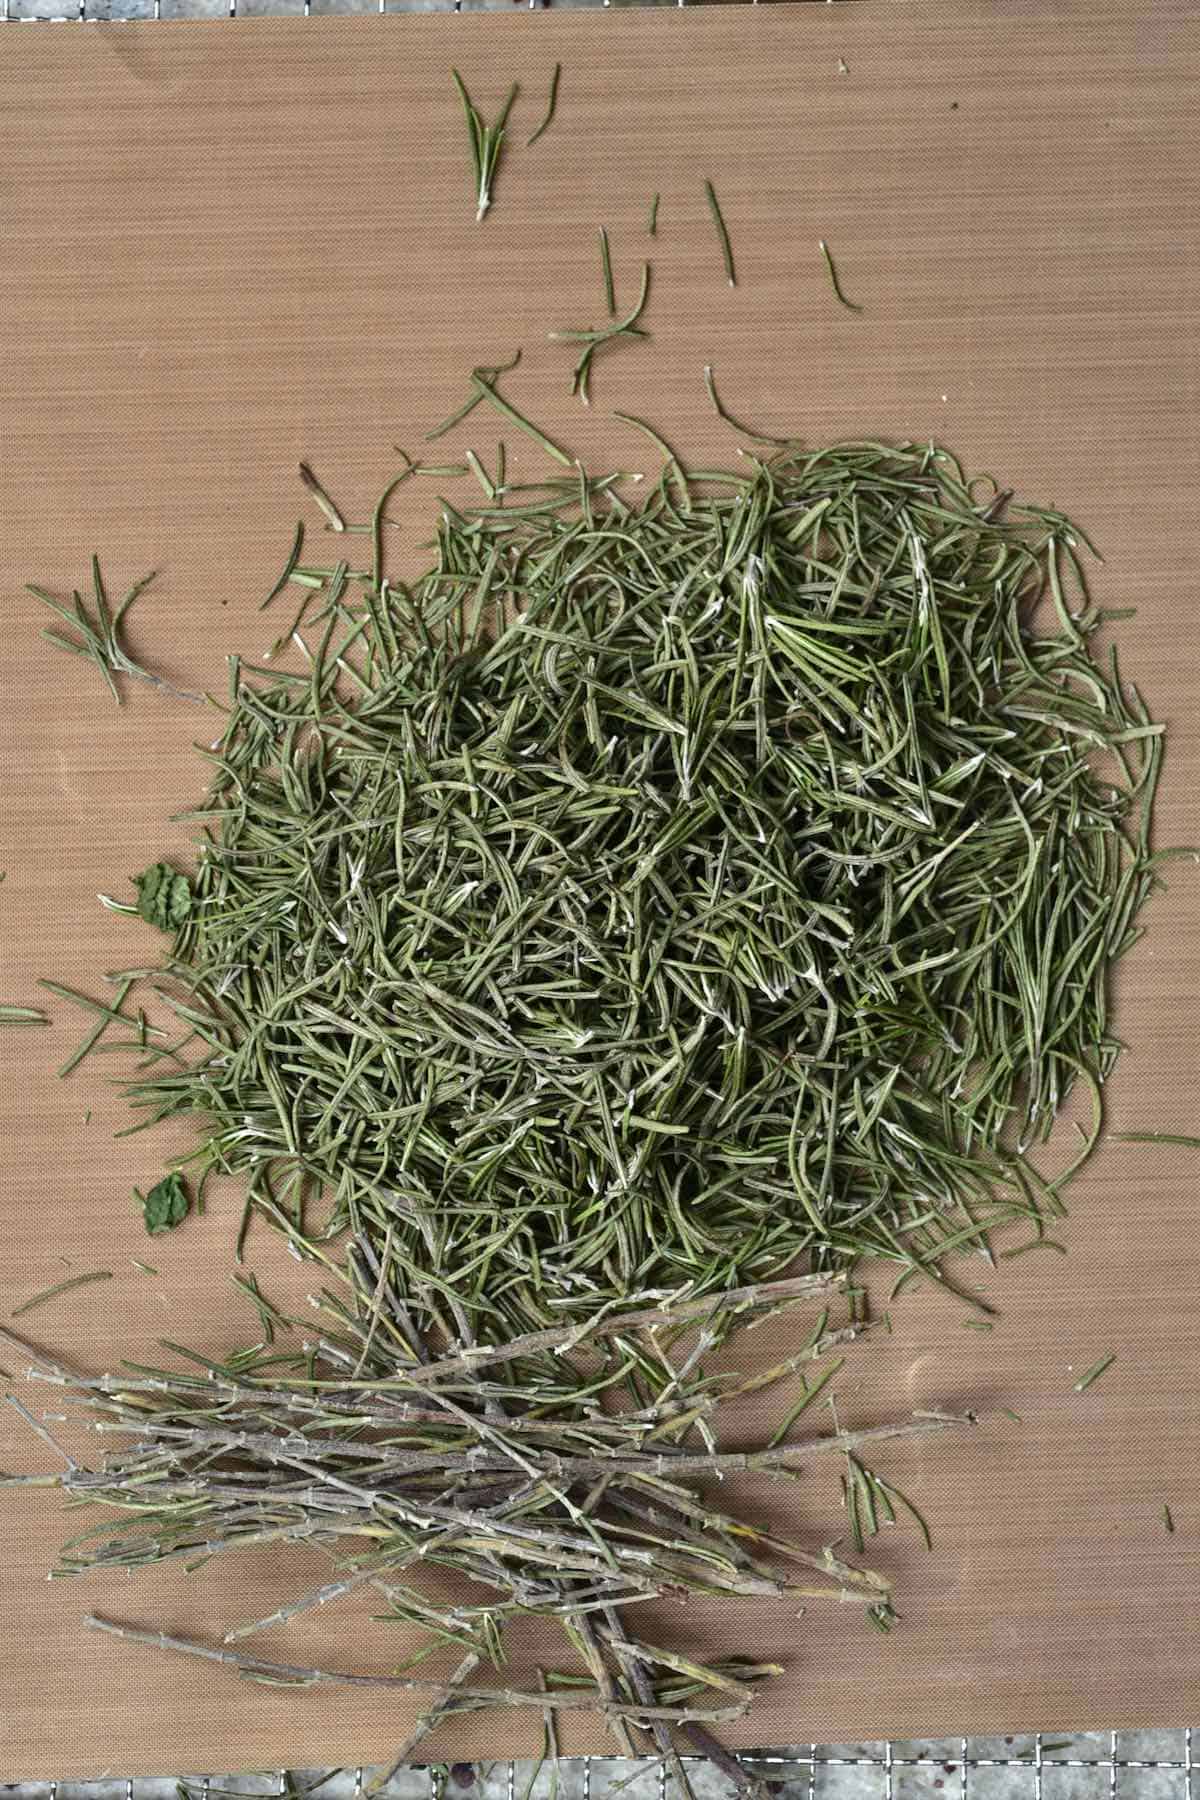
5. Cool And Strip The Leaves
Take the baking sheet out and let the rosemary cool for at least 10 minutes. Cooling helps the leaves finish drying and makes them easier to handle.
Hold each sprig at the top and gently run your fingers down to strip off the leaves. Discard the woody stems. If you like, crush the dried leaves with your fingers or a mortar and pestle for a finer texture.
Non-obvious insight: If you plan to use rosemary for teas or infusions, leave the leaves whole. This keeps more oils locked in and they taste fresher when used.
6. Store The Dried Rosemary
Transfer the dried rosemary to an airtight container. Glass jars with tight lids are best, but any dry, clean container works. Label with the date and keep in a cool, dark place—away from sunlight and heat.
Properly dried and stored rosemary lasts up to a year, but for the strongest flavor, use within 6 months.
Storage tip: Add a silica gel packet (like the kind found in vitamin bottles) to the jar if you live in a humid area. This helps prevent moisture from ruining your herbs.
Oven Drying Vs. Other Methods
You may wonder if oven drying is better than other ways. Here is a quick comparison to help you decide.
| Method | Time Needed | Flavor Quality | Difficulty | Best For |
|---|---|---|---|---|
| Oven Drying | 1 hour | Strong | Easy | Quick results, humid climates |
| Air Drying | 7–14 days | Very strong | Medium | Dry climates, large batches |
| Microwave | 2–4 minutes | Medium | Tricky | Small amounts, fast drying |
| Dehydrator | 2–4 hours | Strong | Easy | Frequent drying, large harvests |
Oven drying is the top choice for most home cooks. It is much faster than air drying, safer in humid weather, and almost as gentle as a dehydrator. The microwave works in a pinch, but it is easy to scorch herbs.
Common Mistakes When Drying Rosemary In The Oven
Many beginners make small errors that can ruin dried rosemary. Here are some to avoid:
1. Setting The Oven Too High
High heat burns the leaves and destroys flavor. Always use the lowest setting.
2. Not Drying The Sprigs First
Wet rosemary steams instead of drying. Pat leaves dry before oven drying.
3. Crowding The Baking Sheet
Rosemary must have space for air to circulate. Dry in batches if needed.
4. Forgetting To Check Regularly
Rosemary can go from perfect to burnt quickly. Set a timer and check often.
5. Storing Before Fully Cooled
Warm herbs create condensation in containers, leading to mold. Always let them cool completely first.
Non-obvious insight: If your oven does not keep a steady low temperature, try using an oven thermometer. Many home ovens run hotter than the set temperature, especially at the low end. Adjust as needed for best results.
Benefits Of Drying Your Own Rosemary
You may ask if it is worth the effort. Here are some real benefits:
- Stronger flavor: Home-dried rosemary keeps more oils and aroma.
- No additives: Store-bought dried herbs can have anti-caking agents or old leaves mixed in.
- Customization: Dry as much or as little as you want. Make special blends by drying rosemary with other herbs.
- Saves money: Fresh rosemary sprigs are often cheaper than jars of dried herbs.
- Reduces food waste: Dry extra herbs before they spoil.
Example: One average rosemary plant can provide enough dried leaves for an entire year’s cooking—saving $10–$20 compared to buying small jars.
Credit: www.alphafoodie.com
How To Use Oven-dried Rosemary
Dried rosemary is more than just a spice for roast chicken. Here are creative ways to use it:
- Seasoning for meats: Sprinkle on lamb, pork, or poultry before roasting.
- Herb bread: Add to dough for focaccia or homemade rolls.
- Potato dishes: Toss with oil and potatoes before baking for herbed fries.
- Herbal tea: Steep a teaspoon in hot water for a calming drink.
- Homemade spice blends: Mix with thyme, oregano, and basil for Italian seasoning.
- Infused oils or vinegars: Place a sprig in a bottle for a month to flavor cooking oils.
- Marinades: Crush and add to olive oil, lemon juice, and garlic for grilled vegetables.
- Bath soaks: Add a few sprigs to bathwater for a relaxing, aromatic soak.
Practical tip: Dried rosemary is stronger than fresh. Use about one-third the amount you would use fresh in recipes.
How To Tell If Dried Rosemary Is Still Good
Dried herbs do not last forever. Here is how to check your rosemary:
- Color: Good dried rosemary should be green, not gray or brown.
- Aroma: Crush a leaf between your fingers. If the scent is weak or musty, it’s time to replace.
- Taste: Pinch a bit and taste. Old rosemary will be bland.
If stored well, dried rosemary lasts 6–12 months. After that, it loses strength but is still safe to use. Replace yearly for the best results.
Troubleshooting: When Things Go Wrong
Sometimes, drying does not go as planned. Here are common problems and fixes:
Problem: Leaves turn brown
Solution: Oven was too hot or rosemary was in too long. Use the lowest setting and check often.
Problem: Rosemary feels soft, not crisp
Solution: Leaves are not fully dry. Return to oven for 10–15 more minutes.
Problem: Mold in the jar
Solution: Herbs were not dry before storing or the container was not airtight. Discard moldy rosemary and dry a new batch thoroughly.
Problem: No aroma
Solution: Rosemary was too old before drying, or oven was too hot. Use only fresh sprigs and gentle heat.
How To Dry Rosemary For Different Uses
You can prepare dried rosemary in different ways, depending on the final use.
For Cooking
Strip the leaves and crush them slightly. Store in a spice jar for easy use. Crushed dried rosemary mixes well into rubs, sauces, and bread dough.
For Teas Or Infusions
Keep the leaves whole or even store small sprigs. This keeps more oils inside. When making tea, crush gently right before use.
For Crafts (wreaths, Sachets)
Dry whole sprigs and keep them on the stem. These can be tied into bundles or woven into decorations.
Note: If you want to use rosemary for crafts, air drying is sometimes better to keep the sprigs looking perfect. Oven drying can cause some curling.
:max_bytes(150000):strip_icc()/__opt__aboutcom__coeus__resources__content_migration__serious_eats__seriouseats.com__images__2015__03__20150317-drying-herbs-storage-5-b0cefcf9b2654648a42eb72463b90fb9.jpg)
Credit: www.seriouseats.com
How Dried Rosemary Compares To Fresh
Should you use dried or fresh rosemary? Here’s a quick look.
| Aspect | Fresh Rosemary | Dried Rosemary |
|---|---|---|
| Flavor strength | Bright, slightly milder | Concentrated, piney |
| Texture | Soft, chewy | Brittle, can be sharp |
| Storage | Few days in fridge | 6–12 months in jar |
| Best uses | Garnish, short-cooked dishes | Long-cooked dishes, spice blends |
| Substitution ratio | 1 tablespoon | 1 teaspoon |
Pro tip: When using dried rosemary, crush it between your fingers before adding to food. This releases the oils and boosts flavor.
How To Store And Keep Dried Rosemary Fresh
Proper storage is key for dried herbs. Follow these steps:
- Use airtight containers: Glass is best, but metal tins also work. Avoid plastic if possible.
- Keep out of sunlight: Store jars in a cabinet or pantry, not on a windowsill.
- Avoid heat and humidity: Do not keep near the stove or dishwasher.
- Label with date: So you remember how old the herb is.
Bonus tip: If you dry several herbs at home, store them in small amounts. This way, you only open a little at a time and keep the rest fresh.

Credit: www.youtube.com
Safety And Allergies
Rosemary is safe for most people, but a few points to remember:
- Allergies: Rare, but possible. If you have allergies to other herbs, try a small amount first.
- Pets: Rosemary is safe for dogs and cats in small amounts but can cause stomach upset in large doses.
- Pregnancy: Rosemary is fine as a cooking spice, but large medicinal doses should be avoided during pregnancy.
If you have any health concerns, check with a doctor before using large amounts of herbs.
Sustainability And Sourcing
Growing and drying your own rosemary is environmentally friendly. Rosemary plants are drought-tolerant, need little fertilizer, and attract pollinators. If you do not have a garden, buy from local farmers’ markets or stores that stock organic herbs.
By drying your own, you avoid plastic packaging and support local growers. Even small balcony pots can provide enough for home use.
Tips For Best Flavor And Aroma
- Harvest at the right time: Late morning, after dew dries, for the highest oil content.
- Use young sprigs: These have the softest, most flavorful leaves.
- Dry quickly but gently: Faster drying keeps more oils inside.
- Store in small jars: Less air means less loss of aroma.
Creative Ways To Use Dried Rosemary
Looking for new ideas? Try these:
- Mix with sea salt for a rosemary finishing salt.
- Add to homemade popcorn for a savory snack.
- Stir into tomato sauce for pizza or pasta.
- Use in homemade soaps or candles for scent.
- Sprinkle on roasted nuts before baking.
- Blend with garlic powder and lemon zest for a spice rub.
Extra insight: If you dry a lot of rosemary, consider making small gift jars for friends and family. Homemade dried herbs are unique and appreciated.
Frequently Asked Questions
How Long Does It Take To Dry Rosemary In The Oven?
Most batches take 45–60 minutes at the lowest oven setting. Thin sprigs may finish in 40 minutes, while thick or woody stems can need up to 75 minutes. Always check every 10–15 minutes after the first half hour to avoid burning.
Can I Dry Rosemary On Foil Or Directly On The Baking Sheet?
You can dry rosemary directly on a clean baking sheet, but parchment paper or a wire rack makes cleanup easier and improves airflow. Foil can be used but may stick to the leaves. For best results, use parchment or a rack.
Is Oven-dried Rosemary As Good As Store-bought?
Oven-dried rosemary is usually much stronger and fresher than store-bought. Commercial dried herbs can sit in warehouses for months and often lose oils. When you dry rosemary at home, you keep more aroma and flavor.
What Temperature Should I Use For Drying Rosemary In The Oven?
Always use the lowest temperature your oven allows, usually between 170–180°F (77–82°C). If the oven only goes higher, leave the door slightly open to reduce heat. Never go above 200°F, or you risk burning the leaves.
Where Can I Find More Information About Drying Herbs?
For more details and advanced tips, visit The Spruce Eats, a trusted resource for herb drying techniques.
Drying fresh rosemary in the oven is a simple kitchen skill that pays off all year. With a little care, you can enjoy the taste and aroma of home-grown or store-bought rosemary in every meal. Try it once, and you may never go back to bland, old herbs again.