If you’re considering upgrading your kitchen, moving, or simply replacing an old appliance, you may need to disconnect your gas stove. This task sounds simple, but working with gas lines carries real risks if you don’t follow the right steps.
A small mistake can lead to gas leaks, fire hazards, or even explosions. Many homeowners aren’t sure where to start, what tools to use, or how to stay safe. This guide walks you through every step of disconnecting a gas stove, so you can do it safely and confidently.
Knowing how to disconnect a gas stove is a valuable skill—whether you’re a DIY enthusiast or just want to save some money. But safety always comes first. This article covers everything you need, from preparation to final safety checks. You’ll learn how to handle the gas supply, what tools are essential, which mistakes to avoid, and when it’s better to call a professional.
If you follow these clear instructions, you can avoid common pitfalls and protect your home.
Understanding The Risks Of Gas Stove Disconnection
Before you grab your wrench, it’s important to know what’s at stake. Gas appliances use either natural gas or propane, both highly flammable. Even a small leak can cause dangerous situations. In the United States, the National Fire Protection Association reports that gas leaks are a leading cause of home fires and explosions. That’s why even experienced DIYers should treat this process with respect.
Many people think turning off the stove’s knobs is enough to stop gas flow. In reality, you need to shut off the gas supply valve—a step often missed by beginners. Also, not every stove connects the same way. Some have flexible hoses; others have rigid pipes or older fittings. Recognizing these differences is critical for a safe disconnection.
When To Disconnect A Gas Stove
There are several reasons you might need to disconnect your gas stove:
- Appliance replacement – Upgrading to a newer model.
- Kitchen remodeling – Moving or removing appliances for renovations.
- Relocation – Moving to a new home and taking your stove with you.
- Deep cleaning – Accessing hard-to-reach areas.
- Professional repairs – Preparing the stove for service.
No matter the reason, following the right steps keeps your home and family safe.
Tools And Materials You’ll Need
Having the right tools makes the job easier and safer. Here’s what you should gather before starting:
- Adjustable wrench (at least 10 inches)
- Gas line cap or plug (correct size for your pipe)
- Pipe thread sealant (Teflon tape or pipe dope, labeled for gas)
- Work gloves (for grip and hand protection)
- Soapy water spray bottle (for leak testing)
- Flashlight (for visibility behind the stove)
- Towel or drop cloth (to protect your floor)
- Fire extinguisher (as a safety precaution)
- Mask or respirator (if you’re sensitive to gas odors)
- Bucket or shallow pan (for catching debris)
Not all homes use the same fittings. Inspect your stove and gas line to confirm you have the right cap or plug. If you’re unsure, take a clear photo to your local hardware store—staff can help you find the correct size.
Step-by-step Guide To Disconnecting A Gas Stove
1. Prepare The Area
Start by clearing the space around your stove. Remove any pots, pans, or flammable materials. Place a towel or drop cloth on the floor to protect it from scratches when you move the appliance. Make sure the kitchen is well-ventilated—open windows and doors if possible.
Tip: If you have pets or small children, keep them out of the kitchen during the entire process.
2. Turn Off The Gas Supply
Locate the gas shut-off valve. It’s usually a small lever or knob on the gas line behind the stove. If you can’t see it, use a flashlight. Turn the valve a quarter turn (90 degrees) so it’s perpendicular to the pipe—this means the gas is off.
Non-obvious insight: Some homes have the main shut-off valve outside, especially in older buildings. If you can’t find the stove’s valve, check near your gas meter.
Important: Never force the valve. If it won’t turn easily, stop and call a professional. Forcing it can break the valve, causing a leak.
3. Unplug The Stove
Most modern gas stoves also use electricity for timers or igniters. Carefully pull the stove away from the wall, just enough to reach the outlet. Unplug the stove from the electrical socket. If the cord is hard to reach, ask for help—never yank the cord to unplug it.
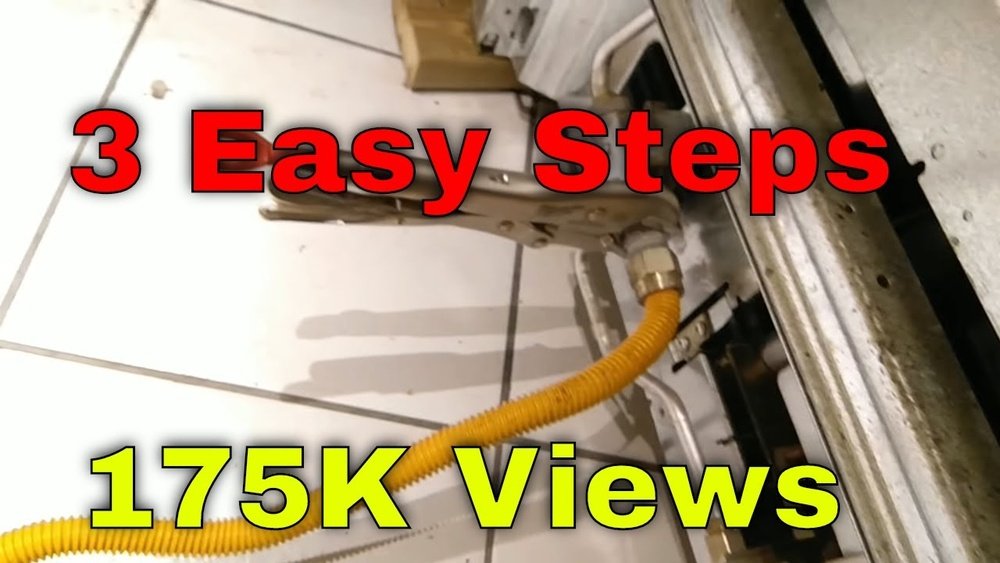
4. Disconnect The Gas Line
Put on your gloves. Using the adjustable wrench, loosen the connector nut where the gas line meets the stove. Turn counterclockwise. Hold the pipe steady with a second wrench if it starts to twist—twisting the pipe can cause leaks elsewhere.
Some stoves use a flexible hose; others have a rigid pipe. Go slowly and don’t rush. Once the connector is loose, gently pull the hose or pipe off the stove fitting.
Pro tip: Have your bucket or pan ready to catch any dust or debris. Sometimes a small amount of old gas can escape—this is normal, but it should not smell strong or continue for more than a second.
5. Cap The Gas Line
This step is crucial. Leaving the gas pipe open is dangerous, even if the valve is off. Use a gas-rated cap or plug to seal the open end of the pipe. Wrap the threads with Teflon tape or apply gas-rated pipe sealant, then screw the cap on tightly with your wrench.
Non-obvious insight: Not all pipe caps are safe for gas lines. Make sure yours is rated for gas, not just water. Hardware stores often keep gas-rated caps in a separate section.
6. Test For Gas Leaks
Mix a little dish soap with water and put it in a spray bottle. Spray the soapy solution on the pipe joint and cap. Turn the gas valve on briefly, then off again (if safe to do so). Watch for bubbles—bubbles mean a leak.
If you see bubbles, turn off the gas immediately and tighten the cap. Repeat the test until no bubbles appear.
If you smell gas or hear a hissing sound, evacuate the area and call your gas company from outside.
7. Move The Stove Safely
Once the gas line is capped and tested, you can move the stove. Most stoves are heavy—tilt it slightly and slide it out, or use furniture sliders. Avoid dragging, which can damage your floor.
If you’re disposing of the stove, check your city’s rules for appliance disposal. Some areas require special handling due to safety and recycling regulations.
Comparison: Gas Stove Vs. Electric Stove Disconnection
Understanding how gas and electric stoves differ can help you prepare. Here’s a quick look at the main differences:
| Feature | Gas Stove | Electric Stove |
|---|---|---|
| Main Supply | Natural gas/propane | Electricity (240V) |
| Shut-Off Method | Manual valve | Circuit breaker/unplug |
| Disconnection Risk | Leaks, explosion | Electric shock |
| Special Tools Needed | Wrench, pipe cap | None usually needed |
| Leak Test | Soapy water for gas | None required |
Key takeaway: Disconnecting a gas stove is riskier and requires more steps than an electric model.
Common Mistakes To Avoid
Many homeowners make simple errors when disconnecting a gas stove. Here are the most common ones—and how to avoid them:
- Forgetting to turn off the gas – Always shut the gas valve before loosening any fittings.
- Using the wrong cap – Only use caps rated for gas lines.
- Skipping the leak test – Even a tiny leak can cause major problems.
- Forcing connections – Never force fittings; if stuck, call a pro.
- Not ventilating – Always open windows or doors to prevent gas buildup.
- Ignoring local codes – Some areas require a licensed plumber or inspector. Check your city’s rules.
- Leaving the stove plugged in – Always unplug before moving any appliance.
- Overtightening – Too much force can crack pipes or strip threads.
- Not labeling the gas line – Use a marker or tape to show the line is capped and disconnected.
- Failing to check for leaks after capping – Double-check with soapy water.

Credit: www.reddit.com
When To Call A Professional
While disconnecting a gas stove is possible for careful DIYers, some situations require expert help:
- Rusty or corroded pipes – These can break easily and cause leaks.
- Damaged shut-off valve – If the valve is stuck or leaking, don’t try to fix it yourself.
- No shut-off valve at the stove – Older homes may not have one. You’ll need a plumber to install a valve.
- Strong gas smell – This means a leak. Evacuate and call your gas company.
- Unusual fittings – Some stoves use special connectors or pipes that need special tools.
- Local regulations – Some places require a licensed professional for any gas work.
Remember: It’s always better to spend a little extra on a pro than to risk your safety.
Safety Tips For Every Step
Disconnecting a gas stove is not just about following instructions—it’s about being alert and cautious. Here are some extra safety tips:
- Never use open flames near the stove while working.
- Don’t smoke in the kitchen during this process.
- Keep a fire extinguisher nearby in case of emergency.
- Work during daylight if possible, for better visibility.
- Have your phone handy in case you need to call for help.
- Check twice, act once—recheck that the gas is off before disconnecting.
After Disconnection: What To Do Next
Once your stove is disconnected, you may need to:
- Dispose of the old stove – Contact your local sanitation department for proper disposal or recycling.
- Prepare for a new appliance – If you’re installing a new stove, check that the connector and fittings match. Don’t reuse old hoses; always install a new one.
- Inspect the area – Clean behind the stove and check for signs of leaks, mold, or damage.
- Schedule an inspection – For peace of mind, especially after major work, have a professional inspect your gas line.
Example: Preparing For A New Gas Stove
Let’s say you’re upgrading to a modern gas range. After disconnecting the old stove and capping the line, compare the connector sizes for your new model. Most new stoves use a standard 1/2-inch or 3/4-inch fitting, but always check your manual.
If the new stove sits in a different location, you might need to extend or reroute the gas line. This is a job for a licensed plumber—never try to extend gas lines yourself.
What To Do If You Suspect A Gas Leak
Gas leaks are rare if you follow these steps, but it’s important to know what to do:
- Evacuate immediately – Don’t try to find the leak.
- Don’t use light switches or phones inside the house.
- Go outside and call your gas company or emergency services.
- Wait for professionals to clear your home before returning.
Symptoms of a gas leak include:
- Rotten egg smell (added odorant)
- Hissing sound near pipes
- Dizziness or headache in the home
Never ignore these signs, even if you’re sure you capped the line.

Credit: www.reddit.com
Gas Line Cap Types: Choosing The Right One
Not all caps are created equal. Here’s a quick comparison of the most common types:
| Cap Type | Material | Best For | Common Sizes |
|---|---|---|---|
| Brass Threaded Cap | Brass | Temporary disconnection | 1/2″, 3/4″ |
| Black Iron Plug | Iron | Permanent closure | 1/2″, 3/4″ |
| Pipe Thread Sealant Tape | Teflon (PTFE) | Joint sealing | N/A |
| Flexible Hose Cap | Brass or steel | Flexible connectors | Varies |
Tip: Always use a cap that matches your pipe’s material and thread size. If you’re not sure, bring a sample or photo to your hardware store.
Understanding Local Codes And Regulations
Gas work is tightly regulated for safety. In many U. S. cities, you need a permit or inspection to disconnect or cap a gas line. Some areas allow homeowners to do this work; others require a licensed plumber.
Why does this matter? If you ever sell your home, unpermitted or uninspected gas work can delay the sale or lower your home’s value. Insurance companies may also refuse to cover damage from unapproved work.
Always check with your local building department before starting. If you’re unsure, err on the side of caution and hire a professional.
Real-world Example: Disconnecting A Gas Stove In An Older Home
Older homes often have unique challenges. For example, you might find:
- No shut-off valve at the stove—You’ll need to shut off gas at the meter and call a plumber to add a valve.
- Corroded pipes—Rusty connections can break, causing leaks.
- Outdated fittings—Older stoves might use non-standard connectors.
In these cases, it’s safer to call a pro. Trying to force old fittings can lead to gas leaks or broken pipes behind the wall.
The Importance Of A Final Inspection
After you cap the line and move the stove, do a final inspection:
- Smell the air for gas—there should be no odor.
- Listen for hissing sounds.
- Check the cap with soapy water again.
A final check ensures your kitchen is safe before you move on. If you have any doubts, call your gas company—they can test for leaks with sensitive equipment.
Useful Resources For Homeowners
If you want to learn more about gas safety, the U.S. Department of Energy offers detailed guides on home energy and appliance safety. For more advanced reading, you can visit the Wikipedia gas appliance page.
Frequently Asked Questions
What Should I Do If I Smell Gas After Disconnecting My Stove?
If you smell gas, evacuate your home immediately. Don’t use any electrical devices, phones, or light switches. Once outside, call your gas company or emergency services. Do not re-enter your home until a professional tells you it’s safe.
Can I Reuse The Old Gas Connector Hose For My New Stove?
No, you should always install a new gas connector hose when connecting a new appliance. Old hoses can wear out, crack, or leak. Using a new, gas-rated hose ensures safety and meets code requirements.
Is It Legal For Homeowners To Disconnect A Gas Stove Themselves?
This depends on your local laws. Some cities allow homeowners to disconnect and cap a gas line, while others require a licensed plumber. Always check with your local building department before starting any gas work.
How Do I Know What Size Gas Line Cap I Need?
Most residential stoves use a 1/2-inch or 3/4-inch gas line. Check the size stamped on the pipe or take a clear photo to your hardware store. Staff can help you find the correct cap.
How Do I Test For Gas Leaks After Capping The Line?
Mix dish soap and water in a spray bottle and spray the capped joint. If you see bubbles forming, there’s a leak. Tighten the cap and test again. If bubbles persist, call a professional immediately.
Disconnecting a gas stove is a serious job, but with the right tools, careful steps, and attention to safety, you can do it successfully. Always check for leaks, use gas-rated materials, and never hesitate to call a professional if you’re unsure.
Your safety—and your home—are worth the extra effort.

Credit: www.youtube.com