Waffle makers bring smiles to morning routines, turning simple batter into golden treats. But after breakfast is over, the cleaning can feel more challenging than making the waffles themselves. If you’ve ever stared at a sticky, greasy waffle iron and wondered where to begin, you’re not alone.
Cleaning a waffle maker isn’t hard, but it does require the right approach to avoid damaging the nonstick surface or electric components. With the right steps, your waffle maker will stay in top shape, making delicious waffles for years.
This guide walks you through every detail of how to wash a waffle maker. You’ll learn what tools to use, which cleaning methods work best for different types, and how to deal with stubborn, baked-on messes. We’ll cover both electric and stovetop models, as well as removable and fixed plates.
Along the way, you’ll find expert tips and solutions to common problems that even experienced cooks sometimes miss.
Understanding Your Waffle Maker
Before you begin cleaning, it’s important to know your waffle maker’s type. The cleaning process can change depending on whether your model has removable plates or fixed plates, and whether it’s electric or stovetop.
Types Of Waffle Makers
1. Electric With Fixed Plates
Most home waffle makers fall into this category. The plates are attached and can’t be removed. These require special care to avoid getting water inside the device.
2. Electric With Removable Plates
These models let you take out the waffle plates. Cleaning is often easier, as you can wash the plates in the sink.
3. Stovetop Models
These are used directly on a stove or campfire. Usually made of metal, they don’t have electrical parts, so you can wash them more like traditional cookware.
Nonstick Vs. Cast Iron Plates
- Nonstick plates are common for electric models. They’re easy to clean but can be scratched by rough tools.
- Cast iron plates are found in some stovetop versions. They need seasoning and careful drying to prevent rust.
Knowing your waffle maker’s material helps you pick the safest cleaning methods.
Tools And Supplies You’ll Need
Having the right tools makes cleaning easier and keeps your waffle maker safe from damage. Here’s what you should gather:
- Soft sponge or cloth (avoid anything abrasive)
- Soft-bristle brush or old toothbrush
- Paper towels or clean microfiber towels
- Wooden or silicone spatula
- Cotton swabs (for crevices)
- Mild dish soap
- Bowl of warm water
- Baking soda (for stubborn stains)
- White vinegar (for mineral deposits or odors)
Never use steel wool, metal utensils, or harsh chemicals. These can scratch or remove the nonstick coating.
Preparing Your Waffle Maker For Cleaning
Before you start, always unplug your waffle maker and let it cool completely. This prevents burns and protects the device from electrical damage. If you rush, you might hurt yourself or ruin the appliance. Once it’s cool, remove any loose crumbs by gently shaking the unit over the sink or trash.
If your model has removable plates, detach them according to the manufacturer’s instructions. If the plates are fixed, make sure you never submerge the entire unit in water.
Step-by-step Cleaning For Electric Waffle Makers With Fixed Plates
Cleaning fixed-plate waffle makers requires patience and care, since you can’t immerse them in water. Here’s a safe and effective routine:
1. Remove Loose Debris
After the waffle maker cools, use a dry paper towel or a soft brush to sweep away crumbs and bits of batter. Focus on the grooves and corners where food can get stuck.
2. Wipe Down The Plates
Dip a soft sponge or cloth in warm, soapy water. Wring it out thoroughly so it’s damp, not wet. Carefully wipe the plates, avoiding the edges where water could leak into electrical parts. For tough spots, use a wooden or silicone spatula to gently lift hardened batter.
3. Clean Crevices And Edges
Dip a cotton swab in warm water and run it along the edges and in tight spaces. This step removes sticky residue that paper towels can’t reach.
4. Tackle Stubborn Stains
If you find burnt-on spots, make a paste with a little baking soda and water. Apply it to the stain, let it sit for 5–10 minutes, then gently scrub with a soft brush. Wipe clean with a damp cloth.
5. Dry Thoroughly
Wipe the plates and exterior with a dry microfiber towel. Leave the waffle maker open for 10–15 minutes to air dry completely before storing.
Step-by-step Cleaning For Electric Waffle Makers With Removable Plates
Removable plates make cleaning much simpler. Follow these steps for best results:
1. Remove Plates
Let the waffle maker cool, then carefully detach the plates. Most will pop out with a release button or lever.
2. Soak And Wash
Place the plates in a sink of warm, soapy water. Let them soak for 5–10 minutes to loosen any stuck batter. Wash with a soft sponge and rinse under running water.
3. Dry Completely
Pat the plates dry with a towel, then let them air dry before reattaching to the machine.
4. Clean The Base
Wipe the inside and outside of the waffle maker base with a damp cloth. Never let water drip into the electrical parts.
5. Reassemble
Once everything is dry, snap the plates back in place. Your waffle maker is ready for the next batch.
Step-by-step Cleaning For Stovetop Waffle Makers
Stovetop models are usually made from cast iron or aluminum. Here’s how to care for them:
1. Let It Cool
Wait until the waffle maker is cool to the touch before handling.
2. Remove Residue
Use a paper towel or soft brush to wipe away crumbs and leftover batter.
3. Wash Gently
For cast iron, avoid soap if possible—just use warm water and a brush. For aluminum, mild dish soap is safe. Never put cast iron in the dishwasher.
4. Dry Immediately
To prevent rust, dry cast iron waffle makers with a towel right away. Place them on the stove over low heat for a few minutes to evaporate any remaining moisture.
5. Season Cast Iron
Rub a light coat of vegetable oil on the plates after drying. This keeps them nonstick and rust-free.
Credit: www.reddit.com
Cleaning Tips For Nonstick Surfaces
Most electric waffle makers have a nonstick coating. This makes cleaning easier, but requires gentle care.
- Always use soft sponges and wooden or silicone tools.
- Avoid nonstick spray—over time, it can build up and turn sticky.
- If batter sticks, let the waffle maker cool, then place a damp paper towel inside, close the lid, and let it sit for 5 minutes. The steam helps loosen residue.
- Never use sharp objects to scrape off food.
Deep Cleaning: When And How
Even with regular cleaning, sometimes your waffle maker needs a deeper clean. This might be necessary if you notice strange smells, stubborn stains, or uneven heating. Here’s how to do it safely:
Deep Clean For Fixed Plates
- Unplug and cool your waffle maker.
- Wipe out loose crumbs.
- Make a cleaning solution: Mix equal parts water and white vinegar.
- Dip a cloth in the solution, wring out, and wipe the plates.
- Use a cotton swab for corners.
- Wipe again with a clean, damp cloth to remove vinegar.
- Leave open to air dry.
Deep Clean For Removable Plates
- Remove and soak plates in warm, soapy water with a splash of vinegar.
- Scrub with a soft brush, focusing on stubborn spots.
- Rinse and dry completely.
- Wipe the base with a damp, soapy cloth, then a clean cloth.
- Reassemble only when all parts are dry.
How Often To Deep Clean
For most families, a deep clean every 1–2 months is enough. If you use your waffle maker daily, consider deep cleaning once a month.
What To Avoid When Cleaning A Waffle Maker
It’s easy to make mistakes when washing a waffle maker, especially if you’re in a rush. Here are common errors to avoid:
- Never submerge an electric waffle maker in water.
- Don’t use metal utensils; they scratch the surface.
- Avoid harsh cleaners like bleach or oven spray.
- Don’t put non-removable parts in the dishwasher.
- Never reassemble or store the waffle maker while wet.
These mistakes can ruin your appliance or shorten its lifespan.
Cleaning Frequency: How Often Should You Wash?
How often you clean your waffle maker depends on how often you use it and what you cook. Here’s a quick guide:
| Usage Frequency | Recommended Cleaning |
|---|---|
| After Each Use | Quick wipe of plates and removal of crumbs |
| Weekly (with daily use) | More thorough wipe, cleaning corners and edges |
| Monthly | Deep cleaning with vinegar solution |
If you make savory waffles with cheese or meats, clean more often to prevent odors and buildup.
Troubleshooting Common Problems
Even with the best care, issues can appear. Here are solutions to frequent waffle maker cleaning challenges:
Batter Stuck To Plates
- Let the unit cool, then use a damp paper towel and close the lid for 5–10 minutes. The steam softens stuck batter.
- Gently scrape with a wooden or silicone spatula.
Burnt-on Residue
- Apply baking soda paste to the spot. Let sit, then scrub gently with a soft brush.
- For nonstick surfaces, never use steel wool.
Rust (on Cast Iron)
- Scrub gently with a brush and a little oil. Rinse, dry, and reseason with more oil.
Lingering Odors
- Wipe plates with a mixture of vinegar and water.
- Leave open to air out for several hours.
When To Replace Your Waffle Maker
Even with perfect cleaning, no appliance lasts forever. Here are signs it may be time for a new one:
- Peeling nonstick coating
If you see flakes, it’s unsafe to use.
- Heating problems
Uneven cooking or cold spots can mean the heating element is failing.
- Cracks or broken parts
These can be dangerous and are often not repairable.
- Persistent odors or stains
If deep cleaning doesn’t fix it, the material may be damaged.
On average, a well-cared-for waffle maker can last 3–7 years.
Storing Your Waffle Maker After Cleaning
Proper storage keeps your appliance clean and ready for next time.
- Make sure the waffle maker is completely dry before storing.
- Store upright or flat, depending on your kitchen space.
- Place a paper towel between the plates to absorb moisture and prevent scratches.
- Keep the cord wrapped neatly to avoid damage.
Comparing Cleaning Methods: Fixed Vs. Removable Plates
To help you see the differences, here’s a comparison of cleaning fixed and removable plate waffle makers:
| Feature | Fixed Plates | Removable Plates |
|---|---|---|
| Ease of Cleaning | More difficult, can’t submerge | Easy, can wash in sink |
| Risk of Damage | High if water enters unit | Low, as plates are separate |
| Cleaning Tools Needed | Brush, damp cloth, cotton swabs | Sponge, brush, dishwasher (if allowed) |
| Drying Time | Longer, must air dry | Faster, separate pieces dry quickly |
If you use your waffle maker often and hate cleaning, a model with removable plates can save you time and stress.

Credit: www.youtube.com
Keeping Your Waffle Maker In Top Condition: Maintenance Tips
Regular cleaning is important, but a few extra steps can keep your waffle maker working like new.
- Oil before use: Lightly oil the plates with a paper towel before each use (unless the manual says not to). This prevents sticking.
- Don’t overfill: Too much batter means spills and harder cleaning.
- Let it cool open: After each use, leave the lid open to help moisture escape.
- Check the cord: Inspect for cracks or damage.
- Follow the manual: Some models have special care instructions—read them.
Non-obvious Insights Most People Miss
- Avoid Nonstick Spray Buildup: Many users spray nonstick spray every time. Over months, this can create a sticky film that actually makes batter stick more. Instead, use a tiny bit of oil on a paper towel.
- Steam Clean for Quick Fixes: If you have batter stuck in grooves, place a damp (not wet) paper towel in the waffle maker, close the lid, and turn it on for 1–2 minutes. The steam will loosen residue for easy cleaning. Unplug and let it cool before wiping away.
- Don’t Skip Air Drying: Even after wiping dry, invisible moisture can cause mold or rust. Always let the waffle maker sit open for at least 15 minutes after cleaning.
- Use Vinegar for Odor Removal: If your waffle maker smells like burnt food, wipe with a vinegar-water mix. It neutralizes odors and is safe for most surfaces.
Safety Precautions During Cleaning
- Always unplug before cleaning.
- Don’t immerse the base in water.
- Use only mild cleaners and gentle tools.
- Make sure the appliance is dry before plugging back in.
- Keep the cord away from water.
Environmental Considerations
If you want a greener kitchen, consider these tips:
- Use reusable towels instead of paper towels.
- Choose biodegradable dish soap.
- Avoid chemical cleaners that can harm water systems.
Waffle Maker Cleaning And Food Safety
Cleaning your waffle maker isn’t just about looks—it’s also about food safety. Old batter and oil can harbor bacteria and mold. Here’s why regular cleaning matters:
- Prevents bacteria growth: Warm, sticky surfaces are a perfect place for germs if not cleaned.
- Stops cross-contamination: If you cook savory waffles (like with meat or cheese) and then sweet, cleaning prevents mixing flavors and bacteria.
- Reduces allergens: Clean plates mean no hidden nuts, dairy, or gluten from previous batches.
Professional Vs. Home Cleaning
Some restaurants and cafes use commercial waffle makers. These are often larger and used all day. At home, your routine is simpler, but the principles are the same: unplug, cool, clean, dry, and store.
If you ever use your waffle maker for a food business, local health codes may require even stricter cleaning and record-keeping.
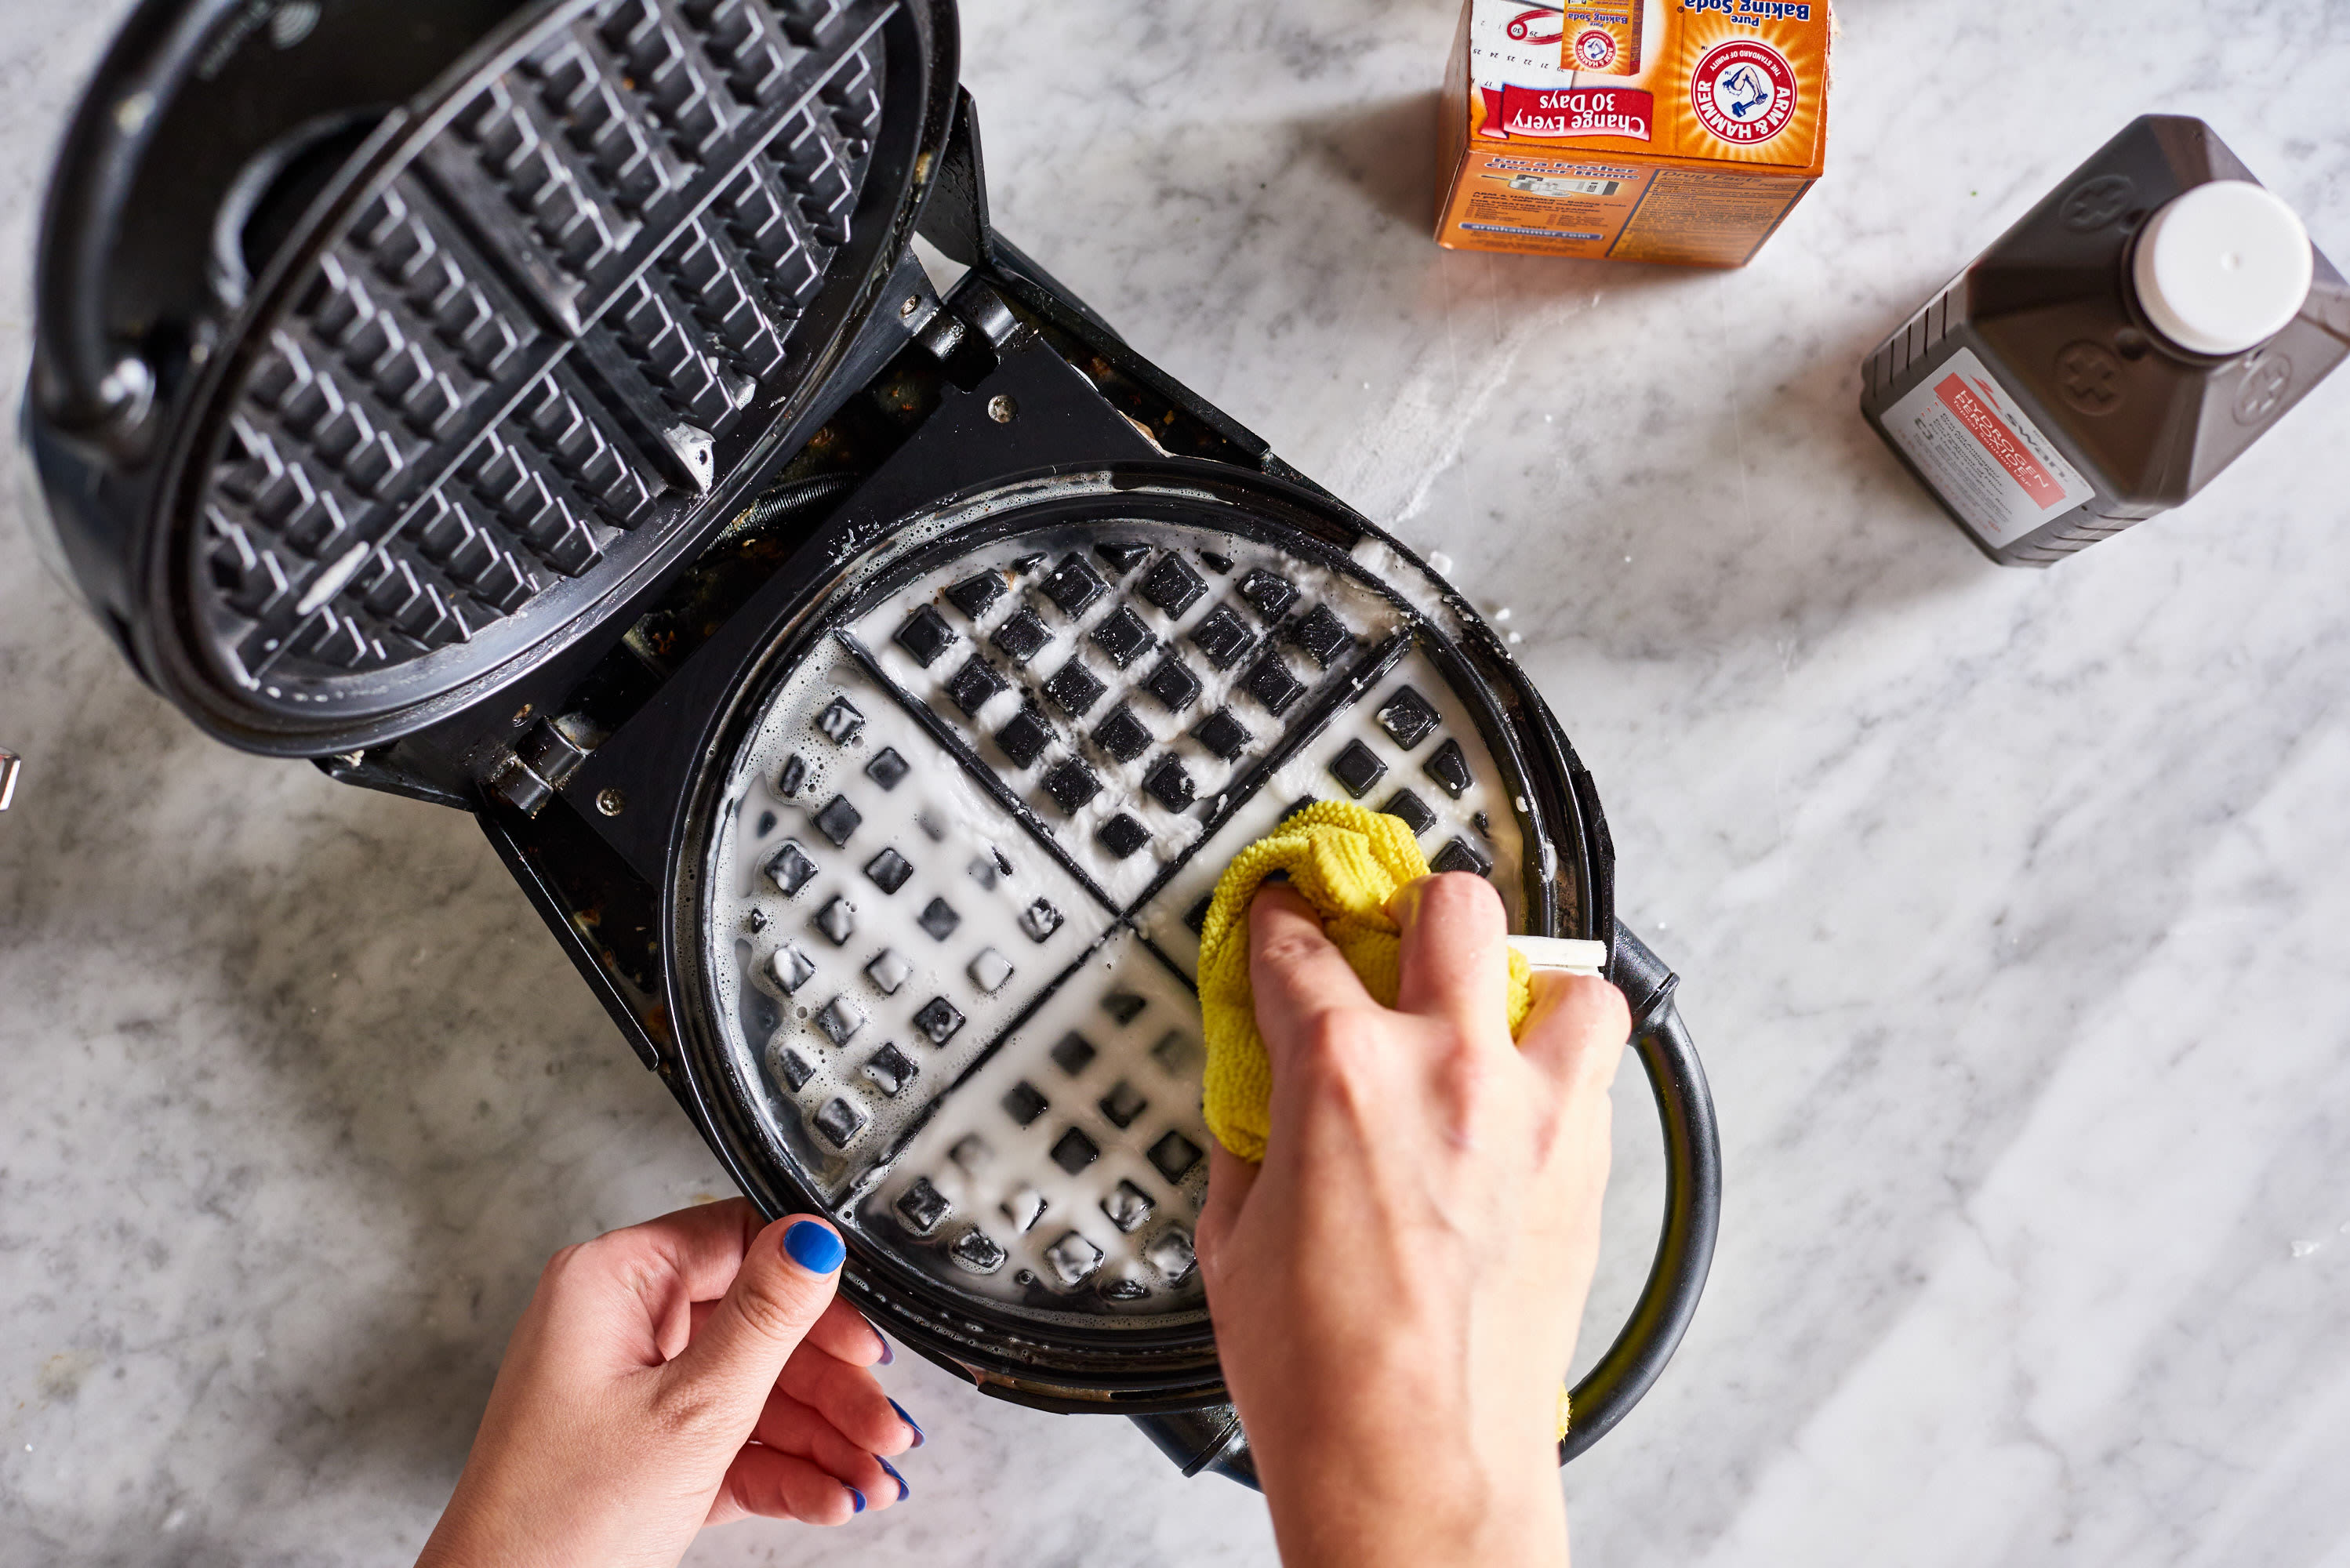
Credit: www.thekitchn.com
Why Regular Cleaning Extends Appliance Life
Skipping cleaning can cost you money. Built-up batter and grease can block heat, causing uneven cooking. Over time, this can burn out the heating element or ruin the nonstick coating. Regular, gentle cleaning keeps your waffles perfect and your appliance running for years.
Comparing Waffle Maker Cleaning To Other Appliances
How does cleaning a waffle maker compare to other breakfast appliances? Here’s a quick overview:
| Appliance | Cleaning Difficulty | Typical Cleaning Time |
|---|---|---|
| Waffle Maker | Medium (more grooves, sticky batter) | 10–20 minutes |
| Toaster | Easy (crumb tray, wipe outside) | 5–10 minutes |
| Blender | Easy (just wash jar and blades) | 5–10 minutes |
| Electric Griddle | Medium (large surface, few grooves) | 10–15 minutes |
Waffle makers take a bit more attention, but the reward is worth it.
Frequently Asked Questions
How Do I Remove Burnt-on Batter From My Waffle Maker?
Let the waffle maker cool, then use a damp paper towel inside and close the lid for a few minutes. The steam will help loosen the batter. For stubborn spots, apply a baking soda paste and gently scrub with a soft brush.
Can I Put My Waffle Maker Plates In The Dishwasher?
If your waffle maker has removable plates and the manual says they’re dishwasher-safe, yes. Otherwise, always wash by hand to avoid damaging the nonstick coating or warping the plates.
Is It Safe To Use Cooking Spray On Nonstick Waffle Makers?
It’s better to use a small amount of oil on a paper towel. Cooking sprays can build up over time and make the surface sticky, actually causing more sticking problems.
What Should I Do If My Waffle Maker Smells Bad After Cleaning?
Wipe the plates with a mixture of equal parts white vinegar and water. Leave the appliance open to air out for a few hours. If the smell persists, repeat or try a deeper clean.
How Long Can I Expect My Waffle Maker To Last With Regular Cleaning?
With proper cleaning and care, most waffle makers will last between 3 and 7 years. Keeping the nonstick surface in good condition and avoiding electrical damage are the keys to a long-lasting appliance.
Washing a waffle maker may seem like a small task, but regular cleaning keeps your breakfasts safe, tasty, and fun. With the right tools and a little patience, your waffle maker will keep performing at its best—batch after golden batch. For more on food safety and appliance care, you can consult resources like Wikipedia’s Waffle Iron page. Take good care of your waffle maker, and it will take good care of your morning routine.